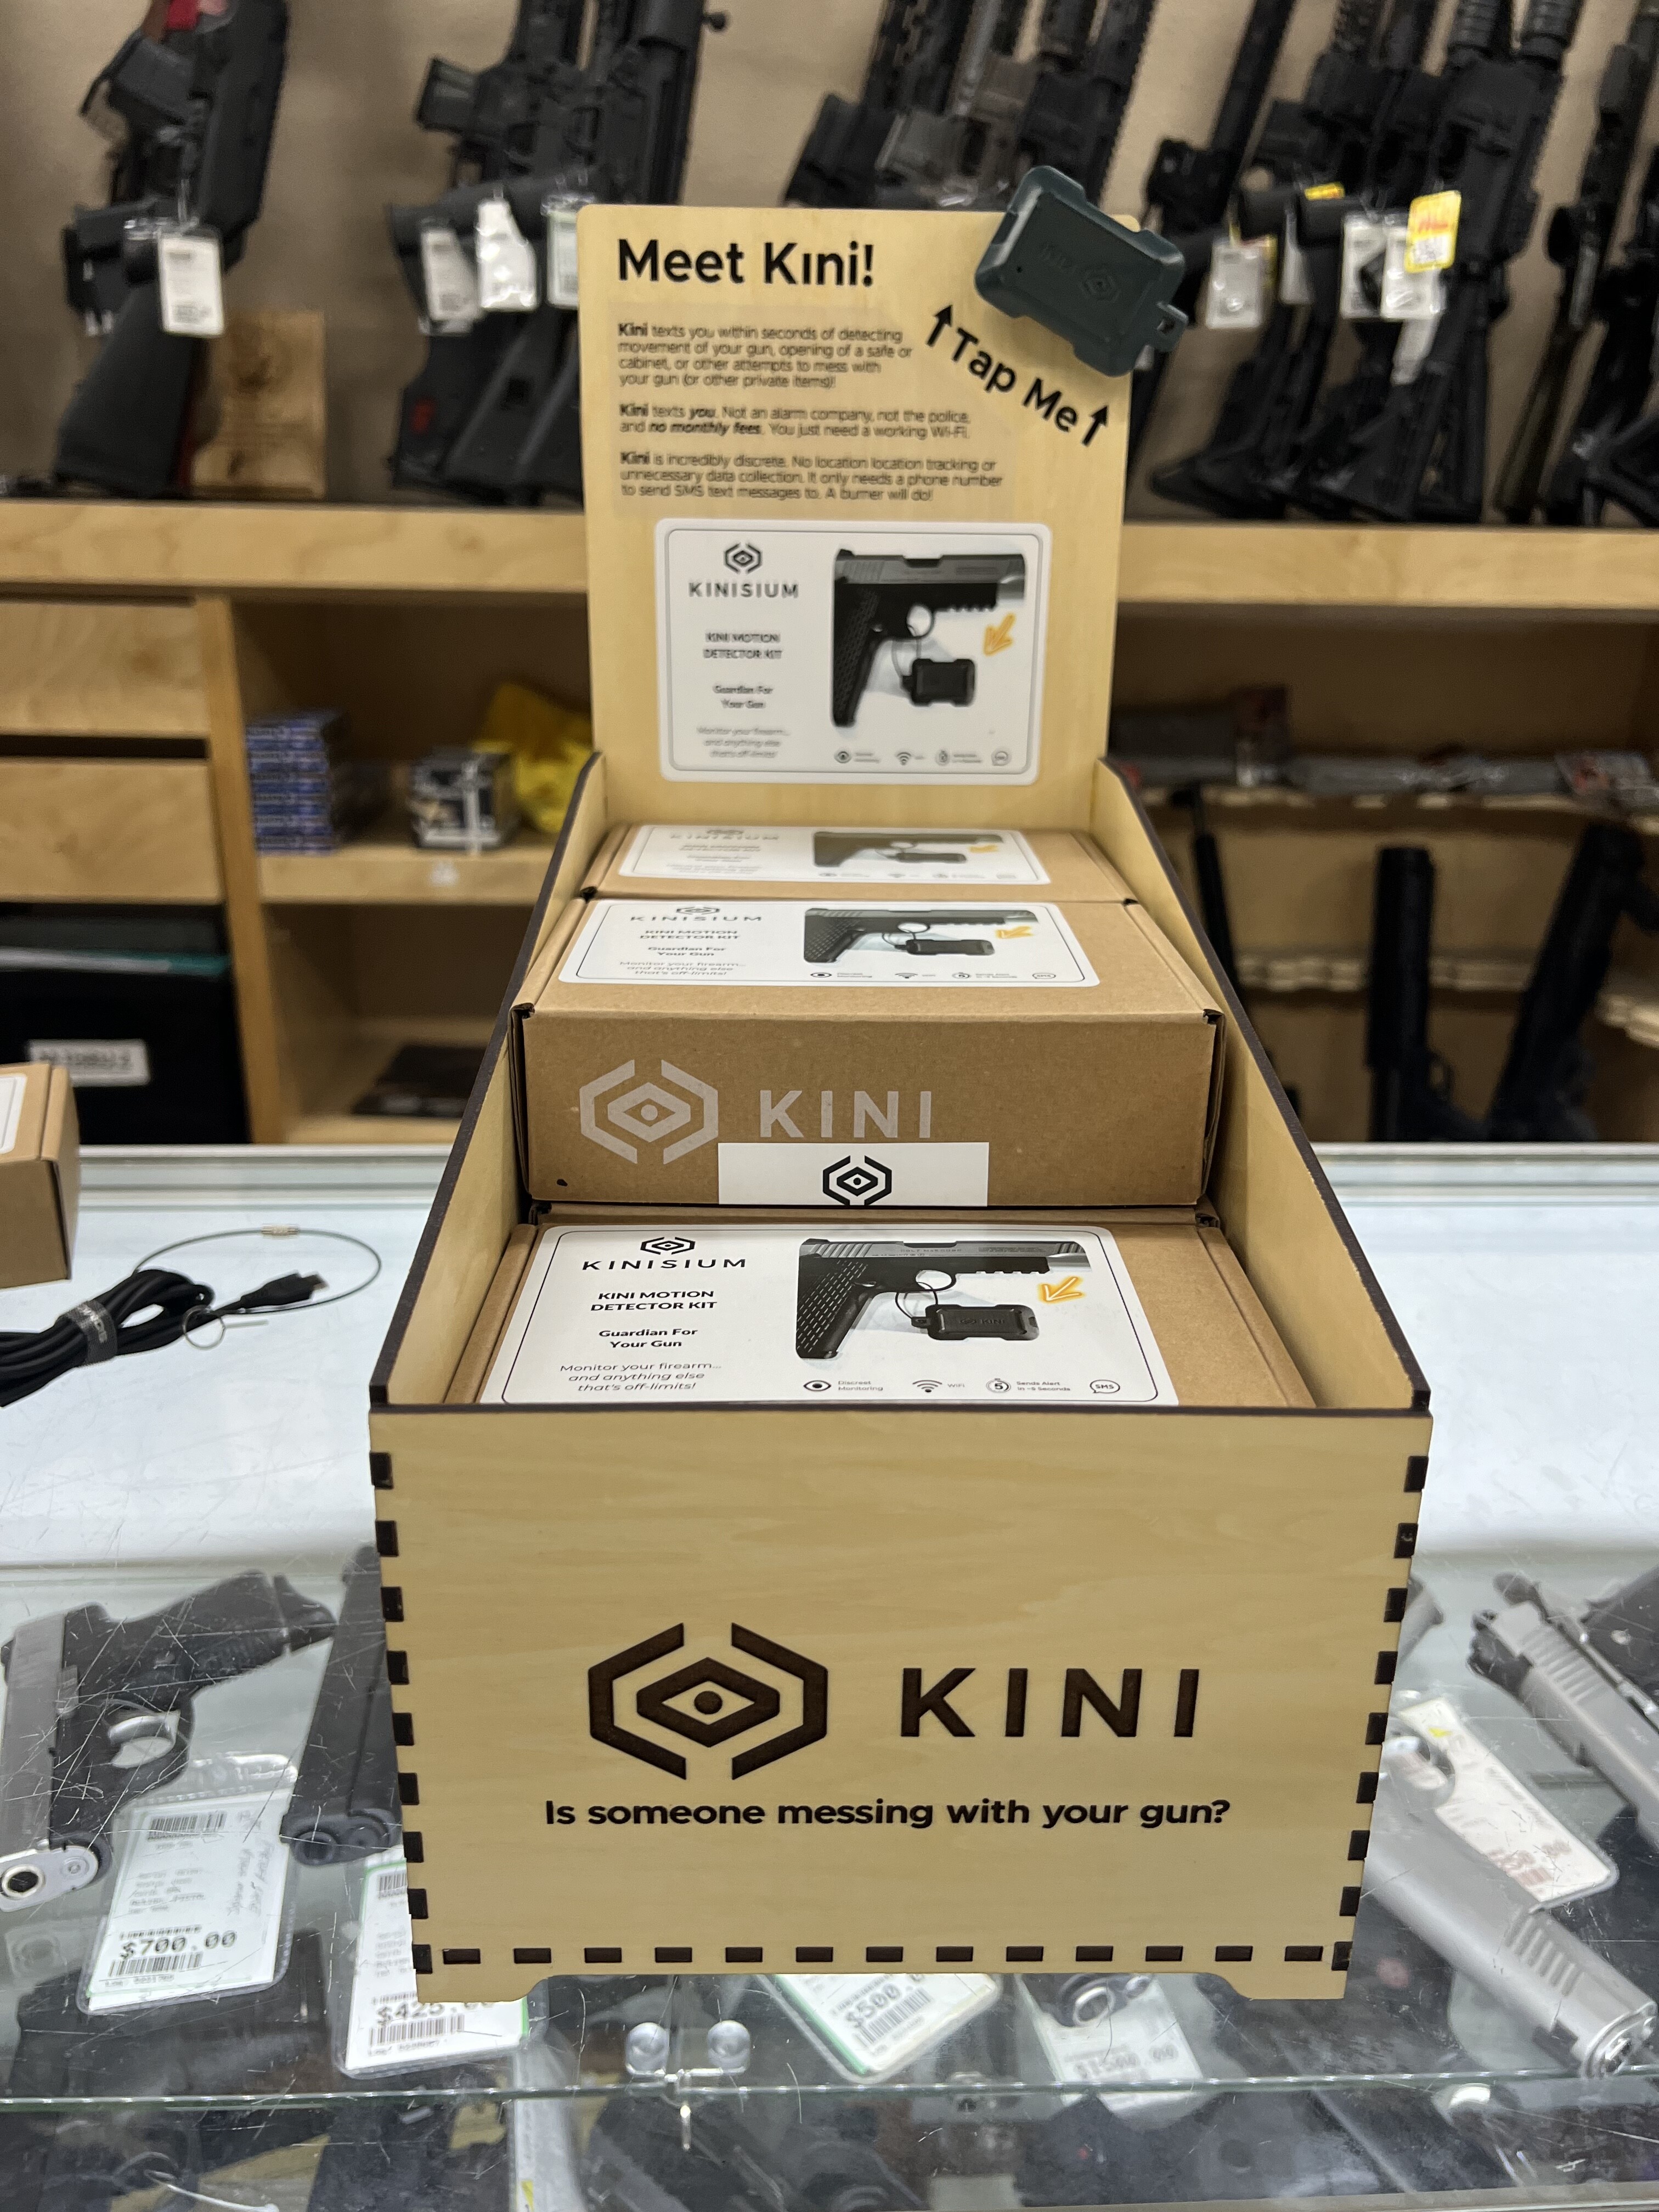
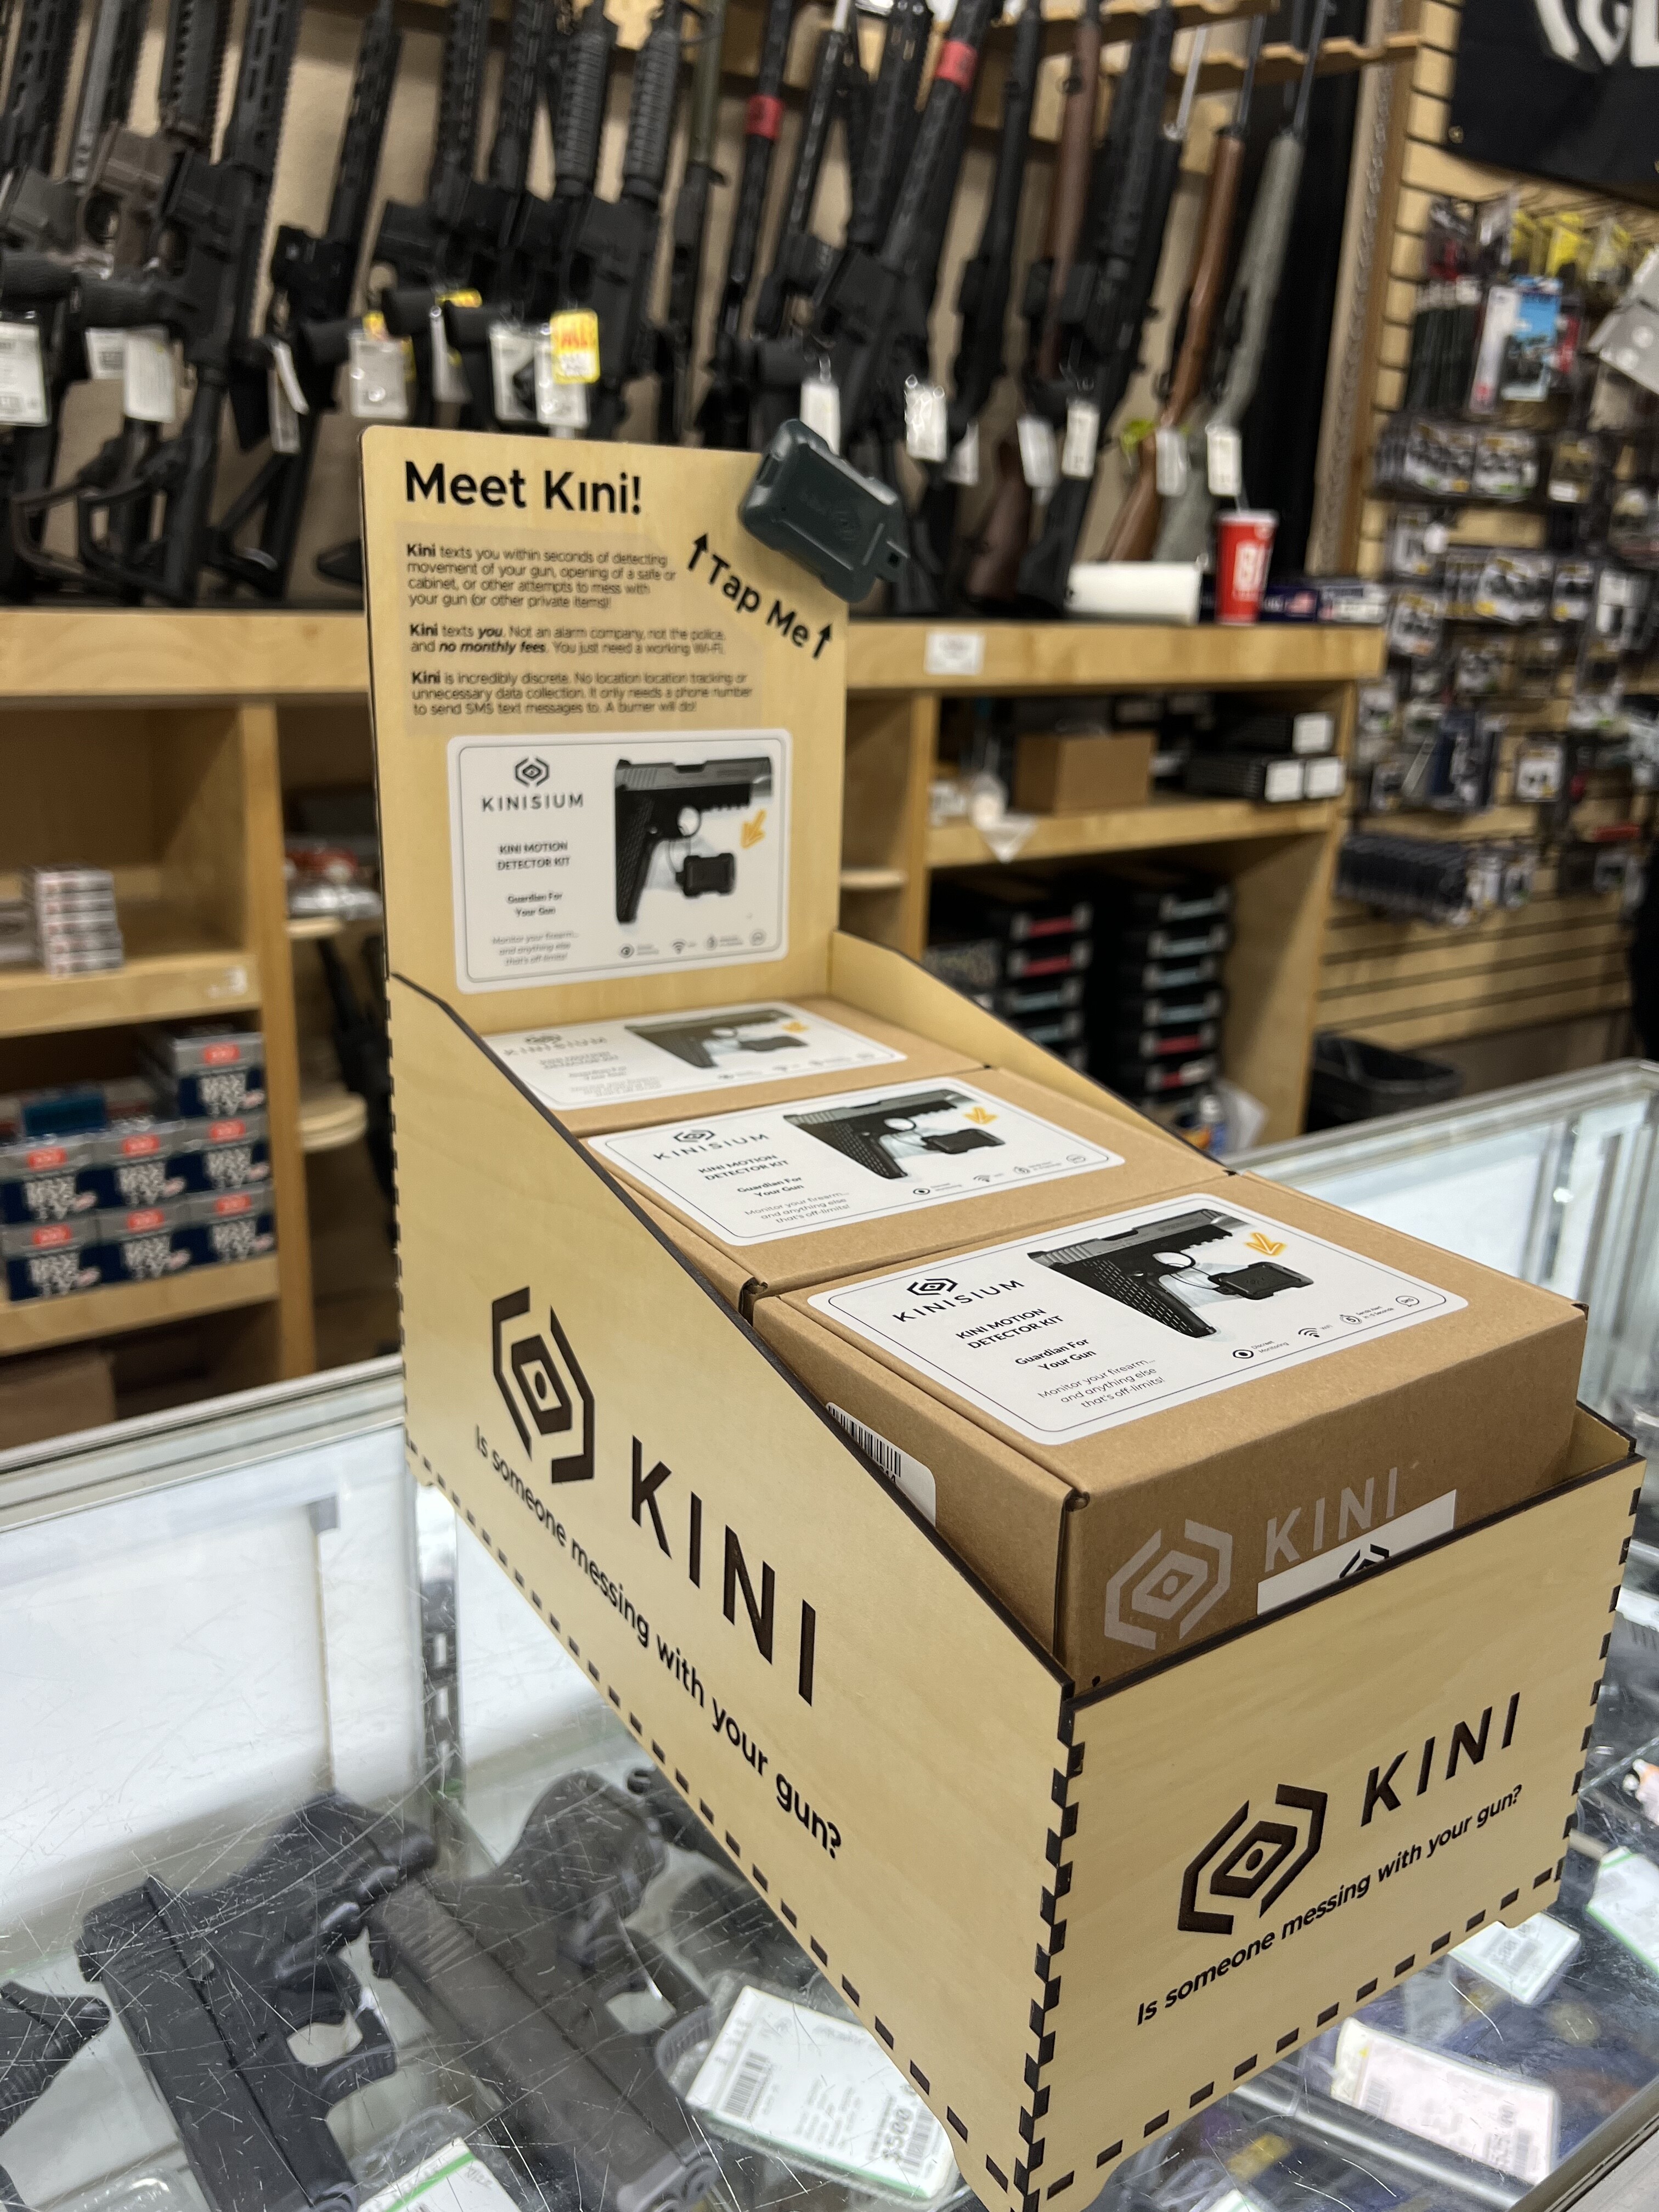
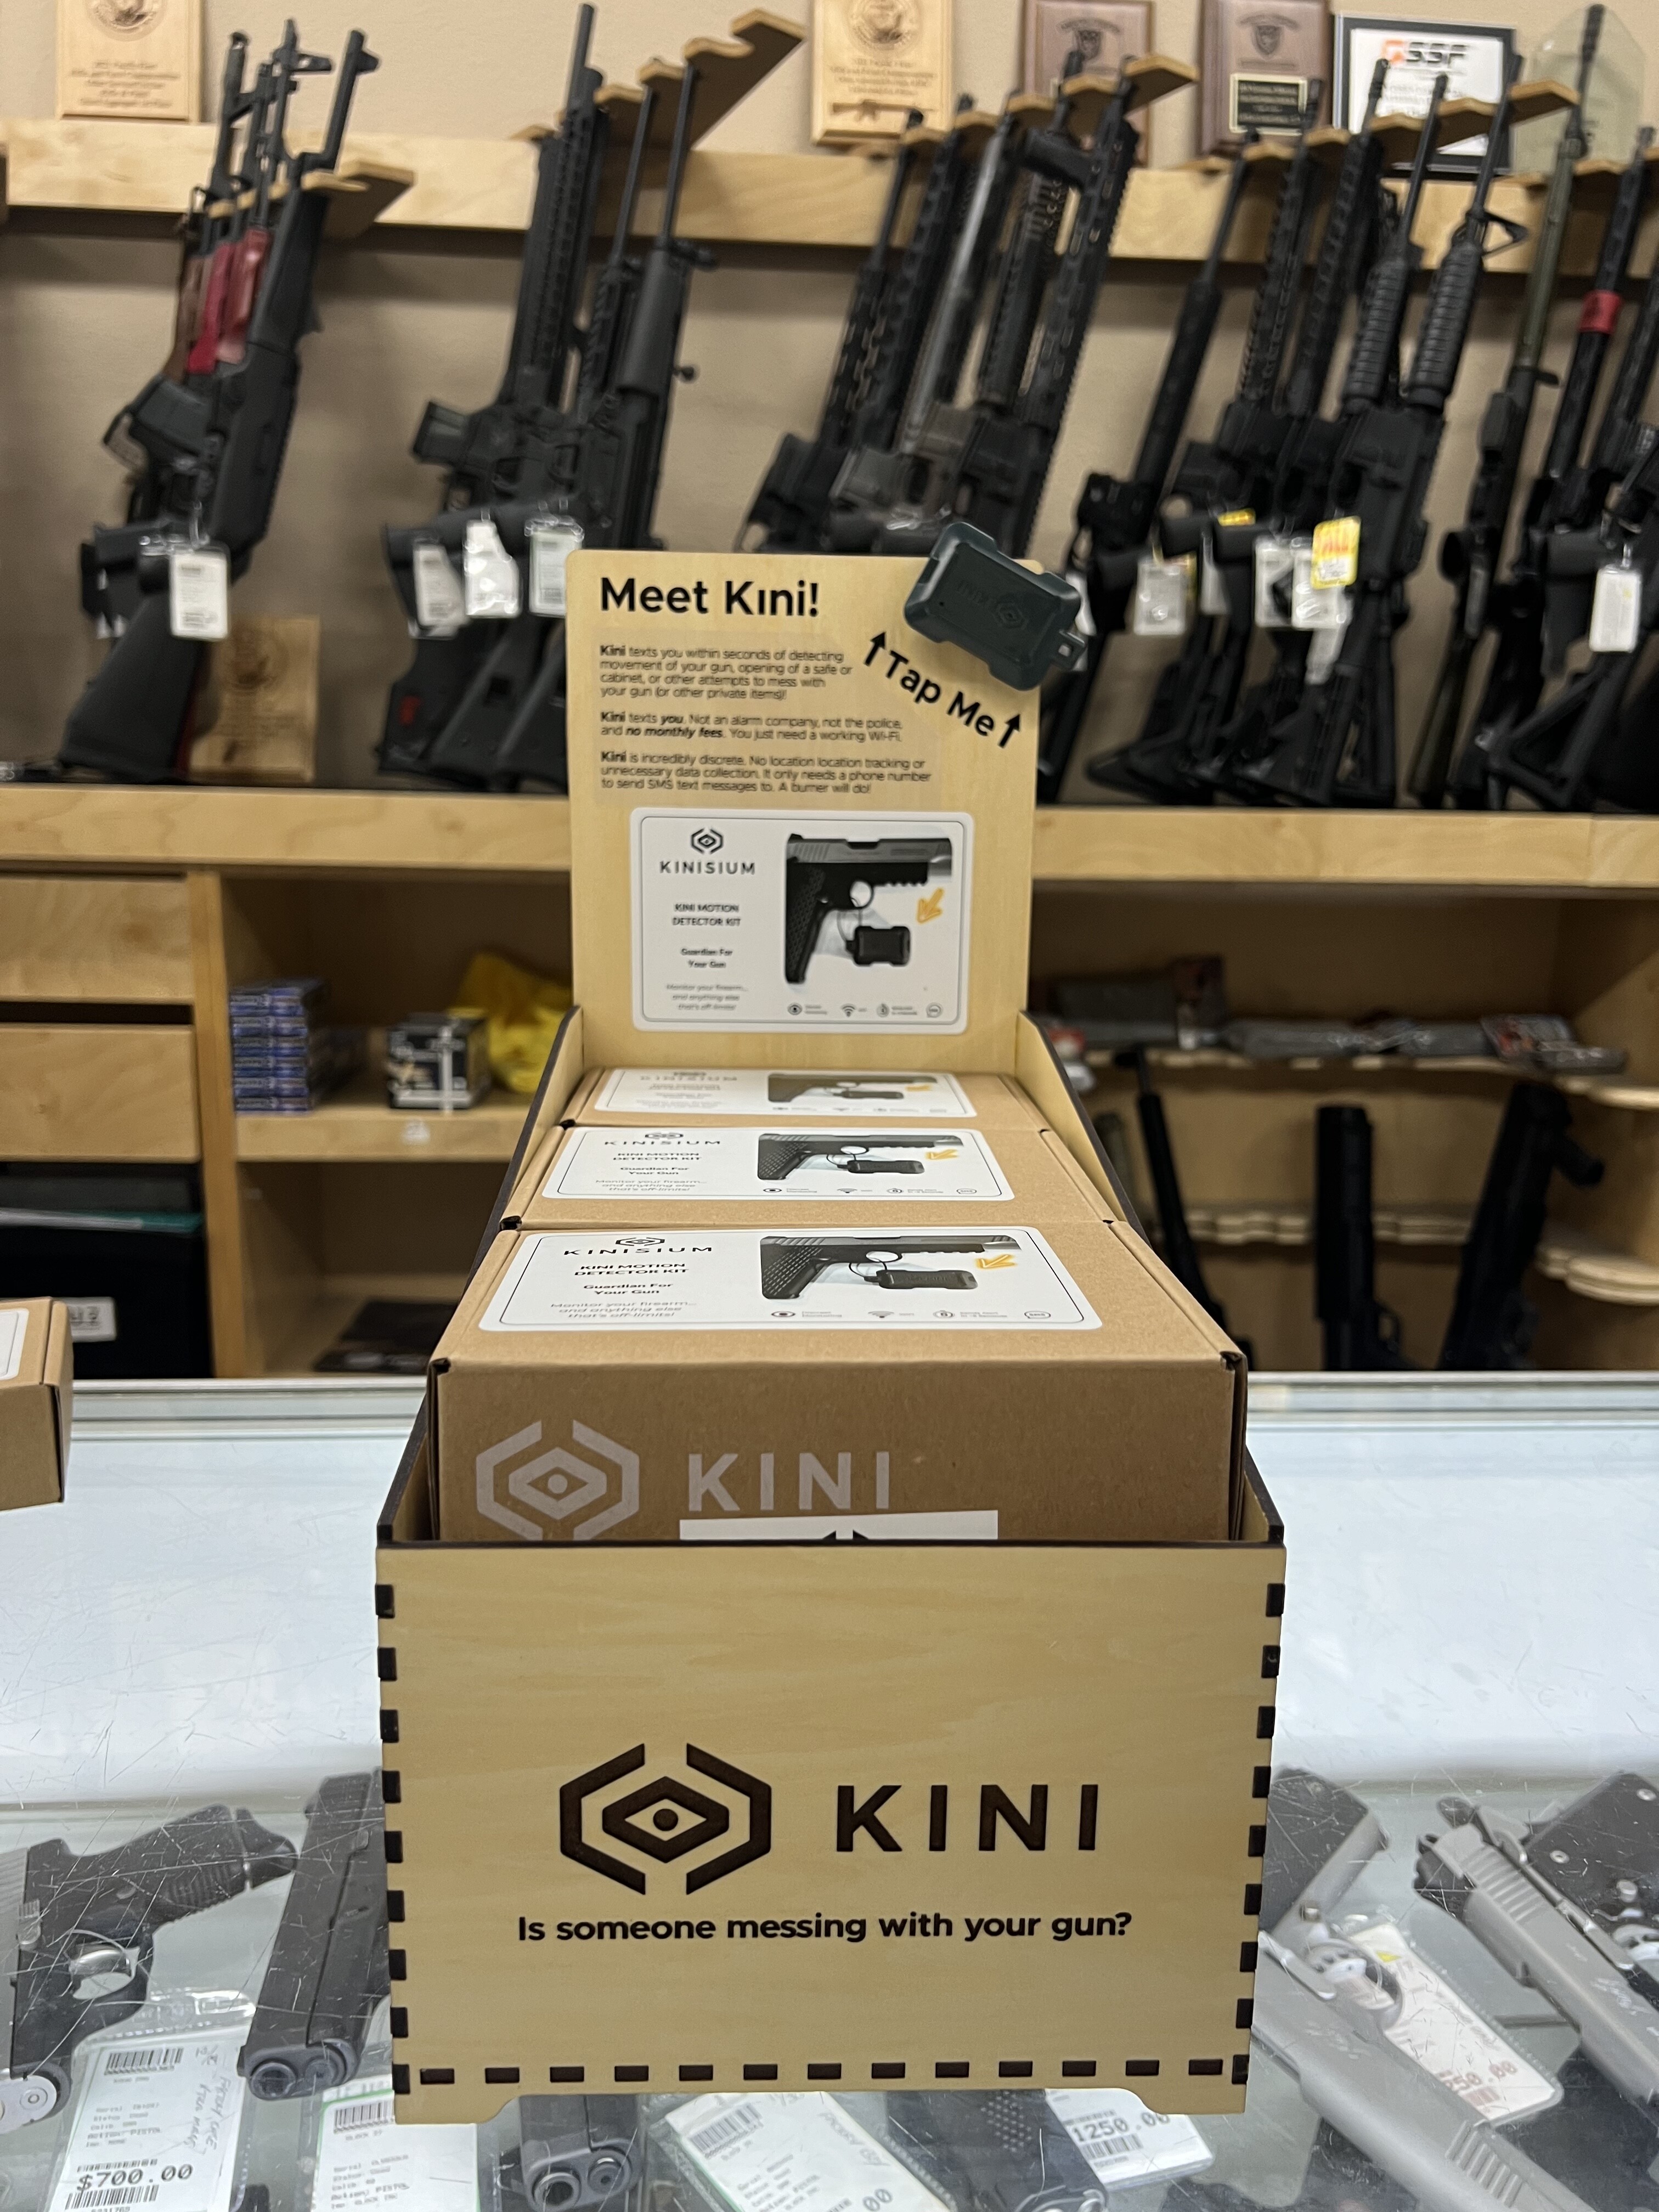
I finished this yesterday. It’s a way to display our new product at retail outfits. We’re selling these at gun shops, cannabis dispensaries, pharmacies and anywhere else where the customers might want some help keeping children out of their “stuff”.
I used medium basswood ply for this. I’m really happy with how it turned out, although the first one had joints that were way too tight and the last ones had to be glued so that the wouldn’t fall apart. With a couple more runs I’ll figure out the best sizing.
What I need help with is on how to reduce the cost. I used three sheets of 12x20 to make one display. That costs almost $55. I need to make more than 100 of these and I really need to bring the price down to about $20 or so per display. Any ideas what would work best?
I’m curious if I should consider a different fabrication mechanism other than the glow forge so that less expensive (non ProofGrade) material could be used.
I’d give heavy chipboard a try. Chipboard comes in different weights measured in points (pts). Thin stuff is useful for temporary use like cereal boxes but heavier weight would last for a long time/more use. You can get some at an art supply store or Dick Blick (online too) to try. Then you could order it in wholesale quantities.
A “point” is 1/1000". 100 pt chipboard is .1" or 2.54mm thick.
That’s nice but the question of cost cutting comes down to a) how nice does it need to be and b) how much post production are you willing to do?
There are some less expensive prefinished woods but prefinished will always be costly. If you are willing to do some sanding and apply some finish 1/8” Baltic birch would be much less.
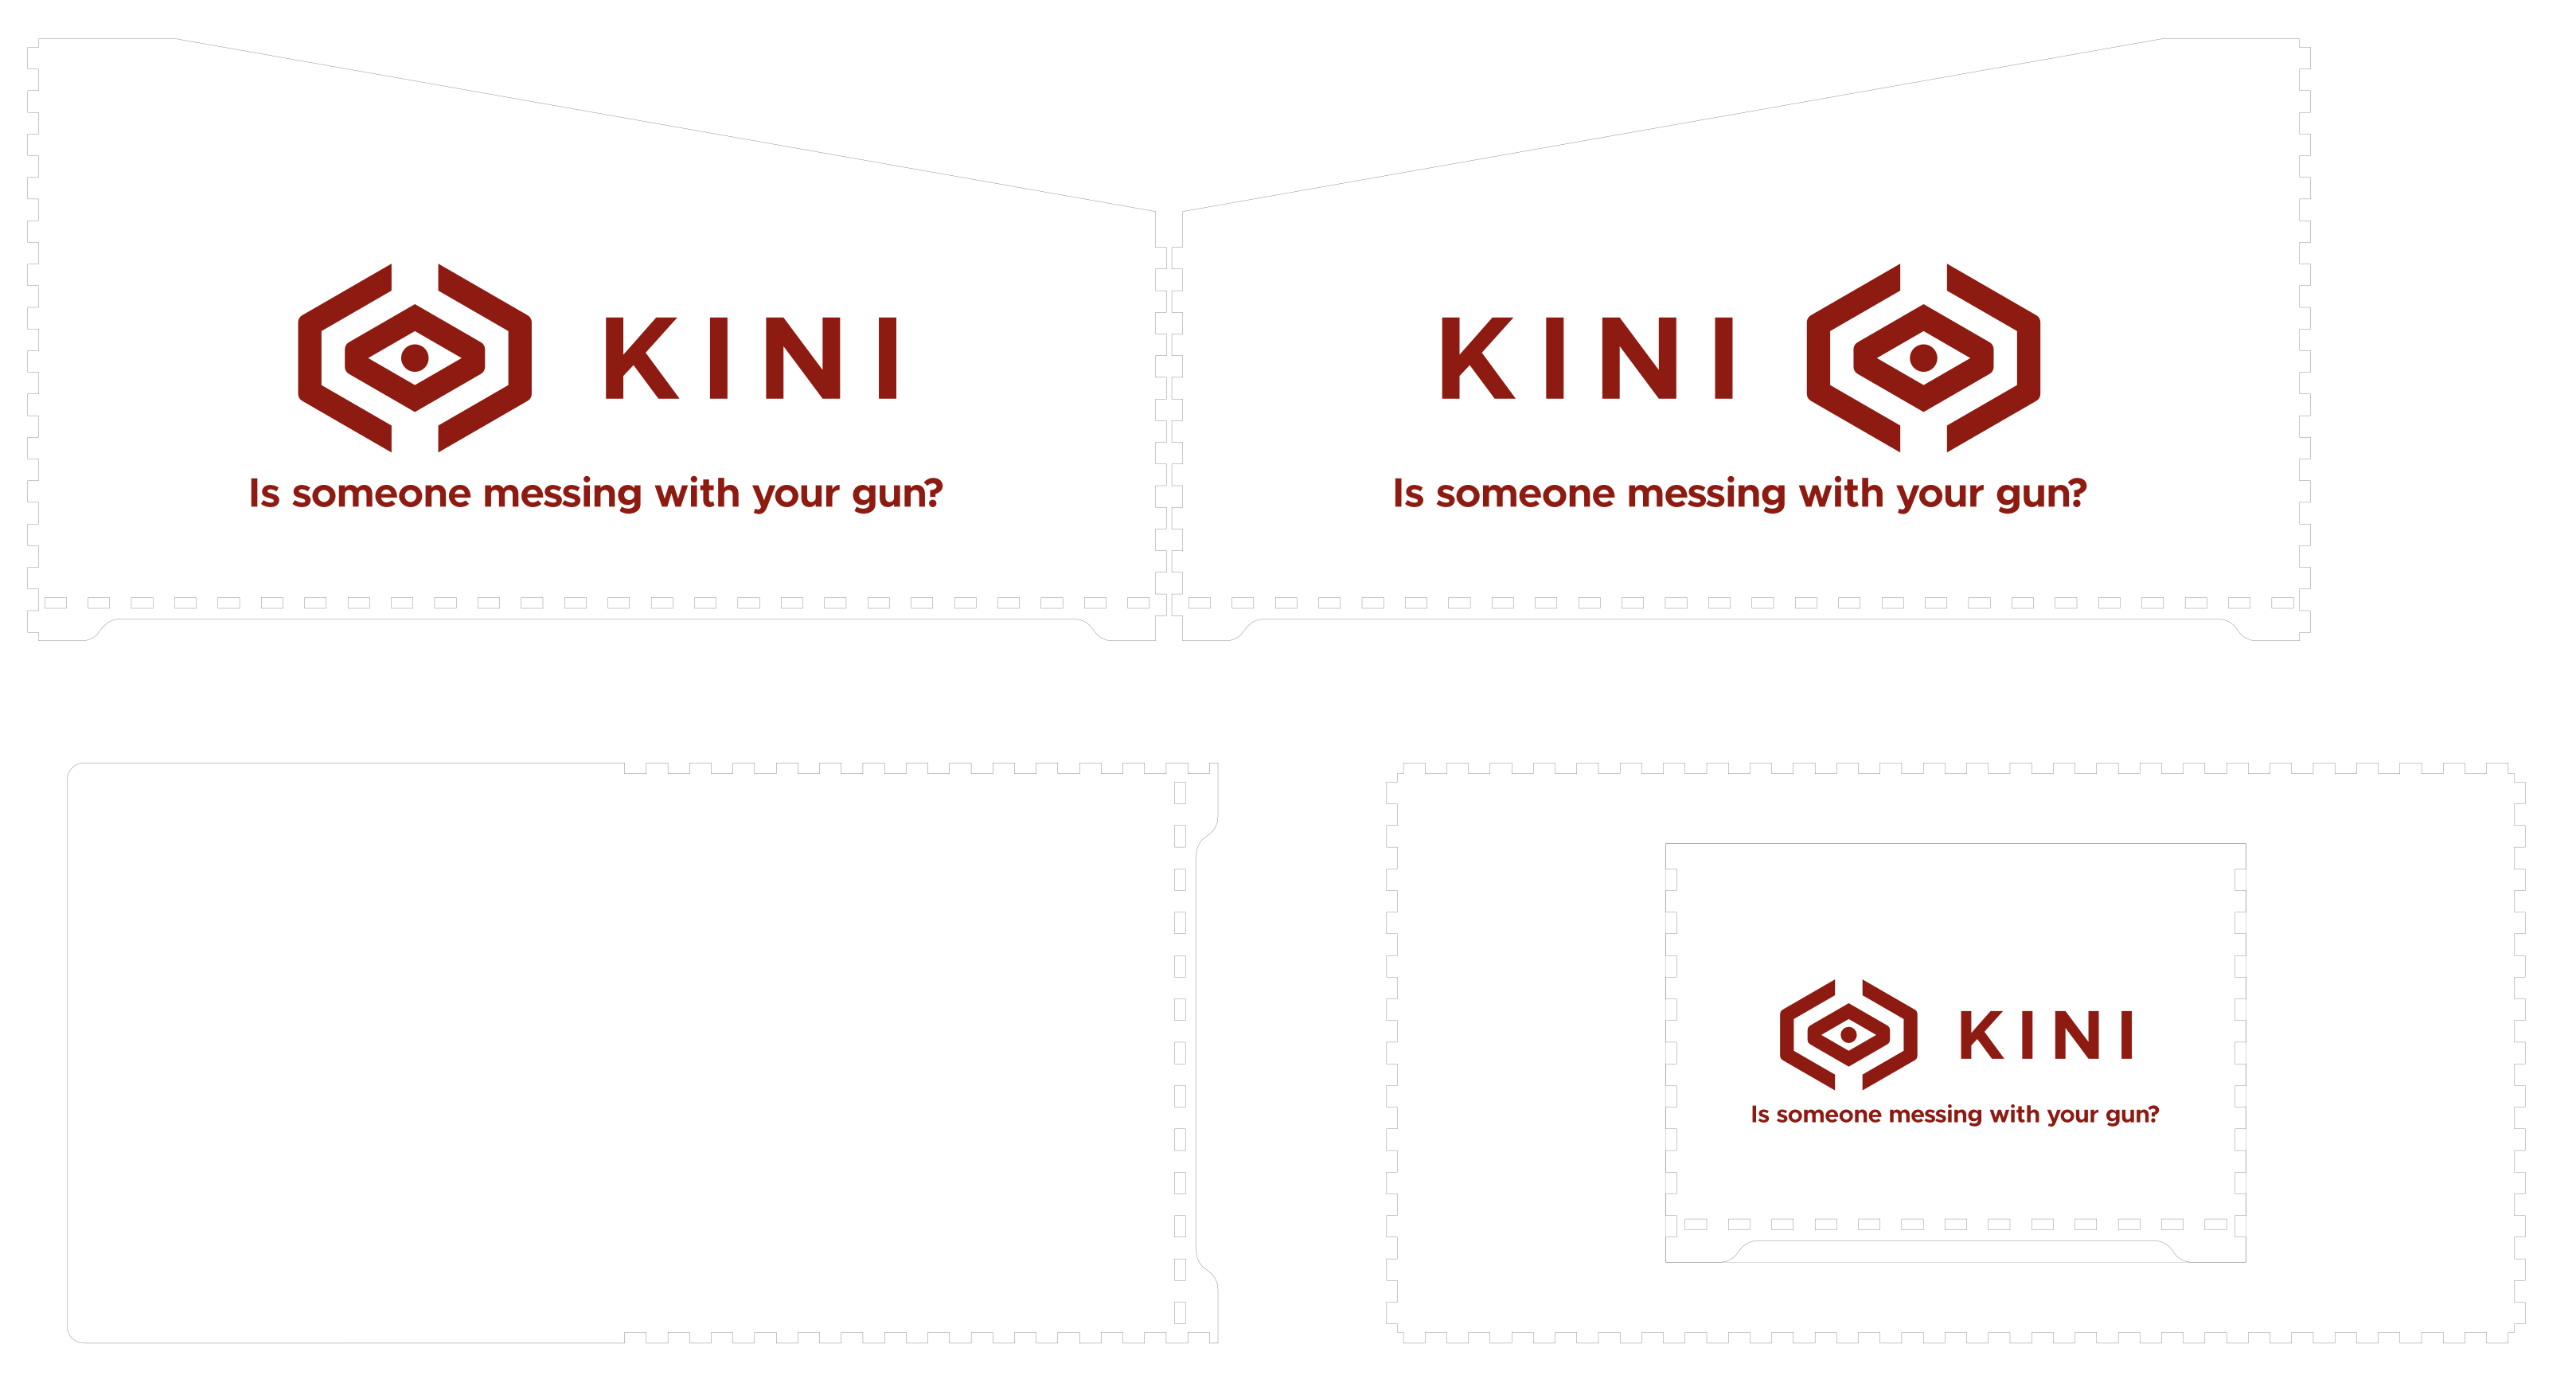
Also you might want to look at if there is a way to cut this down to two sheets of whatever you end up using.
If you’ve got any wood suppliers in your area, and access to a circular saw, you can buy 4x8 sheets and cut them down which usually lowers the price drastically. Light sanding and a poly spray before you cut would give you a coating and be pretty fast.
I was going to suggest removing material from the bottom, but it looks like you already did that. Maybe use draftboard for the bottom piece. You could also lower the sides enough that you might be able to get two sides from one sheet, but still leave enough space for your branding.
To do the sides, I do one side, flip the sheet over, and then do the other side on the remaining wood. If I didn’t have engraving on both sides, I would just do both sides on one sheet in one print.
I also tried to make the back be two pieces, but i made it a little weaker, and didn’t really help out. Since I want people to tap the device and see it light up, I don’t want the back to be easily dislodged.
Just fyi, I think you might have a typo on your product. I zoomed in as I was trying to understand your product. In the third paragraph, second sentence, I believe you have the word location twice in a row.
Changing material to Baltic Birch would drop your material costs significantly. I see GF sized bundles of 20 for about $100 on etsy. So three sheets means $15 vs $55 in material cost. If you have the means to cut your own from larger sheets, then that cost drops even more.
Leaving the finish “raw” would also cut down on 2ndary costs and time required. The raw look might fit well with the market you are in. The burnt look you would get from not masking might also work here.
Laser time is also a cost. You can play with engraving settings to reduce the amount of time spent per item.
Or… consider making a stencil and painting on your logo vs engraving.
Or… consider making a rubber stamp for your logo (glowforge does that) and text and stamping it on vs engraving.
Or… tweak all or part of your logo to be a cutout vs engraved, that will typically reduce the time needed. You may want to increase the size of the text in your “is someone…” so that the cutout is more readable. You have room for that. If you take this path, think about reversing the logo image on one side so you do not have to flip material (which also takes time).
Or… tweak your logo to be more of an outline vs fill and use a defocused score vs engrave… Typically quicker than a cut (same power level (full) but higher speed) and much quicker than engrave.
Or… some combo of the above example: cut out the big part of you logo and use a score for your “is someone…”
if you quantities were higher, I would suggest a redesign to a printed foldout chipboard box that you would have someone else make. With quantities of 100 this is not likely to be a good path. @ 1000+ it would probably make sense.
THank you for the typo-spotting! My wife caught that at the store. I stayed up till 3am to finish those before she had to get on a flight to Southern California to drop them off. Because I wasn’t sure what that text would say, I didn’t engrave it. I printed it on a clear sticker sheet. That makes it easy to correct the typo. I just have to mail them a new sticker.
Yes, absolutely. The logo and maybe the tag line, look really good when engraved and it does make it look like the box isn’t repurposed after being mass-produced overseas. I think I’ll keep those engraved. Other stuff can be printed on vinyl or clear laser print material, and be modified as we figure out our marketing.
Correct me if I’m wrong, but your original post seems to indicate that you think you can only use Proofgrade in your Glowforge. That is definitely not the case; any of the above suggestions can be used in your Glowforge.
You know your GF can cut other things besides Proofgrade, right? I’d go with Baltic birch. You’ll have to finish them, but it cuts wonderfully and looks really nice. I like to sand off the char on the edges and let the layers show, since they’re so nice and uniform in BB.