I just FINALLY got my Pro up and running. Now where in the world do I find those Crumb Tray “pins”??? I want to print a set but I cant find them anywhere in the catalog. Thansk
2 Likes
Just do a search for “pins” with the search function.
And welcome to the forum. You will find more items and topics than you can imagine in the archives.
3 Likes
They can be hard to track down, since they’re talked about so much. Here’s the link:
10 Likes
Ok, did that. Four designs come up:
Leaves, feathers, arrows, and important orange & red bits.
Are they not a Glowforge design?
1 Like
they are not. a user designed them early on.
2 Likes
No. I believe they were created by a user of the forum.
1 Like
Now I have clicked on the link from geek2nurse. I screen came up with a picture of the pins. Now how do I send them to the printer?
Download the zip file. Unzip. Load SVG into GlowForge Dashboard. Set engraves and cuts and scores as needed. Print.
2 Likes
I have no clue what you are talking about. I think I have downloaded it. Now where is the “Unzip” button? And how do I “load SVG into GlowForge Dashboard”?
Please keep in mind that I have just landed here from another planet and have absolutely no clue how to do any of this stuff.
2 Likes
You should do the first three GF prints to learn how to use the machine.
As for UnZip, Mac or PC?
6 Likes
PC
Thanks. I finally found those first 3 projects and have printed the first 2. Working on the third now. But I still d
cant figure out how to UnZip.
Right click on the file (it look like a folder with a zipper on it) and choose Extract All. *This is on your computer.
Alternatively, you can double click on the icon and choose “Extract All” from the upper right side of the folder.
The file has been compressed to make it easier to upload/download. You need to decompress (or “unzip”) it.
4 Likes
Ok, did that. Now I have a screen that says “Select a Destination and Extract Files”.
Im pretty sure I have UnZipped it but now how do I “Load SVG into GlowForge Dashboard”?
The third of the tutorials shows you how to upload files. Scroll down until you see “Arrange Your Print.”
4 Likes
First you’ll want to find a place on your computer to store your Glowforge Designs. You can right click on your Desktop and click New > Folder - call it “Glowforge Designs”
Now on that “Select a Destination and Extract Files” screen, click “This PC” then click “Desktop” then click on the “Glowforge Designs” folder and hit Save (it might say something else, it’s the button in the lower right corner of the box you’re on) and it will unzip the files into that folder.
1 Like
Ok, so I’ve done the first two prints with no problem. Now I’m trying to do the third. I have already installed InkScape but I CANNOT do the first step, which is to draw a circle. It’s supposed to be a blue outline with a no color in the center. but no mater what I do all I can get is a solid color circle. What am I do wrong???
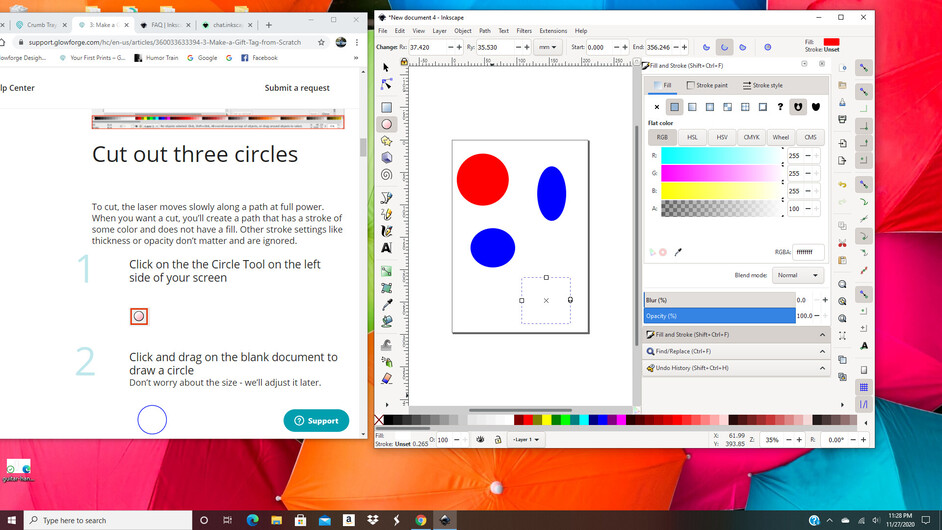
I don’t use Inkscape, but what you need to look for is “stroke” (which puts color on a line) and “fill” which fills the shape with color. You need to apply a stroke but remove the fill. It looks like in the menu showing in your screenshot you need to click on the “stroke paint” tab and select a color, maybe?
1 Like
In Illustrator you’d click just one button to flip the fill into a stroke.
You may benefit from the Inkscape Beginning Tutorials.
On the upper right hand side, it says Fill. Click the “X” to clear the fill. Then click on the Stroke tab and choose the color you want.