For those of us considering how to support/place our Glowforges, here’s an intriguing possibility – the open source Maker Bench project at http://www.sketchthis.net/makerbench
If you have access to a CNC router, you might think about modifying the model/plans available for free on the Sketchup 3D Warehouse: 3D Warehouse
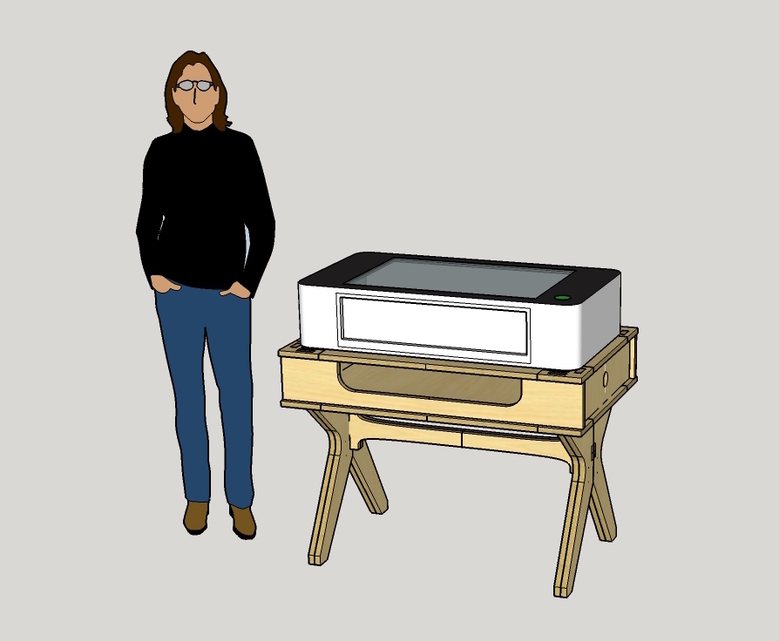
To make customization even easier, user Chris E created and uploaded a rough model of the Glowforge: 3D Warehouse
Please note that while the overall dimensions were correct at the time the model was made, it is not an “official” model and does not include the exhaust port, pass-throughs, etc. and should only be used as a rough guide for sizing and placement. Use at your own risk!
In this quick and dirty example, I imported both the bench and GF and scaled the length of the bench by eye. Actual CNC cutting would of course involve careful measurement and sizing so that the material (3/4" baltic birch) is accurately represented.
Surely the best kind of bench is one that can be laser cut and assembled from parts that would fit inside the glowforge?
I can’t think of a better first use for the machine. Something that would support pass-through materials, possibly via a removable extension, would be ideal.
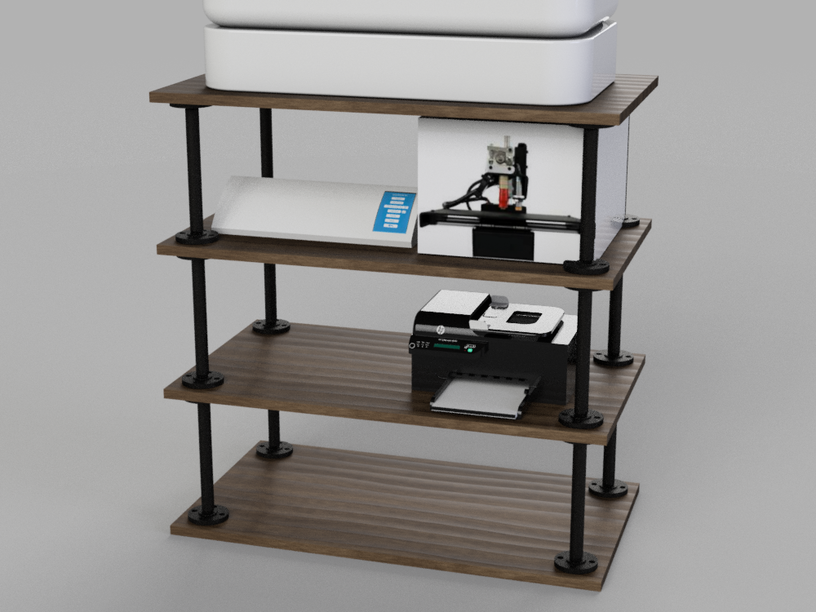
I designed a pretty simple system in Fusion 360 to put my 3D printer, GlowForge, Printer and vinyl cutter. You can view it with this link. Still need to get lumber and pipes to get it done before my system comes
I think I’d like a stand where the shelf directly under the Glowforge would be able to raise and lower - just in case a way is found to add thicker materials. Not that I’d EVER cut a hole in the bottom to enable this to happen!!!
LOL! I was thinking just the same thing. Staring at my 3D printer, the bed goes up & down and down & up Pretty simple engineering. Depending on how the sides/top of the GF are attached it might be possible to mount the existing bed on rods with a threaded one that allows you to dial up & down. Easy peasy would be if all the internal stuff was mounted to the side/top and the bottom is only holding the support grid but life is never easy peasy
Looks nice, but have you worked with iron pipe like that before?
I ask because if you haven’t you may find it to be a bit more difficult than that rendering would suggest.
I use it to make furniture regularly (there is a local metal recycler that sells it as scrap) and getting everything the same length can be a challenge. The threads are tapered, so they only screw on a certain amount, and they are not exactly “precision cut” so the pieces end up fitting differently. I sometimes have to use my threading die to adjust the pipes if they get tight too fast, and often have to use a really big wrench.
My unsolicited advice is to buy extra flanges and pipes so you can swap them around until they all fit the way you want. Also make sure you don’t line up the screw holes in the flanges, otherwise the screws will hit each other (DAMHIK).
And get a big pipe wrench!
Thanks for the tips. I haven’t worked with pipe like this much so it will be a learning experience for sure. I just purchased some reclaimed wood and hope to get a start on it fairly soon, just need to get all the pipe and flanges.

 Not that I’d EVER cut a hole in the bottom to enable this to happen!!!