And apparently PLA lasers just fine. So that offers the option of doing some parts of the process with each.
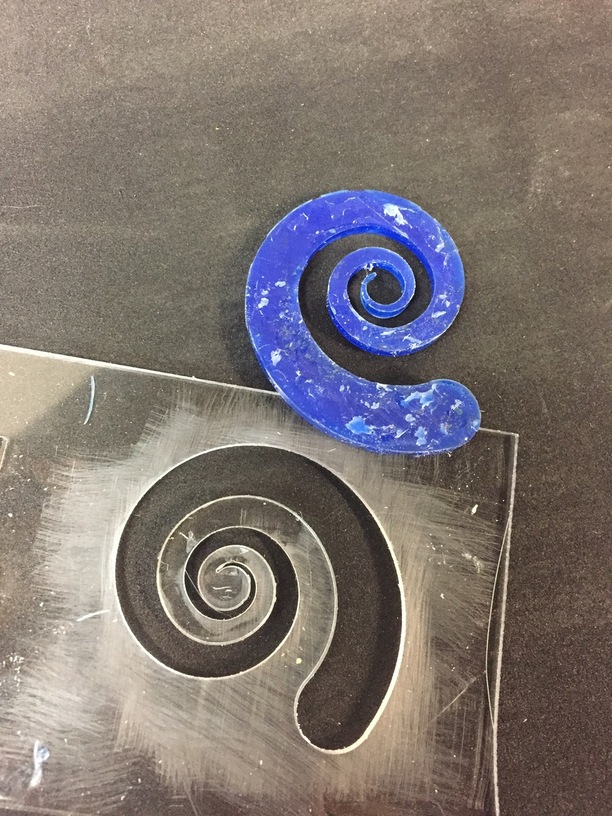
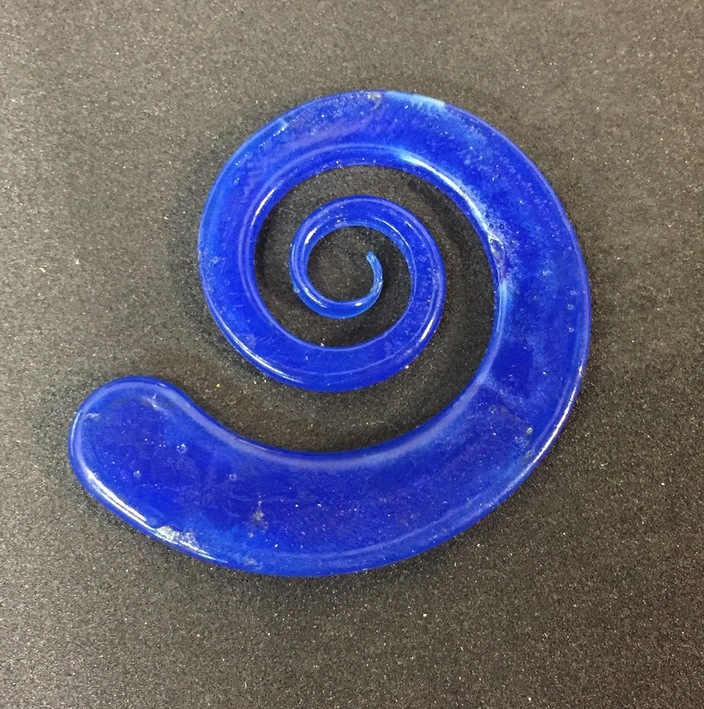
We (I and my studio partner) were also curious. Not brave enough to make a mess inside our GF but then we got thinking. We like to work with wax, but some shapes can’t be carved by hand, so we experimented by cutting a negative out of acrylic and then pouring the wax in the “mold”. This produced a very nice wax base that a could be further altered by hand.
This will drastically cut down the time and expense of making a mold from a separate source material on about 60-70% of our current projects. And if we need to to make micro adjustments it’s as easy as altering the vector file. ![]() Fingers crossed.
Fingers crossed.
Note the photo posted is our very first attempt. Not bad.
18 Likes
Wow! I’ll say! That’s a great new implementation of the Glowforge into your workflow. 
1 Like
Really great application! I imagine you’ll be able to make some intricate molds this way. Please keep us posted with your results.
1 Like
Hurrah! And remember that with 3D engraves you may be able to do variable depth on the spot as well.
1 Like
Nice! Great idea 
1 Like
I was thinking of throwing some machinist wax in that I have for my minimill. Seems like it should work very well. I just need to put something under it to prevent drool into the honeycomb
That’s awesome!
Bit of Glowforge trivia: the chocolate rockets from the video on our homepage were actually made two different ways. We made them by lasering the chocolate directly, which was really tricky, but we also made them by doing exactly this - cutting acrylic to make a mold (and lining it with saran wrap before pouring the chocolate). It worked great.
I also made chocolate coins with my kids this year by doing a 3D engrave onto acrylic, then making a silicone mold from it, so I can confirm that works too.
7 Likes
That actually sounds a little more wholesome. I wouldn’t want to eat anything that came into contact with my grid. ![]()
3 Likes
Geeze 2 years later. Just kinda bums me out there is no glowforge at me house yet lol. Cool idea about using the plexi as a mold for the wax. I wonder if it would be possible to use the 3d etching as well for fine detail.
Since the laser cuts a bevel in the material, that would naturally facilitate the release from the mold oriented correctly. ![]()
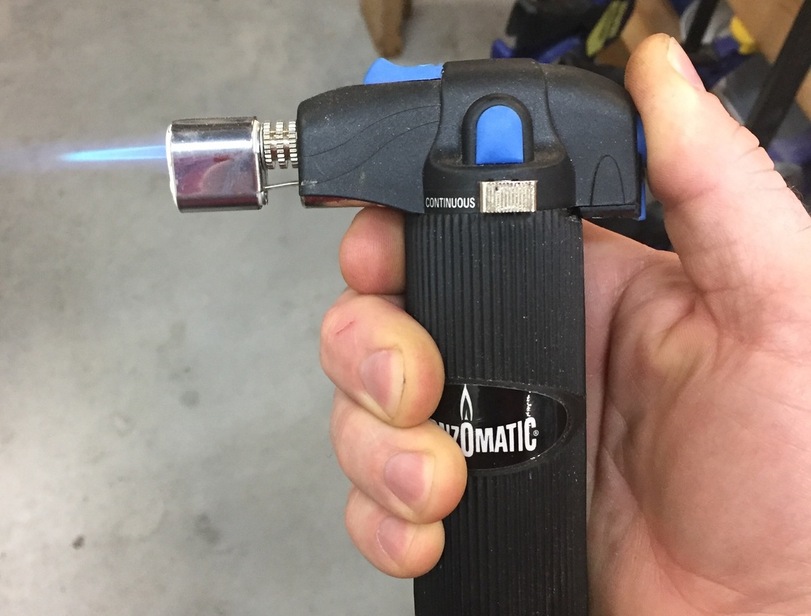
Yes, with a ‘touch’, I used heat to ‘polish’ my wax carvings. I used an electronic wax pen set on high so the wire tip glowed red hot, sweeping it across above the surface. A bit more control than with a flame. With practice, you can flow the flat faces without ‘rounding’ the edges or detail because of the surface tension of molten wax.
4 Likes
Here’s an update on the project.
Cliff Notes Version: HUGE SUCCESS! ![]()
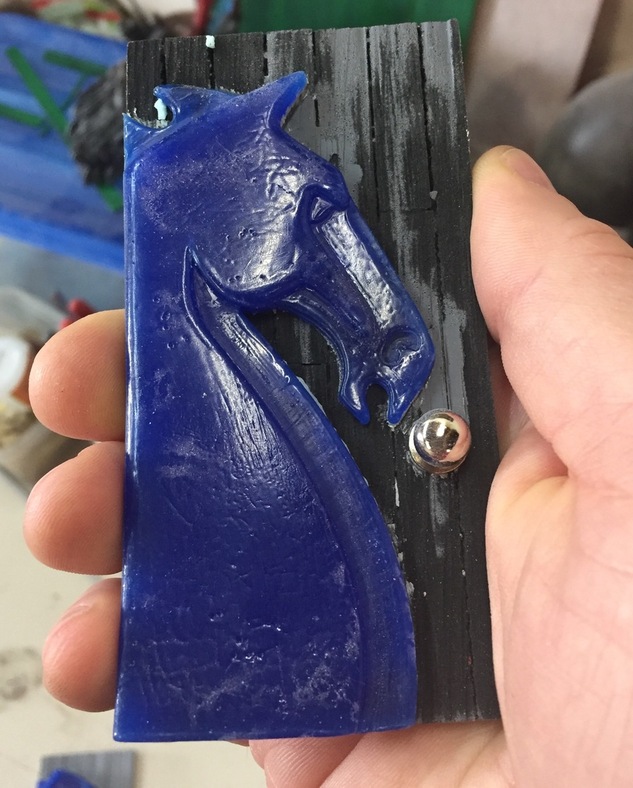
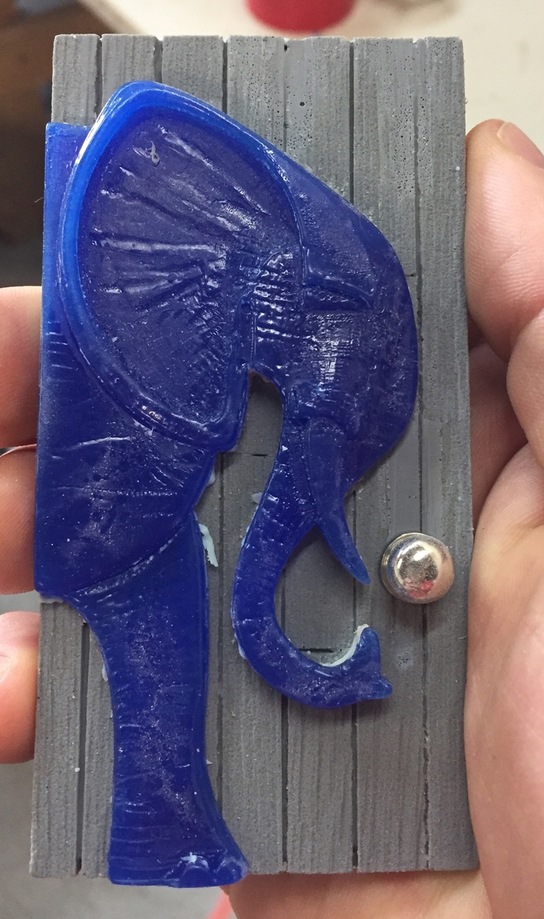
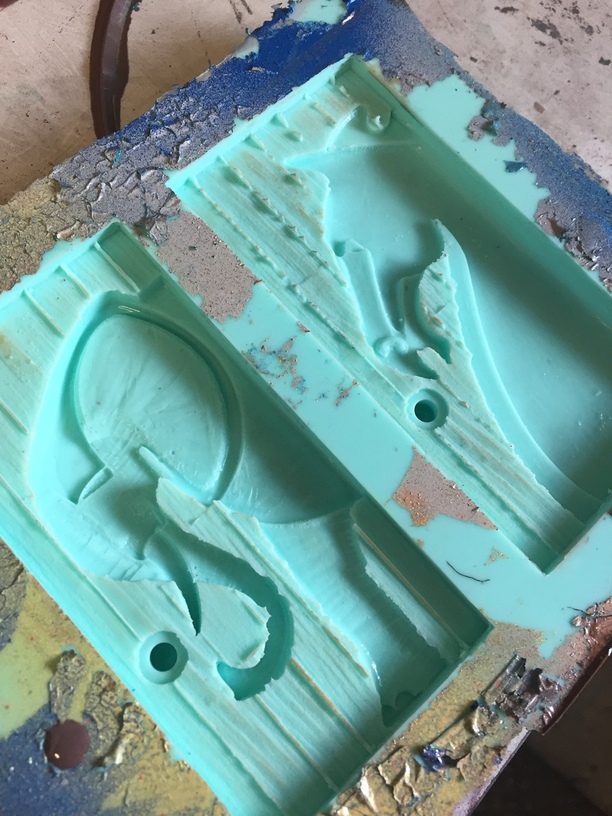
Made “wax stencils” for an elephant and a horse. Created in illustrator after scanning in some of our sketches. Stencils were made out of 1/8” clear acrylic.
Poured and popped wax. Did some clever things by having the GF cut secondary stencils that we could push inside the primary stencil allowing us to create a multilevel effect in the raw wax. This process involved multiple pourings inside the same stencil (less complicated that it sounds)
Took raw wax and hand carved additional details into it, but -seriously - not too many. Then softened and smoothed it out with a torch. Now we have finished wax.
Attach the wax to a tiny door. Did I mention that we make tiny fairy doors? Well, we do and they’re awesome. Link at the bottom if you want to see them.
Created mold for our doors with two part silicon mold.
Come back the next day. Pop mold and begin pouring our finished product. The colors are done directly inside the mold using a combination of painting, powdered pigments, and spray paint.
End by attaching a magnet to the back of the door and it’s frame so that can be opened or even switched with another frame. Done.
Super happy with the result. Here’s the link:

27 Likes
Playing with that next
Beautiful!
1 Like
Hold the phone, these are awesome! And great technique too.  d
d 
3 Likes
I’m not meaning to hijack a thread, but its related. So here goes…
As other users suggested we started experimenting with complicated engraves to help make more complicated wax molds. Cliff Notes Version: HUGE SUCCESS.
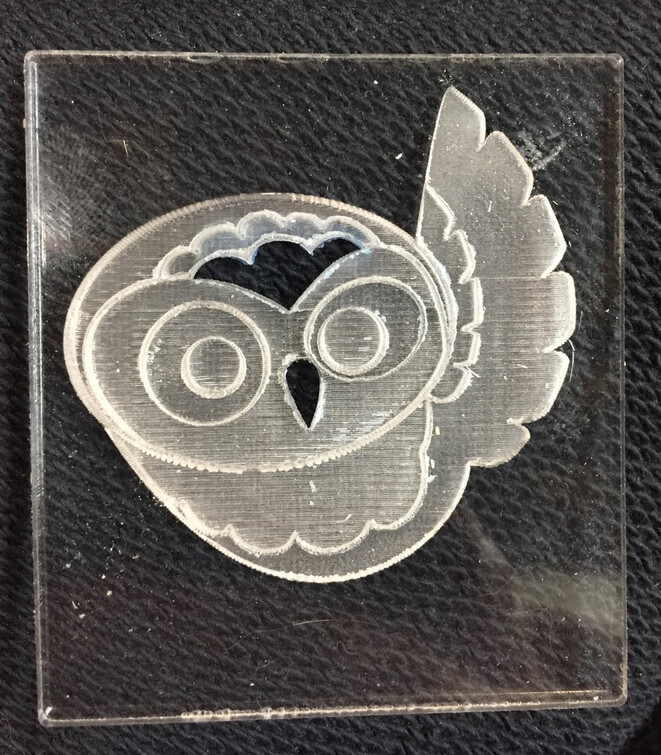
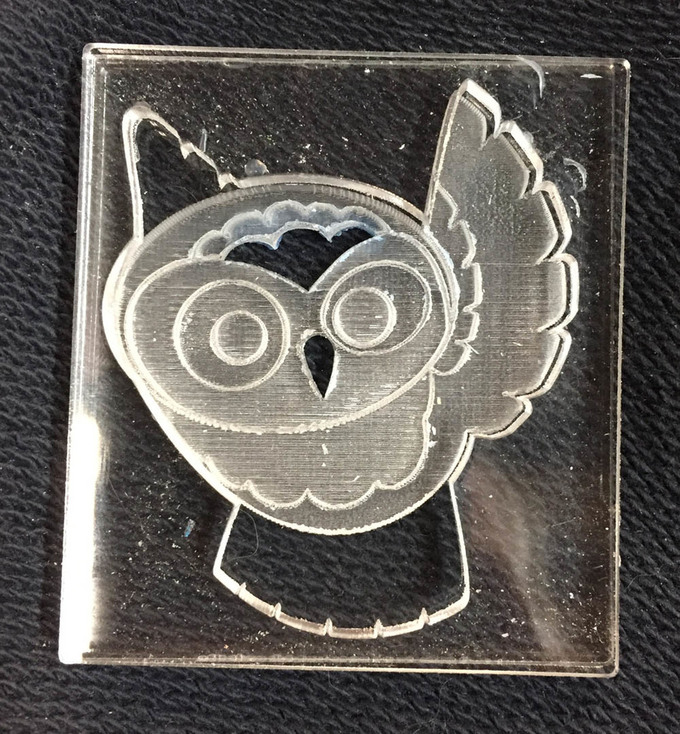
Through experimentation we found that clear acrylic is the best material for making mold, mostly due to its versatility for engraving. But it’s transparency also lets you get a good look at the wax before you pop it out of the mold.
We found that we get 8 distinctive levels of engraving on the 1/8 inch acrylic. This was done with FULL SPEED SD ENGRAVE with multiple passes and only 2 power settings. Either FULL POWER or 75%. Level 1 barely dents the surface, creating a “sandblasted” effect. Level 8 nearly cuts all the way through the acrylic (calipers read 0.028 inches). If a HD engrave is used the engraved surface is much more even, but this is much slower and not a concern for this project.
Level 1: 75%power/one pass
Level 2: Full power/one pass
Level 3: Full power/ one pass AND 75%power/one pass
Level 4: Full power/two passes
Level 5: Full power/ two passes AND 75%power/one pass
Level 6: Full power/three passes
Level 7: Full power/ three passes AND 75%power/one pass
Level 8: Full power/ three passes AND Full power/one pass
The longest part of the project was sitting in front of the computer and trying to figure out how many layers we needed and in what order they should be cut. Had to train our brains to think in reverse order (i.e. to get a positive wax owl we had to make a negative mold). Otherwise the technique was very comparable to what I described previously in this thread but here are the results. DIG IT!
We cut put our final layer of the owl from another piece of acrylic to get a little extra height and make the wax easier to pop. The beak and forehead of the owl were cut through because this also makes the wax easier to remove from the mold.
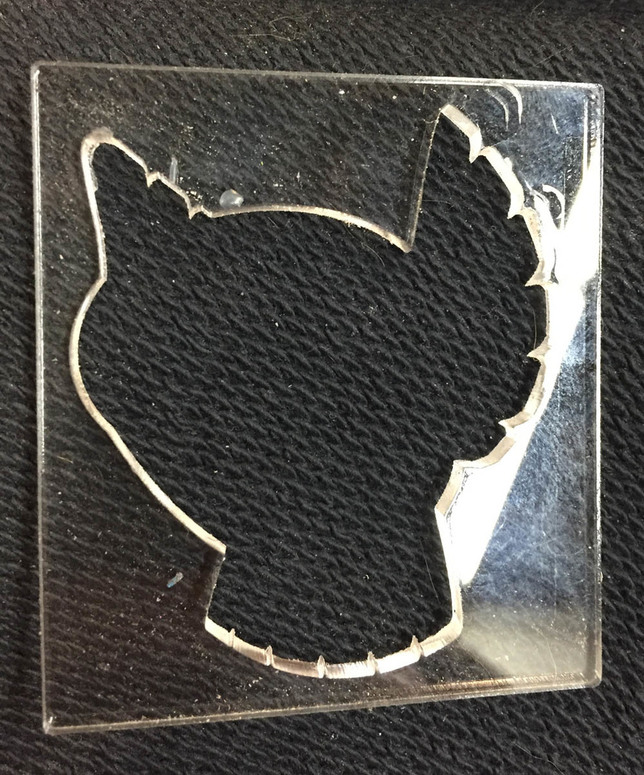
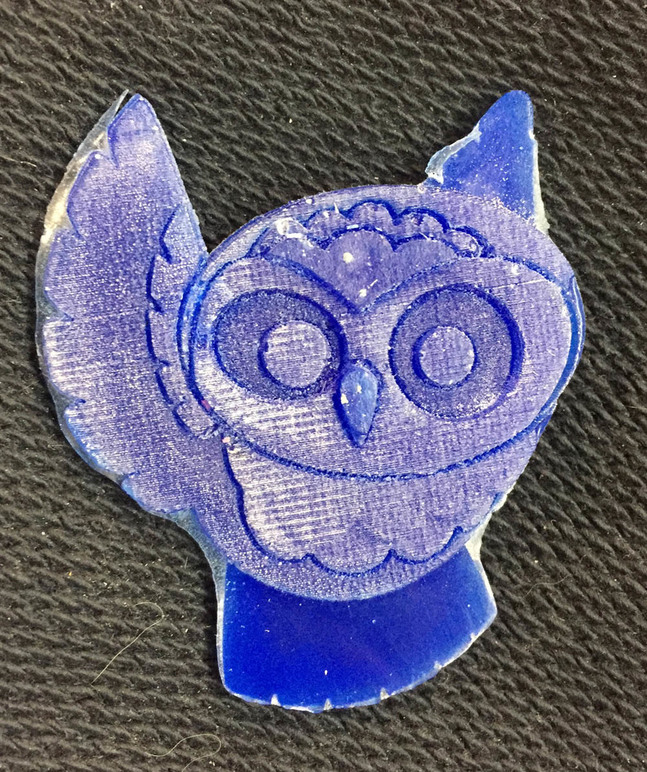
Look how it popped out of the mold.
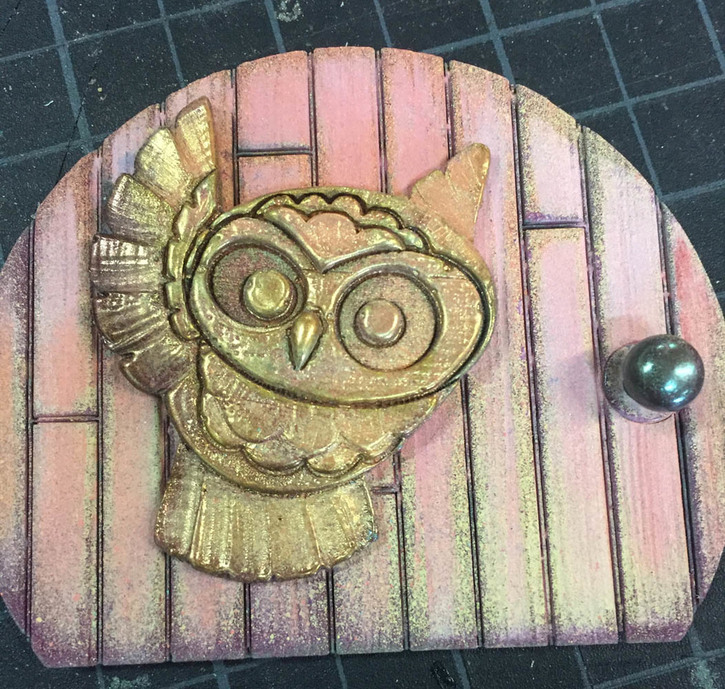
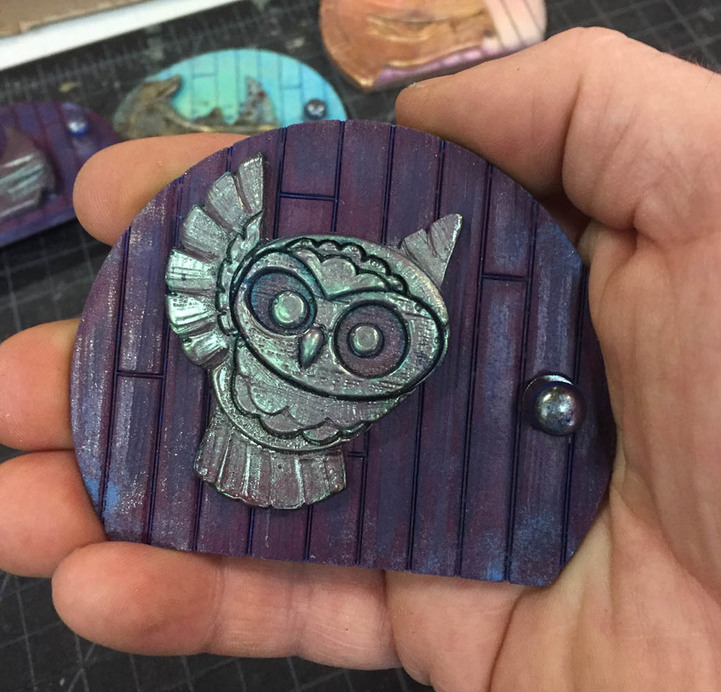
Then a little hand carving and finishing wax work. Attached it to a Fairy Door (which we also carved on the GF). Made a silicon mold and then started painting and pouring. Here’s the finished product.
22 Likes
I’m afraid this is going to be another rabbit hole! Great results! (And thanks for posting your settings.) Bookmarked!
1 Like
By the way, we can’t move individual posts, (only entire threads), but if you wanted to re-post that in Beyond the Manual it would be a great help to folk looking to achieve a certain depth with engraving acrylic. (And i think more people would see it.)
3 Likes
I second the new thread idea, this is really impressive/helpful and deserves it’s own place to discuss/inspire and woo over!
1 Like