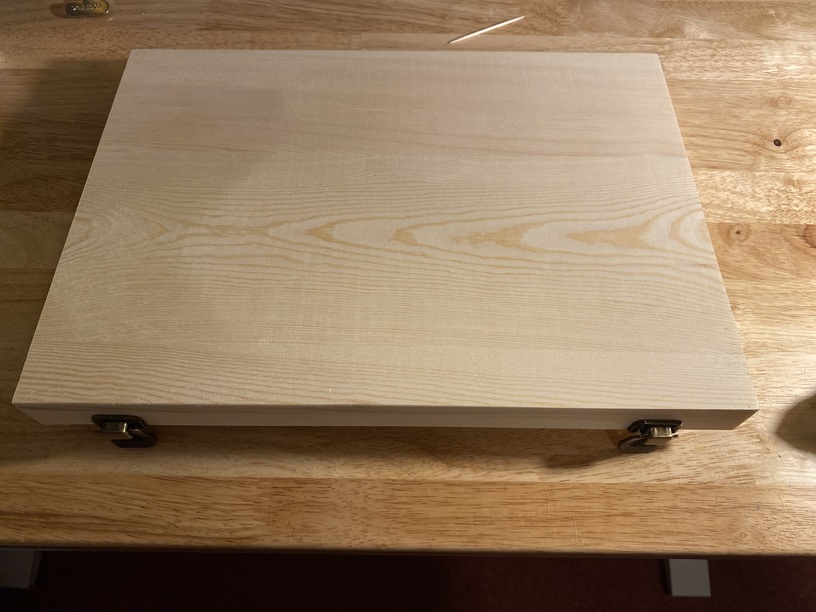
I was recently tasked with making a slot in the top of a Amazon purchased wooden box. I am able to remove the top of the box, but I have no idea how to place it on the tray or remove the tray or how to set it up. The wood feels like a birchwood and the top piece is only 1/8” thick. Any suggestions or tips would be greatly appreciated as I only get one shot at this to make it right. Thank you
1 Like
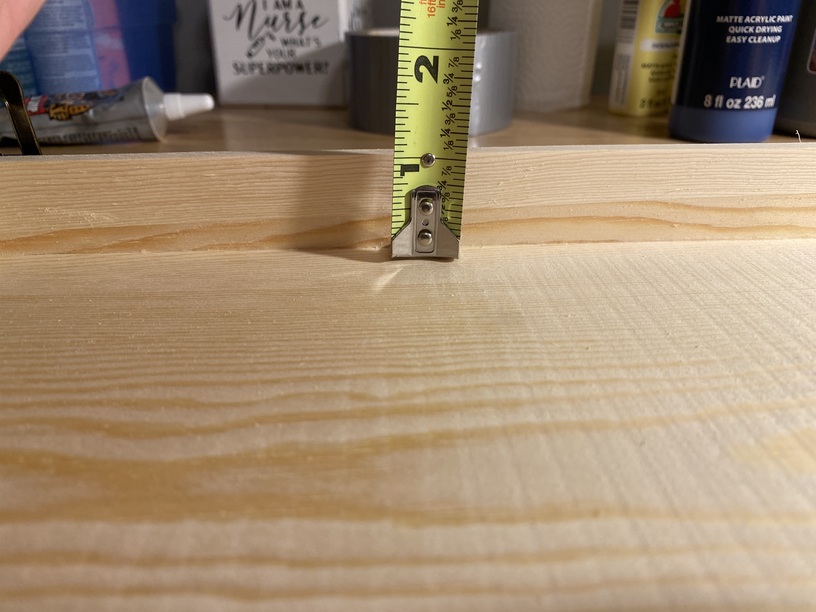
You will have to remove the honeycomb tray in the Glowforge. To do this you open the lid of the Glowforge and pull open the front door. Then you have access to the honeycomb tray which you carefully remove. You will want to place the lid from the box oriented as it is in your first picture, edge down. You will need the surface of the lid to be between 1.5" and 2" from the floor of the Glowforge. To accomplish this you will have to elevate it about 1/2". Use the set focus tool and place the area for the slot as close to directly under the lid of the camera as you can. Place the slot cut file where you want it to cut. You can then use the proofgrade settings for a similar wood and cut the slot.
Before you do this, however, you should consider placing masking in the area of the slot and running a light score (power 1) over the cut file to make sure it is actually going to cut exactly where you want it to cut. Once you are sure it is going to cut in the right place, change the score to cut and use an appropriate speed and power level to cut the slot. If the slot does not drop out, don’t move anything and run the cut again.
Alternatively, you could probably use a saw and quickly cut the slot without using the Glowforge at all.
4 Likes
You definitely want to take out the tray, then find something just over half an inch high to set the lid on top of - that should get you to a workable focal range. I’d suggest masking both sides where you’re going to make the cut, then place it as close to centered under the camera as you can and tell the Glowforge it was “thin birchwood”. Use “Set Focus” tool, and let 'er rip!
(But since it’s a one-shot item, I’d also try on a cardboard mock-up version first…)
6 Likes
Ooooo… That “run a light score” tip is a good one, too… Do that!
6 Likes
Thank you so much for the reply, I will try exactly what you suggested. I will let ya know how it comes out! Thanks again
3 Likes
Thank you as well for the reply! The masking both sides is a good tip! And the height always gets me! I sometimes think I think about it to much 
4 Likes
If you make the “Risers in draftboard” and No-Math focus ruler" first (if you haven’t made them already - they’re in the “free laser designs” section) it will help a lot with using the risers to place the cutting part of the top at the right height, using the no-math ruler to make sure. I use these two items a lot and they definitely help.
5 Likes
This topic was automatically closed 32 days after the last reply. New replies are no longer allowed.