Since my machine is a basic model, there was no passthrough slot. I don’t see why a removable hole in the back couldn’t be put in, though. Obviously all the same safety measures are violated as putting a hole in the bottom, so be careful! I don’t have my machine in front of me, but I don’t remember there being any wiring or other electrical there. Just be careful to ensure you don’t compromise the integrity of the casing. If your model already has a pass-through slot, all the better.
1 Like
@matt.stoker You’re back!!! Awesome!!! – can you post a ‘cutting guide’ template so people don’t slice thru stuff on the bottom? - I know over the time I have seen people here that wanted to do your mod, but feared hitting something critical.
you are the god of Toast!!
Jonathan
1 Like
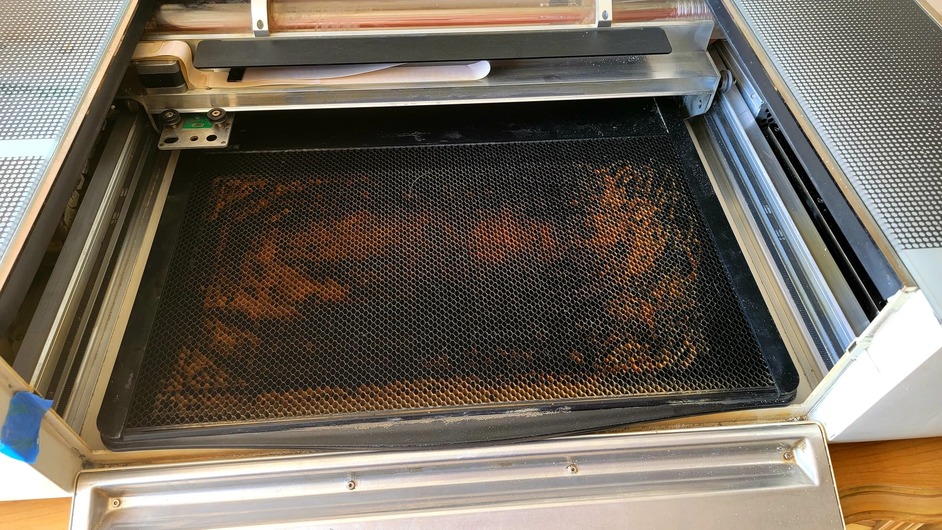
So I did something today, I cut the bottom out of the GF to garner greater depth and it was surprisingly easy. After I was done I decided to test it out on a cup, a water bottle and a glass bottle.
I’m new to this whole cylindrical material engraving and would love to hear from any one who has done this successfully.
What are your techniques for centering graphics?
What is the greatest width you use?
Do you do one graphic in multiple engraves if so how?
What I did was find the center line mark a half inch on either side and made the graphic an inch wide. Then I turned the material a half inch and did the next part. I felt like it was a lot of work. Is there any other ways that make it easier? I think biggest issue is going to be alignment. If you can give some insight please help.

3 Likes
Im not sure if anyone else watched this video…but for those who did… I wanna know who else jumped when they put that first pyrex down on the wet counter?? Even though I knew it was coming! I even blocked the glass from hitting my face by covering my face!! Now I will never hear the end. He always jokes that I am so skittish, even in broad daylight!
When you cut out the bottom, how did you check to make sure you where not cutting thru any tubes, or wires?
can you put the tray in, and use it?
what are you doing about venting the smoke out?
(My curiosity runs wild)
Jonathan
1 Like
I took out the crumb trey then removed the silver plate that’s underneith the crumb trey on the inside of the GF. There’s 5 small star screws that screw in from bottom the GF. Then I measure 1 1/2" from the center of the back screw holes on both the right side and left side and drew a straight line across. That gave me the cut line for the back side nearest the gantry when it’s in the home position. I measured a 1/2" from the trey removal door on the front side on both sides and drew a line across the front. That gave the cut line for the front. Then I measured 1/2" from the little notches that the crumb trey sits in on both sides front and back to get the side cut lines. I squared it up and cut it out with a dermal cut wheel and a jigsaw. There’s a metal price on the bottom that has a lip. It house cables. I can put the crumb trey back I’m and use as normal as well.
3 Likes
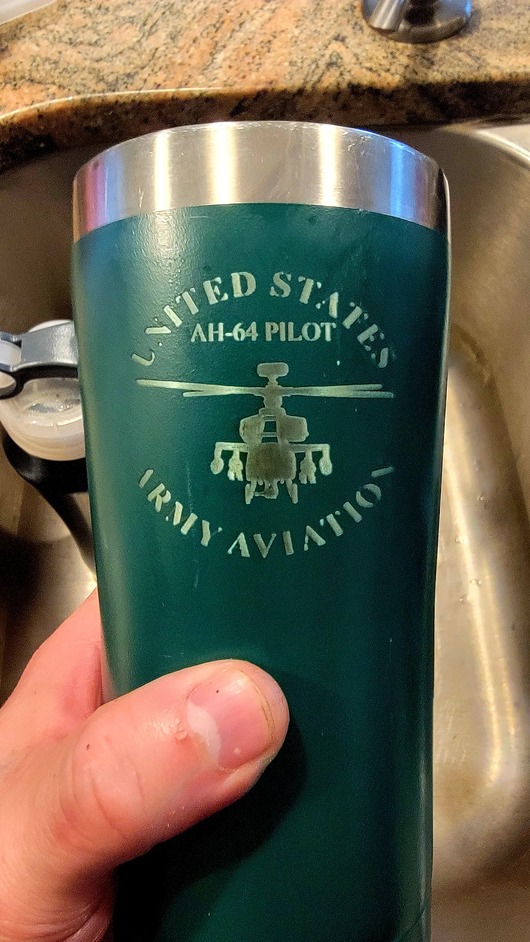
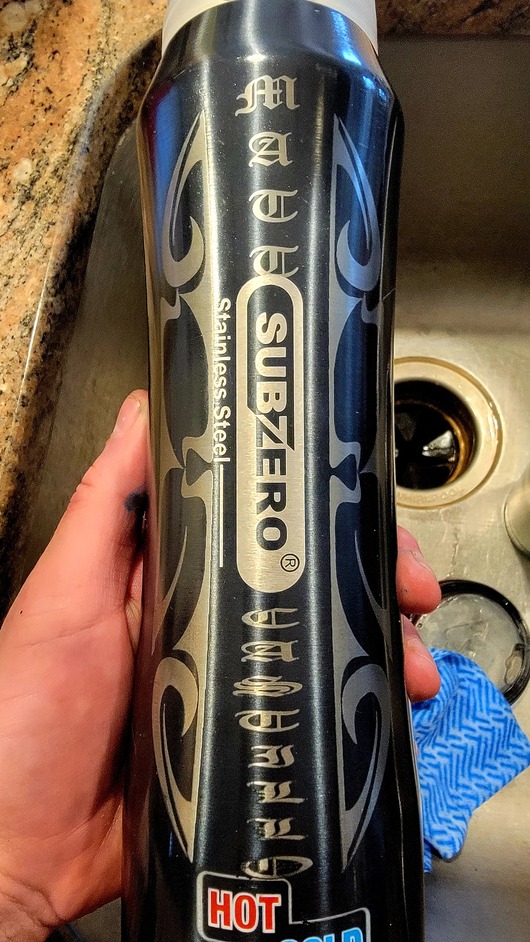
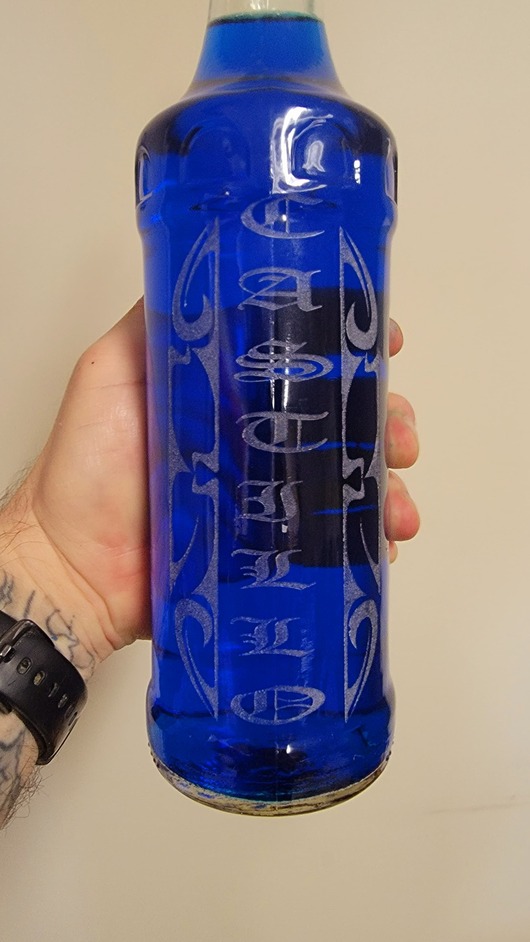
Been playing around with this new found space after cutting the bottom out. I think I figured out the cylindrical thing with out having a rotary tool. Had to manually rotate the tumblers and do multiple engraves but it workout pretty good.
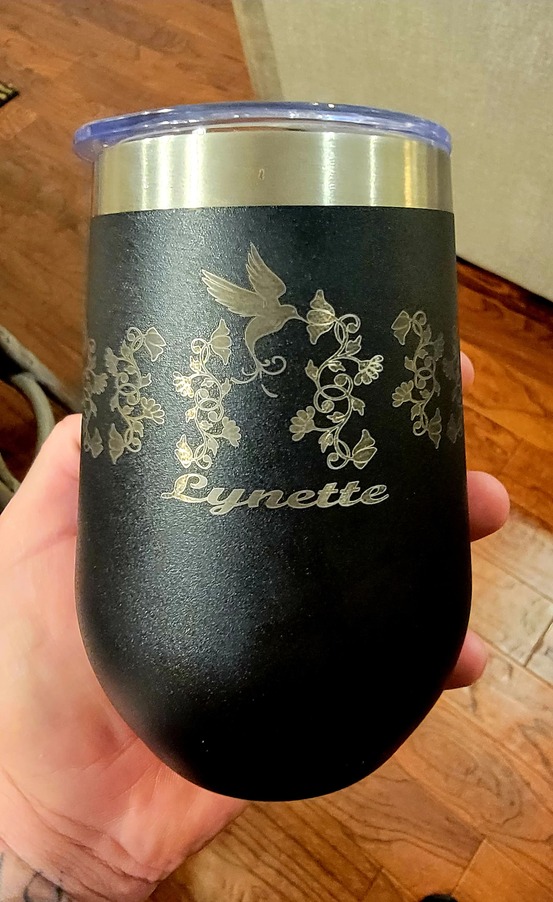
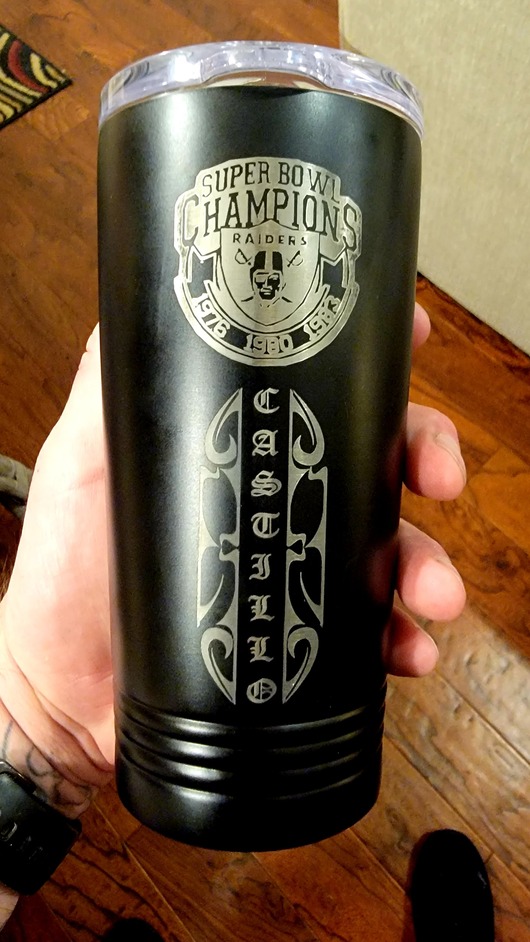
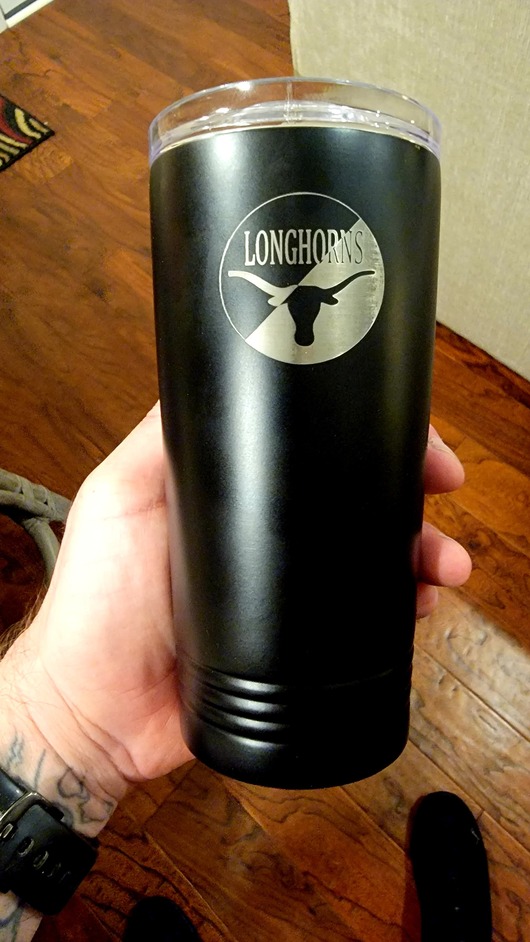
3 Likes
One thing that might help is manual focus. But it would take some measuring. Basically, split the difference between the highest point of the engrave and the lowest point, and you’ll have a little more consistency over the curvature.
In the other photos you shared, it looked like you were probably going a bit too far out of focus at certain areas which changes the energy density, and how well it will engrave.
You can usually wipe it down with some LA Awesome cleaner (dollar store) after the engrave and it will clean up any engraving residue really well.
1 Like
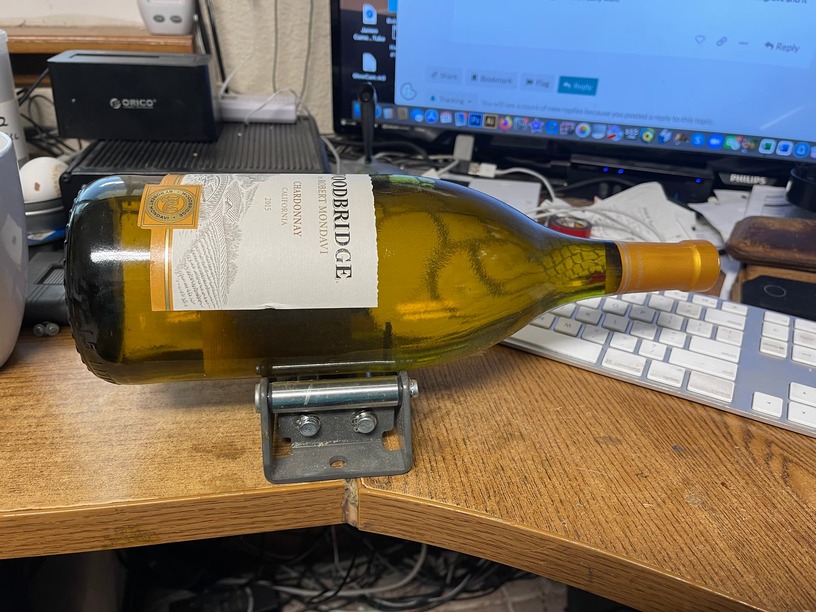
I found this in harbor freight, its used to manage pulley cables for a winch,
I think I paid like $20 for it.

3 Likes
Good luck finding one that works for that price.
I think the way @castillo_87701 did it is best: just measure in 1/2” from the metal plate. I did mine the odd shape because I was concerned it might hurt the structural integrity of the machine. It doesn’t, so just go ahead and make it a rectangle slightly smaller than the metal floor plate. That way, you can replace the plate and use it like a regular glowforge when the extra height isn’t needed.
2 Likes
Beautiful pieces! Ya, I tried to build a rotating jig, but found I could usually get away without it. Maybe if the GF guys let me modify the source code so I could have it engrave a single line and rotate the piece instead of moving in the y-axis…
Glowforge guys? Source code? 
Genius!
1 Like
my issue / question is there is about 6 cables, how did you move them to be out of the way?

[Orientation bottom is back / top is front]
2 Likes
You really wouldn’t need to unless the object you plan to engrave is that big. Cutting up to it is what most do since the laser can’t go back any further than that anyways.
I’m not doing it because I need to, I am doing it because I WANT TO!

1 Like
Now that’s what I’m talkin’ about!
1 Like
Are there cut plans available anywhere? Warrantee is up and I keep turning down work for engraving bottles ect. I’m ready to take the leap but want to make sure I don’t cut aria that may have wiring ect. Search YouTube ect and haven’t found a video with detailed plans. I also love that you cut in a way that allows you to add metal plate back in.
1 Like
If you have a specific need to do bottles you can make that happen without modifying your Glowforge. Directly marking the glass with the laser is pretty cool … but there are lots of other options.
3 Likes
We are looking into doing something similar. Wondering about smoke as its no longer sealed in the machine.