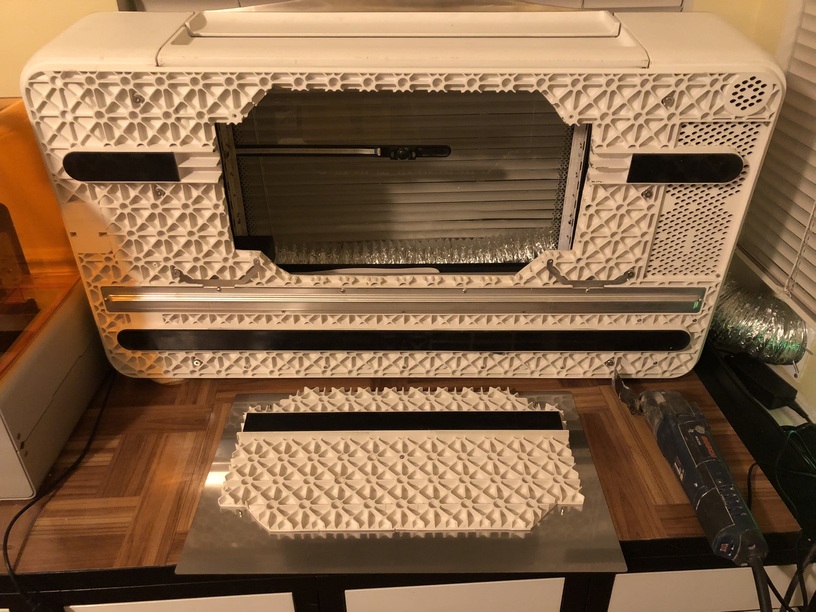
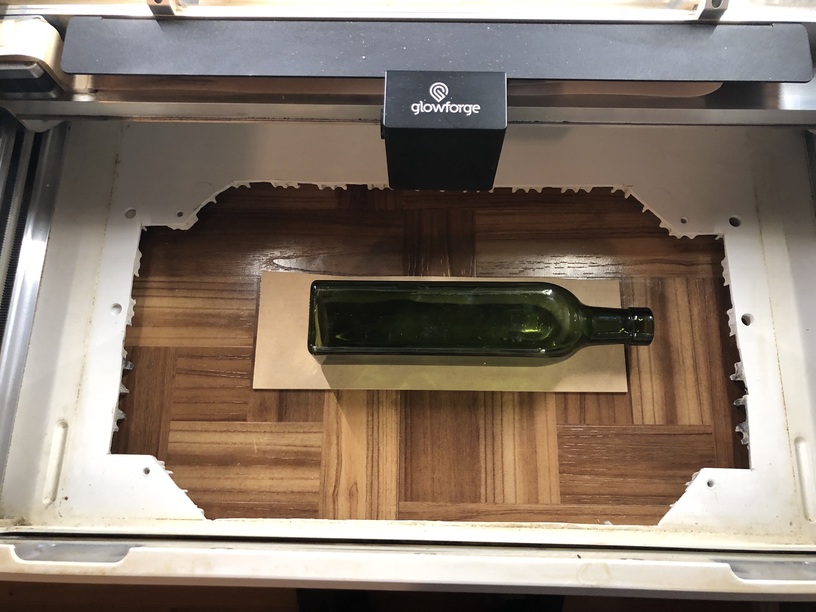
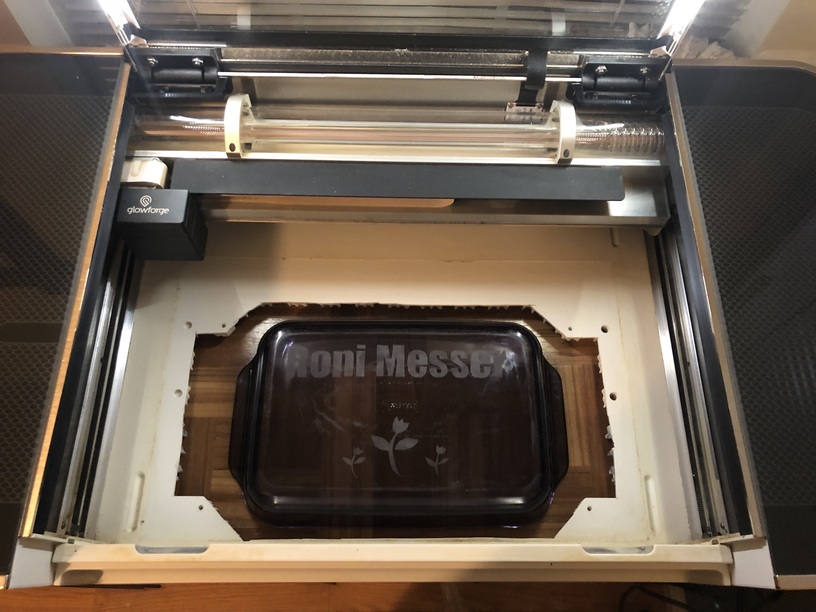
So I finally did what I’ve seen many say they wanted to do, but had not found anyone had yet done: I cut a hole in the bottom of my Glowforge Basic. I constantly find I want to engrave or score on top of things that are just a bit too thick. So, since my unit is out of warranty, I increased the max dimensions of work pieces from ~20" wide x ~12" high x ~2" thick to allow for any thickness.
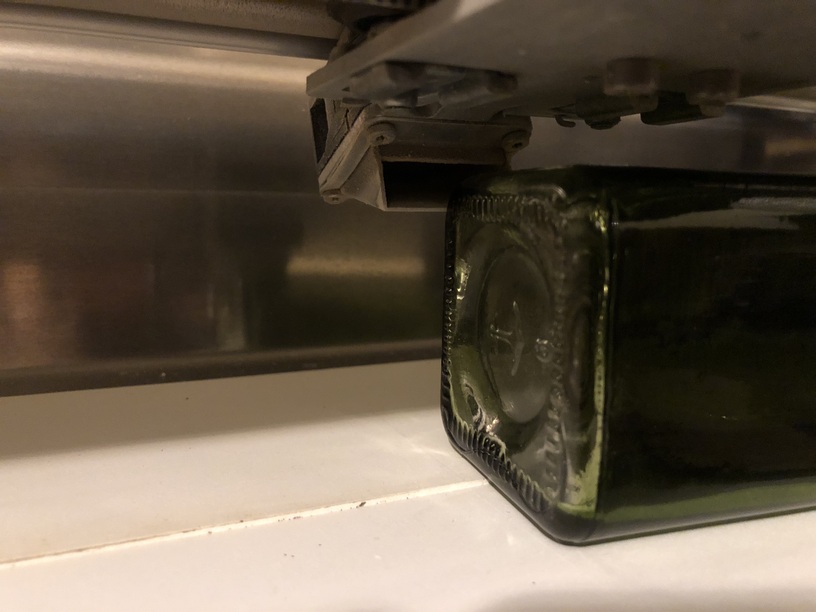
Because the designers added a metal plate at the bottom of the unit that is removable via screws, removing the metal plate and cutting a hole smaller than the plate allows for the hole to be filled whenever you are not cutting thick materials by replacing the plate. Makes this a much less permanent modification to your Glowforge.
Note that if you put a hole in your unit, it is no longer a Class 1 Laser Product. Also, the U-shaped clips on the bottom of the unit that attach to the metal plate via a screw are probably for grounding, removing static electricity from the fan blowing over the work area. Find another way to ground your work area, just in case. I haven’t tried anything that produces much smoke yet. I assume that the venting will not work well when the unit is in infinite-thickness mode. Pop the plate back in to keep that stuff out of your workshop for typical-thickness pieces.
Awesome! Now if you really wanted to get crazy you could cut the piece out of the table the GF is on and mount the piece on a lab scissors jack so you could just reach under & raise or lower the floor.
Or build an adjustable table set using lead screws, gear nuts, belt and stepper motor so you could raise & lower the GF itself. The adjustable tables in many large lasers work that way. You’d just be making the GF raise or lower around the table instead of making the table raise or lower in the GF.
Either one would save you from having to muscle the GF around.
Not sure I’d be comfortable doing this, but I’m impressed with the stuff you are putting out. Not sure the bottom of a baking dish is a good idea, unless planning to only do decorative use. You may have seriously weakened the thermal tolerances of the dish.
Oh, my. It took me a while to realize that you still have to get things up into the focus area. And yeah, scissor jacks would be a great thing, maybe for the GF.
Intrepid.
I think increasing the air flow by removing the obstruction of the exhaust fan Grill would be of some benefit since when the bottom is open airflow across the intake heat exchanger is diminished. It couldn’t hurt.
This^^.
When an automobile company makes a convertible it takes a stronger chasis to compensate for the structural loss of the top. I might think about duplicating that cut out in a piece of 3/16" steel the size of the glowforge and attach the machine to it, then motorize that assembly as described above.
Besides the increased Z, you also have a multi-directional “pass-under” instead of a single direction pass through.
Exactly what I was thinking… look up DIY router lift solutions, you could even have markings on the adjustment wheel to set up a “floor depth” gauge for quick material height setting. A custom metal floor and external wire link to the units frame and you’d not need to worry about the provided floor.
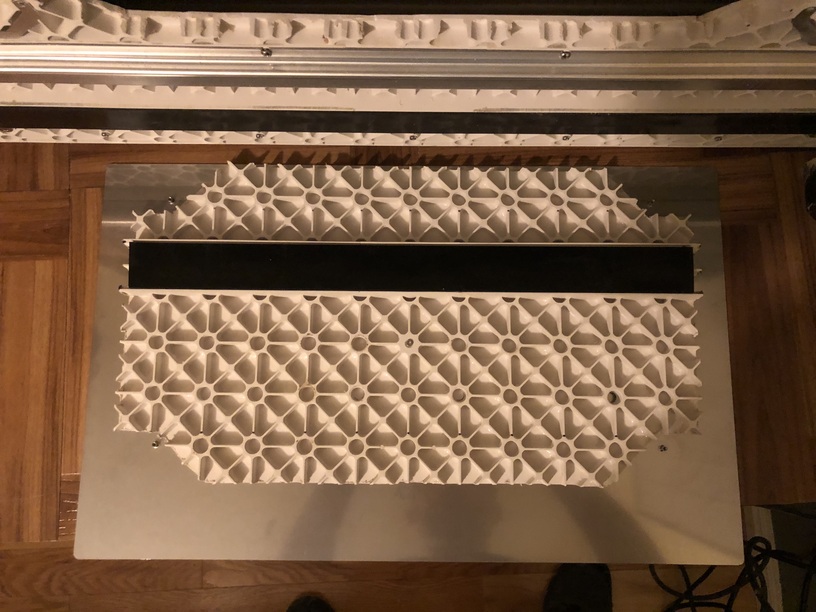
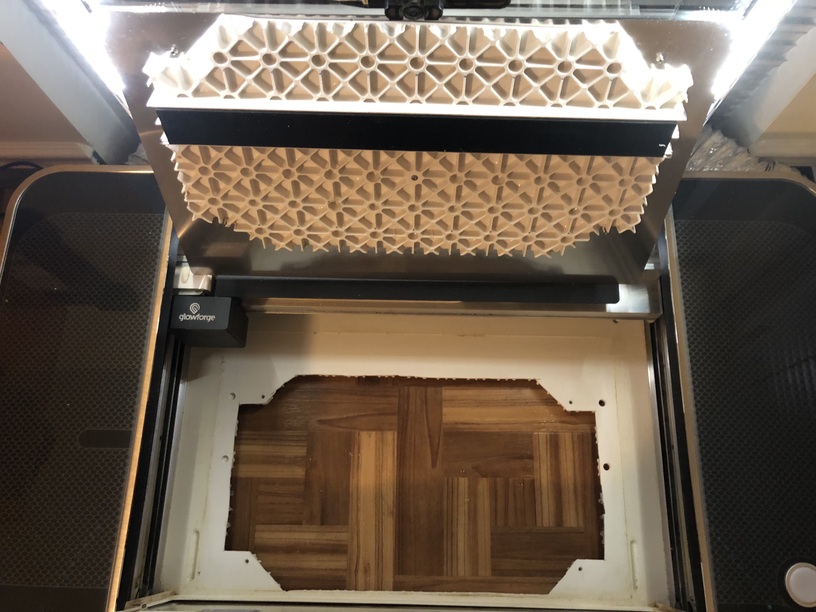
Yes, the metal plate can be replaced from the top, opening the glass door and crumb tray, then slotting it into place. In this way, the plate is only held in by gravity, but the original screws can be used to hold it in place.
The metal plate has 5 screws. In the mod done to our machine, we left 4 of them intact, with the center screw being cut out (see the image in the post). The center screw can be used to affix the cut portion to the plate. The other 4 are accessed from the bottom of the machine. The plate fits nicely without the screws put in place, though, and if using the crumb tray there is certainly no need to screw things back together. It fits flush and has a good feeling.
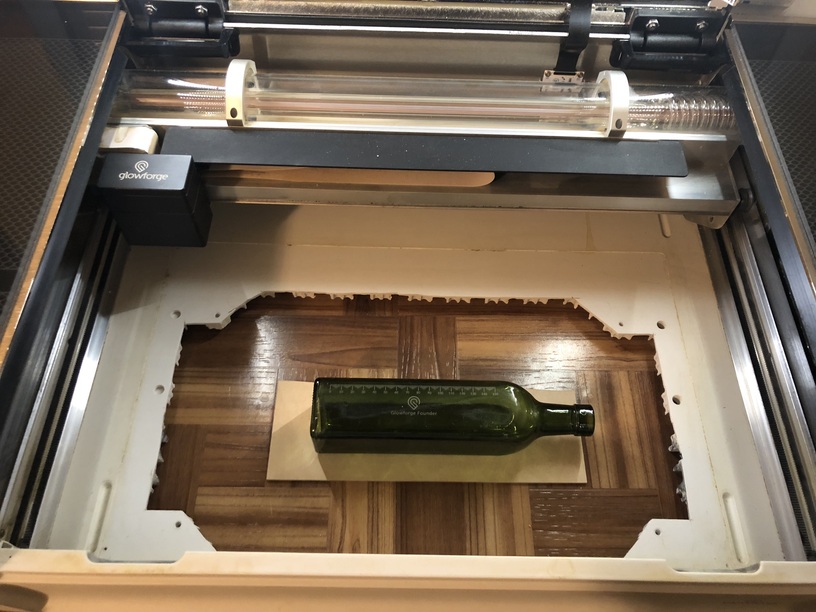
Ya, a z-axis mechanism to move things up/down automatically and with precision would be the next step. I’m just using 1/8" scrap to position things in the focus area at the moment.
Ya, moving the z-axis in a good way is the next usability upgrade. The way the cut portion slots back in with the metal plate makes it feel very user-friendly. I’d like to get this figured out for good z-axis positioning with precision, then make a DIY post for any others that would like this capability.
No, I have not noticed any issues using the machine with the hole yet.
The first thing I did after cutting it was make sure it would go back in nicely, then did a test cut with no hole. Everything worked exactly as it did pre-modification.
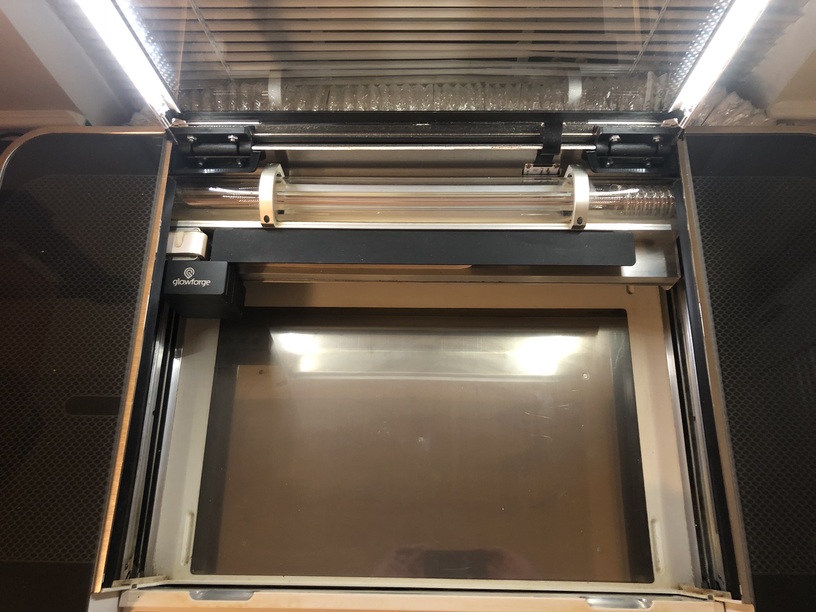
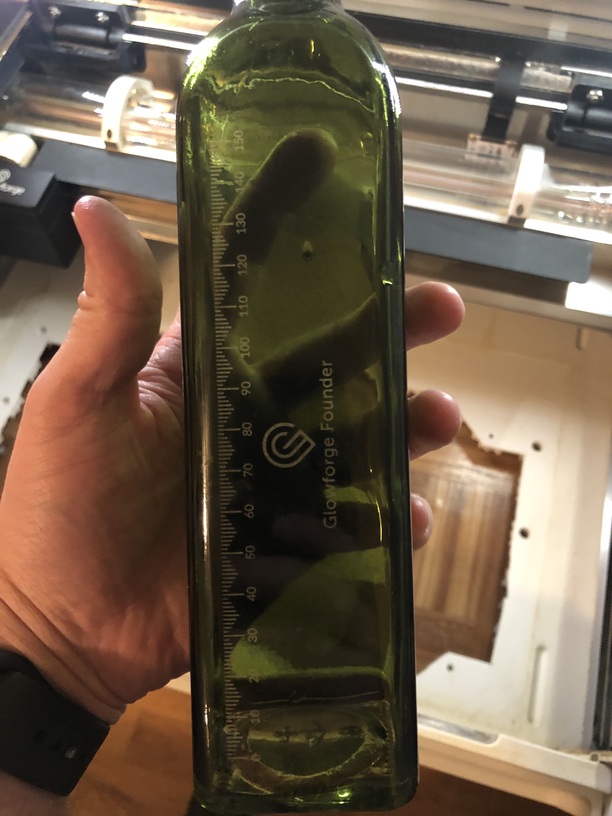
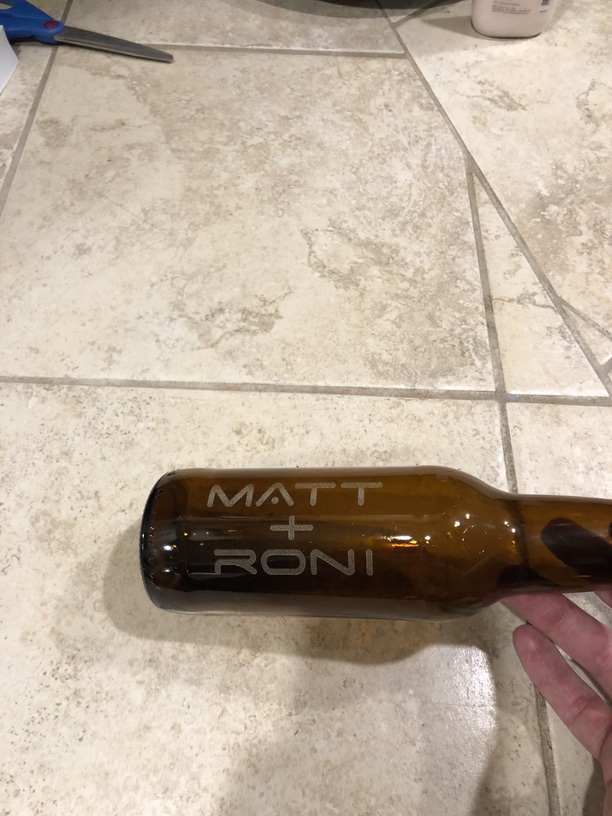
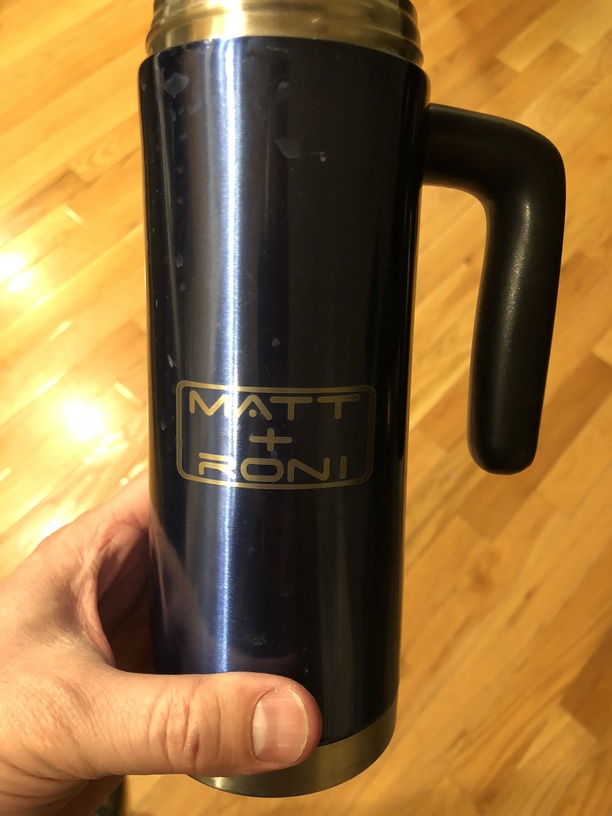
The next test was on glass, since there is little smoke with those. The machine repositioned and centered the head with no problem. The green bottle was not even particularly well positioned in the z-axis, but the engrave came out looking great. I could use the bottle as a ruler.
Yes, some baking products rely on the glass being tempered as part of their thermal performance envelope. Any lasering of these, especially Pyrex products, should take that into account. We’ve used masked, sand-blasted dishes for years and years with no trouble. If the laser power is set very low and makes more of a “scratch” rather than deep impressions, the dishes should still hold up to baking temperatures just fine.