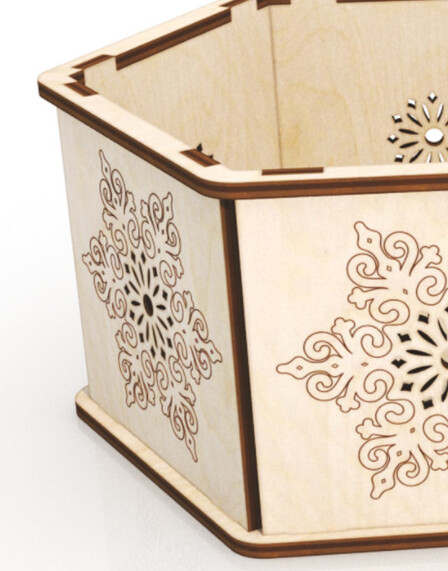
Does anyone know if there is a box generator that will build a box with this type of edge? I really love the clean look of boxes that don’t show the finger joints.
11 Likes
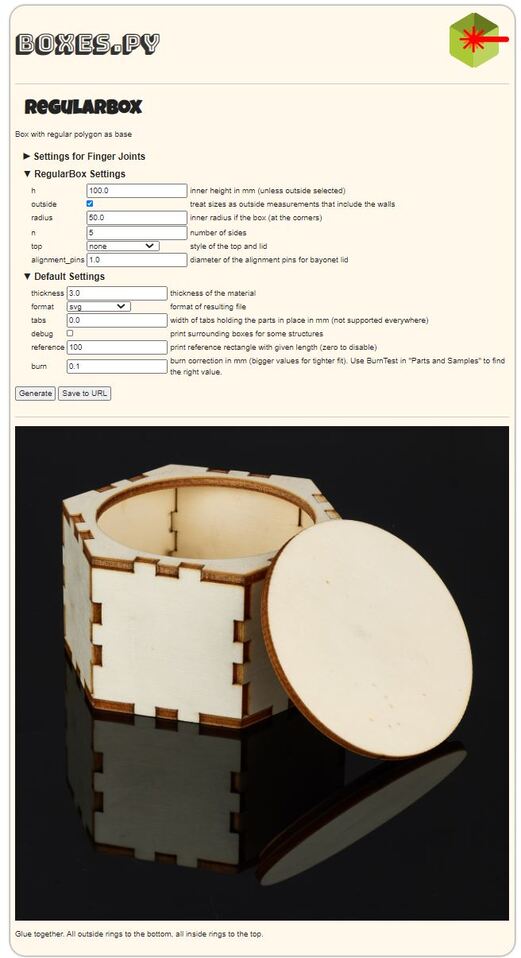
Boxes.py is the king of weird boxes. I’d look there.
That being said this should be easy to do with any old box and just modifying the lid design by subtracting it from a surrounding shape. It’s slightly tricky, you’d have to do some clever flipping of the tab pattern, but it’s just a few minutes of work.
3 Likes
Yeah. I am way too new at this to try modifying anything. Lol
And I do use boxes.py. I’ve checked every box type available there but I can’t seem to find that style. Are there any other box generators that might have it?
1 Like
Hmm I posted a long list of box generators, let me dig that up…
Here we go:
I’m not sure if they keep that page up, there may be some on that list that are dead and some that aren’t represented. It’s been a minute.
2 Likes
@evansd2 Is right. A few boolean operations from and you can make from boxes.py. Do you have any experience with Adobe Illustrator or Inkscape?
Well, hold on a sec, not exactly. I thought it might be that easy at first, but then realized it wasn’t quite. I went through this as an exercise, this is what I came up with as a workflow in Inkscape. If you’re not an Inkscape person that’s ok, but this is the basic way you’d do it in any vector program.
Before we get started: this is not optimized for full efficiency, it’s more optimized to be “sort of” intuitive. I take some baby steps along the way to show exactly what I’m doing, even if they are maybe a little inefficient. Here we go:
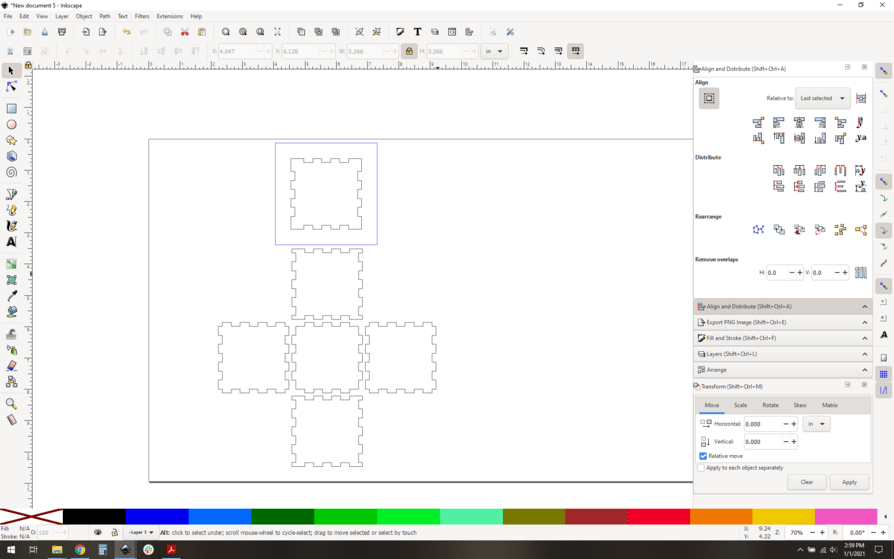
Start with your box. Here’s a basic 2x2x2" 0.005 kerf adjusted box.

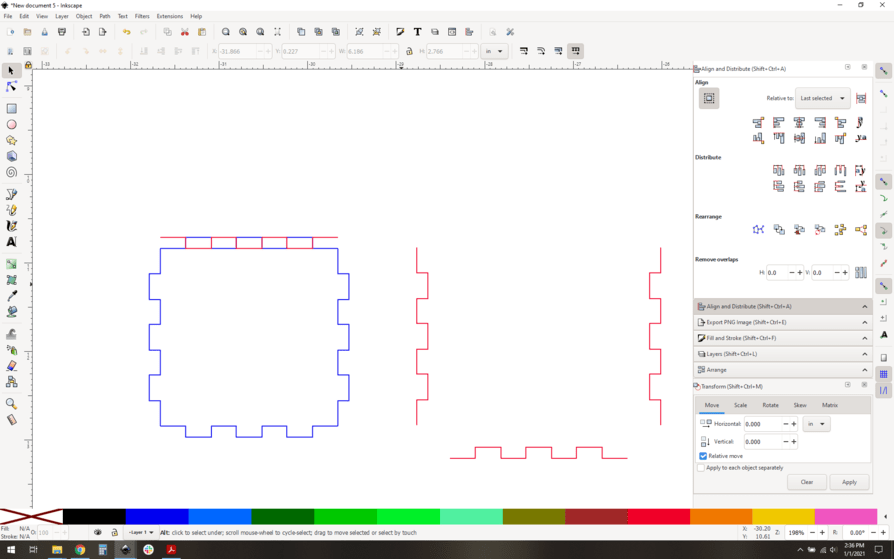
We don’t care about anything but the lid. I’ve chosen this as the lid in blue:
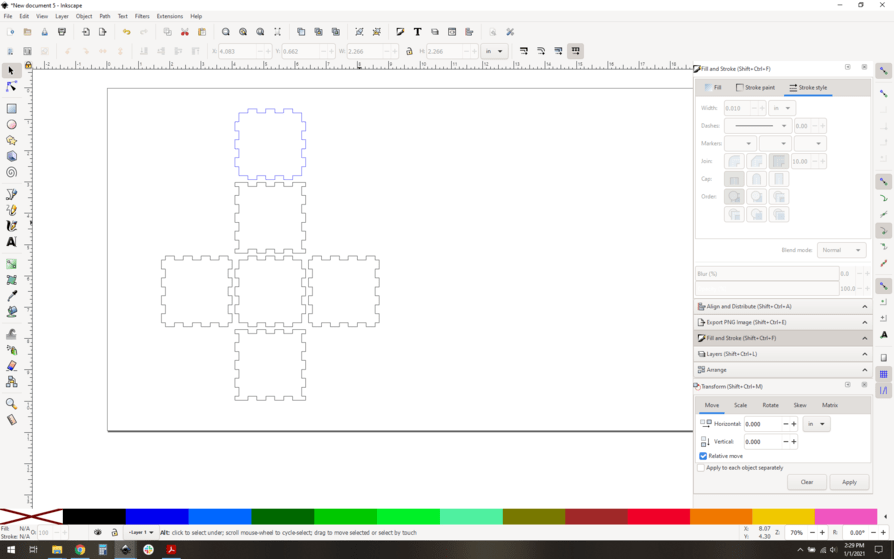
Focusing up on that lid:

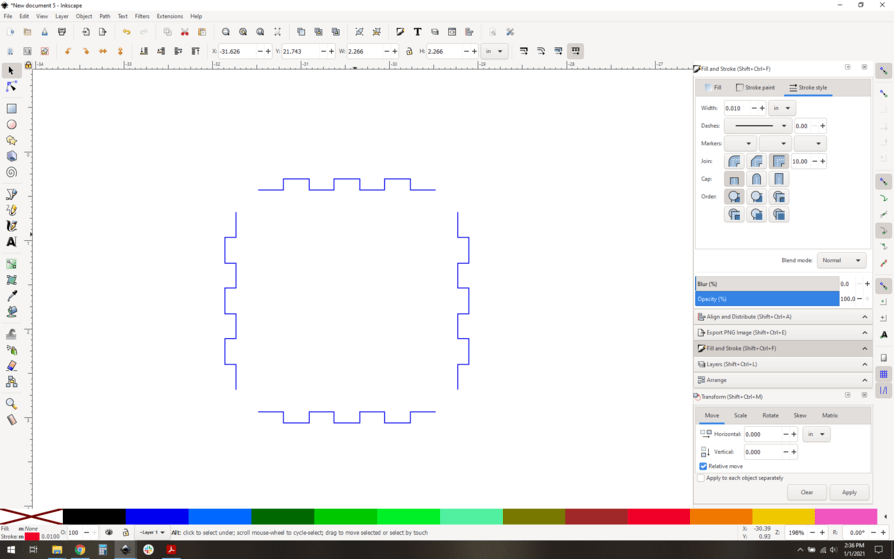
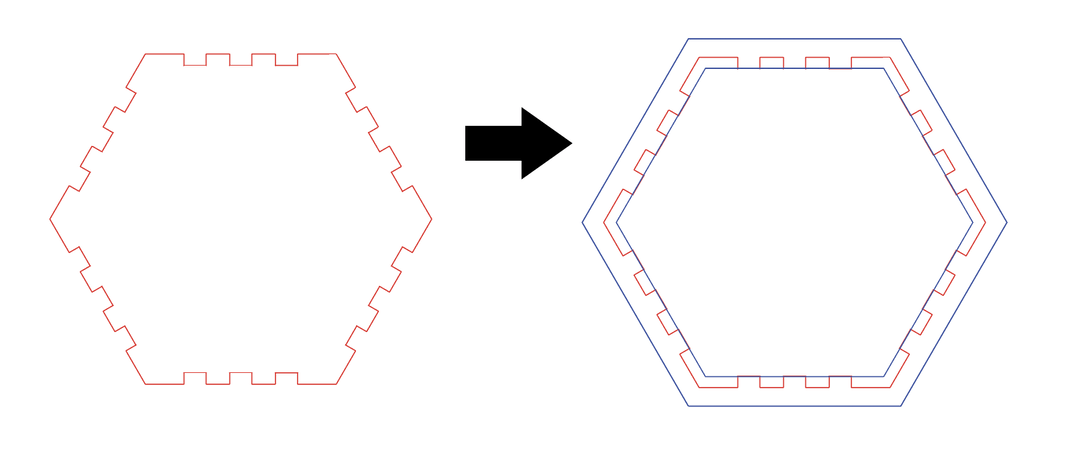
The tricky part is that you need the tabs to stay where they are, so we can’t just subtract this shape from a surround and be done with it, we have to first flip all the edges. So:
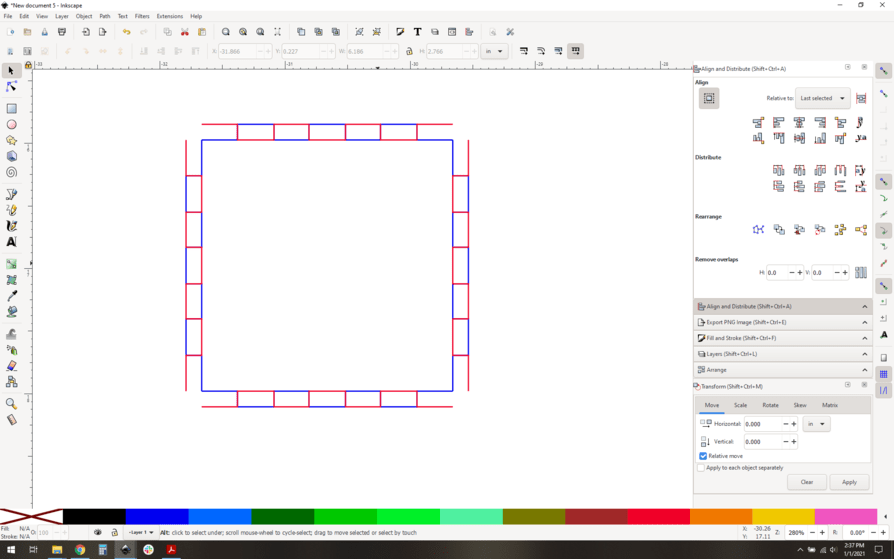
Make a copy of the original lid and set it aside, you’ll want the original shape later. Now, let’s break the path at the corners. I’ve broken it up and separated the edges so you can see what I’m up to.
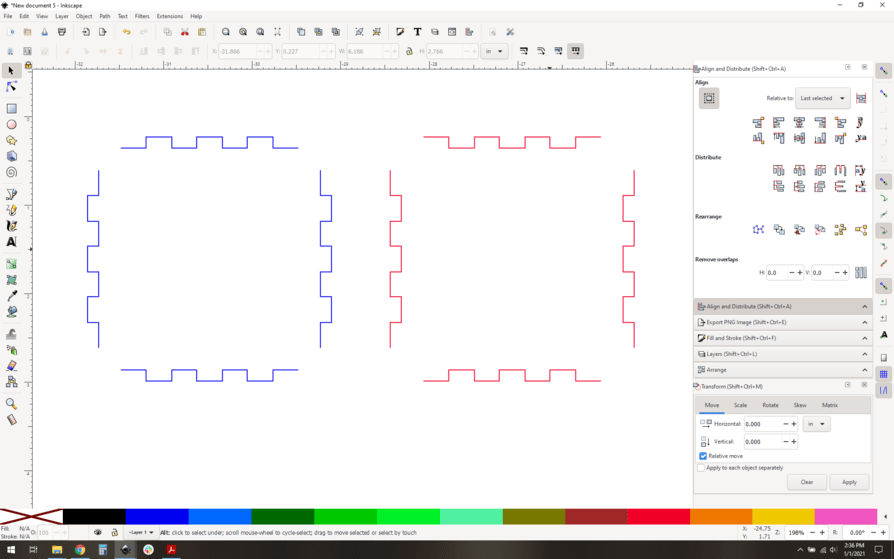
Now flip all the edges. The top and bottom flip vertically, the sides flip horizontally. I made a copy and color coded it to see what I mean. Blue original, red flipped.
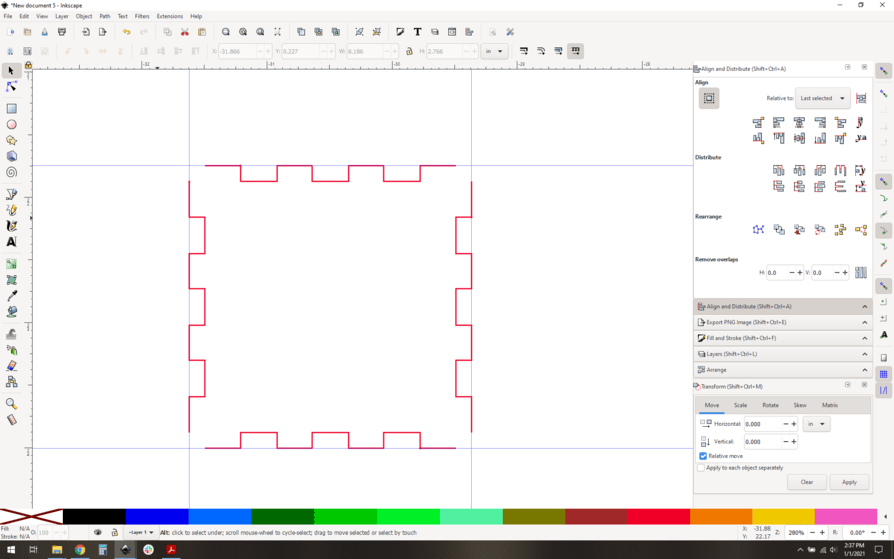
Now we need to align those tabs back to their original place. That’s why we saved another original copy. Here I’ve snapped the top edge to the original blue shape.
And now all snapped.
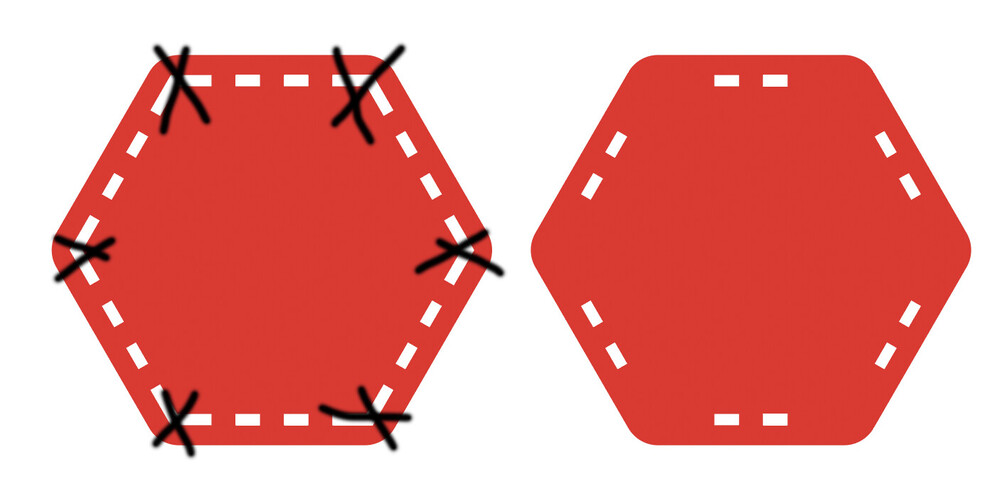
We don’t need the original blue outline, so move or delete that. We can immediately see that the corners aren’t complete now. Don’t sweat that, some guides will help. I’ve added the guides so you can both see where the corners need to be and also snap the ends of the edge paths to them.
Snap…
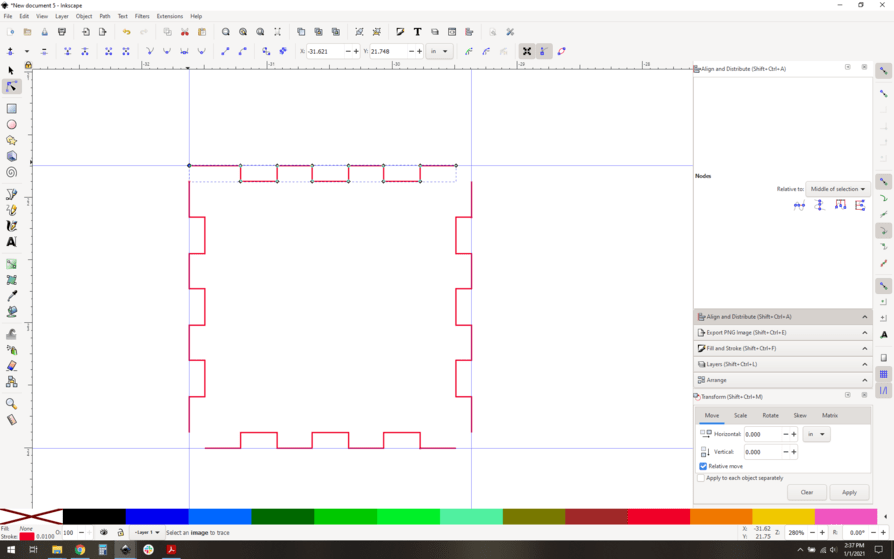
Snap snap snappity snap snap.

Now you have your cutline for the inner part of your new lid. You can join them into one single path if you like by joining the corner nodes, but it’s optional.
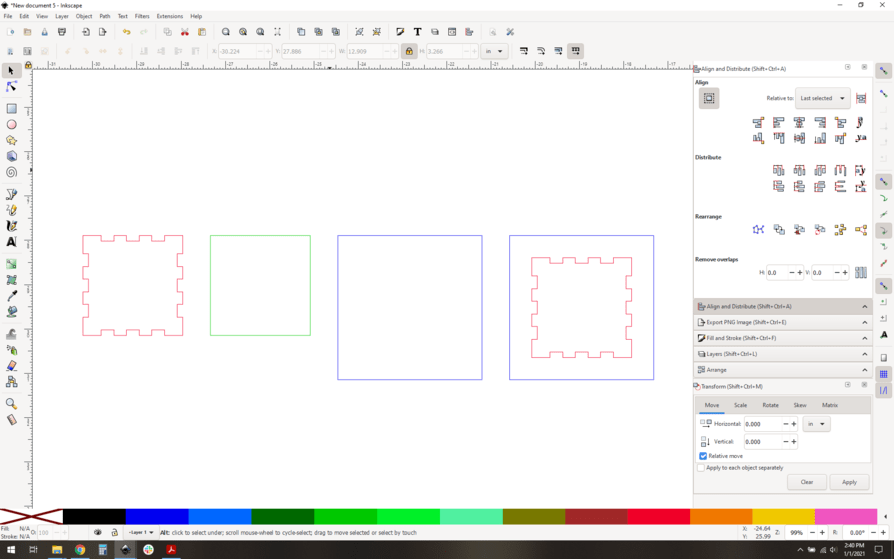
Make a surround shape. Here’s an illustration of the concept in one picture:
Left to right: 1: Your new lid shape (red). 2: a rectangle (square in this case) that is exactly the same size as your new lid shape (green) 3: scale that green guy as you need. I made it an inch taller and an inch wider, resulting in a ‘rim’ that will be 0.5" wide. (blue) 4: center your original red shape on your new blue shape. You’ve got your new rim-lid.
As a final step, color code them so that the inner rim is cut first. I like black and a dark blue here.
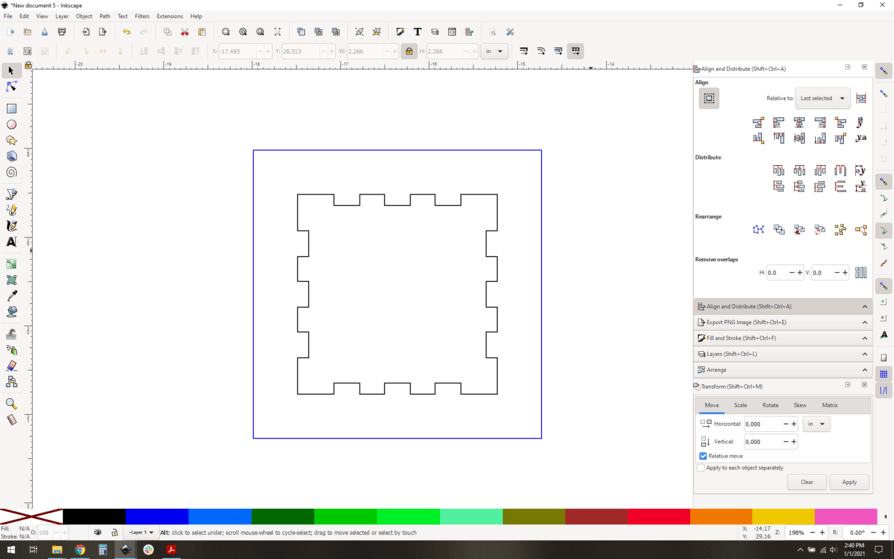
And there you have it. Your box with its new lid.
“Dave this is a nightmare, that’s way too many steps!”. Well… not really? I went back and redid it and timed myself. 81 seconds to go from original box to final product. Granted, I knew what I was going to do, and I used some tricks to make it go a little faster, but that’s my point: this sort of thing is pretty easy to do with some practice and getting rock solid on path manipulation.
Further reading:
https://inkscape-manuals.readthedocs.io/en/latest/editing-paths.html
10 Likes
Here is what I was thinking…
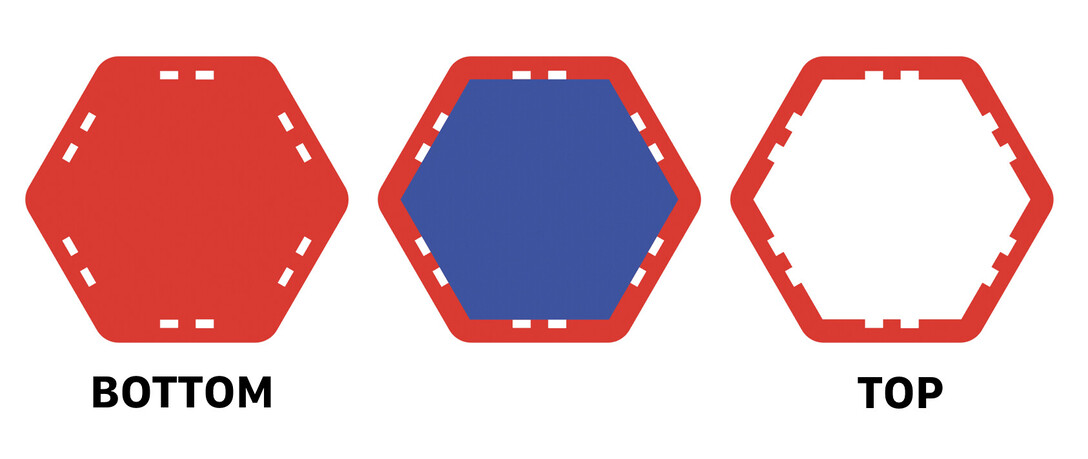
Original boxes.py output.
The only thing we need is red piece in outline (and the walls).
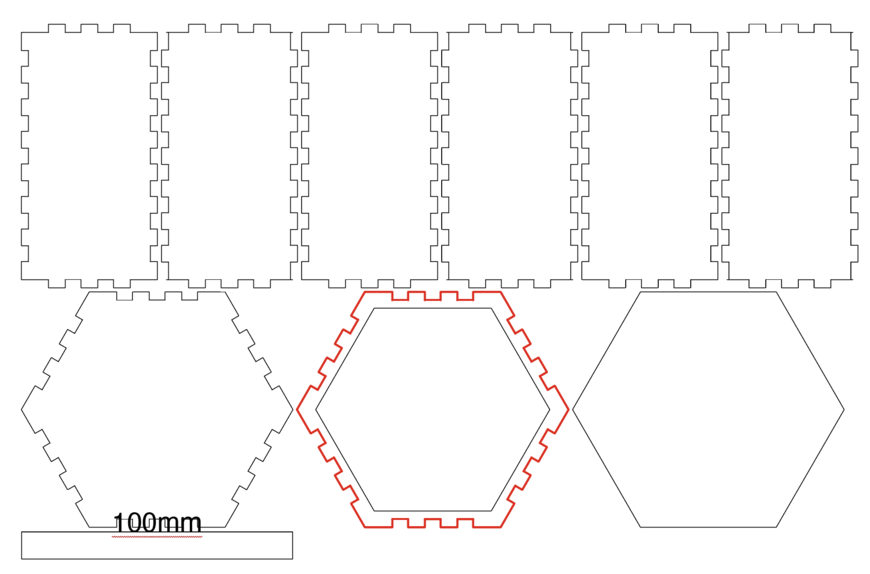
Draw two hexagons (in blue).
Round the corners of the outer shape. Pathfinder, combine. Then delete the extra slots.
Use the original inner hexagon to subtract from the bottom to make the top.
12 Likes
The all boolean approach is definitely doable and quite efficient, my main two reasons for not doing something like that are:
-
Box generators can be squirrelly and make weird output SVGs. Booleans sometimes don’t work well with those source SVGs.
-
Boolean actions can introduce small errors, you can introduce some fit problems if the boolean goes very slightly awry. Sometimes it’s small enough that it’s not visible to normal inspection, but you will feel it as you assemble a highly precise box. By slicing the original paths and extending them the way I did you eliminate that potential gotcha.
Lots of ways to get there though, yours is definitely more elegant than mine, but mine has fewer edge cases that might bite you.
1 Like
Ok, I’m really not that good yet so for now I’ll just use what Boxes.py has to offer. It’ll work for what I need. Just thought that style looked really clean. I’m just a little disappointed that they don’t offer that style.
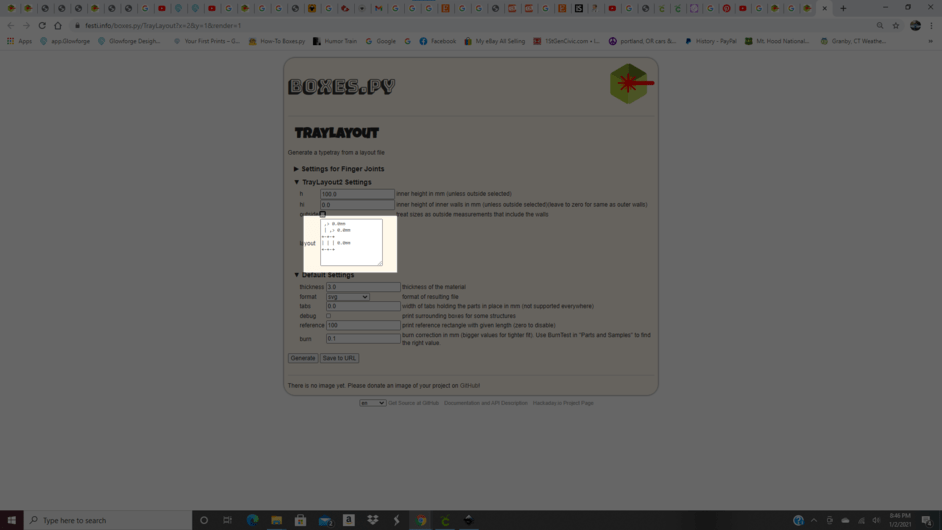
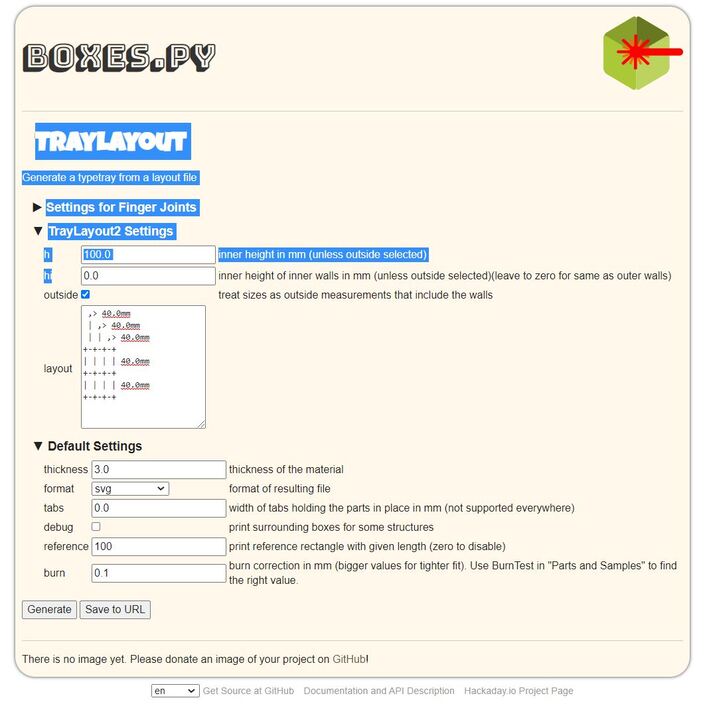
NOW - I have another question. So I’m trying to make a tray with 3 compartments in a row. In Traylayout there’s an area that I don’t understand. I have searched for a tutorial on it but I can’t find anything. It’s this section here. What do I fill in here:
Got it! You’re right. Type Tray is much easier for sure. I just designed exactly what I needed. Thank you!
1 Like
you might like this!
1 Like
Thank you. That’s just the kind of clean edge I’m looking for.
1 Like
This topic was automatically closed 32 days after the last reply. New replies are no longer allowed.