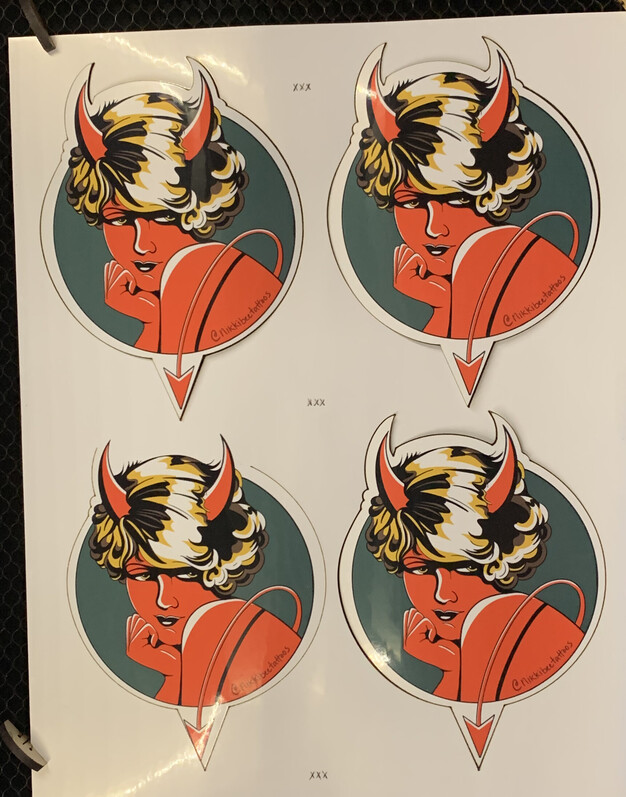
I am attempting make my own die cut stickers. it seems real finnicky to perfectly align the cut path over a scanned bed image. But even after I get my images centered inside the cutlines on the GFUI preview, they never actually cut perfect. and worst of all, they are all coming out slightly different even though the cut path is made from the same file as the printed image and I never moved them. I clicked auto focus before placing the cut paths. anyone know what else I could be doing wrong?
The Set Focus is only accurate from the spot you click on - so you’d need to do Set Focus at spot 1, then place your art, then Set Focus on spot 2 and place your art, etc. Don’t move any of the prior ones as you continue forward even though they look off - the only thing you want to move is the one you just set Set Focus on.
Die cut is not easy. Honestly the best way involves using a jig - if you search here there are folks who have come up with solutions.
Your cuts all look identical to me except for the lower left, which looks like it was stopped before it finished. Are you seeing something different?
1 Like
These are pretty close except for the one I stopped because of How terribly off it was…but regardless, none of them are centered like planned
As you have already discovered, die cut is difficult. When I tried printing and cutting, I discovered that it was my printer that was changing the images slightly, so even though the cut line was part of the original file, it didn’t match when in the Glowforge. If you have snapmarks, you may be able to get a better outcome.
I guess the real question is, how do I get the actual cut to be exactly where it’s showing in the preview.
Follow the instructions I typed for you above.
1 Like
Glowforge specs for visual alignment states that it will be accurate to within 1/4". That is not going to be good enough for your project. I really think running the lid camera calibration will be helpful, but creating a jig as @deirdrebeth stated is going to give you the best results.
1 Like
Yes a Jig is best. An added step I would try is put ting ‘waste’ graphic or an x like a circle in between your main stickers and fire the laser to cut those spots to see how far you are off (like a target) so you can shift your svg on the app by that amount before cutting the actual decal.
Oh no! I’m sorry you’ve hit a snag. As others have mentioned, a combination of creating a jig and using Set Focus is going to be the best way to receive consistent and successful prints. Wit that being said, since this issue is on materials other than Proofgrade, I’ve moved it to the Beyond the Manual so the discussion can continue there.
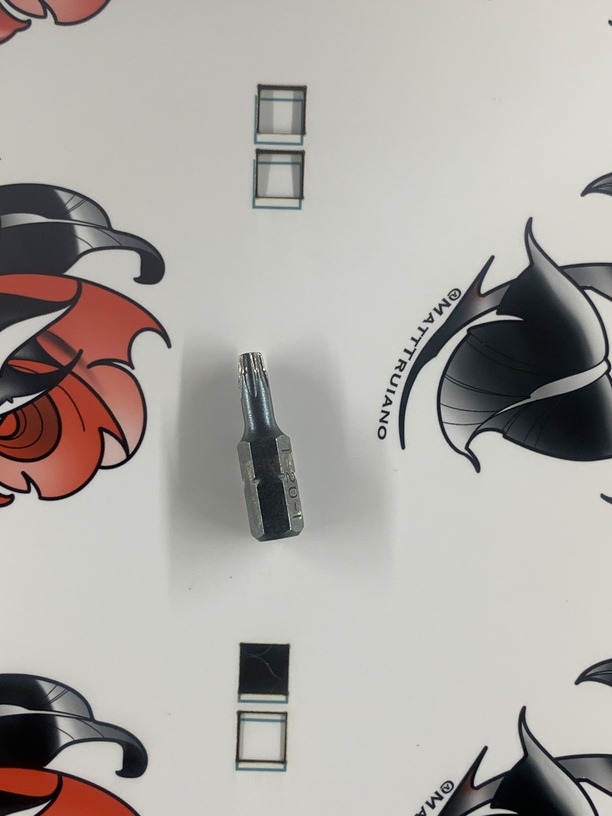
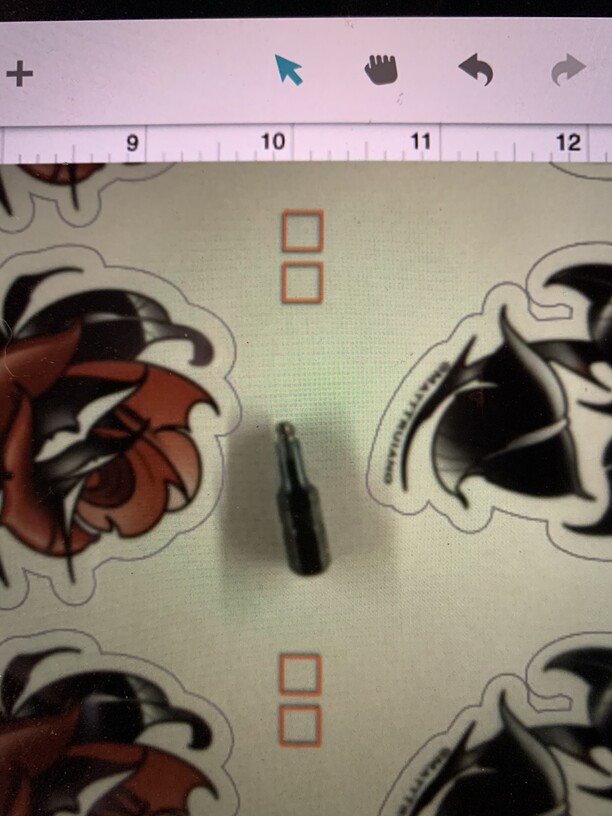
So here’s a better idea of my problems. I made registration marks so that I could line everything up and see exactly where my card is off. So this isn’t exactly a diecut problem as much as an alignment issue I suppose. If I wanted to engrave on a small object and have it centered on the piece…looks like it’s not going to happen
What you really need here is a jig. You have the relationship of the cut line to the print file built in, which is a start. Now you need to focus on a way to locate the print exactly where you need it.
I did this with cutting larger puzzles on the Glowforge. All of the large ones were actually cut in halves and no one noticed. That was fairly easy since I could just score an outline of the print size and glue up the print.
Really what is ideal here would be Snapmarks, registration marks. But I’m guessing that’s not an option yet. There are a lot of things that can go wrong that amplify the error: printers are rarely perfect in tracking, gluing up, etc. all account for some amount of error and I think any error on this would be pretty noticeable.
2 Likes
I understand needing a jig for repeatable sheets. But a jig seems pointless if I can’t even get the first cut lines up right. Am I missing something?
A jig can be any number of methods - what it’s doing though is allowing you to place the material in a specific place. The camera at that point isn’t even needed.
Like I mentioned on the puzzles, I would have one design file that included the graphic to be printed, the puzzle cut lines, and then a separate “print outline.”
I would print the print, and trim it to the print outline - so then I would have a printed graphic the exact same as the “print outline” in my design.
Then, I’d score or cut the print outline by itself, and glue the print up to the board. After that, I would just run the puzzle cut lines. The camera didn’t matter because it was all set up in the design.
I know that you aren’t gluing these up, so that will be a little bit different. Whether you just use a piece of sacrificial material (like chipboard or whatever) beneath the sticker paper or whatever, you need a way to locate everything. That’s just saying how I did it.
Have you ran the camera calibration? That, in combination with Set Focus, is likely going to be as good as it gets with a visual alignment. It’s a pretty tall order.
1 Like
yes I did a calibration. that seemed to have help a lot
This topic was automatically closed 30 days after the last reply. New replies are no longer allowed.