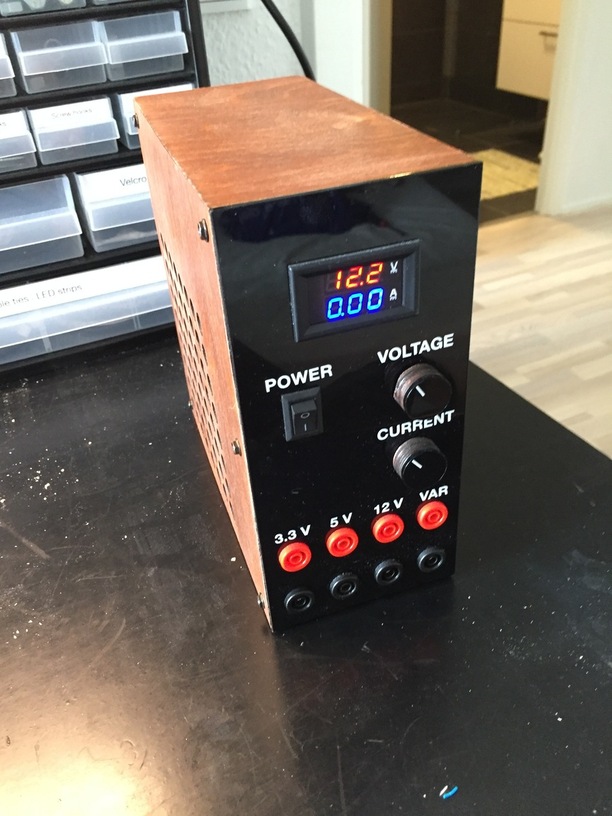
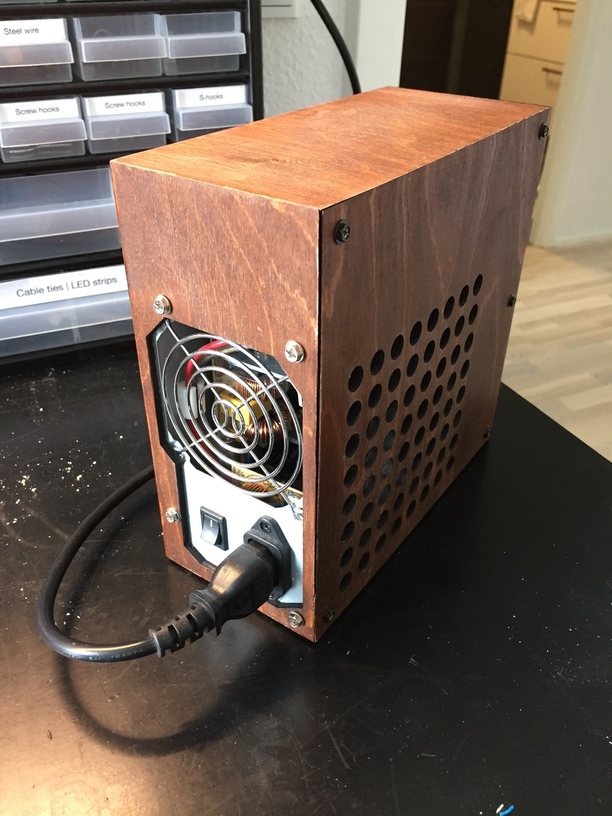
Made from Birch plywood and Black acrylic. All parts are laser cut. I used a router with a 45 degree chamfer bit to create the miters.
Decals were made on a silhouette cameo
Made from Birch plywood and Black acrylic. All parts are laser cut. I used a router with a 45 degree chamfer bit to create the miters.
Decals were made on a silhouette cameo
That is pretty sweet!
I am working on a box to house my milling machine DRO. The labels in particular make me happy to have a CNC machine (even if it can’t cut vinyl).
Very nice!
Cool project Brian, and a valuable asset to the test bench!
I beg for a wiring schematic. That would be one of my first projects!
Thank you for sharing!
Oh wow. I’ve noted that if you are getting into electronics this is essential. Nice work. My foray into an Atx power supply was to make blowers for a cardboard smoker I build to make Canadian bacon. Computer fans worked well for a cooler smoke. The back bacon was great.
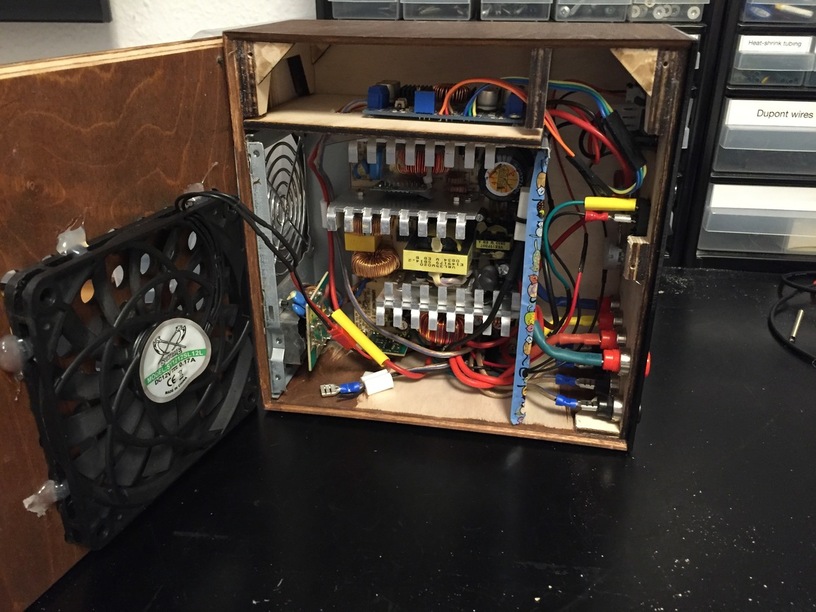
I followed this guide: https://www.youtube.com/watch?v=wI-KYRdmx-E
It’s very simple.
I’m not too happy with the display though (slow at updating). If I ever redesign this I might buy an lcd screen at make the measurements with some sensor boards of eBay and a microcontroller.
Thank you. For this project I actually tried first to make the labels on the front by etching the black acrylic, applying white paint and then removing excess paint with a scraper. I didn’t get good results and I didn’t want to sand the acrylic. On wood this should be a pretty good method though.
Looks good. I take it you used a re-purposed ATX unit to give you 12, 5, & 3.3v ( https://youtu.be/QoGnOoTICGY ) and added the variable supply to it?
This is where I go to get the circuit kits, great idea for the box!
Exactly. Used the components outlined here https://www.youtube.com/watch?v=wI-KYRdmx-E
Thank you!