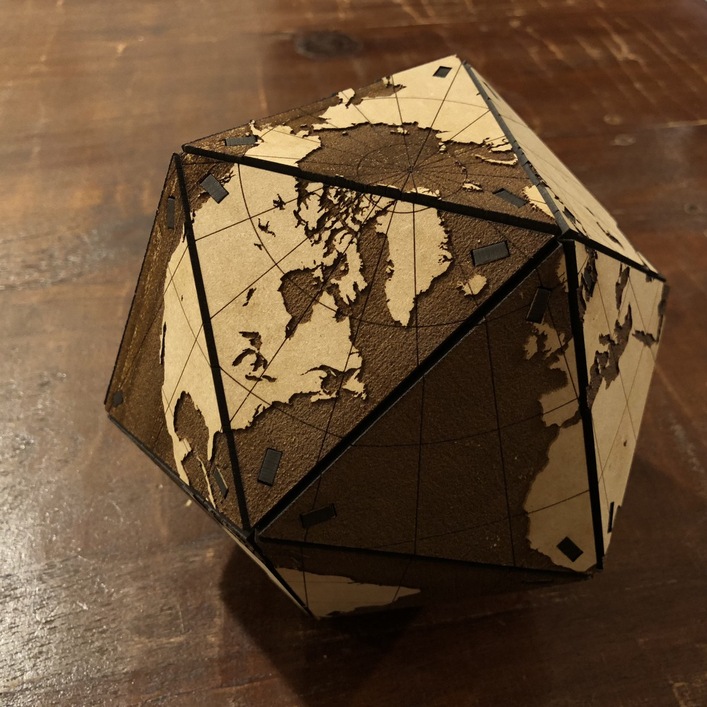
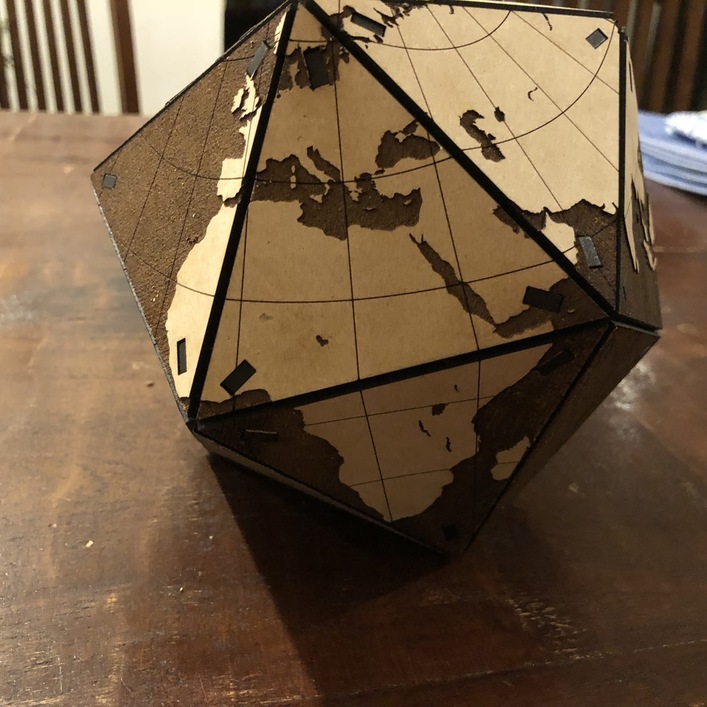
I used the same Thingiverse model as @evansd2. However, this model had some extra pieces which weren’t needed and didn’t include enough of the vertices. In order to simplify this for other Glowforgians, I published a remix on the Thingiverse which includes everything you need to construct your own Dymaxion Globe using a single sheet of .
I recommend using medium draft board as it looks beautiful and is very cost-effective. You shouldn’t need any glue as the pieces held together just fine thanks to the perfect fit.
I assume you left out the circular notched pieces?
I left them in, I found that they enhanced structural strength even with a very tight fit. Even with them still included I was able to fit it all on one sheet.
Thanks! I’ll have to go back and check. I also used the tight-fitting circular pieces when I made mine and will upload a new version to Thingiverse if I inadvertently left them out.
Clever job on your layout, putting all the engraves in the middle with wide margins. Allows for faster engraving speeds than I used. My layout had a much wider area to engrave, which limited my speed, since the margins crept in. (Basically don’t do that. )
If I were going to do this again, I would probably break the job up into 2 chunks, with separate color schemes in the 2 sections. You’ll get a break between the two jobs and your triangles for each section will be complete independently, which would allow you to break the whole thing down and do other projects between as necessary. I’d also rasterize all the engraves and use vary power, as the way it’s setup now, you have to engrave the globe, then engrave the lat/long, which is a very long tedious process. Rasterizing it as greyscale would allow for a single action to engrave the land, lat/long/ and any other embellishments you might like to add (maybe a small heart where you live? Little flags for every place you’ve visited? You tell me!)
Of course, one other way to really speed it up would be to scale down the triangular faces. If anyone tries that, beware that you can’t scale down the slots/tabs, or nothing will fit together. It’s also critical that the distance of slot to corner vertex is also maintained.
Great suggestions! I had a similar idea regarding marks for my favorite places that I have visited over the years.
The lat/lon lines are already drawn in a separate color, allowing you to either engrave or score these lines. I used a draft score when I created my globe yesterday.
I should also note that fully engraving the oceans resulted in a lot of residue in my . I had to give it a thorough cleaning afterwards.
Yeah, add “I engraved the lat/long as a separate process” to the list of things I wouldn’t do again. Flattening it all down into a single layer raster is definitely what I’d do.
Second on that cleaning note. Even baltic left a good bit of residue.
Wow, fantastic print! I’ve been wanting to make one of these since I saw it in Make: a few months back
Quick question about cleaning - how exactly did you go about doing that? I’ve wondered that for a while, since I’m starting to see some soot inside my machine, especially on the outside of the laser tube.
I ordered a big bag of Zeiss wipes from Amazon and used two of them to first clean the laser lenses and then wipe down the laser tube and the underside of the glass lid.
Spent the afternoon making this… 2+ hours on the and another hour or so with char cleanup, removing masking, and assembly. Finished it off with some clear Krylon Matte Acrylic paint. Looks great, and I’m going to give it to my granddaughter as a birthday present.
 )
) score when I created my globe yesterday.
 . I had to give it a thorough cleaning afterwards.