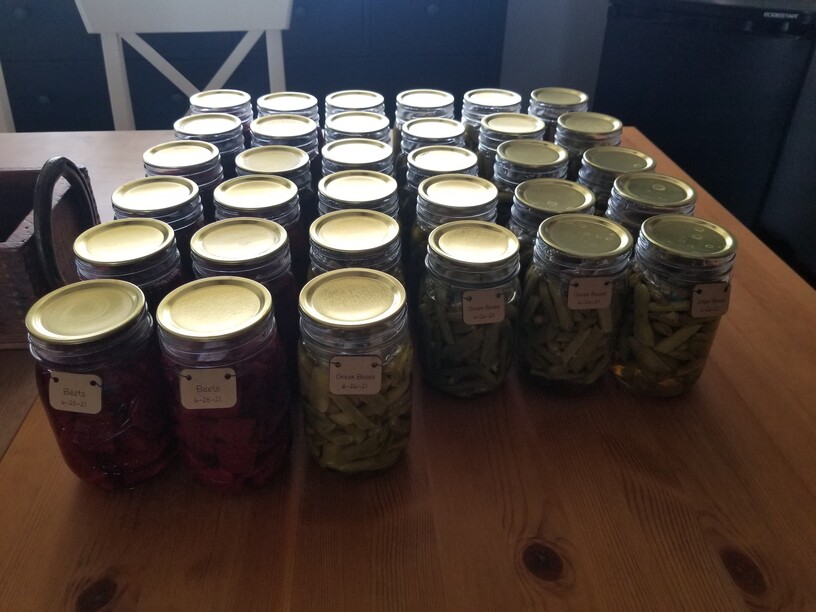
Given some veggies from a neighbor, I needed to get them canned. I hate stick on labels because some are hard to get off, and writing on the lids doesn’t help if you’re looking to use the product by date you canned it (I have green beans from last year, different dates as they were picked, and now the ones I did the other day). So I decided to use my Glowforge to make some labels out of cardboard. Fun to do, free material, easy to change. After trial and error with attaching them, I found that using a 9 1/2" piece of thin wire (I used the green kind they use for floral arrangements, but any kind will do), it was super easy to just put one end of the wire through a hole and fold it over, wrap the wire around the jar, put the wire through the other hold and fold it over. You can tuck the ends under the cardboard if you want, although I didn’t. It makes it really nice and easy to take them off when you want to reuse the jar. The tags are pretty small, but they can be adjusted. I left the wording off, of course, so you’ll have to play around with that.
I did think of making some just labeled with the different goods - green beans, beets, etc., that the dates could just be written on, but I’d rather make them as needed and just as many as I’ll need. Otherwise I’d have a ton of little cardboard tags around that I would have to store, and I just don’t have the room!
So if you want to use these, please enjoy. I’m now trying to think of other things I can use these labels for!
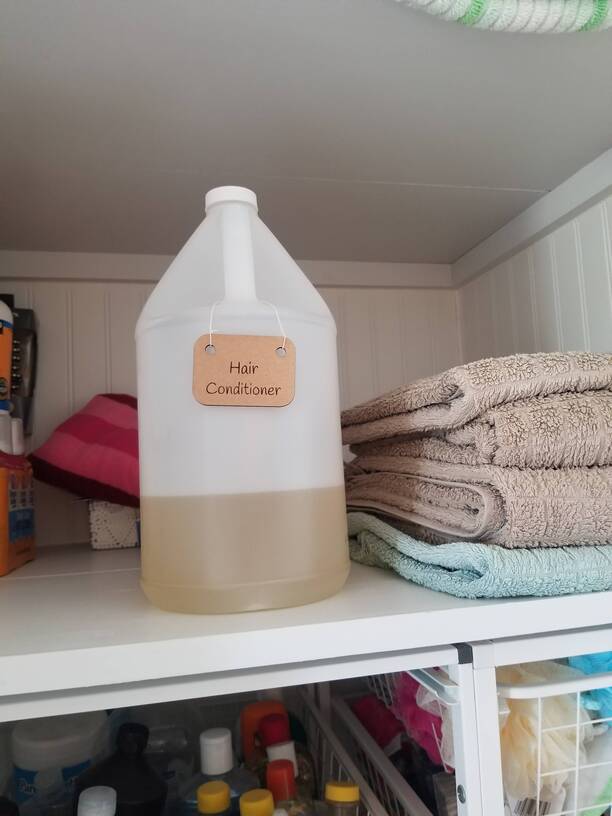
I’ve been making my own hair condition for the last 9 months. I like it much better than any of the brands you buy. My hair combs out easier, is healthier, shinier, thicker, and smells good. It’s just 8 oz water, 2 oz apple cider vinegar (without “the Mother”), 15 drops rosemary essential oil, and 10 drops lavender oil. You can use whatever essential oil you like, but I know that rosemary and lavender are both healthy for skin/hair care. I used to make just one batch at a time, but finally decided to make a gallon at a time and just refill the bottle I keep in the shower. I do still make it a batch at a time and pour it into the gallon, because sometimes my brain just doesn’t work well to do the math to figure out how much it would take to make the gallon! (I’ve always been horrible at math.) I believe the whole gallon costs under $1, definitely less than $5.
My favorite rinse of all time. (Finally got my mom to try it, she has been distraught over her thinning hair for the last decade or two, and after a month of rinsing with it she was thrilled to notice new and thicker growth where she wasn’t expecting it. Hubs too. We don’t bother with the EO though, and it’s distilled white vinegar, so I guess you could call us hard-core.)
Also great for cleaning glassware and dirty lasers.
Have you tried etching the lids? Just curious, I ordered my Glow Forge today and reading through everyones ideas. Cant wait to get mine to start some projects!
You are well ahead of the game if you are reading the forum in advance of receiving your Glowforge.
The Glowforge cannot engrave metal, and engraving is rather time consuming, but if you really want the lids of your canned goods identified with the Glowforge there are ways to do it.
@rivenbark.mike - welcome to the forum! As stated by @dklgood, you can’t engrave metal, and I wouldn’t want to spray anything on them if I’m using them for canning purposes for fear of contamination, especially because of the heat involved in processing. I am thinking that I’ll be making my next ones on label paper (making sure I use a tacky board to keep the paper from flying away during cutting), once I make sure what the non-stick part of the labels is made from. I know the labels I use for our wine making come off very easily with water.
@Xabbess, the part of the lid that would be labeled is thrown away (or should be!) after it’s used anyway, so it doesn’t really matter if it’s permanent. I mainly did these so that I could see the labels from the sides of the jars rather than having to tilt them to see the dates on the tops. I don’t know how others do it, but I know I always put the date I can food on the labels so I use the oldest first (i.e., I have green beans from last year and this year). Plus making the labels on the GF makes for a nice, consistent look, rather than handwritten, as well as having fun using the GF to make them.
@eflyguy, you are right, canning lids should never be reused (you can reuse the rings, as long as they are in good shape and not rusted/pitted). There are some lids that are supposed to be reusable, but I just can’t bring myself to trust them.