Easy new way to engrave in black on ceramic tile

I recently learned about a fast and easy new way to engrave in black on ceramic tile on Youtube, and I wanted to share with this group! It’s new to ME anyway, and I was unable to find it here via a search.

And yes, I know there are other ways to engrave tile. I’ve used the spray paint method in which you “engrave off” the black paint to leave the white tile color beneath. I’ve also used the method in which you engrave a tile then color in the engraving with a black magic marker (“sharpie”) then wipe of the majority of it. Both of these methods have their uses but for a simple black and white image on tile, you might want to try this new technique.

Credit for this NEW technique goes to the original Youtube poster who’s video can be seen here: https://www.youtube.com/watch?v=HwjCYH2iQF8

Supplies that you’ll need:

  1. Ceramic tiles - I used Bright White 4 1/4 in. x 4 1/4 in. Glossy Ceramic Wall Tiles from my local hardware store, but I think any light color would probably work well. These were under $20 per case at the time of this posting.

  2. Isopropyl Alcohol - I happened to have some 99% isopropyl alcohol on hand, but I think that any percentage would work (70%, etc.) The lower % may just take a bit longer to dry as it has a higher water content.

  3. A continuous fine mist sprayer - Search for “Continuous Spray Nano Fine Mist Sprayer” on your favorite shopping site to see some selections. 2-pack are easily under $10 at the time of this posting.

  4. Some gloves, paper towels, a paper cup, a stirring stick

You very well may have many of the above supply items already! Here’s one more that you will need to purchase for this new technique, as it’s not something people commonly have already.

  1. Titanium Dioxide Power - search a large online shopping site (Amazon, etc.) for “Titanium Dioxide food grade”. It’s available in different weights. I elected to get a 1 pound bag, and it was under $20 and should last me a LONG time.

What the heck is Titanium Dioxide? Well, according to the Internet… “Titanium dioxide is a powder that’s also used as a white pigment in a variety of products such as sunscreens, cosmetics, paints, and plastics. You can also find titanium dioxide in food products like candy, coffee creamer, baking and cake decorations, and white sauces. It is often used to give a natural whiteness and opacity to foods, helping make them better-looking.”

  1. A respirator or a very well-ventilated area (such as outdoors) - Although Titanium Dioxide is considered safe for use in many products, my understanding is that when it is in powder form, it is considered a possible carcinogen by the International Agency for Research on Cancer. So please use it responsibly!

Ok, so how do we do this?

  1. While taking appropriate safety measures, mix some Titanium Oxide Power with Isopropyl Alcohol.

The ratio I used was two parts (teaspoons) Isopropyl Alcohol to one part (teaspoon) of powder. The original youtube video suggests equal parts of each (for example, one teaspoon of power to one teaspoon of isopropyl alcohol) but I found that mixture too thick for my sprayer.

As far as I can tell, the ratio is not that critical. If the powder is overly diluted, you’ll just need to spray the solution on the tiles more times to get complete coverage. If it’s too thick to spray, just add some more Isopropyl Alcohol to the bottle.

  1. Clean off the tiles to ensure they have no dust or fingerprints, then spray the tiles with the Titanium Oxide Power / Isopropyl Alcohol mixture.

For best results, use multiple light coats. You just want the glossy shine on the tile to fully disappear.

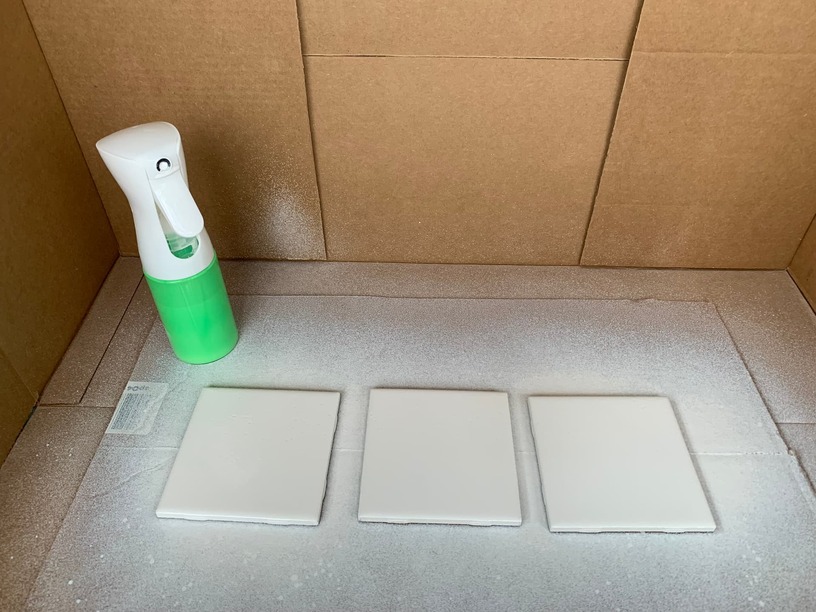
  1. Let the tiles dry for a few minutes.

Since the solution is made with Isopropyl Alcohol, the drying time is very short compared to spray paint, etc.

Note: When fully dry, the mixture will be “chalky” on the tile and is susceptible to scratches, finger prints, etc. until it is engraved. Be sure not to touch/smudge/scratch the surface of the tile at this stage of the process.

  1. Prepare the image that you want to engrave and resize it to fit on your tile. A black and white image will work best.

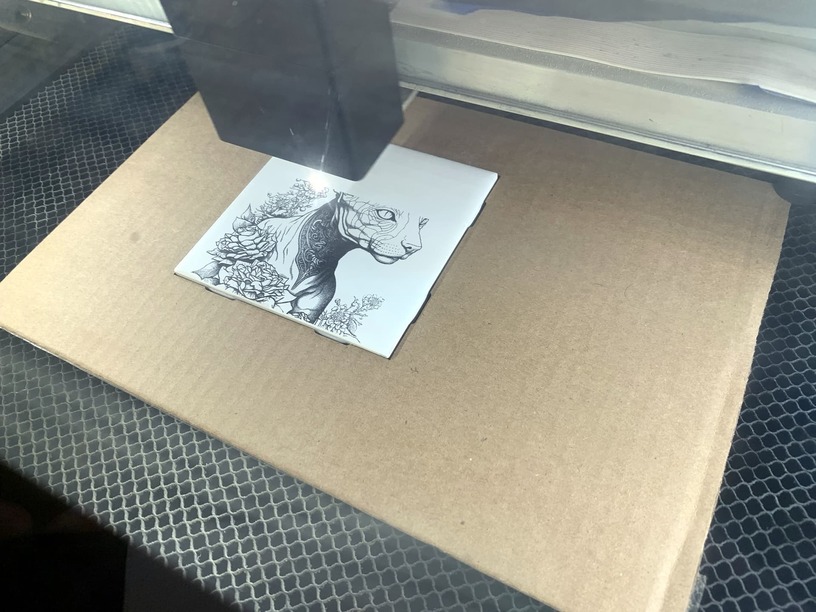
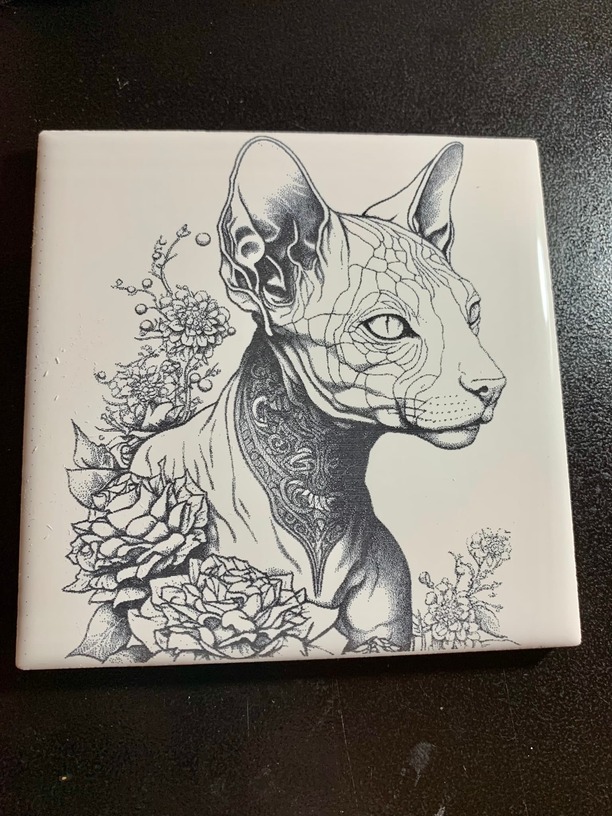
I’ve provided a cutout template for a common 4x4 tile, along with the sample image of a Sphynx that you can use.

Template and test image: Sphynx Tile Engrave

To ensure perfect alignment when engraving tiles I personally choose to cut out a tile jig from scrap cardboard, insert the tile, then engrave. This is not 100% required, of course. You can just place a tile directly on the Glowforge tray, align the image using the Glowforge camera, and away you go!

My OPTIONAL process looks something like this:

  • Upload the image AND the cut out jig template to Glowforge (example file is provided)
  • Set the image to “Ignore” in the Glowforge interface, and cut out the jig in the cardboard, and then remove the cut out
  • Set the jig to “Ignore” interface, set the tile in place in the hole, then…
  1. Engrave your tile!

Glowforge settings I used to engrave:

Speed: 1000
Power: Full
Grayscale: Convert to Dots
Lines Per Inch: 170
Number of Passes: 1

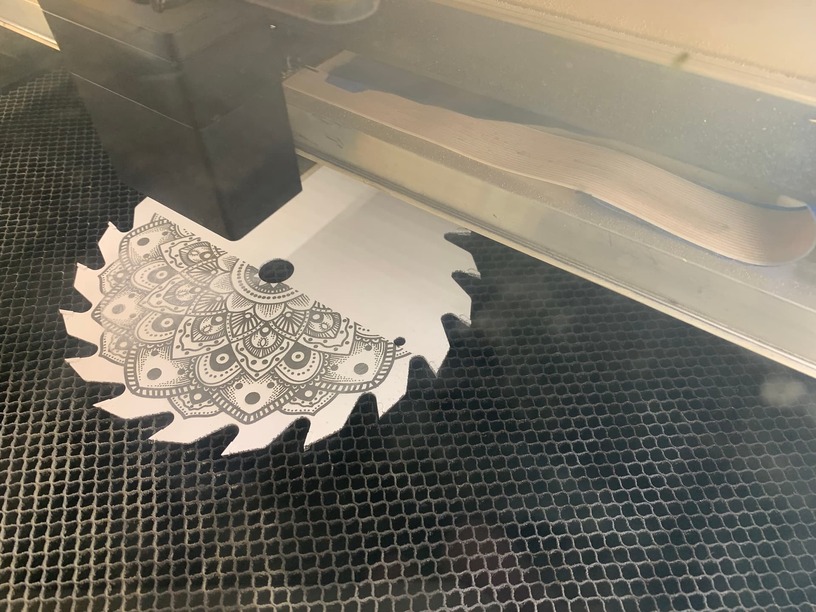
  1. Rinse off the tile in warm water. The chalky un-engraved powder is very easy to remove! Feel free to use an old toothbrush if you’d like. Cleaning the tile only takes a few seconds, and the engraved part will NOT wash off!
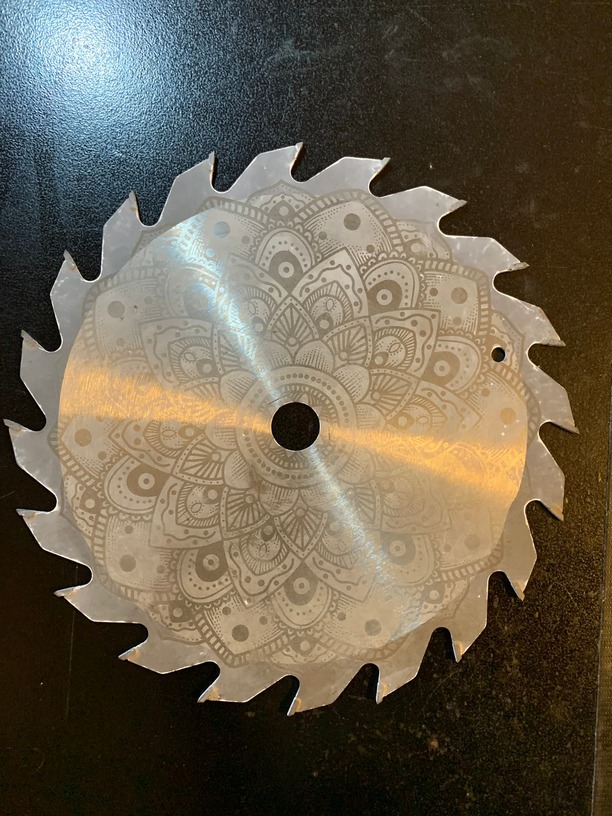
Final result:

Questions and answers:

  1. Would this would on slate/glass/metal?

Maybe! Let me know if you try it before I get around to it. Maybe this will turn out to be easy/better than the Molylube method for metal? Who knows?

  1. Why is this better than the Black Marker/Sharpie method?

For me at least, the results are much more consistent with less work. I have a hard time cleaning off the right amount of sharpie without affecting the engraved image. Cleaning off the tile after using this method is much faster, and you can engrave at much higher speeds since you do not have to engrave so deeply.

  1. Why is this worse than the Magic Marker/Sharpie method?

With the Sharpie method, you can use whatever color marker you want. With this method, the engraving will only be black.

  1. Would other engraving settings produce better results?

No idea! Give it a try and let us know. :slight_smile:

Have fun!

47 Likes

Isn’t this just a highly manual version of the Norton method?

Titanium oxides are the main ingredient in white spray paints. Seems like the same technique more or less?

14 Likes

Titanium Dioxide is used as a whitener in many products, yes. But by applying it as a light powder on a tile using this method, it engraves to black only where hit by the laser, and the extra easily washes off everywhere else. If you spray painted a tile, there’s no super simple way to wash off the “extra” paint (at least without chemicals) that I know of. With this method, you can wash it off with warm water in seconds.

Also, a tile that’s sprayed with this solution dries MUCH faster than one sprayed with paint, thus improving the speed of the overall workflow.

Oh, and lastly… the smell of spray paint makes my wife mad, and I don’t want THAT. :grinning: This solution has no smell.

15 Likes

Thanks for this! I am going to have to try it. I even have the titanium dioxide, as I’d bought it to make diy nail polish, which I still haven’t done yet, and which I bought over a year ago. This will give me another reason to use it! The only thing I don’t have would be the spray bottle, so I’ll have to buy that.

9 Likes

Yeah, I could see how to clean up would be easier… But I think the mechanism is exactly the same as the Norton.

I wonder if there would be any easily washed water-based paints that contain titanium as their white agent that would do the same job without having to source all the different materials and go through that process.

8 Likes

Agreed. The chemical reaction while being engraved does sound the same, since titanium dioxide is in white paint too.

For me, the only two things I personally did not already have on-hand was the titanium dioxide powder, and the spray bottle.

Another plus is when “someone” accidentally got this stuff on the carpet… that someone was very glad it wasn’t spray paint. Don’t ask me how I know this. :rofl:

I’m eager to see now if this works on metal!

10 Likes

That would be interesting to see if it works on metal. I have a bunch of little 3/4" metal tags I need to do something with. I bought them to use with magnets on my porch leaners, but they didn’t hold well enough for me. So right now they’re just sitting in a drawer.

7 Likes

I’ll wager it will work on metal the same, the process just deposits an oxide layer that takes abrasion to remove. Not sure about glass, perhaps a multiple-pass method with lower power to avoid pitting the glass would be worth a try.
Thanks for sharing that method, you should join us more often!

10 Likes

Seconded!

8 Likes

Ok, so… does this work on metal? Based on my single experiment the answer is… “sort of”.

I looked around my house for something metal that I could test on, that I wouldn’t care about ruining. I came across a circular saw blade and thought, “Why not?”

As you can see in the photo, it looks GREAT while being engraved. BUT…

After washing off the Titanium Dioxide, the engraving effect is very subtle. It’s not a deep black like on a ceramic tile. Maybe for deep black I’ll stick to the Molylube spray technique.

But who knows… maybe someone will have a use for this exact result someday? And it’s also possible that results may vary based on the type of metal used.

If you zoom in on the photo below, you can see the subtle effect on the center of the saw blade, but the effect is a little more pronounced on the outside ring of the blade where the metal is different.

Anyway, that’s my update for now. Time to keep experimenting!

22 Likes

Also can I just say that I appreciate the effort you put into that writeup. It’s not easy to make a good guide like yours.

14 Likes

Once upon a time, there was a product called “LaserTile” which had some kind of mystery property that engraved black. But they seemed to go out of business around 2017.

I still have a whole box of it, since I tend to buy supplies for projects I never do. I wonder if it has degraded over time. I also wonder if this was their secret sauce.

12 Likes

Thanks, I appreciate that! I’ve benefited greatly from so many other folks’ efforts at clearly documenting stuff here, and I’m just glad to be able to contribute.

6 Likes

i still have 4-5 of the 4" lasertile tiles, too.

6 Likes

I still have a bunch of it, too. I used one a year or so ago and it turned out just fine.

6 Likes

But less toxic which is appealing on many levels.

4 Likes

Fair about (probable) lower toxicity. As always pretty much everything you laser emits harmful fumes and proper ventilation is a must. Once that’s set up correctly the toxicity of the byproducts from what you’re lasering is somewhat irrelevant, no fumes is no fumes.

It’s impossible to get perfect ventilation every time so I agree that less toxic is always preferred.

Some of the toxins that worry me the most are metals. Heavy metal poisoning is particularly concerning to me because of the way it affects the nervous system. Since we’re still using titanium here I’d say it’s advisable to treat this as carefully as any material that you laser.

The potentially good news is that titanium oxides don’t seem to be as dangerous as other metals.

More info:

2011: Until relevant toxicological and human exposure data that would enable reliable risk assessment are obtained, TiO2 nanoparticles should be used with great care.

To our knowledge, this is the first report of titanium dioxide inhalation as the potential cause of metal fume fever in humans.

8 Likes

Titanium dioxide is the key ingredient in mineral/children’s sunscreen among other things so I’m not worried about that.(post cancer doctor’s orders).

I was referring to the toxicity of spray paint fumes and solvents in the overall process :slight_smile:

6 Likes

I see your point and agree that it doesn’t seem as toxic as many other metals. The key difference to me is that you generally don’t inhale nano particles of sunscreen.

History is riddled with things we used to freely give to kids that were harmful. We do the best we can but sometimes we’re way off the mark.

Potentially upsetting stuff about risks to kids

DDT trucks:

Texas children sprayed with dangerous pesticide DDT in 1940s clip | Daily Mail Online

Gilbert U-238 Atomic Energy Laboratory - Wikipedia

Super Elastic Bubble Plastic - Wikipedia

The list goes on and on… tanning oils that increased uv exposure, scotchgard spray, so many things with lead in them.

Not to mention more modern ongoing things like BPAs and PFAS and micro plastics that break the blood-brain barrier. We regularly find out new risks… just because it’s in kids sunscreen doesn’t give it an automatic pass, and I definitely would avoid inhaling it.

7 Likes

Great write up. I’m anxious to try it…just need to purchase the Titanium!

2 Likes