Edge Lit Acrylic Badge

Here’s the design and construction details for the edge lit badge I showed in this post; I didn’t include the Halloween image since it came from a paid clip art program. You’ll want to use your own designs anyway.

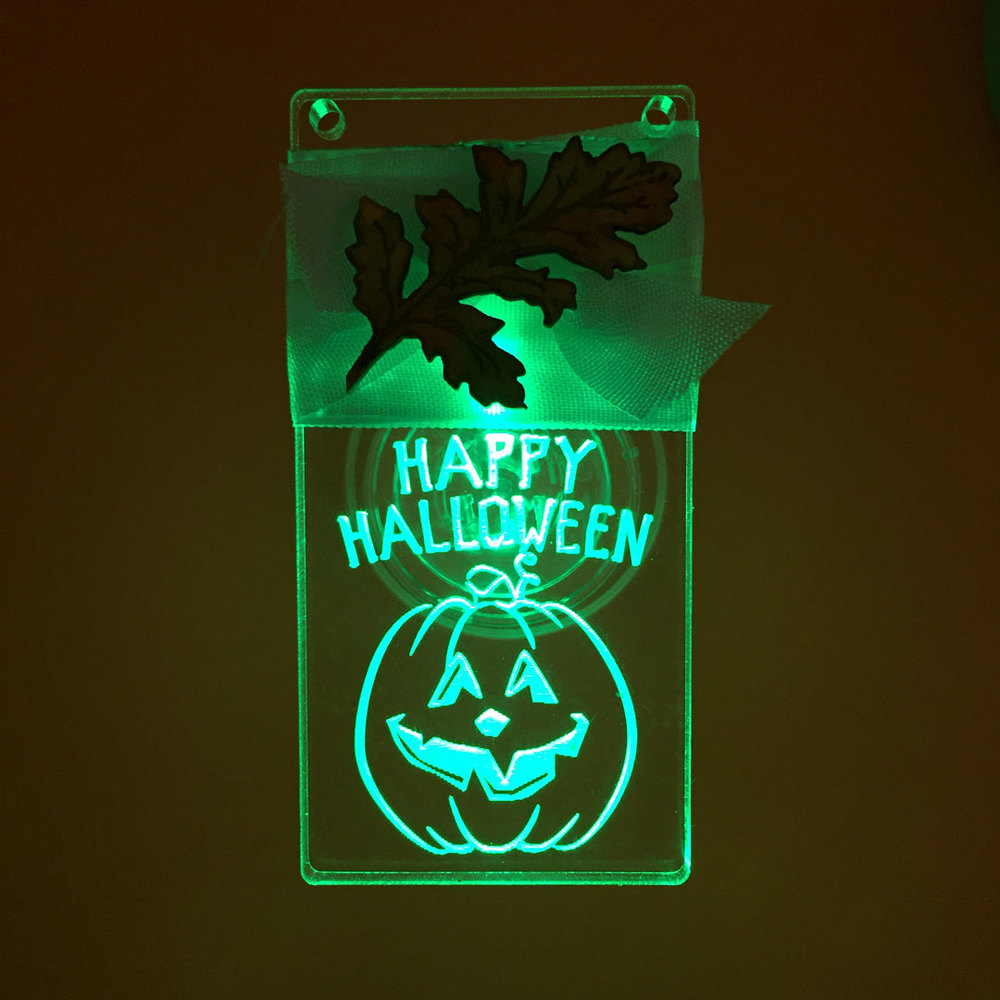
Here is the finished badge:

The design is based on a more complex design by Solarbotics I found on Instructables. His design called for four LEDs (two of them scrolling RGBs), two layers of acrylic and two batteries. It’s really really cool and you should check it out.

My design is way simpler, just one battery, one LED, and one layer of acrylic (either 1/8" or 1/4" can be used. I built my design from scratch but it is based on Solarbotics’ design as much as I can tell (couldn’t access his design files).

Couple of notes: There’s no switch on this, so you should assemble the badges just before using them. Don’t worry, it’s a quick assembly. Also, be aware that the current draw for LEDs is different depending on the color (there’s a great discussion of that in this article) so you should avoid red, yellow and orange for that reason.

Here is the file: Lighted_badge1

Construction:

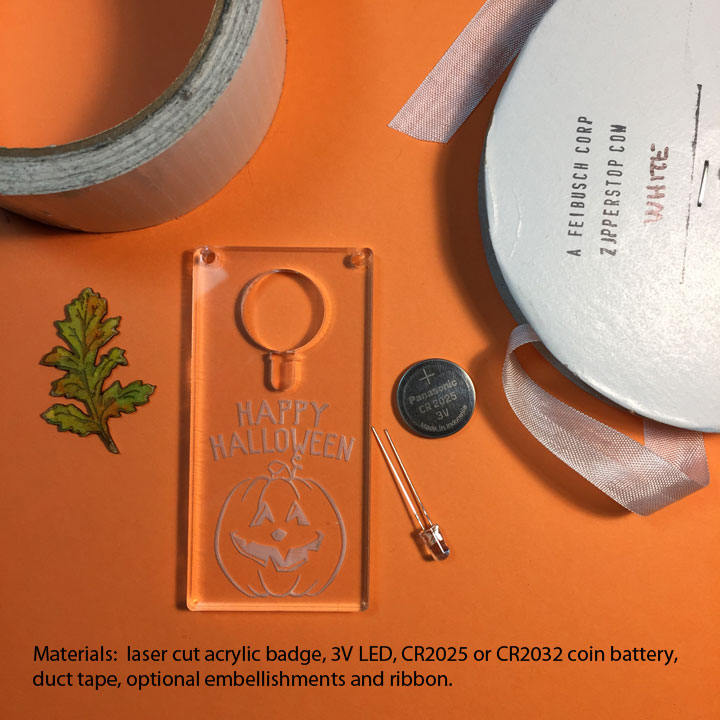
Step 1– Materials: laser cut acrylic badge, 3V LED, CR2025 or CR2032 coin battery, duct tape, optional embellishments and ribbon.

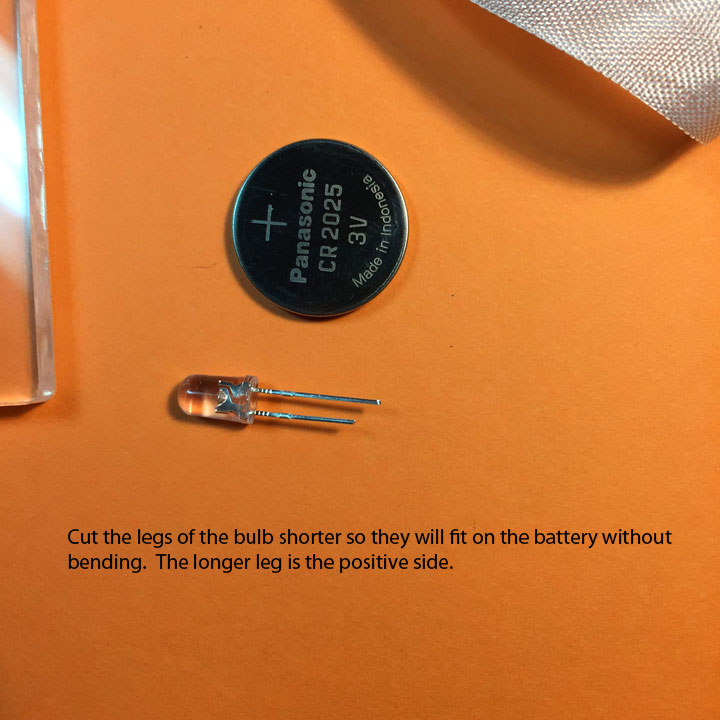
Step 2– Cut the legs of the bulb shorter so they will fit on the battery without bending. The longer leg is the positive side.

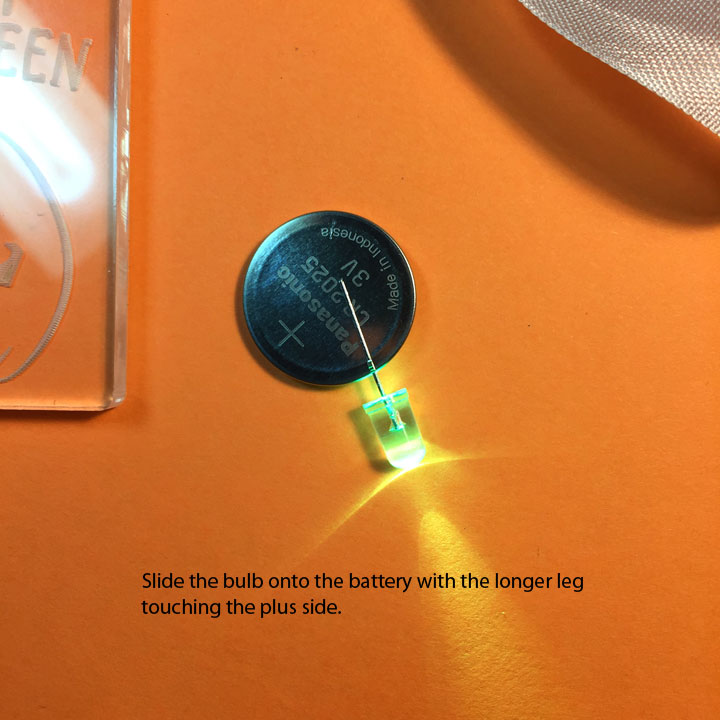
Step 3– Slide the bulb onto the battery with the longer leg touching the plus side.

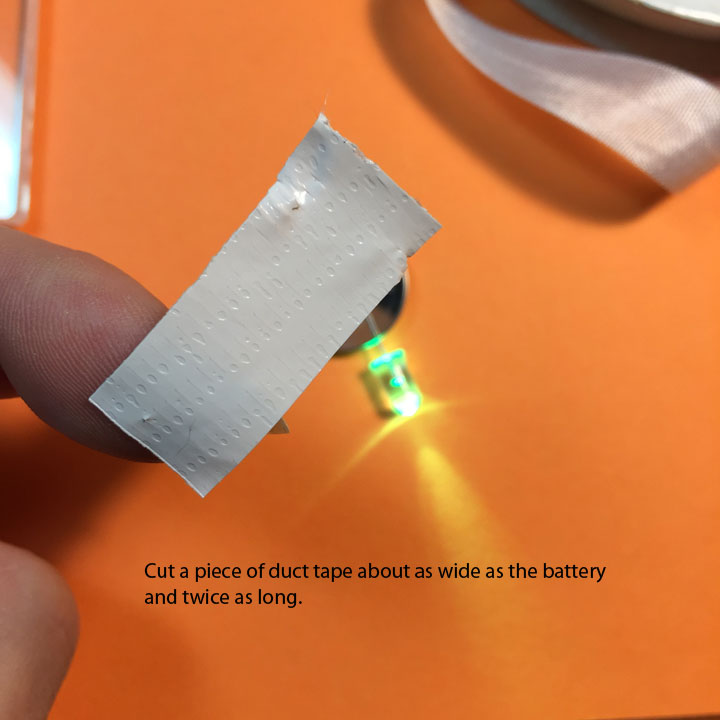
Step 4– Cut a piece of duct tape about as wide as the battery and twice as long.

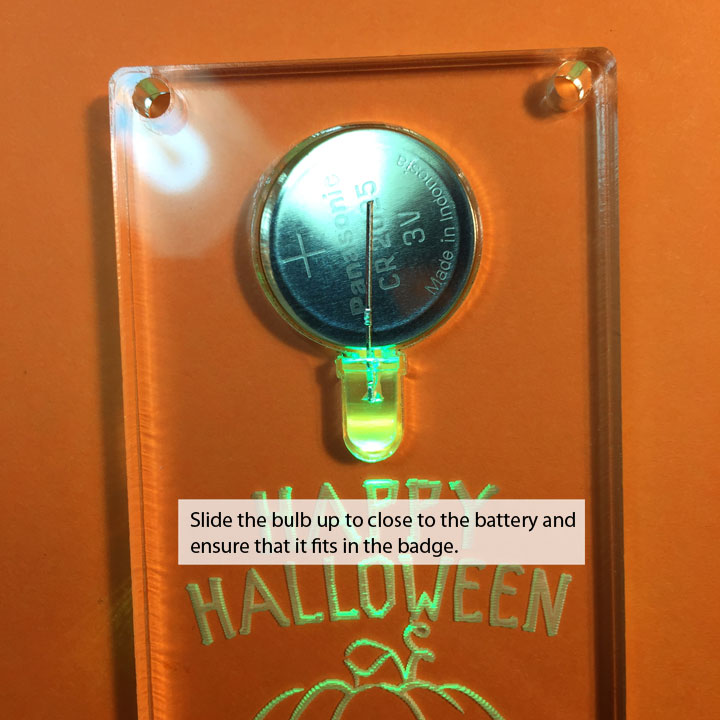
Step 5– Slide the bulb up close to the battery and ensure that it fits in the badge.

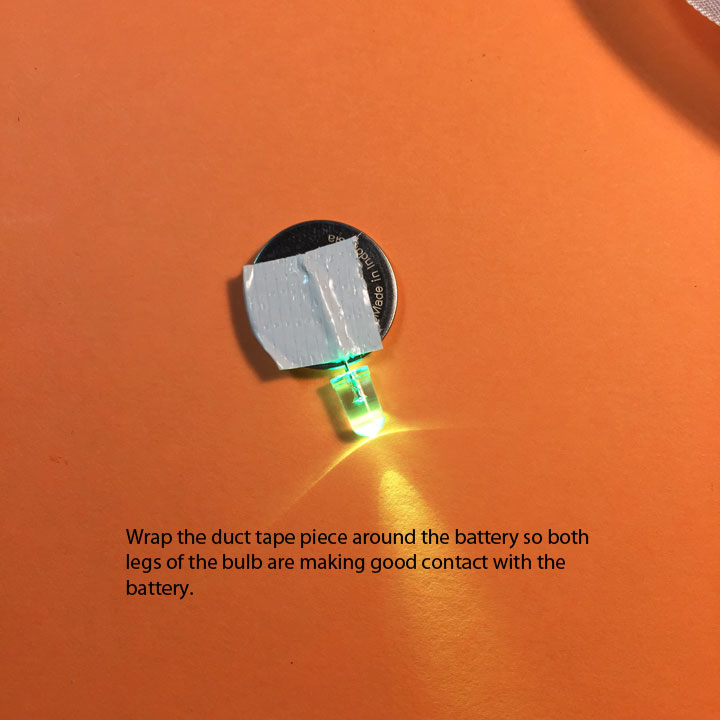
Step 6– Wrap the duct tape piece around the battery so both legs of the bulb are making good contact with the battery.

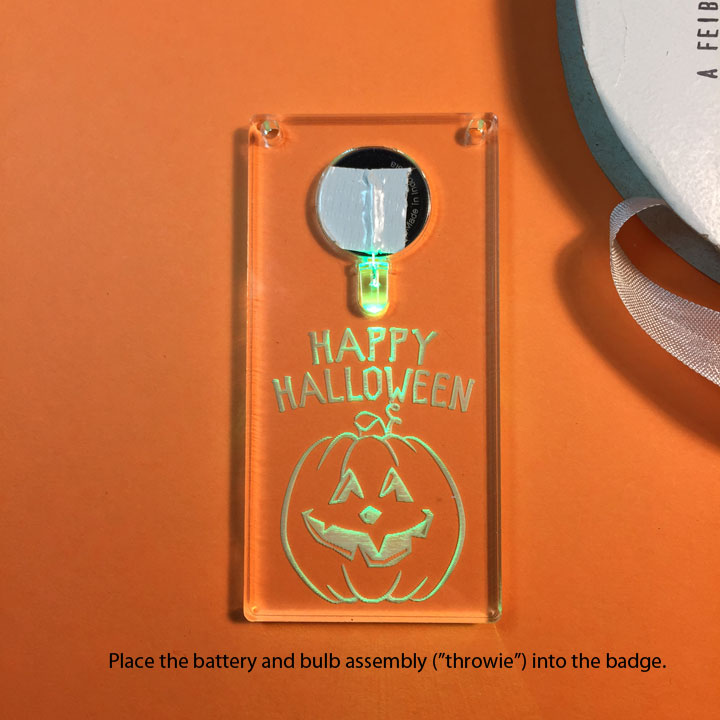
Step 7– Place the battery and bulb assembly (“throwie”) into the badge.

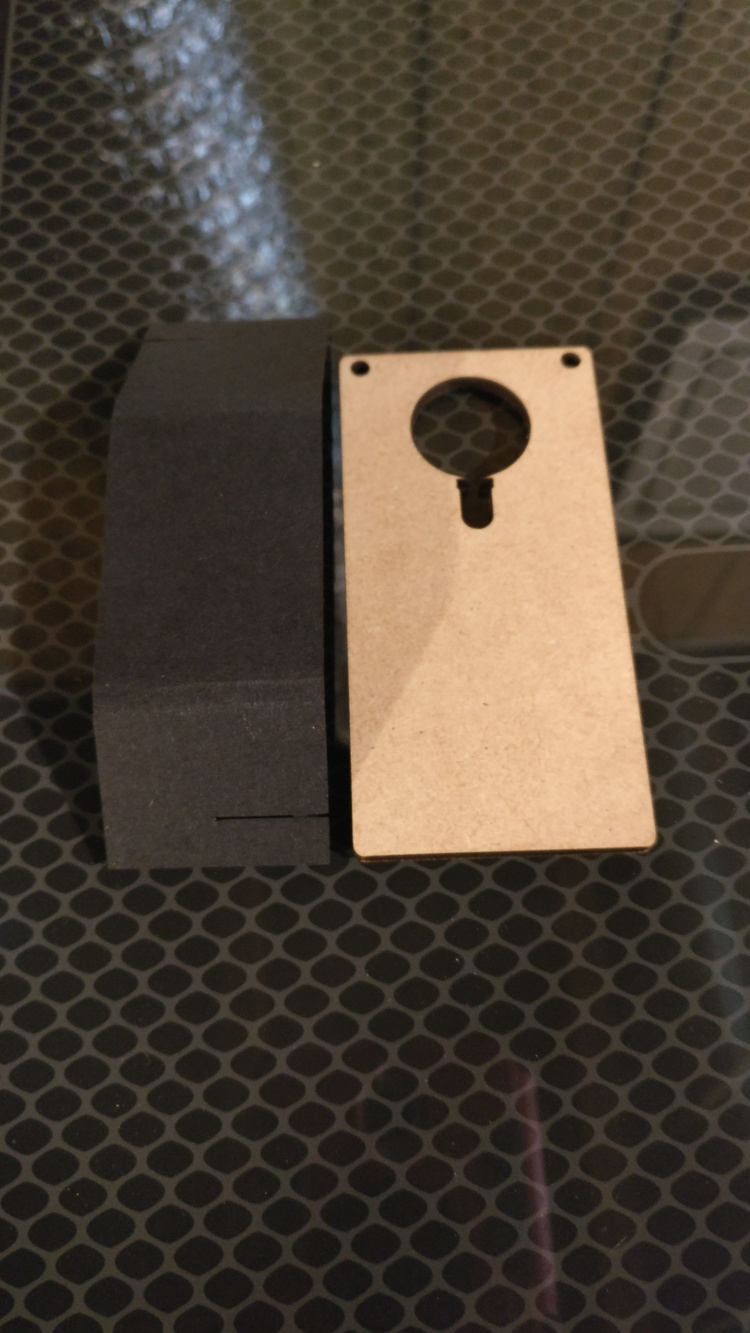
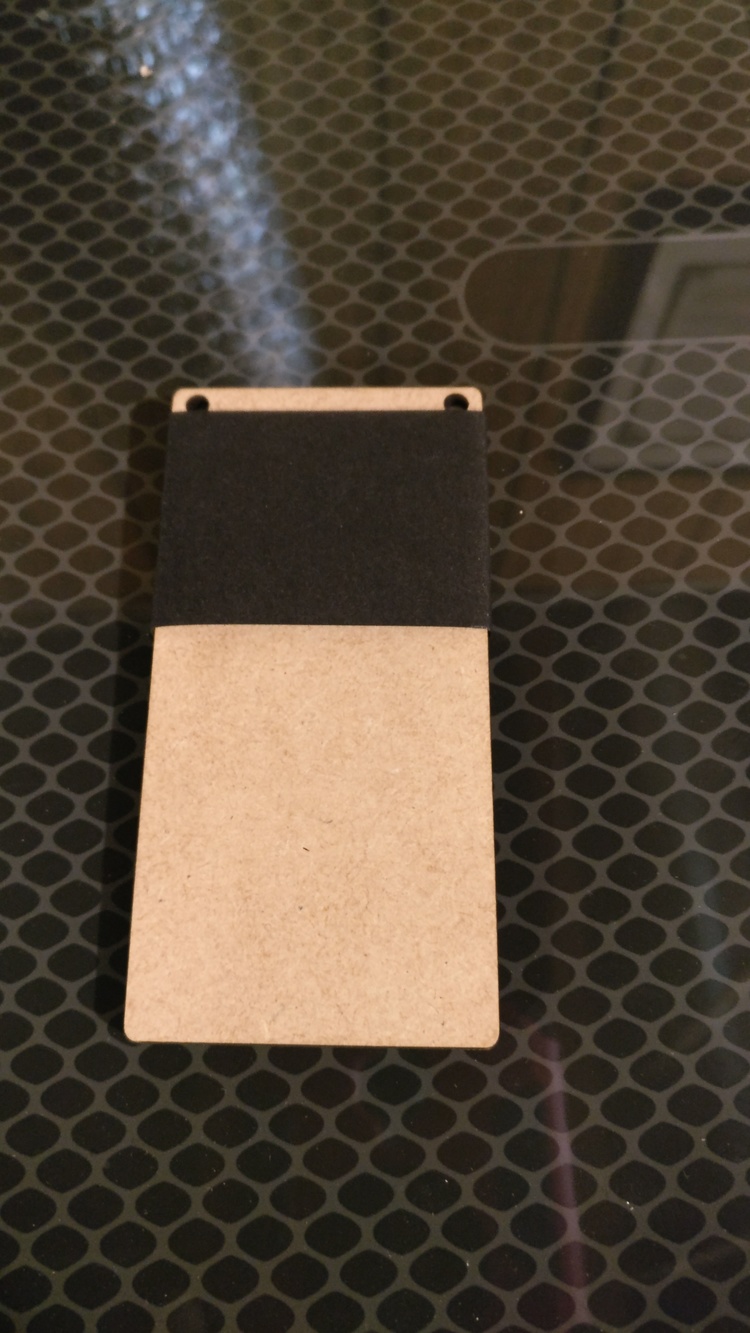
Step 8– Wrap duct tape around the top of the badge to hold the battery in and conceal the bare bulb. Be careful not to cover the holes near the top edge.

Step 9– Wrap the top with ribbon, mummy style, to conceal the duct tape (optional).

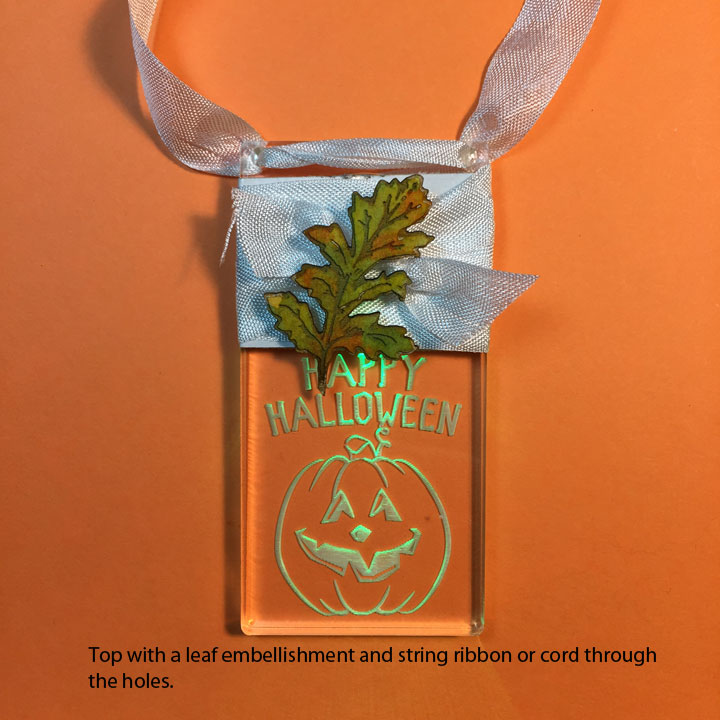
Step 10– Top with a leaf embellishment and string ribbon or cord through the holes.

63 Likes

What a great project! Fun for all ages! Thanks for sharing everything!

4 Likes

Oooooh! Love the technique, it opens up a lot of ideas for Halloween. Thanks for sharing the construction details. :grinning:

4 Likes

Great write up and a fabulous looking badge. I love how you figure all this stuff out…then share it with the rest of us. Thanks!

4 Likes

I may have to make some in orange for my nephews, Thanks for the ideas. :smiley:

2 Likes

Nice write up. Love the simplicity of the battery/LED combo. Thanks!

3 Likes

How long will that battery keep the LED lit?

1 Like

According to the article I linked to, the brightness will drop off fairly quickly then stay lit at a dimmer level for a much longer time, depending on color. Red, yellow and orange could last up to a day while other colors could last as long as 2 weeks. Unless you solder in a resistor to even out the flow.

5 Likes

Really fun idea!

2 Likes

Great for the kids to wear on Halloween. Thank you for sharing.

2 Likes

Fun!!! Thank you so much for sharing your work … and your excellent write up!

1 Like

Has anyone thought of a way to make a sleeve for the upper area of this to make it a little more re-usable. Tabs on the sides of the acrylic insert to hold it in place then simply slide it up and replace the battery/LED as needed. I’m thinking that medium draftboard would be a bit bulky. Not to mention that gluing up a bunch of tiny “boxes” would be time consuming.

Excellent idea! Maybe a silicon tube of some kind. If you come up with something I’d love to see it!

This is awesome! Great idea :+1:

@cynd11

Thank you for your EXCELLENT design. It was quite timely and I was able to locate some 5V led on hand and make a name tag for my wife who was attending a writing conference this weekend. I altered your design to work with my battery needs (2 cells). I also experimented with backing the led away from the engravings and making the engravings closest to the led more shallow.

Thank you again! :clap::clap::clap::clap:

2 Likes

You are very welcome! I’d love to see a photo of your badge.

1 Like

@cynd11

I will take photos once it is dark. My phone and camera aren’t liking the badges right now. I did look up bulk CR2032 batteries on Amazon and a new assortment of 3V LEDs arrived from Amazon yesterday!

My wife both loves and hates you!

Thanks again for sharing.

2 Likes

Came up with a poster board material sleeve.


Cutting settings were 500 speed and 75 power.Edge%20Lit%20Badge%20Sleeve

4 Likes

Perfect! This is an essential addition. Thanks for your design!

is this a specific type of acrylic that would reflect the LED light? I think I read somewhere there are 2 types and one of them wont work for this