Hi all,
I have never really tried to make an edge lit acrylic piece before, but I’ve had an idea I can’t shake so I guess I’ll be trying soon! This will be a type of lit sign. Normally I’d just start experimenting but getting materials is a bit tricky for me at the moment, so I’d like to make sure I’m not making a horrible mistake first.
What I would really like are glowing letters on a black background. To that end, could I spray the clear acrylic with black paint on one side before I engrave? Then the engrave would remove paint and engrave in the same step? Though it literally just occurred to me that if I’m edge lighting then could I paint afterwards right over the engrave? I’m not sure if there’s an advantage one way or the other.
Also, I have read about increasing the depth of the engrave the further away from the light source, which makes sense to me. I would guess I will need to apply a gradient to my design, then use an option in the settings that changes based on that. Does anyone have any guidance on which of the methods would work best? I’m guessing Vary Power but I’m open to suggestion!
Thank you!
edit: I should add that I’m assuming I’d be engraving the back side. I would really love to do the front as I think the black paint would hide anything unintentional, but I’m not sure if front engraved, side lit lettering looks as good. Any advice here would be great as well.
2 Likes
Seems like it ought to work. You could also back it with black cardstock or painted wood probably.
Do a small test, it’s the best way to be sure.
You guessed right! It’s called 3d engrave if you use proofgrade, vary power if not.
I think this sounds like a great idea. If you wanted it to be really light tight, paint both sides and engrave from the front. Engrave and cut it out, then paint the edges?
I’m not sure I’ve seen anyone try this, I think it sounds really cool. You’re onto something, I say do some small proofs of concept and go for it.
5 Likes
this sounds like a neat idea. I’d love to see your results; even the not-so-good ones have merit for techniques to build on.
2 Likes
I’ve done edge lit pieces a few different ways and painted acrylic worked fine. I prefer matte spray paint because it’s more forgiving and shows less flaws and spray paint is so easy to apply. And depending on how you intend to light it, you may or may not have to do a graduated engraving for even lighting. I’ve never done it and I think they still look pretty good. 
I didn’t keep a pic of one I fully painted and then engraved, but just to kinda give you an idea, here’s one in the reverse with the engraved part painted black.
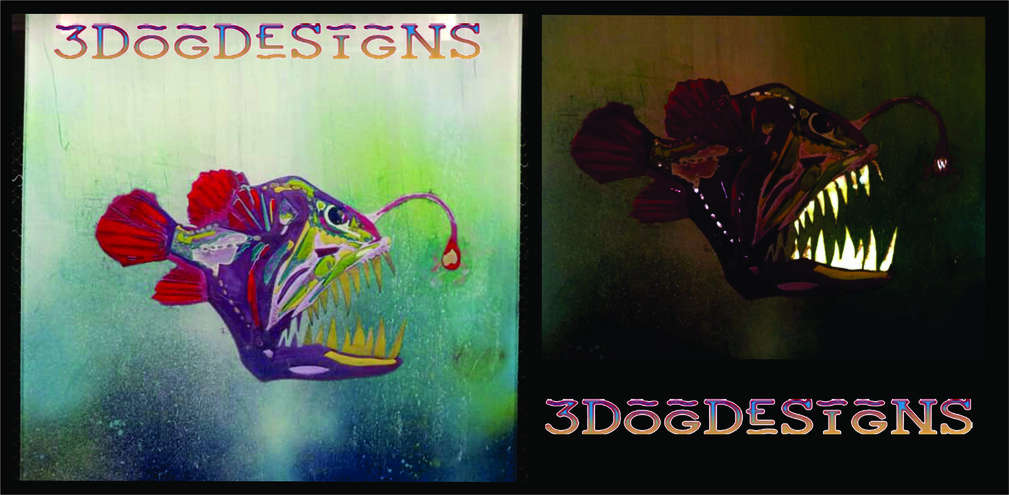
And here’s painted acrylic with light shinning from behind. (The teeth had a thin coat of glow in the dark paint.)
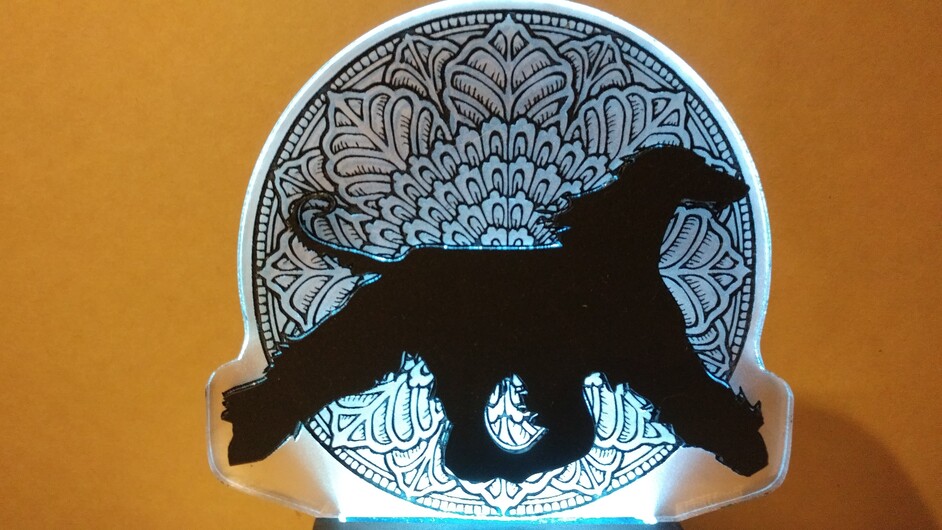
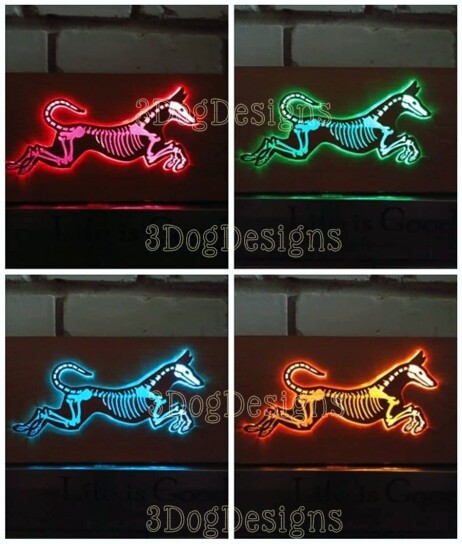
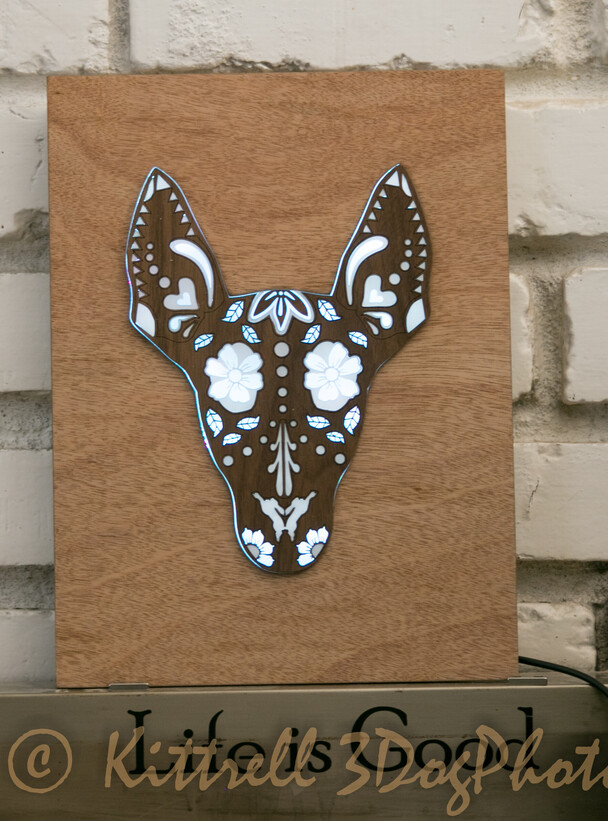
These below are wood or black acrylic layered over clear acrylic. I prefer this over paint because I think it looks a little cleaner, but obviously it takes a lot more material. (The last dog one is a different version than the one I posted above.)
16 Likes
Well, thanks to the encouragement from everyone and some cool examples from @kittski, I did some experimenting.
One caveat, naturally these are really hard to take photos of accurately. But here we go.
I started with just engraving the back of a piece and shining light up through it. It looked pretty good. I did do a graduated engrave. Then I tried painting the back black, right over the engrave. That ruined it. I did another one, and this time I painted the back white over the engrave, and it wasn’t bad. Here’s an example:
Both tiles were painted black on the back, engraved, then the one on the right was painted white. In real life I find the one with white paint to look a little less evenly lit and perhaps a bit dimmer.
Then I started really experimenting.
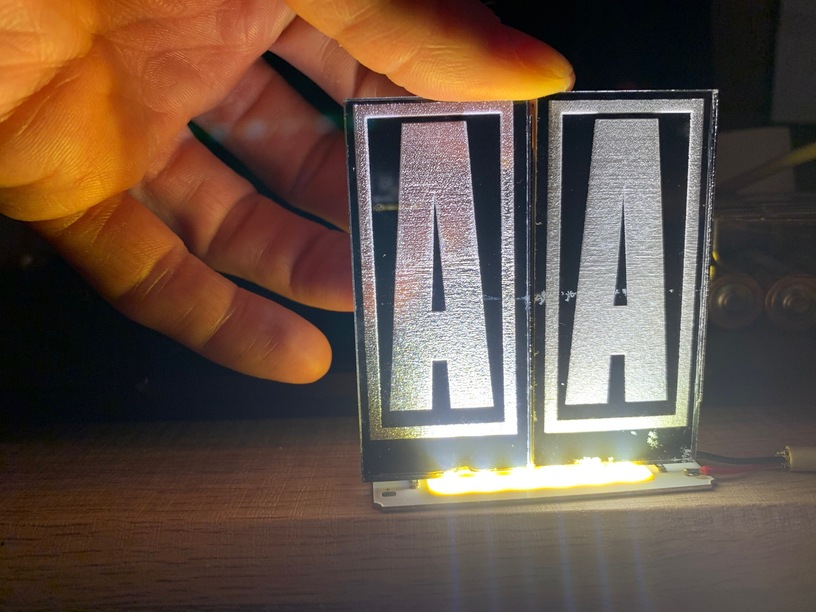
The tile on the right started with a piece of masking tape on the front and a coat of black paint on the back. Then I used the laser to score the tape in the shape of the letter. I weeded, then sprayed black over top the remaining tape. Once that was dry I flipped it over and etched a large rectangle in the back. The goal was to create something akin to a light box. I think it looks pretty good.
The tile on the left started with paint on both sides. The back got the light box engrave, then the front got a light non graduated engrave just to burn off the paint. It also gave a very lightly frosted appearance to the front. In terms of the light distribution it looks quite even. The only real downside is that the lettering looks less sharp. Even though the edges are perfect, the appear fuzzy.
So…what’s best? I don’t have an answer yet. I want to think about it some more. Happy for outside opinions though!
Edit: Botched left/right on the second photo description
6 Likes
I think I can tell which you mean with the descriptions but, would welcome clarification.
Ah…that’s because I completely botched that description. I’ll edit the post…thank you for noticing that, clearly I was a bit too tired…

1 Like
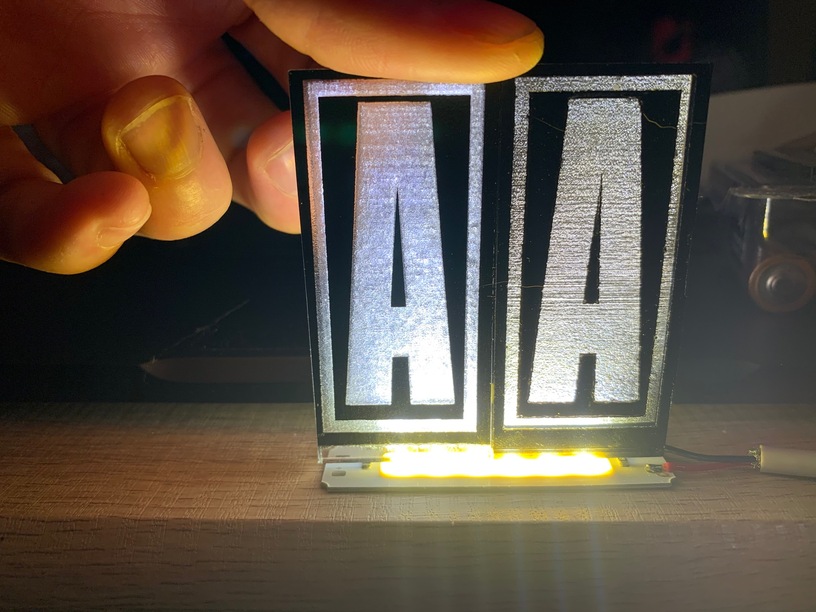
That bottom left photo shows a really clear letter. I’d go with that method for sure.
I didn’t have a ton of time today, but I did a test with the same technique as bottom left (laser removal of front paint, light box engrave on rear).
Because of how I’m holding the tiles they look different colour temp in this photo. I have another idea that I’m going to try tomorrow…stay tuned!
6 Likes
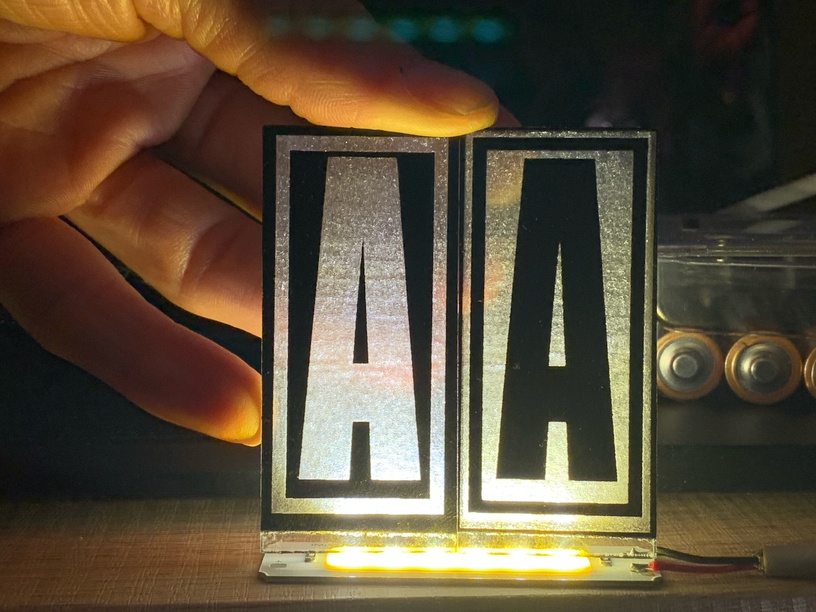
And here’s the latest on the left:
It’s the same as the right except…I flipped it 90 degrees for the etches. This means that there aren’t the line gaps you can sort of see on the right one. In person it looks quite smooth and nice from the front. I think this is what I’ll end up going with in the future.
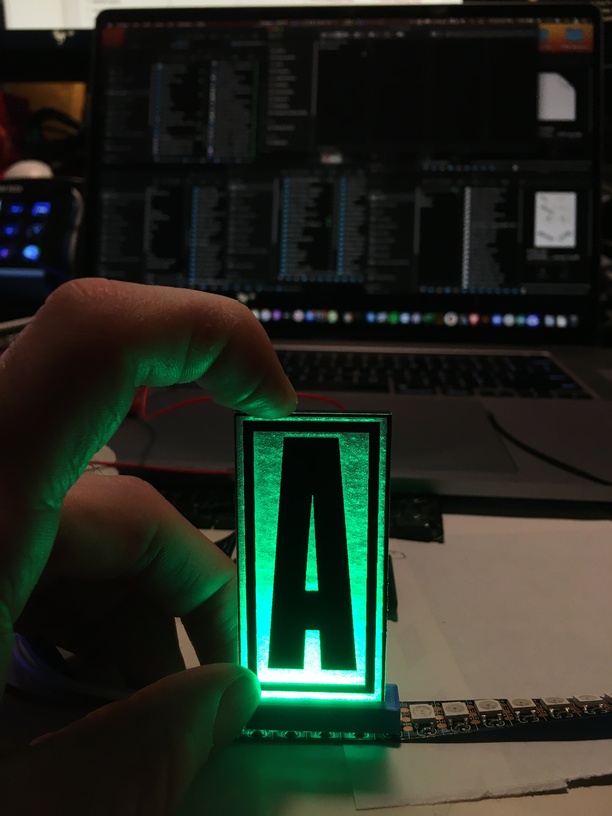
I 3D printed a little adapter to try it with some LED tape:
In person it looks quite smooth, with some fall off towards the top but not too bad. You certainly don’t see the bottom as a blown out hot spot, that’s for sure!
4 Likes
How are you getting your color fill so opaque? Or is this painted on the front?
I’ve been trying to find a simple and faster process for paint fill. It seems when I engrave clear cast acrylic on the back, then paint fill, the color appears opaque. Once any light hits it from behind, you can see right through it in many areas. It looks blotchy.
You got it, it’s painted on the front. I tried doing a white colour fill on the back but it messed up the way the light spread out for the light box.
In the end my process was to spray the front with two coats of black paint. I engraved the ramp light box reflector thing on the back, then flipped it over and used the laser on a low setting to burn off paint on the front. A huge side benefit to this is that the areas on the front where the paint got removed by the laser were then slightly frosted which looked great!
2 Likes