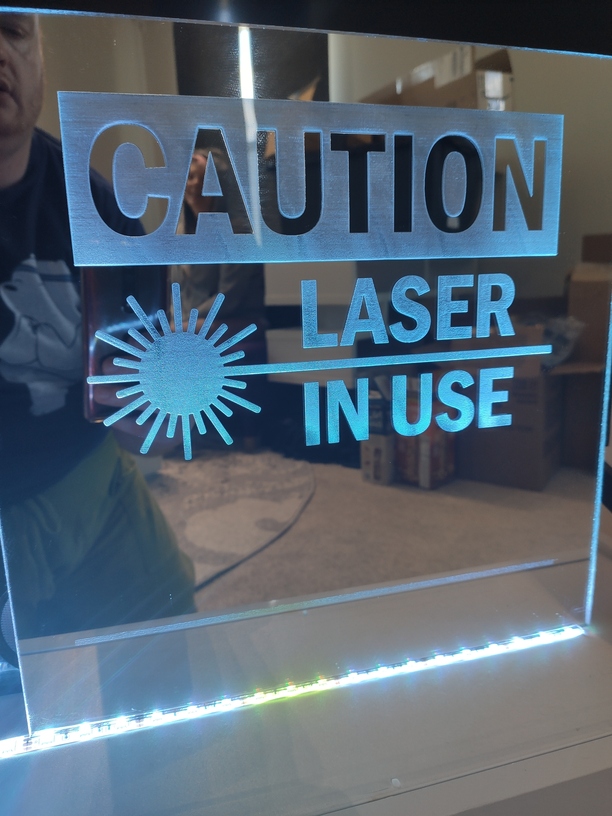
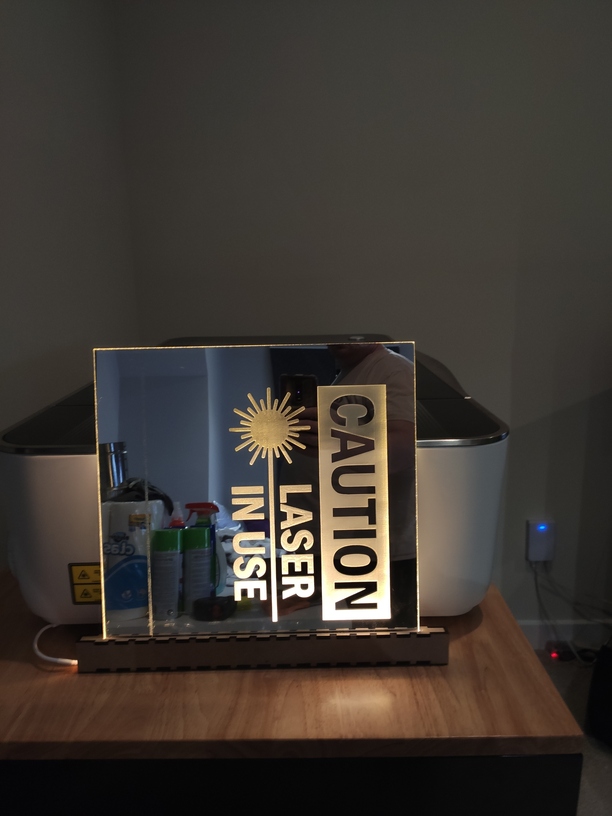
Since we have the Pro housed in a living/guest space, and because it’s a cool beginner project, I made this sign. I used a gradient and 3D Engrave as suggested elsewhere to help with even light refraction and the second photo shows what a difference it makes.
27 Likes
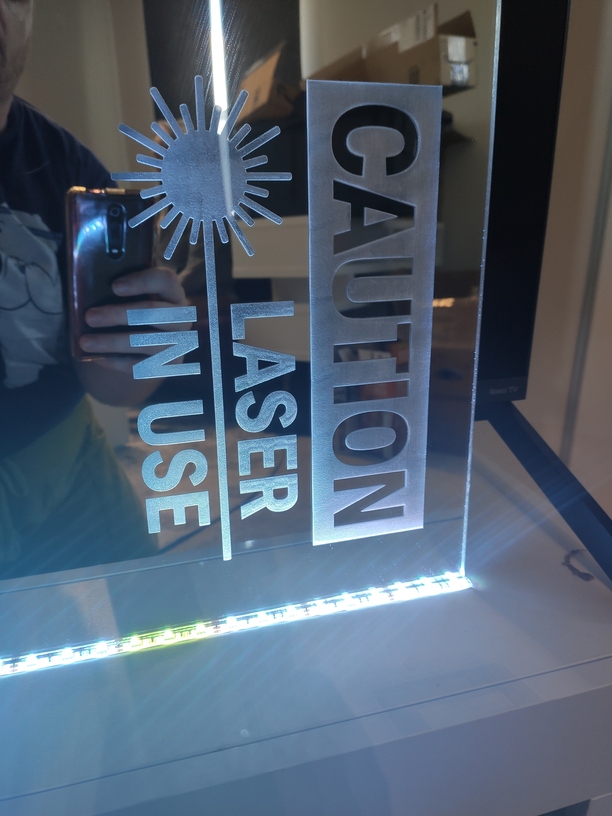
Here is the image I used, a PNG with a transparent background. I intend to tint this, but it came out so well I figured I’d show it off at this stage. I’ll post finished pictures once I make the housing for it and its dedicated light source. I have the GF extras (work area light, inline exhaust fan, and now this) all on one switch so it will always be on when the GF is in use.

13 Likes
It turned out great, no way to tell you’re a beginner with a sign like that!
4 Likes
Nice! I am on the fence about gradients. I use them but can rarely detect a huge difference. You said you are going to tint it. Can you explain this? Great work!
2 Likes
I think the photos show a substantial difference created by the gradient depth. When illuminated from the bottom, light easily reaches the entire sign. But from the side, where the gradient won’t function, the sign hardly lights at all.
As far s tinting, I will probably use transparent acrylic ink. You can also paint, or fill the engraved space with colored epoxy.
4 Likes
Thank you for showing the picture of the gradient that you used. I had read that a gradient close to the light source would make a more uniform display, but I would not have thought of using that much gradient. Your sign looks fantastic . 
3 Likes
A great project to stretch your wings a bit. Looks great!
3 Likes
Glad it helped! That’s about a 15% gray all the way to 100%. The line you see at the bottom in the actual print is an artifact of having an extremely light gray (instead of transparent) background, so with acrylic you can clearly go from 0% to 100% if you want to and everything will be visible if lit from the correct direction.
1 Like
That is really nice! I have not tried mirrored acrylic yet, but it always look amazing when projects are done with it.
You do not seem like a beginner with the projects you have posted on here! If you claim to be a beginner, you must be doing your research first! Because these look amazing.
1 Like
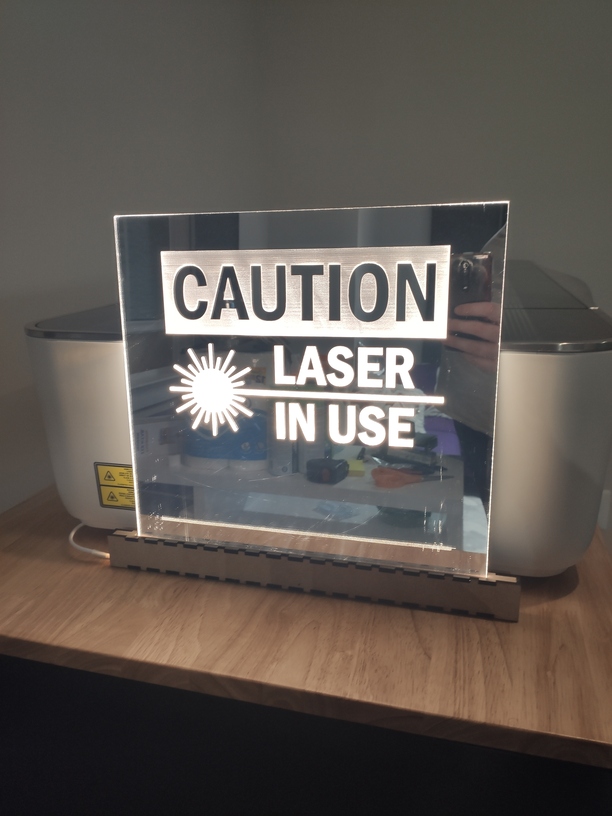
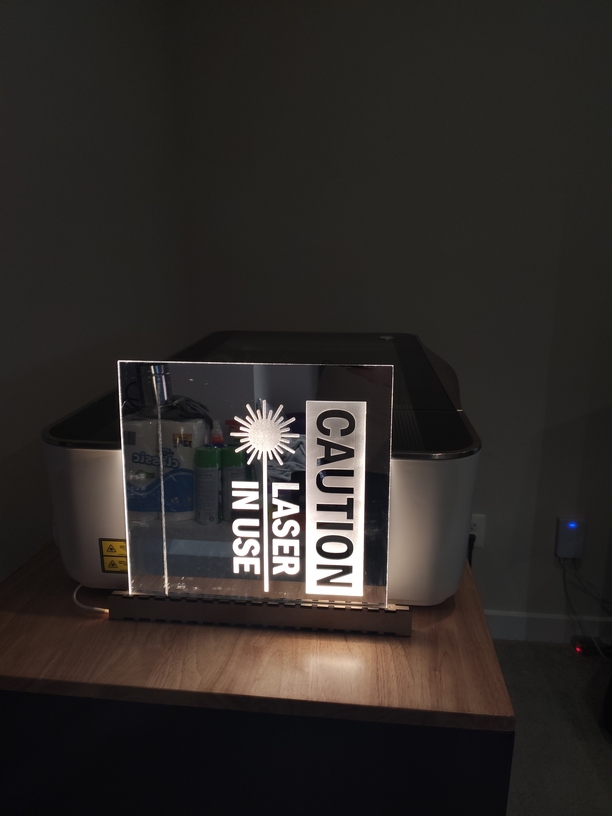
I built the housing for the sign and LED strip so that it aligns properly, which makes a huge difference. The photos show the sign properly aligned with the LED, and then improperly aligned. And then the next two show what it would look like without the gradient properly aligned, and finally without the gradient and improperly aligned. The difference between to the first and the fourth is huge! So definitely use 3D engrave and ensure your LEDs are aligned and in direct contact with your sign edge.

4 Likes
I know it, but don’t have a piece handy to illustrate it (and this is your thread!) - but would you care to elaborate on what you mean when you say “properly aligned”?
Here are the plans for the box, btw… I just used Boxes.py and added a cut out in one piece to slot the sign into. The box was set to interior width of 9mm, exactly matching the width of my LED strip, and I used inkscape to ensure my cutout for the sign was perfectly centered, ensuring the LEDs would line up optimally.
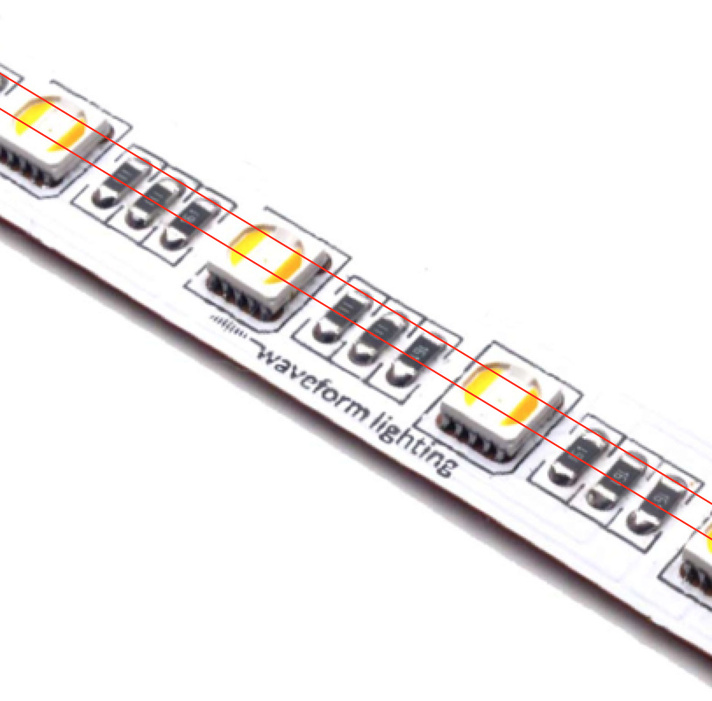
What I mean by properly aligned is the edge of the acrylic needs to be flush against the LEDs. For this, I purposefully bought bare LED strips with square diodes so the acrylic is literally sitting directly on a “shelf” of lights basically. If the lights aren’t centered, or the acrylic is not at a perfect 90 degree angle to the light strip, there will be a lot of light degradation as shown in the second photo above.

2 Likes
Wow that looks incredible!!!
1 Like
Put another way, you want the edge to be centered over the LEDs like the red lines here:
(Correct me if that’s not what you mean…)
3 Likes
Exactly what I mean… thanks @eflyguy . That image also illustrates why you want a bare LED strip. Pretty much every strip on the market can be removed from its weather coating (usually soft clear plastic that’s rounded on top) and can be cut to length if marked as such. There are many videos out there on doing both. But I was able to find a nice affordable set (uncoated, and cuttable) on Amazon. 3x 16" LED strip and one power source for $16. I’m sure there are better deals out there if ordering directly from overseas, but I wanted to get this project done fast.
My only question now is whether to go ahead with the tinting or leave it clear as-is.
2 Likes