Very nice!
I’m “dying” to see a @kittski skeleton treatment on these. 
8 Likes
Thank you! It’s so cool when folks share their designs. Really appreciated!
1 Like
That’s what life is all about isn’t it? Times like those. Glad I could help make memories for you and your grandson!
3 Likes
OK! For starters here’s the Fusion360 file that goes along with the screen grabs below. I’ve eliminated duplicate items just to make things a little easier, those are easy enough to duplicate in design software or the GF app.
@Jules feel free to link this in the Tips and Tricks.
First step is to import the SVG file and set the desired parts to have parameters. This can be somewhat tricky with an “artsy” file that you’re importing so basically everything except the slots gets a “FIXED” constraint so they don’t move around and break the model. Then only the width of the slots get parameters that are linked to the material thickness and the width of the laser kerf. This is all done in the Fusion file above, so the slots are even kerf adjusted already. You just need to change your material thickness and if your machine/material get a different kerf value, you can change it easily. I put .008" for starters.
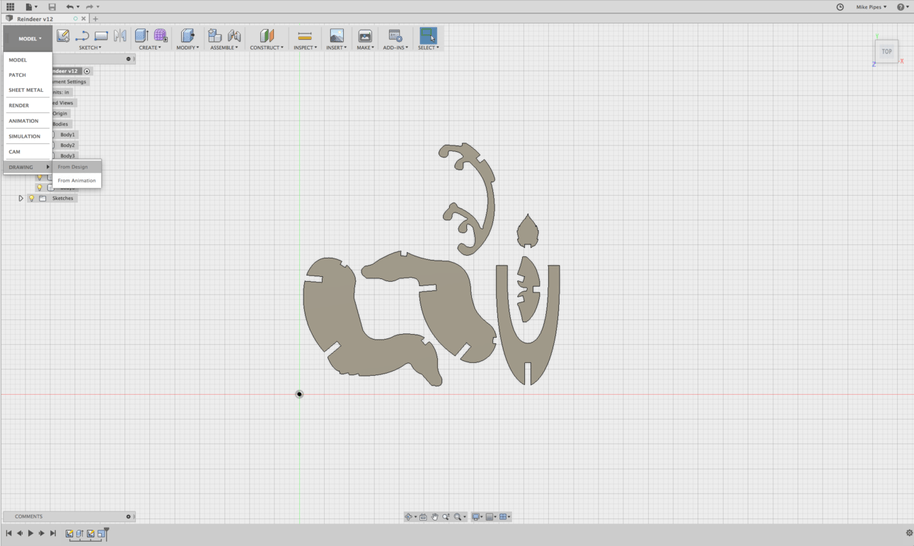
After the sketch work is done you want to extrude all the items because the Drawing feature requires solids to work.
Once that is done you go into the Drawing workspace:
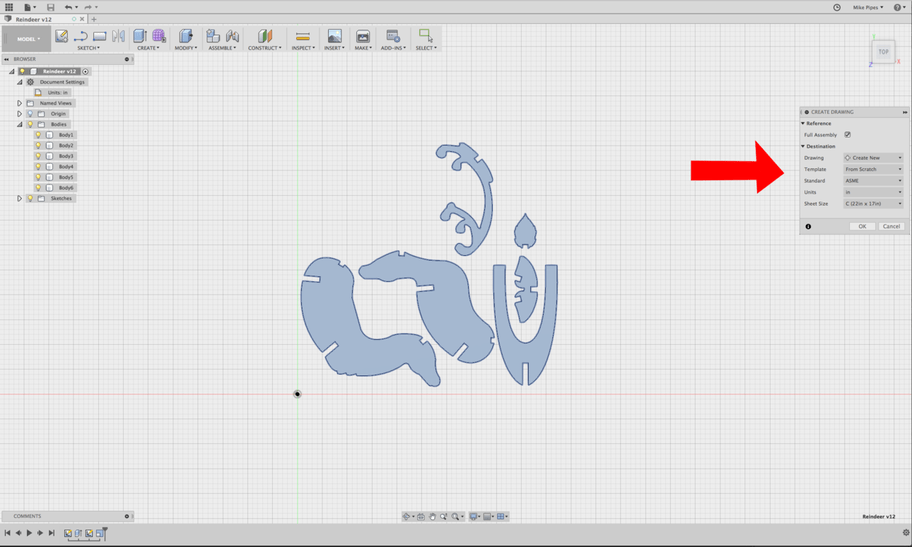
Set the options for the drawing as shown. This is not super critical but ASME gives you sheet size options in inches and ISO gives you metric sizes. I went with ASME C-size sheet since it’s closest to the size of the Glowforge. If you know you’re going to scale an item UP, choose larger sheet sizes to make sure everything fits on the page.
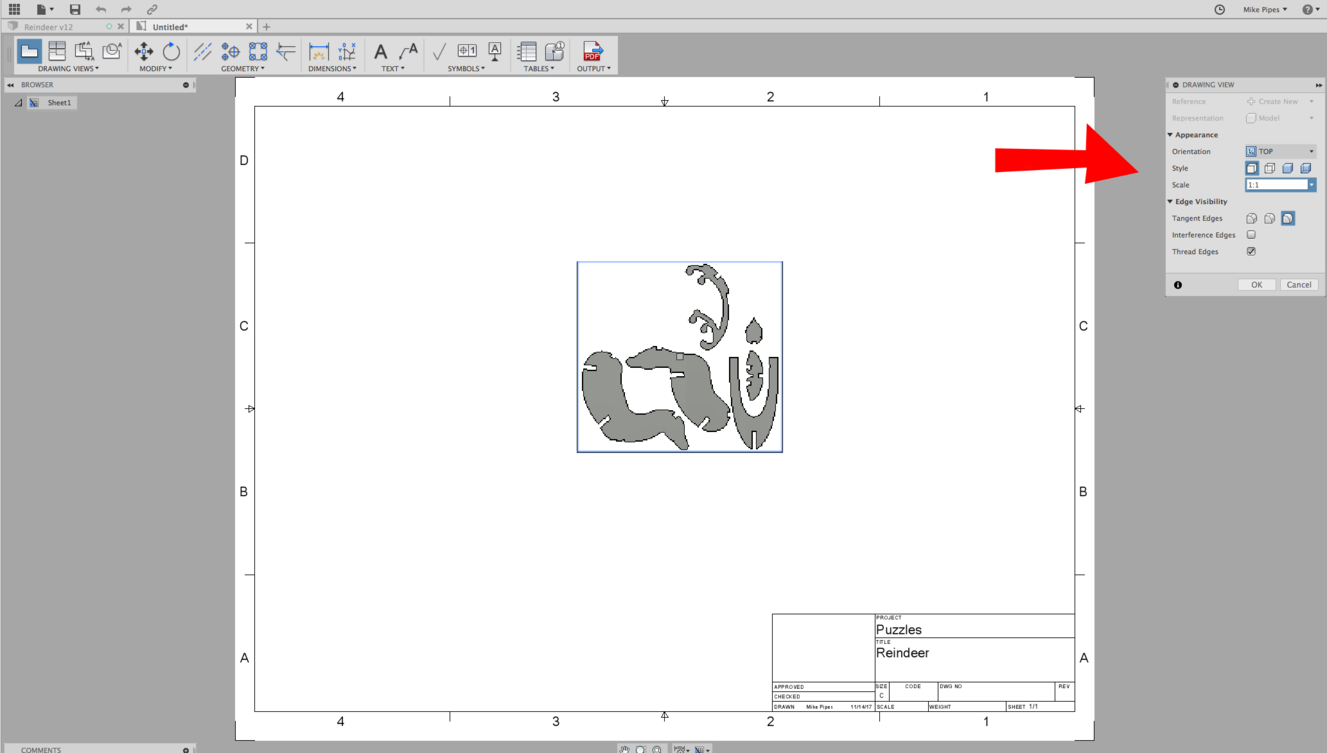
Orientation should be set to match the view that you drew the model in the Model workspace. In this case I know I drew it in the TOP orientation. Sometimes I feel saucy and might opt for the front view or left. ![]() Whichever way you choose, Fusion will show you a realtime thumbnail so if you pick the wrong one it will be obvious.
Whichever way you choose, Fusion will show you a realtime thumbnail so if you pick the wrong one it will be obvious.
Style should be set to Visible Edges
Scale MUST be set to 1:1 for this to work properly.
Tangent Edges should be turned off.
Hit OK here and you’re good to go. You can delete the title block and page border, just select and hit delete.
Now Save the drawing.
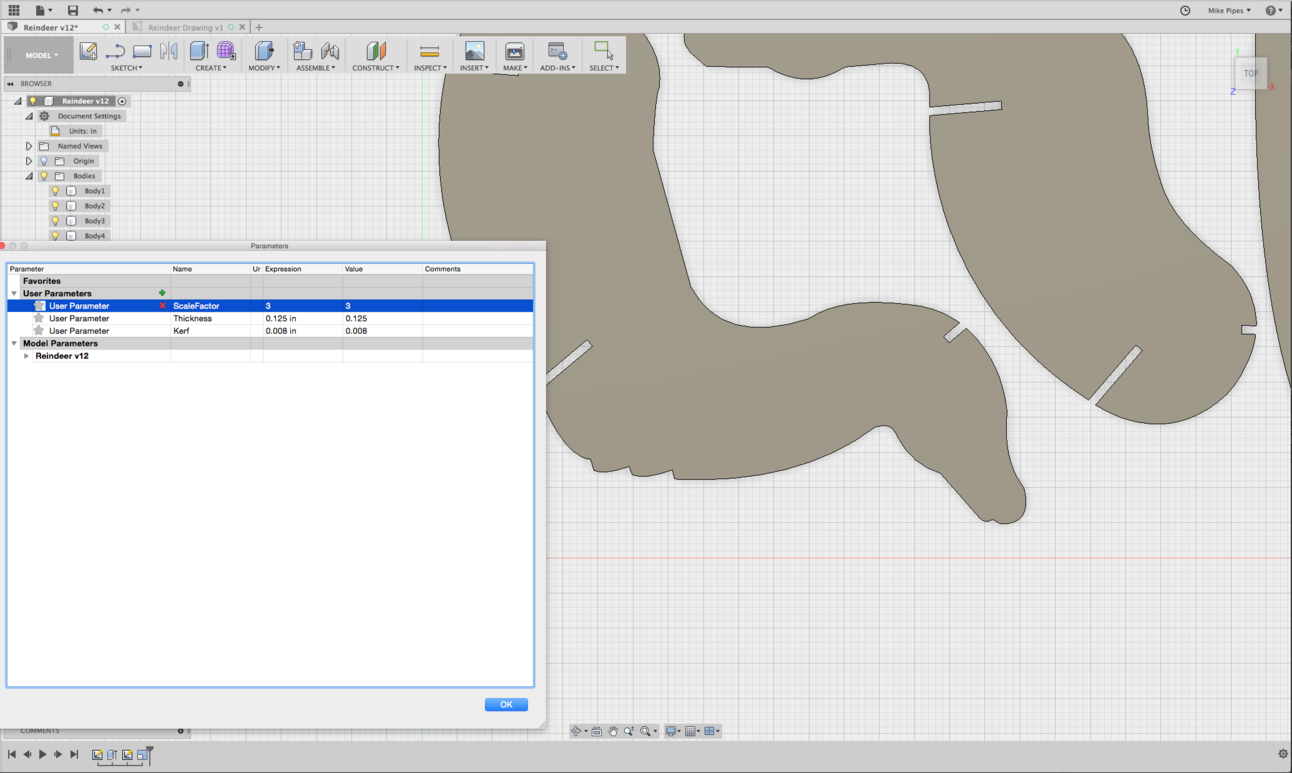
Now I’m going to flip back to the model and change the Scale Factor in the Parameters. You can see that the items have scaled up, the depth of the slots have maintained their same relative depth to the parts but the width of the slots is still setup for the same thickness of material, in this case I had it set at 0.125".
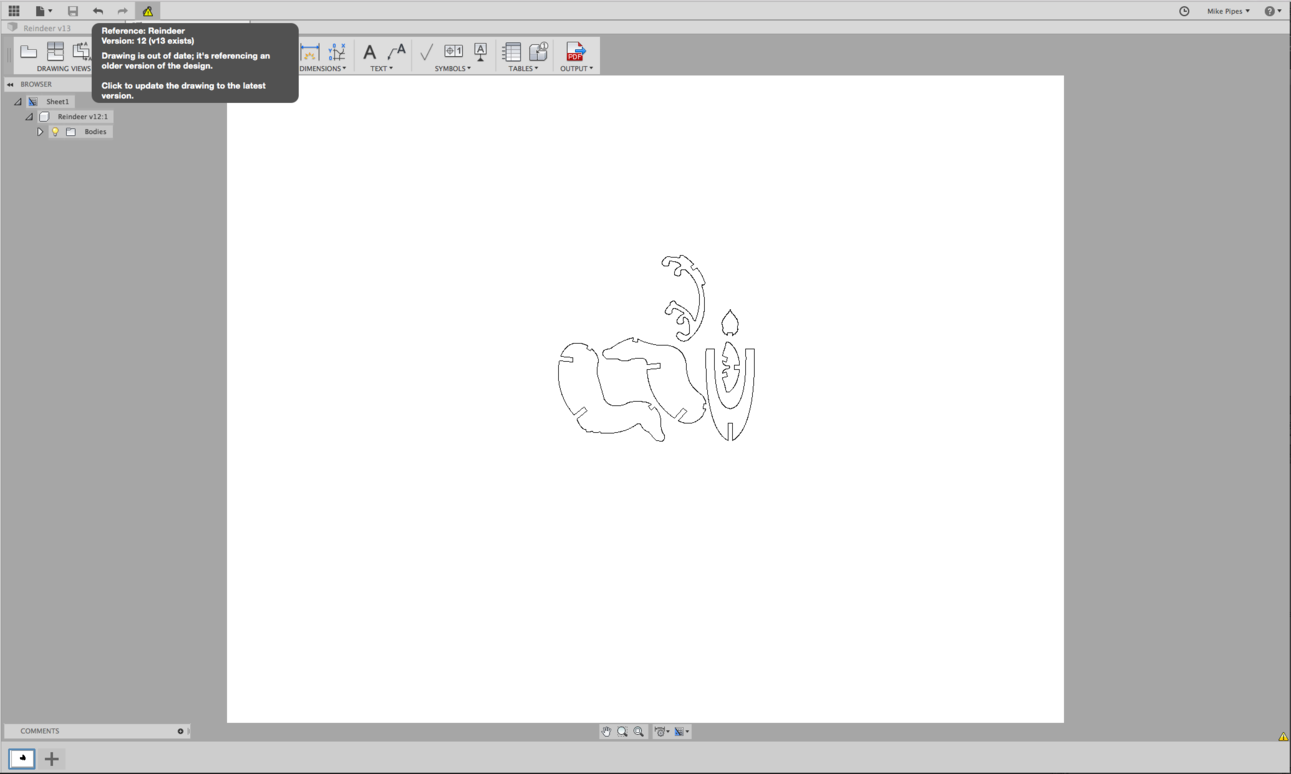
Now save that change to the Model. When you go back to the Drawing, it is still linked to the model and now it will show you an alert that the model has changed. Click the icon at the top to update the drawing.
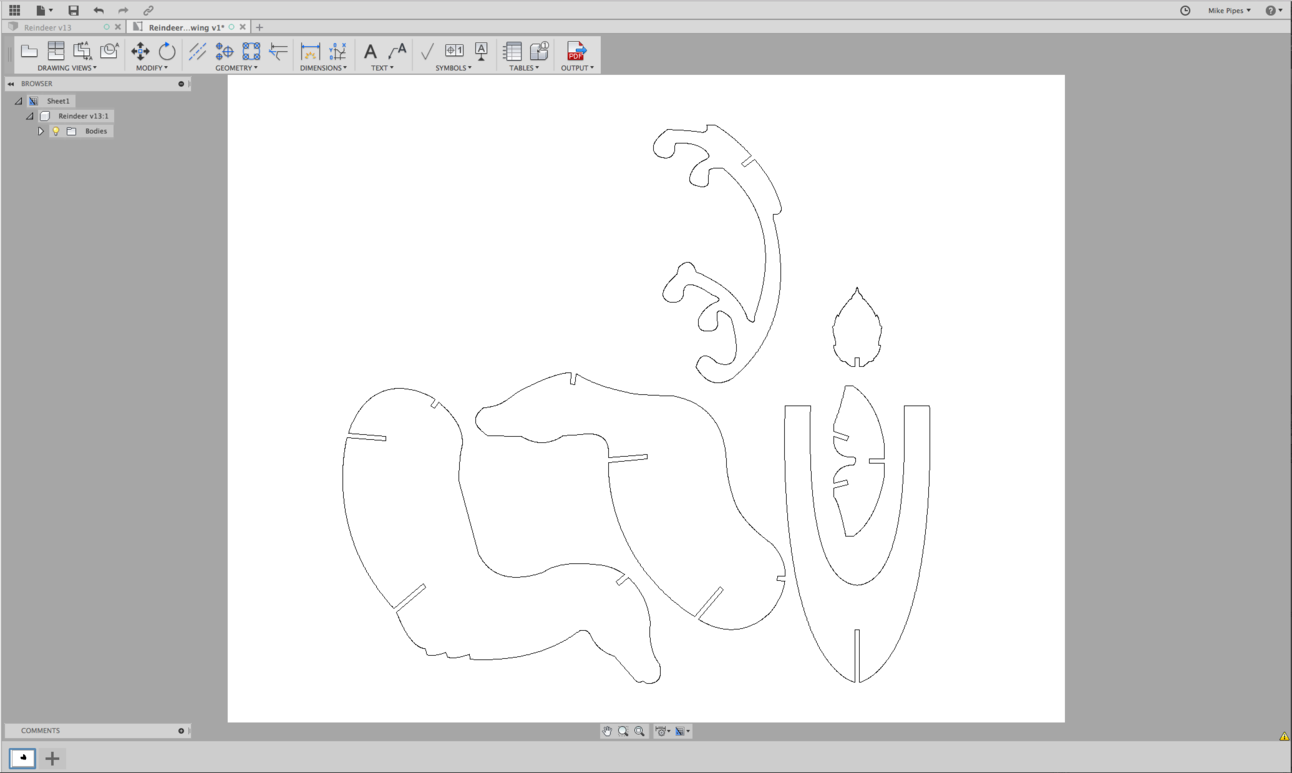
Boom! The drawing updates.
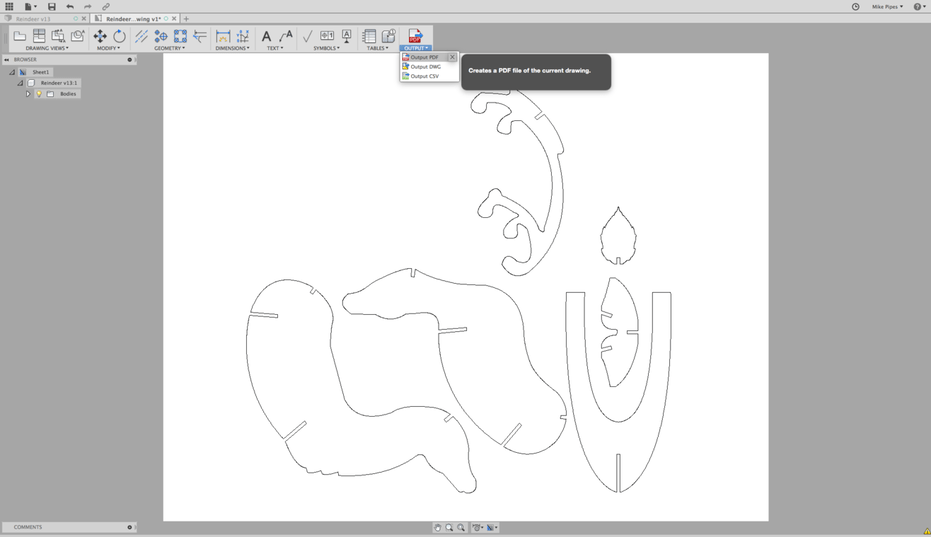
Now you can spit out a PDF file right from Fusion. One caveat: It’s still a CAD program and CAD programs don’t care what you’re ultimately doing with the files. You’ll want to check them in Illustrator, Inkscape, etc to ensure line segments are joined and shapes are closed otherwise you’ll end up with either erratic cutting paths, or shapes that will not engrave properly.
26 Likes
Thanks for the lesson Mike! - and the file. 
1 Like
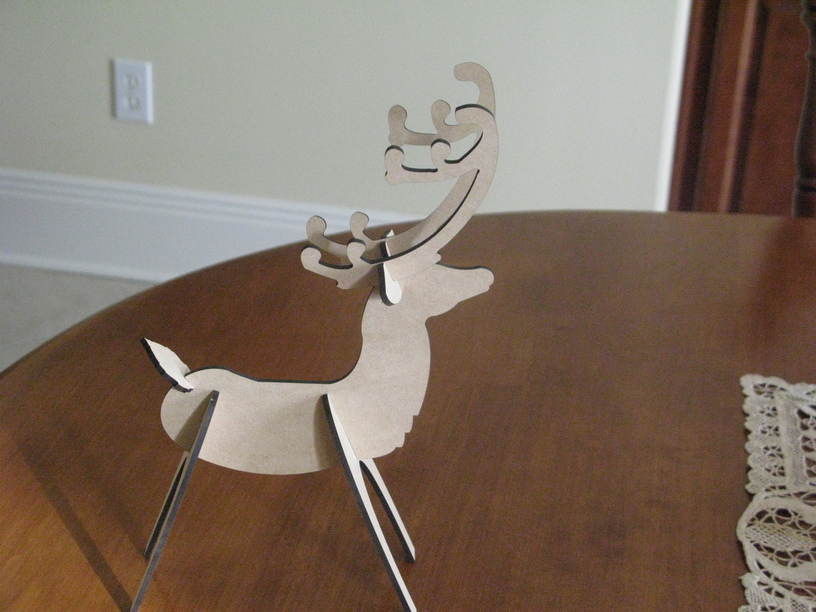
Fantastic! For those not ready to do this, I went ahead and made a much…LARGER pair of Reindeer. LOL
Wife said bigger, so I went bigger. I like this size best.
Enjoy!

19 Likes
Yahooooo! Thanks!
3 Likes
Holy cow. Tutorial in beast mode!
3 Likes
Looks like you tripled it?
Hahaha! Its my day off work and I had time between carbon fiber layups for resin to cure, so I figured may as well kick out a write-up. ![]()
5 Likes
What adorable little creatures and a neat Illustrator project. Thanks for sharing your design!
3 Likes
I just cut two pieces of the reindeer tonight to check the fit, first. Wow…nice and tight…no glue needed. So I made the rest of the little guy and snapped him together. I will be making an entire herd, now! Thank you again.
2 Likes
=)
You’re very welcome. Took quite a bit of fiddling to get the joint the way I wanted. I was concerned the notches may get wonky with proof grade, or other materials for that matter. Glad it worked out for you the way I hoped!
I made them tight like that, so you could flat box them for gifts, and pack them up flat after the holidays to reduce breakage and size. 
2 Likes
haha. I put them on my artboard, and scaled them till I could just fit both on one sheet. Once cut, my wife verified they were “just perfect!”. No math required!
3 Likes
I have that ‘test’ reindeer boxed up in that way right now, to send to a friend. I tested the fit using some scrap cherry PG, so he’s a pretty little reindeer!
4 Likes
Share pics! =)
3 Likes
I forgot to take a pic…and he’s ready to be mailed. But for sure, when I begin on the remaining herd, I will take photos!
2 Likes
Wow, they are really adorable. Thank you for sharing!
2 Likes
FANTASTIC
This is a great first project.
Thanks very much. I was sitting down to do something like it, and figured it would be several hours.
Now, lets admit that I probably would learn a lot from the project; but since you already did it, I’ll use yours. I like your wife’s cuteness level… it’s better than mine.
Thanks for sharing.
2 Likes