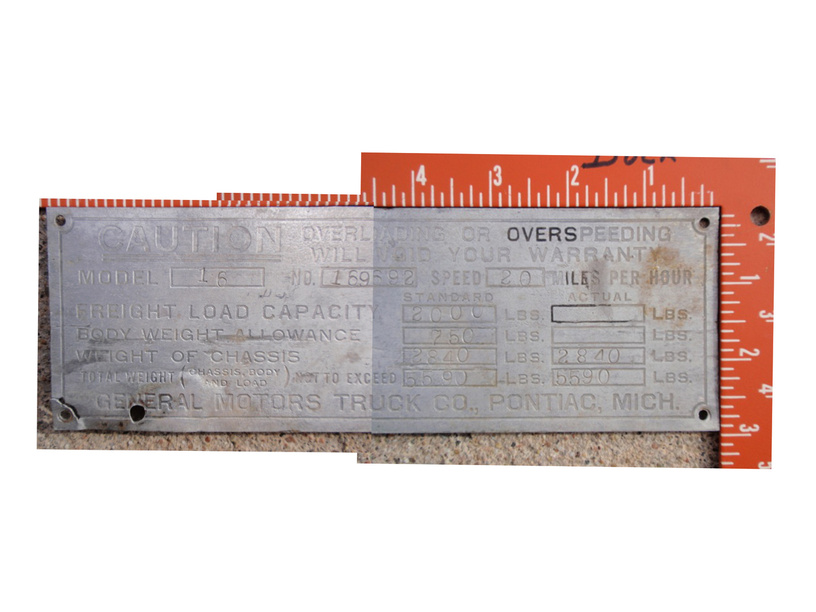
I finally finished a reproduction Makers Mark for our 1919 GMC. The original plate was stolen off the truck in the '80’s. I was lucky enough to find a guy who had one and was willing to take some really good photos.
It’s been a long journey. I’ve done research on different techniques to make engine plates since our original went missing. I now believe the original process was either chemically or electrochemically engraved, and the resist was applied either by a lithography process or a photo direct mask.
A few years ago I started to redesign the rather unique font, as it was not a top priority it took about 7 years, and I now have a full version of the font made. I called it “Old Truck”
The two other fonts are a modified version of “Transit” which is the font you will find on British motorway signs. I cleaned it up, and used it as a base for my new font “American Transit” The “S” and the “D” were modified to match the original plate. The third font was a great find “Alternate Gothic” This was a direct match. I was even able to verify it as an authentic font from a font catalog from the early 1900s
I used Fusion 360 and Inkscape to assemble the design, and create the SVG.
The 0.8mm aluminum plate was prepped by cleaning with scotchbrite 00 steel wool equivalent, then sprayed both sides with Krylon MAXX matte Black paint.
Engraved on the glowforge (Settings Redacted) Then a gentle pass over the surface with the scotchbrite to remove any remaining residue from the surface.
I used a Hydrogen Peroxide/Muriatic acid mixture, it took about 15 min to etch to the depth I wanted. The process is similar to the technique used in this video at the 3:20 mark. I have made other plates with Ferric chloride, but I find it miserable to work with, and I can get the peroxide/acid local any day of the week.
After the acid bath I wiped the remaining resist off with Acetone, repainted the plate, and squeeged off the excess paint. After drying, I sanded with 400 grit sandpaper.
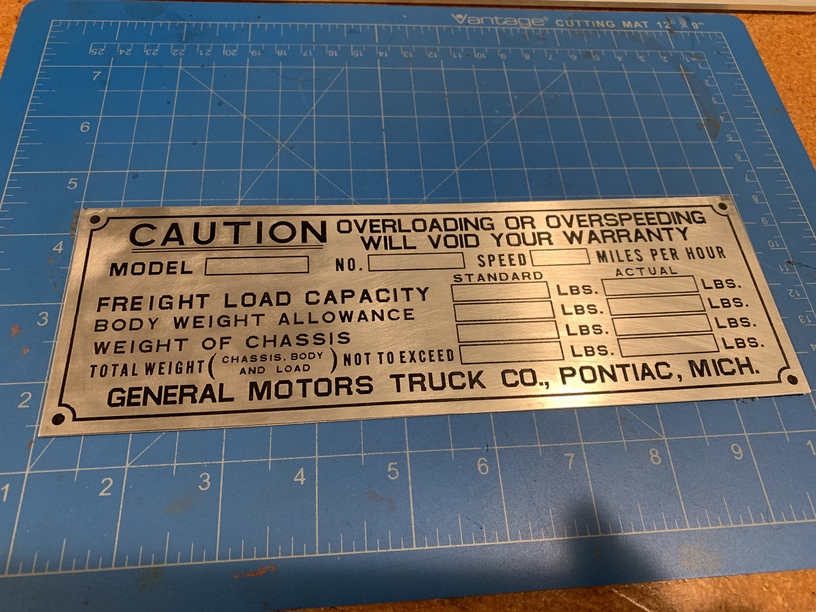
The finished result.
The original picture I started with.