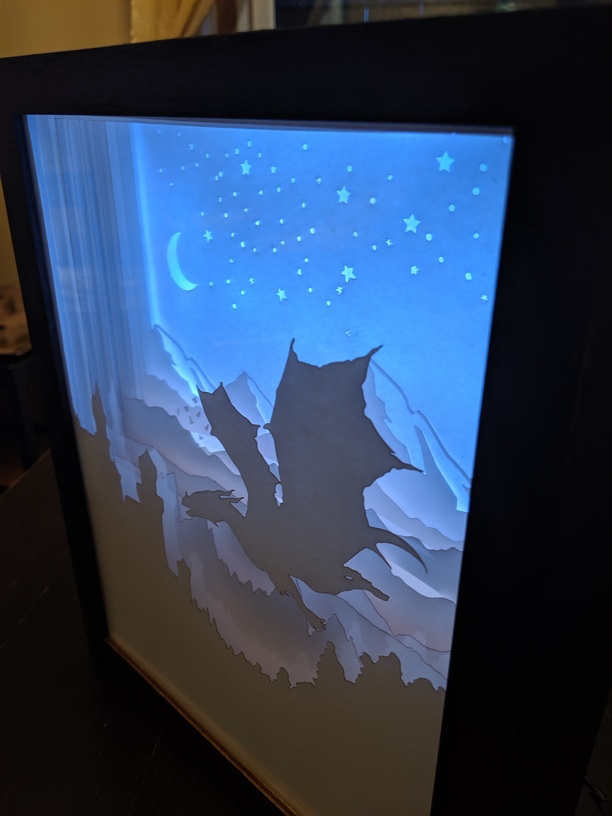
I have completed two paper cut light boxes in the last month or so. I posted pics of the projects elsewhere. Since it involves cutting multiple layers (usually 10) of white card stock, I wanted to find a way to eliminate smoke staining.
I stumbled across a post where someone had engrave cut a very intricate snake out of copy paper. Then some kind members of the community helped me figure out how to use “stroke to path” in Inkscape so I could engrave cut my card stock.
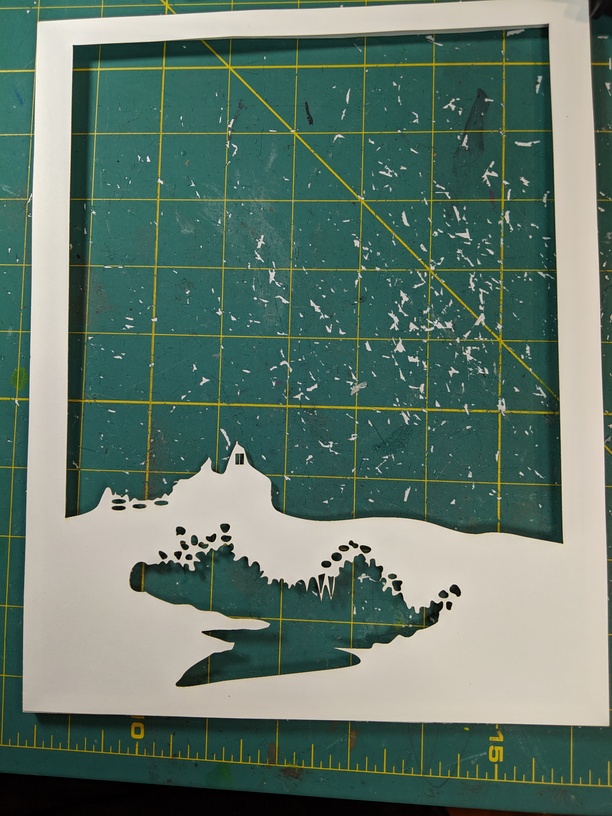
What I have been doing with each layer is cutting the straight lines (especially the vertical ones) away from the rest of the design. Then I use stroke to path in Inkscape to change the not straight bits from strokes to filled bits that can be engrave cut. I have been setting my stroke thickness to 0.203 mm before converting it.
These are the settings that have worked best for me:
Engrave - Speed 650, Power 75, LPI 225
Cut - Speed 500, Power 60
This cuts nicely through the card stock when engraving and results in minimal amounts of staining.
25 Likes
I should add that the reason I cut away the straight lines from the design and cut those, rather than engrave cut them, is that it significantly shortens the amount of time each layer takes. The example layer above would take over an hour to engrave but by cutting the straight lines and only engraving the other pieces, it took around 15 minutes.
7 Likes
Why not cut all of them? Why would you engrave away the small ones when you could just cut them? You could probably get down to a minute or two per layer sticking with cuts.
To eliminate the smoke stain. You get quite a lot on white card stock when you cut but almost none when you engrave cut it.
3 Likes
It’s a B’nei Mitzvah gift for my oldest child’s friend. They love dragons!
3 Likes
This may come down to settings.
Try doing two or three partial cut passes, I bet you’ll get almost no smoke residue, and it’ll probably be far faster than engraving. I’ve had a lot of luck with white cardstock and cuts.
2 Likes
I haven’t tried partial cut passes but was unable to eliminate enough of it with any of my test cutting. I don’t mind how long this takes. Most layers aren’t more than 15 minutes and I get a really good result with the engrave “cut”.
Would you mind adding a screenshot of what your GF UI looks like when you are cutting/engraving… I’m curious how you do the straight lines separately from the engrave and if you engrave the entire negative space, or just a small area/line around where you want cut?
Are the ‘engrave cuts’ normal vector paths like the cuts and then you use an engrave setting instead, or are they larger fill areas like you would normally use for an engrave?
The technique uses a very thin rectangle to approximate a vector line, but uses the engrave function to burn away the material there instead of the cut function. You can probably find other posts about it in this section by searching on terms like “paper” and “engrave” and “settings.”
I don’t think a screenshot would show you anything, since to the naked eye they would all look like lines. 
3 Likes
I thought part of the advantage of engraving away the material is that you didn’t have loose flaps of paper flying everywhere?
2 Likes
This method just replaces cut lines with engrave lines; it’s because you don’t get as much scorching of the edges that way. The paper that’s left behind is going to flap if it’s not stuck down well, regardless whether you’re engraving or cutting.
1 Like
I would imagine that your bottleneck isn’t in the GF time, it’s in the assembly anyway.
But… for science! Someone should take a look at multi passes.
1 Like
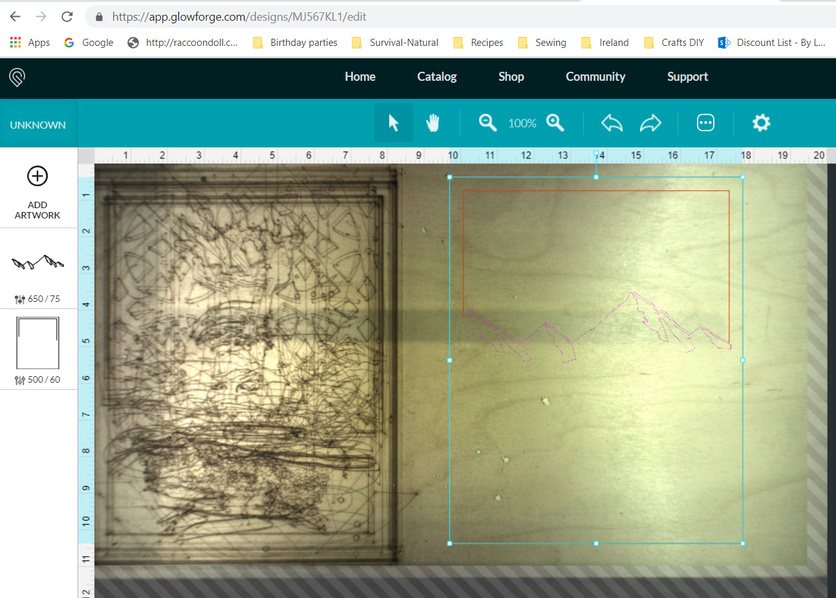
I understand why you are asking because initially I wasn’t sure how to accomplish this. Normally, if you tell the GF to engrave a vector…it’s going to engrave the entire negative space inside the stroke. By converting the stroke to a path, it’s only engraving the “line”.
Here’s the screenshot. As you can see, the mountains are being engraved…but just the lines around the mountains because I used to stroke to path on those pieces. The straight vertical and horizontal lines are being cut.
I took this screenshot with my GF offline so excuse my cut up plywood piece.
2 Likes
@geek2nurse is right. The pieces will still blow once they are fully “cut” because of the fans.
I use a piece of 1/8" baltic birch ply sprayed with Easy Tack to hold my card stock down and stop pieces from flying around. You can see it in the screen shot I just posted. It’s gotten a lot of use but it works great! And it’s way cheaper than buying a laser safe mat.
2 Likes