This is still a work in progress as I continue to experiment, but I wanted to post this to show off some of the neat effects I’ve been able to achieve using the Glowforge and an airbrush.
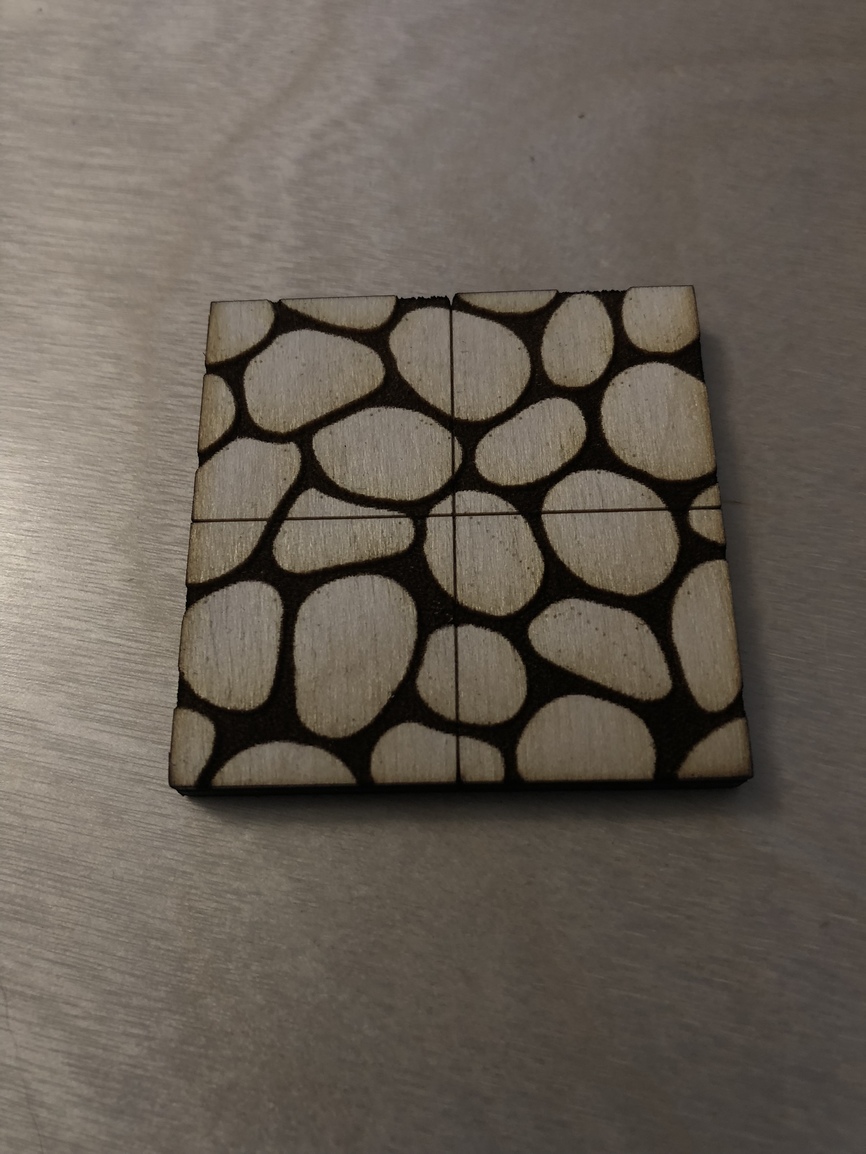
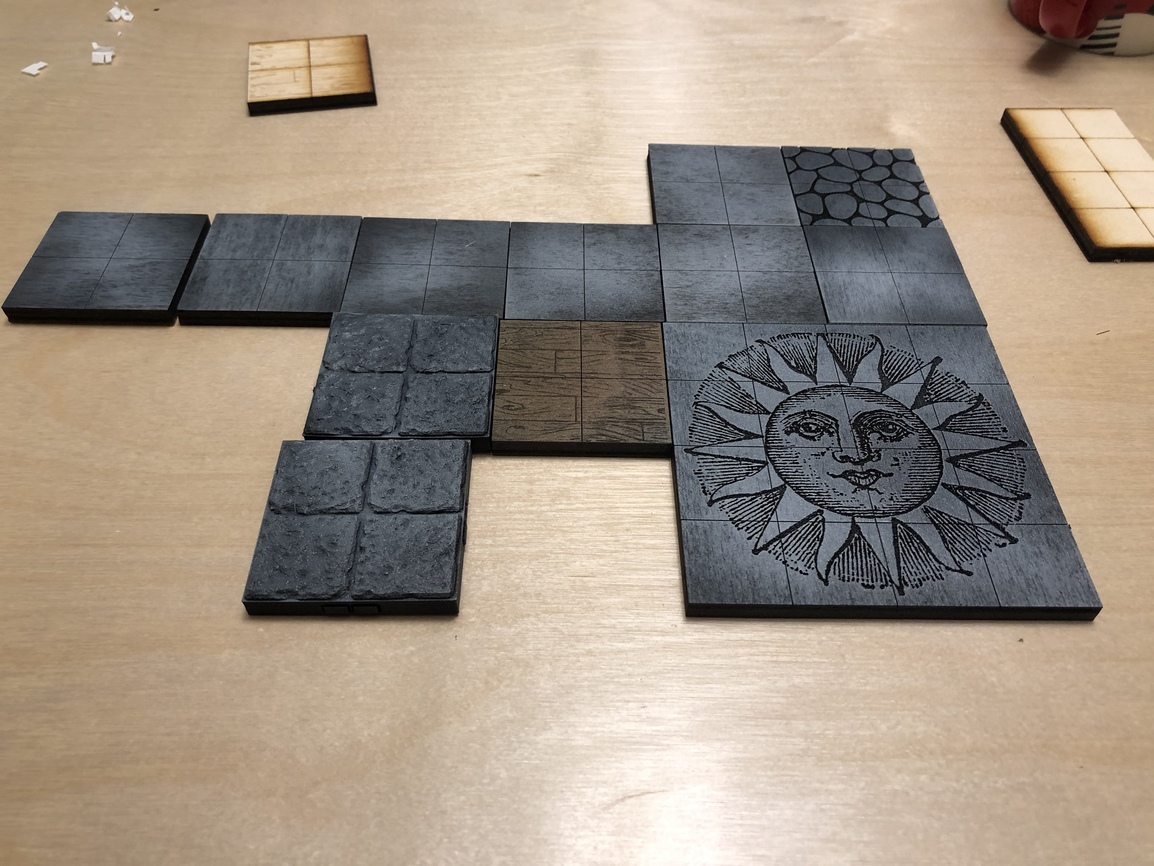
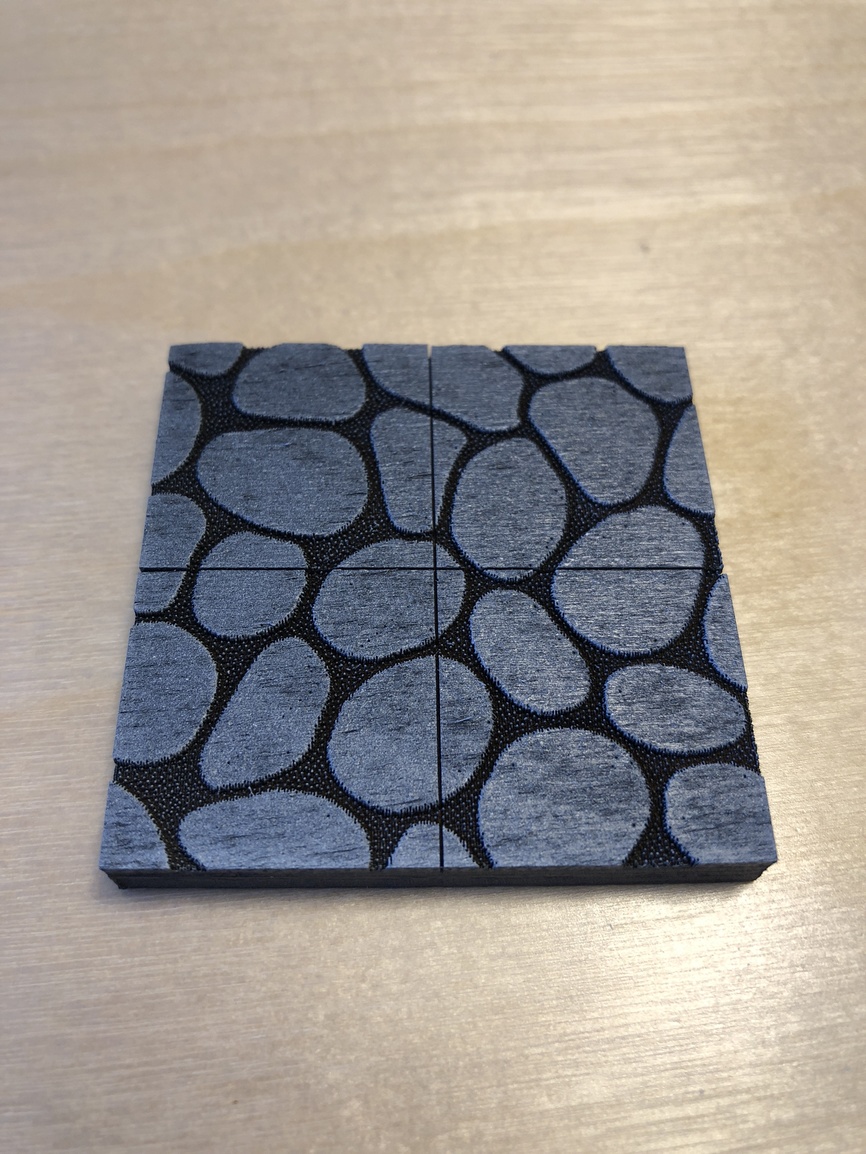
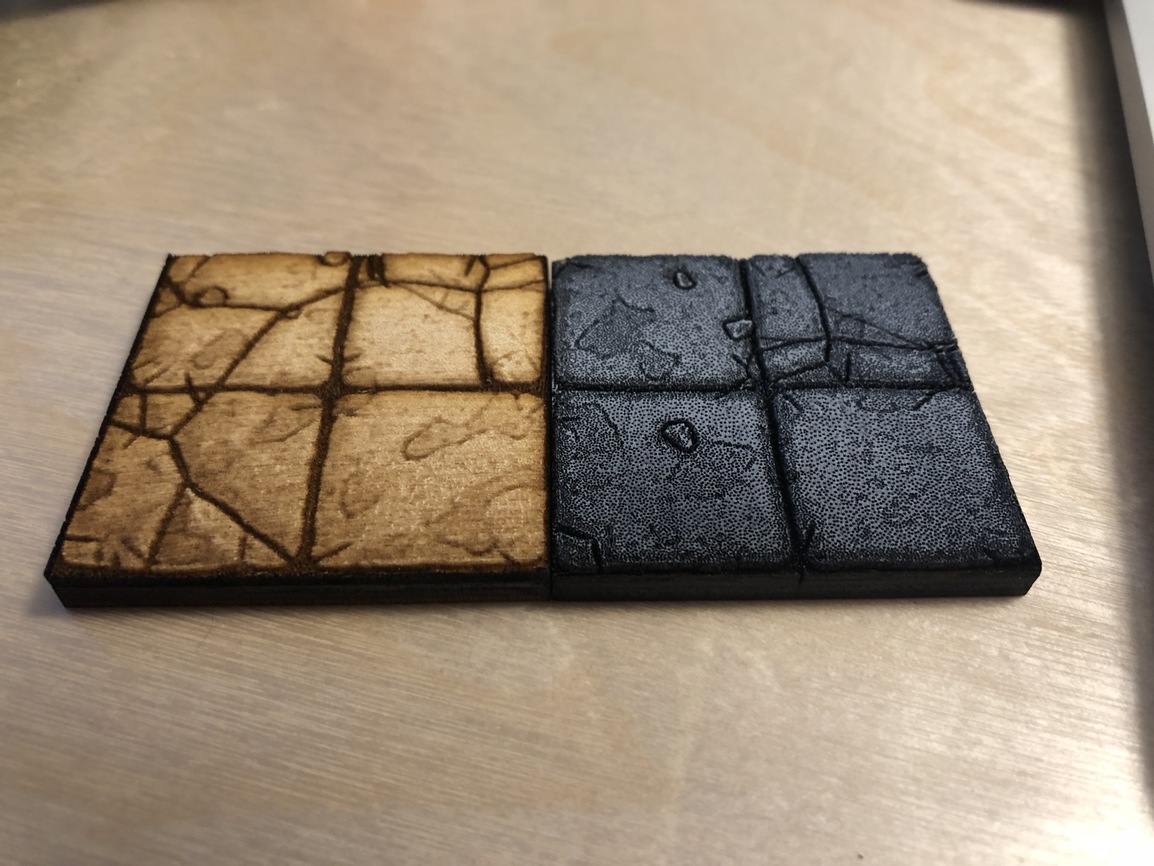
I’ve been working on some designs for Dungeons and Dragons dungeon tiles. These are used when you’re playing D&D to map out the dungeon for the players to play on with their miniatures. You may have seen some of my other work like this that I posted previously in the Temple of Tiamat.
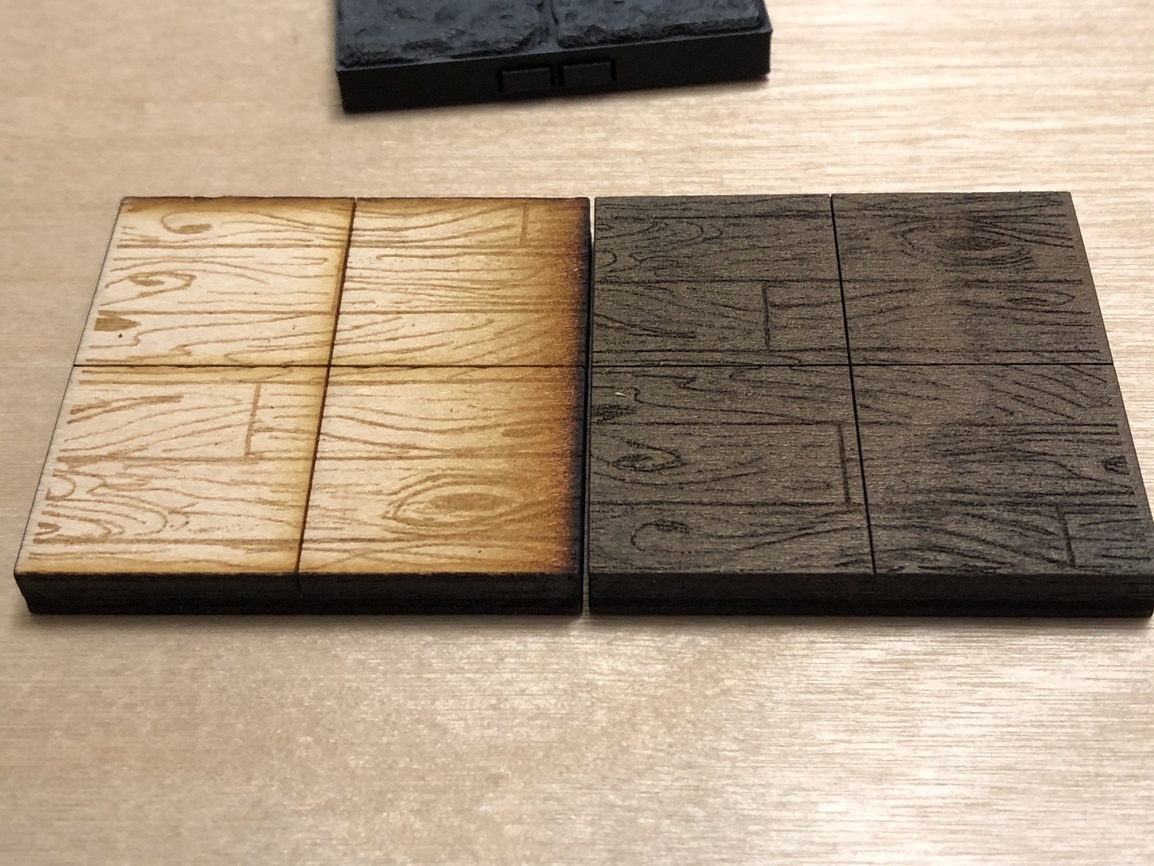
My original idea was to simply engrave and cut them and leave them as raw wood, but when compared to 3D printed dungeon tiles, they just looked unfinished and cheap, so I thought I’d play around with painting them, and I’m so glad I did, because the results are pretty phenomenal.
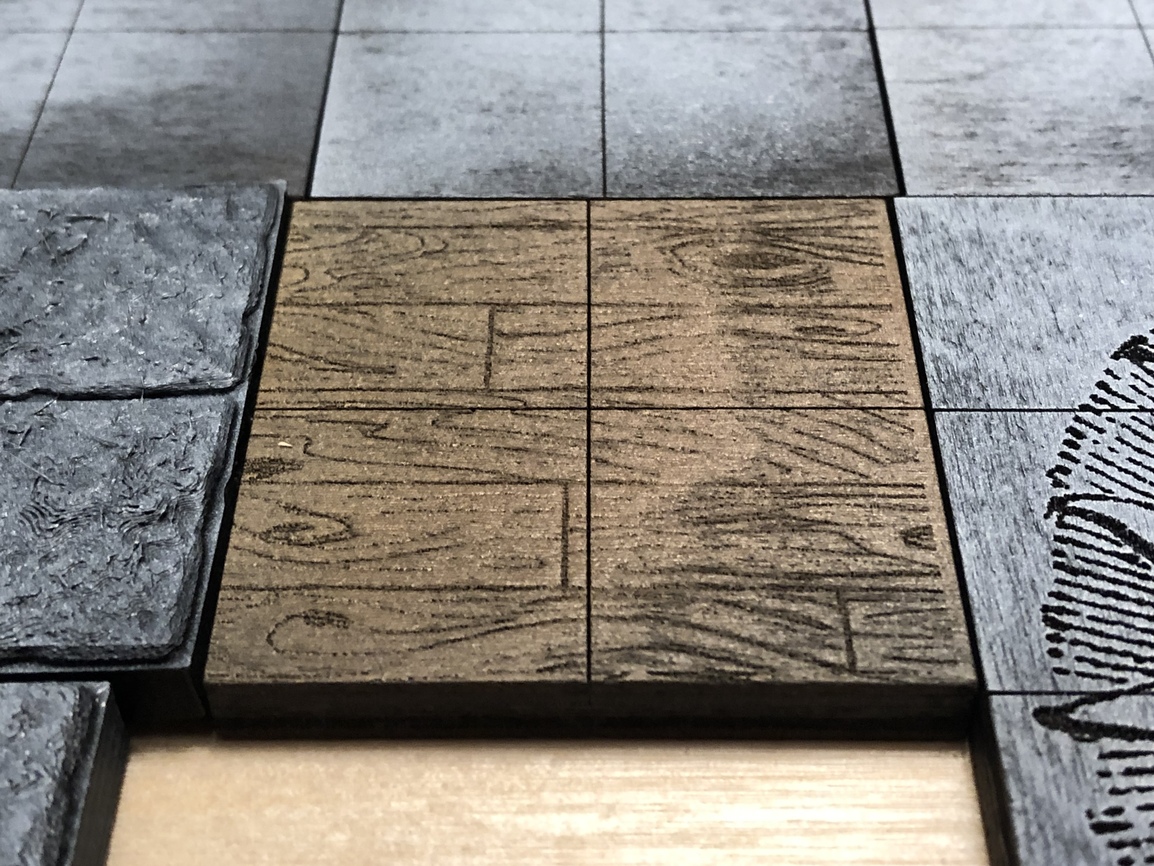
The cool part is that I prime them first with black, and I make sure I get the black all the way into the engraves and stuff, then I come back with a neutral gray, and just hit it with a light spray of that, and then finally, I do a highlight pass with white. What winds up happening is that the engraved areas keep the black paint, while the white and gray sit on top, this really brings out the design spectacularly. Even the light engraving I did on the tiles that have wood grain on them came out great when I painted them brown.
They print really well, and paint up nicely. The best part: They are SUPER CHEAP… so lets run the numbers:
For those of you who don’t know, the “Dungeon Tile” concept kinda grew popular as a result of a Kickstarter, called Dwarven Forge. You can find those tiles here.. There’s even a documentary video that talks about how they were created you can see on Netflix called The Dwarvenaut.
The Dwarven Forge tiles are pretty darn good, and if you have the money and lack the capability to make your own, they’re a decent option. The biggest problems with them are:
Expensive. They ultimately come out to be about $2.50-$3.50 per tile, give or take.
The sets they come in are not particularly flexible. I can’t pick and choose parts, which leads to…
They seem to insist that you have pieces with walls, which I have NO interest in, because walls just get in the way of seeing what’s going on.
They are thick! About a 1/2in each. Which makes them heavy and hard to pack and transport.
Another option is 3d printing your own tiles. There’s a project called OpenForge. The disadvantages of this are:
SLOOOOWWWWW… takes approximately 3.5 hours to print a single 2x2 tile.
Kinda expensive. Costs about $1 per tile in materials.
Still thick, though not as thick as DF.
Now, compare these to cutting my own out of Baltic Birch plywood. I get my BB from a specialty wood store which sells it pretty cheap, but if I just look at WoodCrafters, where I can get BB in 12"x30" sheets for $6.99, I can get about 90 tiles out of one of those sheets, which puts me at about $0.08 per tile. They take 5 minutes per tile to cut. They are all uniformly 1/4" thick, which makes them super easy to pack, and 1/4" plywood is super light, which makes them easy to transport.
What settings are you using? Mine take over 18 mins per…which was why I decided at the time this wasn’t going to work. If I could cut my time down to 5 mins per, and keep the quality, I’d use the GF. Fastest the GF can do on a pro is 16 mins. =(
Just a FYI, non-PG settings can only be discussed in the Beyond the Manual section, so posting them here will result in this thread being moved there (which isn’t a bad thing at all, it just can upset people when they don’t know it’s going to happen).
Wow! 18 mins per 2x2 tile? That’s crazy! (Incoming settings, please feel free to move this thread to beyond the manual. :))
I’m using Birch plywood from Home Depot currently. I have another source for Baltic Birch plywood that is cheaper and better, but it doesn’t cut as well because it’s TOO strong.
For engraving, I am using Full Power, and full speed, focused at the height I measured the plywood at, which is about 0.245in.
For cutting: Full Power at 180 speed. Same focus.
Technically, to do a single 2x2 tile, it can take IIRC, about 7 minutes. It’s a 2in by 2in engrave, and then cutting out the square. But, if you design it as a 4x4 tile, and then cut it into 2x2 pieces, so if can do all the engraving in one pass, it cuts them in about 20 mins, so it comes out to be 5 mins per tile.
Importantly: Anything you can get to get cut together will speed it up, so for example, don’t put the grid into a seperate engrave/score… do it as part of the initial engrave. Makes it much faster.

 Thanks for sharing!