I wanted some custom stamps for my product packaging and envelopes, and I had been trying to make them with the 40 watt Versa Laser at my Makerspace by cutting individual letters out of a sheet of silicone that the Silhouette company makes for you to use on their cutters. I had very mixed results and for no good reason some letters wouldn’t cut all the way through or they would fall through the holes if the pieces were too small and I would have to go try to fish them out. You obviously couldn’t do anything really detailed or it would fall through the cracks or just obliterate itself from the power of the laser. It also is really freaking messy leaving white powder everywhere.
I’ve been doing a lot of playing around with molding and casting and had some liquid silicone Alumilite high-strength 3 used for mold making (it can be bought at Hobby Lobby in the model section with a 40% off coupon!) and thought duh why don’t I CAST the stamps. I hadn’t messed with acrylic yet and realized silicone will not remotely stick to it when it’s curing, so why don’t I use all of that scrap getting thrown away up at my Makerspace and cast stamps with it!
But since doing this, I realize how many amazing things I can do with the acrylic and silicone combination and I’m looking forward to trying some of them out next time I can get up there. Once I have my Glowforge I won’t have to wait. This whole waiting is painful to a right brain that doesn’t shut off. Next thing I want to engrave and cast are rings or bracelets…
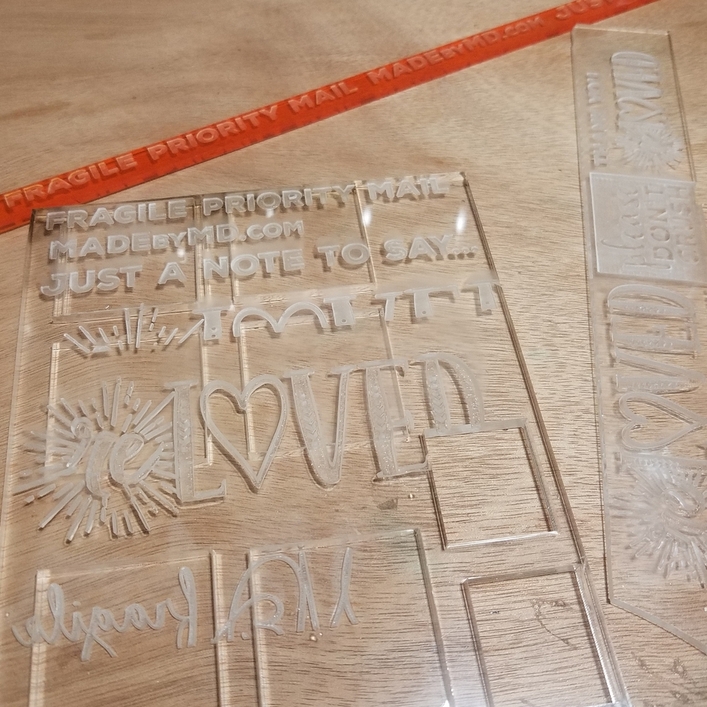
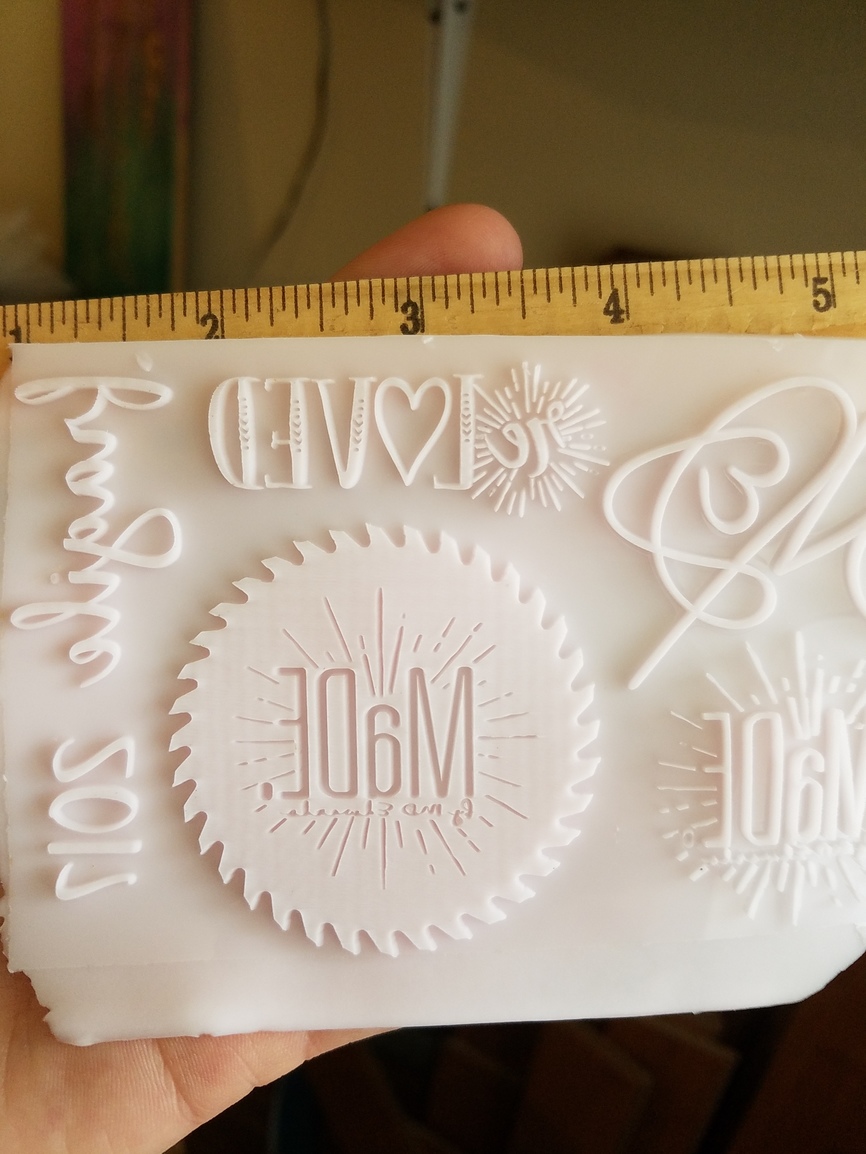
Please note my guessing on placement on the scrap…where the Glowforge would have saved me from my own stupidity. lol
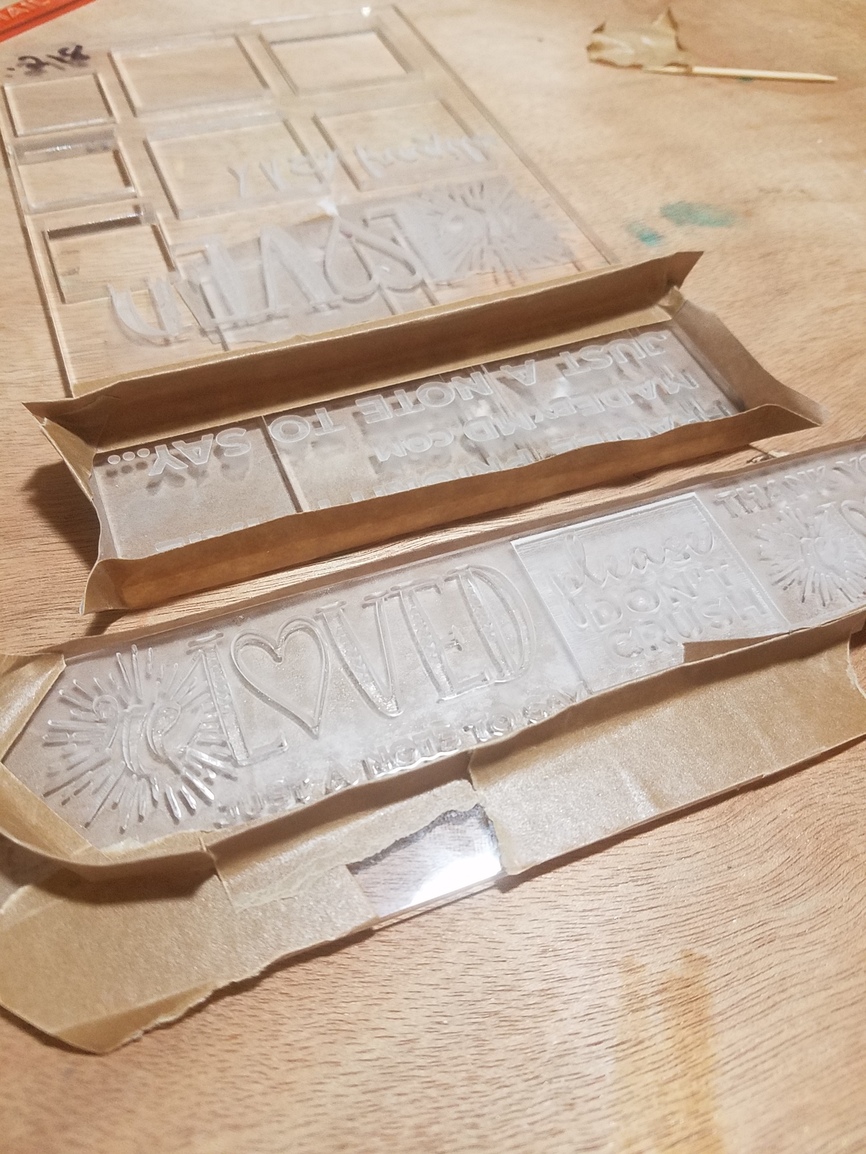
I found something else that brown boxing tape sticks to as viciously as it does to paper and skin… ACRYLIC. I was not expecting that, but it worked flawlessly to make little edges around the designs. When it sticks it is INCREDIBLY bonded. Comes off, but not if you don’t want it to.
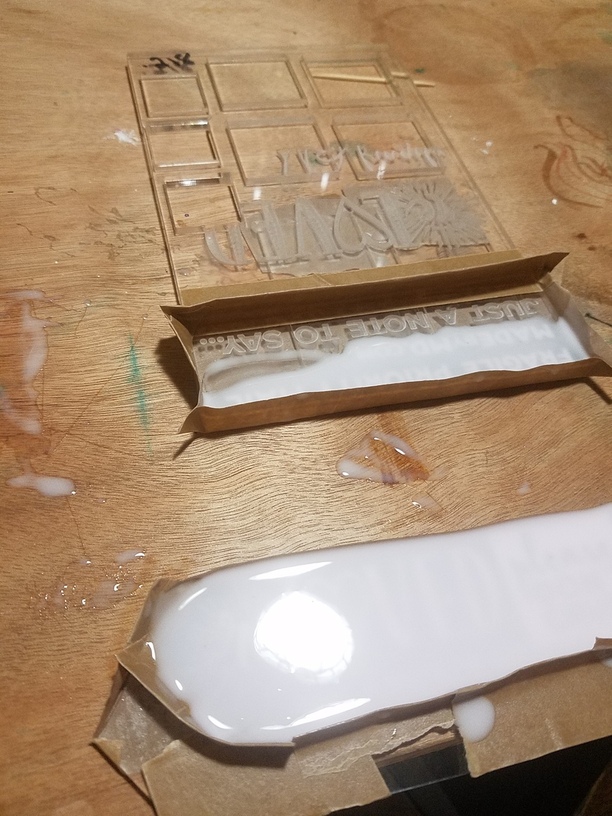
I filled in the etch…and don’t try to turn around to talk to someone if you have silicone in your hand… it ends up on your table. Not helpful. lol
Things I learned…
-
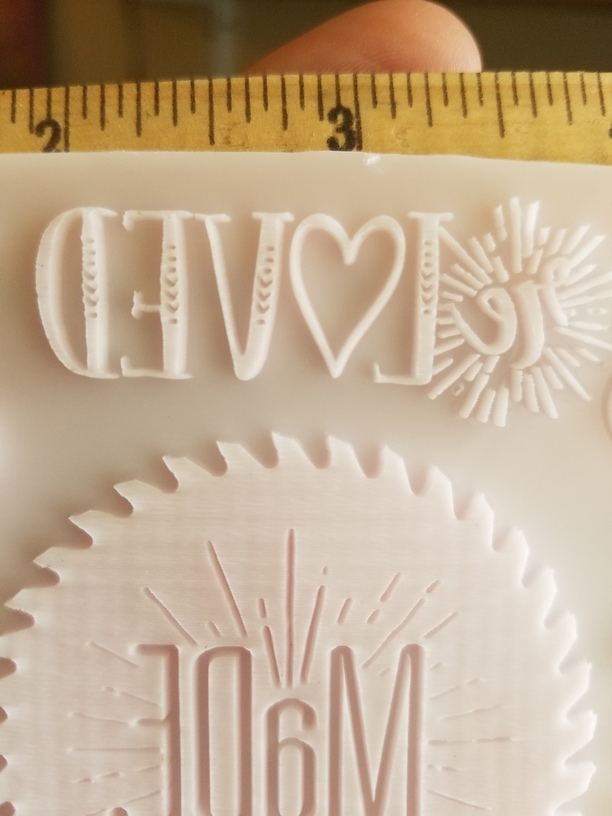
Do a trial and fine tune your depth of engrave with your chosen silicone strength and denseness. Using something like I did makes it come out flawlessly from the cut because it’s super stretchy and strong. I didn’t lose a microscopic piece to the acrylic using this. But, on the really skinny stuff I engraved too deep so it won’t hold up if I go to press on it. If you were to do something with less flexibility it would probably work better but not stand up to having to pull. I will update this thread as I try different types so that it may save somebody time and money. If you’re doing a really detailed design you don’t want it to be very deep because no silicone will be dense enough. If it’s really really fine, then do a negative space image where the design is removed. I was stunned with the level of detail I got. This isn’t with a Glowforge, so I can’t speak to is ability yet.
-
Depending on your settings, you are going to have striations in the solid portion unless your design lends itself to working ok defocused. (See awesome other post on forum) If that bugs you, and if you do it deep enough you could just pour in some resin and it would completely smooth it out before you put your silicone in.
-
The finer detail in the design the more likelihood you’re going to get bubbles, so you want to use a initially thinner silicone (pourable vs caulk) it will release the bubbles and so you can pop them when you see them. You can spot the tiny bubbles in the too small detail.
Just cut them apart and put them on clear acrylic blocks… I will try to do this with clear acrylic next if I can find some that works well. -
I wish I would have cut each stamp out of the acrylic completely by themselves so that I have stamp blocks to put them on the reverse side. Oh well… I guess I’ll just have to do it on the bandsaw. But it will be very cool to just just be able to color fill in the word (if you don’t want to recast from it) and be able to know what the stamp is on the shelf.
-
I will design in empty spaces to begin pouring the silicone on to the flat surface. You always want to pour in one spot and allow it to fill in itself to prevent bubbles. The one I didn’t do this on was full of them.
-
Having a Glowforge will be nice because I love recycling and using scrap. I’m a scrap hoarder. Here is an example where I went had to head with placement with the VersaLaser and lost. 20 minutes on a deep engrave I’ll never get back. Yeah yeah measure twice cut once. I know. I know.

-
Talking into Google Docs is so much faster than typing.
I’m looking forward to the plethora of the knowledge all of you folks can add to this and impart on me and also when this and the other hundred projects I have either done or am planning can be put in the made on a Glowforge category. I could finally start making my YouTube videos ![]()
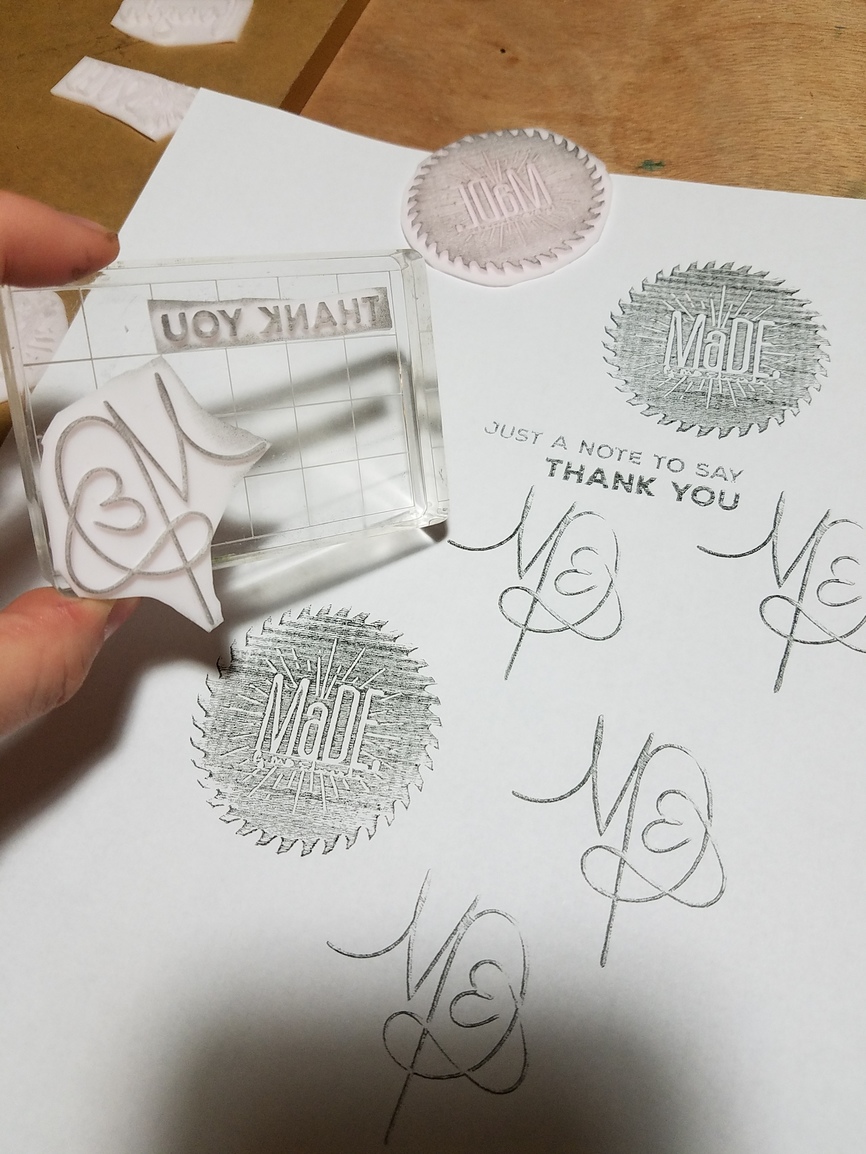
@jules made me realize I didn’t post the actual stamping. OOPS! Silicone will not stick to acrylic when curing, but once cured it sticks perfectly to a clear acrylic block you can buy with a grid for alignment (we can easily make ourselves) that you can change your stamps out as you wish. I am using a not so new charcoal colored solvent stamp pad, but it still worked great. I will for sure try a little less flexible silicone and or not engrave so deeply. Those words I really had to hold rather still to keep from blurring… the saw blade not hard at all. With this particular ink, it is REAL obvious to see the engraved texture of the solid space… this will need to be fiddled with once I have my own. I am not spending more time learning this thing. lol