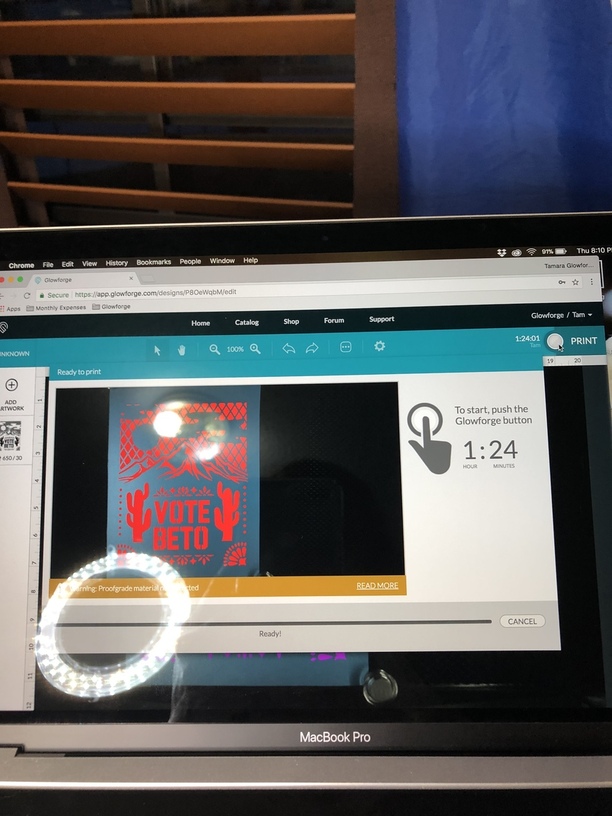
So I wanted to cut what I thought was a fairly straightforward design with my Glowforge Basic, using some of the settings I’ve found on here, but it’s telling me that it’s going to take an hour and 24 minutes? It will take about 5 minutes on my Silhouette. (Yeah, yeah, I know- so why don’t I just use the Sillhoutte, right?). Am I missing something or doing anything wrong, or is this normal?
Forgive me- I’m going to Grad School right now and I haven’t had nearly the amount of playtime on this as I want to. Any assistance is greatly appreciated.
Appears you have a B&W design set to run as an engrave, which means the laser has to pass over the entire image hundreds of times per inch, burning away the dark areas and skipping the light.
Your Silhouette would be cutting the perimeter of those areas, not scanning back and forth removing tiny pieces.
So to produce the same result with the laser, you need to convert the raster (bitmap) image to a vector, which would trace the edges and would allow it to simply cut the pieces out, the same way as the cutter. The specific method will depend on which application you use, but in general, it’s a “trace” function applied to a bitmap.
Thanks SO much for the explaination. That make PERFECT sense. I’m still new to this and, I have to tell you, absolutely TERRIFIED of doing something stupid and destroying this thing I’ve waited two years to get. I’ve only done a few proofgrade cuts so far, due to being in Grad School (something I hadn’t even considered when I bought this thing). BUT- I’m skipping Summer Sessions to give me time to PLAY!
Just one more thing - if you do switch to “cut” on paper, be aware that the laser head can not change direction instantly, so it has to slow, then accelerate off again in a different direction. When cutting paper or other light materials, this will lead to more “scorching” at/near those corners. Depending on the design (and software you use), you might be able to “round” those corners slightly. There’s lots more on here about that, but just wanted to make you aware.
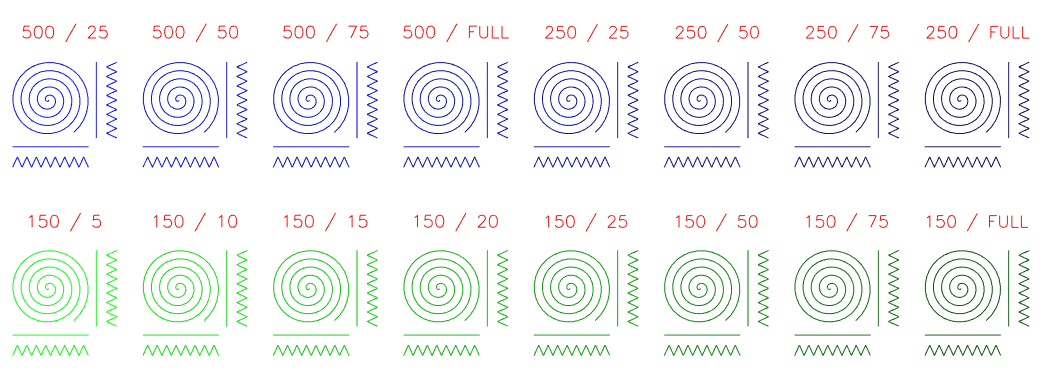
We cut a lot of paper, I use this test pattern to dial in settings. The spirals are great to test for through cuts, the zig-zag tests corners and causes the laser head to slow down to see how it will behave on intricate cuts.
I didn’t include a raster pattern, because I’ve had such limited luck with actual raster engraving, it’s crazy dependent on the paper. I found with coated papers (which is typically what I’m cutting) it often ablates the coating and only lightly browns the paper underneath.
Like others, I use magnets as a hold down. Also, I found if you put a sheet of copy paper under your actual paper prevents scorch/burn/ash marks on the underside of the actual paper.
Yep, cardboard, card stock, foam, all kinds of things. I generally just use the whole thing which gives me a sense of how the material behaves. But when I’m test stock similar to something I already use, I’ll just pick a range around the parameters I think will work and set the others to ignore.
Thank you… I’ve been struggling to get a grip on this, but I used your template to create this test on one of my desired materials (1/8" chipboard), but around 50% reduced (approx. 3.5x1.25). Using 500/10 for the text, and the associated settings for each sample, here’s the result:
Full = 100% for my Pro. It’s not clear in the pic, but 500/75+100, 250/75+100, & 150/50+75 all cut thru cleanly, without adjacent scorching or burning - which is the issue I’ve been struggling with…
As you would know, 150/100 cuts first, and had me reaching for the fire extinguisher I have next to my GF…