So, in preparation for the soon-to-arrive machine of wonder I have been looking at scroll saw puzzles, like from this book. There are so many trees here in Norway, so an extra woodworker will do no harm…
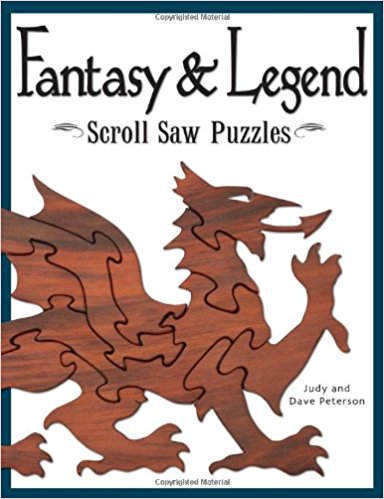
Converting the puzzle into a vector image worked out better than anticipated.
However, I do struggle connecting the different vectors into a single one. Would a file like this one cut on the Glowforge, or would it cause and error because it consists of too many separate paths ?
Is there a simple method to connect the paths ? I do hav Illustrator CS5 and access to Rhino (though i have not worked much with either of them).
I try to attach images of my vecotor file illustrating the issue and an svg version as well.
And here the svg:
I’d greatly appreciate your input !! This goes without saying that the work of this book is, of course, protected and I reccomend bying it
The SVG has a TIF file embedded rather than vector lines.
From a pathing standpoint, if these were all vectors, it shouldn’t pose an issue. It’s not overly complex.
From a designing perspective, the Glowforge is going to cut whatever you tell it to cut. Meaning, any vector lines that are in the file are going to be cut. You’ll want to be careful of double lines. For connecting pieces, you’ll want to make sure that you only have one shared line between piece 1 and piece 2.
First thoughts on looking at this, if I were to design it, I would pen trace the outside of the entire design on its own layer. Then, I’d start working through interior pieces.
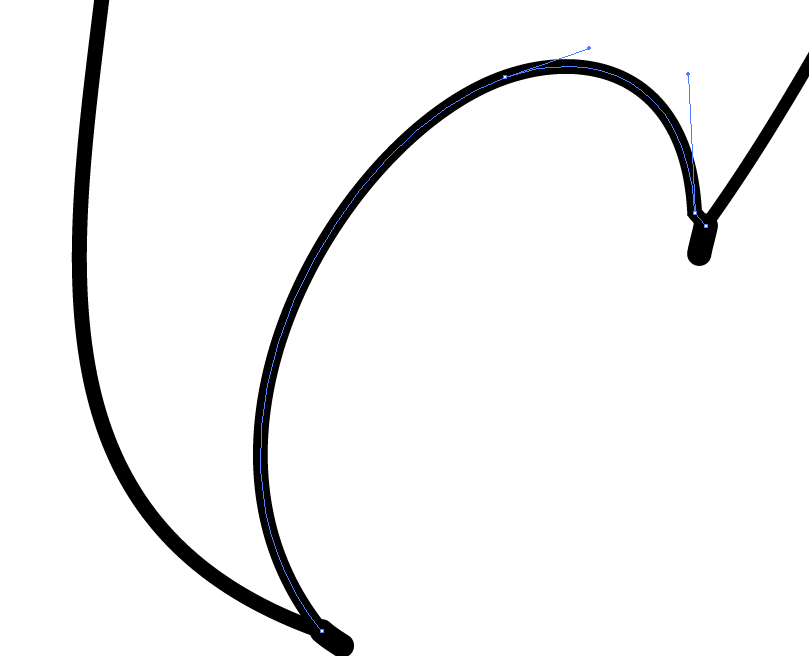
For example -
The red path in this would be part of the entire outline.
Then the green path would butt up against, or just a hair off of the red path, and I would continue that to where it intersects back with the outline.
The green path has a branch off, that is shown by the blue line. Make that a separate path that connects all the way back to the outline.
To cut it on the Glowforge, I would make 2 different colored strokes for the paths. One for the outside outline, and then all of the interior paths a separate color.
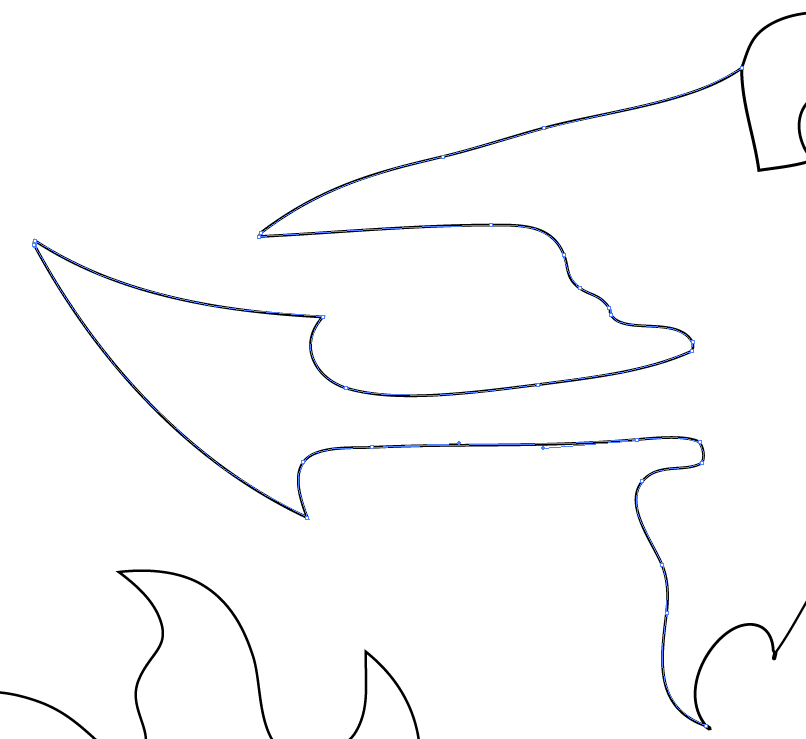
By the way - the loops that you showed on the details on the head - to see exactly what the Glowforge is going to cut, go to Outline Mode in Illustrator ( command-Y) and it will show you exact path the laser will take. When you’re drawing those tight little curves like that and are using bezier curves, the anchors will default to keep making curves. If you hit a “point”, like at the top of the head where it goes up, and then sharply back down, when you hit the top point of that curve, hold the option key (on Mac) and click the last anchor you put down. That will reset the anchor point handles and you won’t get the loops.
Thanks so much for taking you time and explaining the technicalities in a way a newbie can understand!! I guess I had hoped I could just convert the image into a vector and hit print. But I am starting to realize that even the use of high tech tools like a laser does not remove the necessity of preparing the job carefully I Very much appreciate your help
A lot of stuff you can run through the image trace and have “good enough”. Just remember, your print will never be better than the source, so you should try and have the best source file available.


 I Very much appreciate your help
