Faux metal badge -- Draftboard, 3d engrave, paint

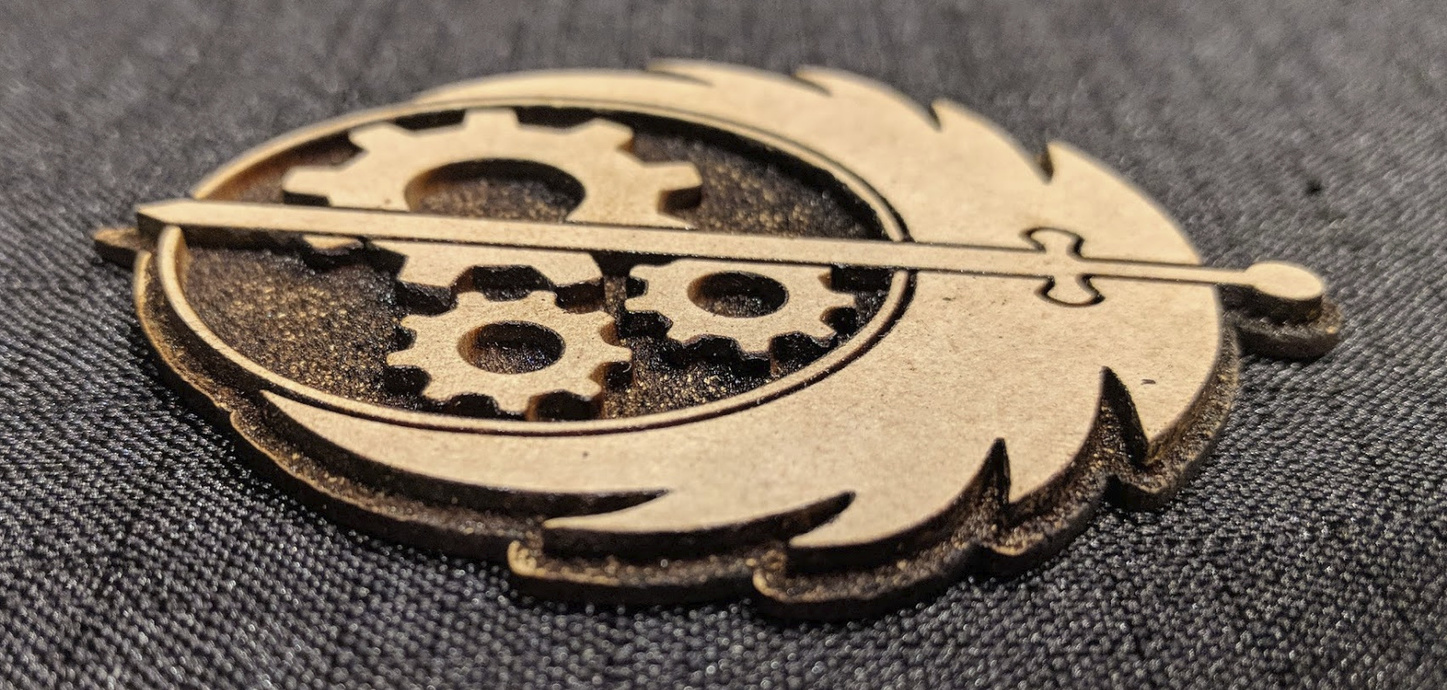
I wanted to explore 3d carving, so tonight I did a quick proof-of-concept 3d piece and finished it with a quick and dirty paint job. I’m looking forward to making these kinds of things for costumes and this first test was very satisfying!

Here are the process details if anyone is interested:

  • The artwork is a raster image with the high points being white, and the low points being 100% black.
    • I started with a vector file that I found online, used Illustrator’s Object>Path>Outline Stroke to make a surrounding object for the border. (I had to Pathfinder>Merge the border object shapes together.)
    • The border and the artwork were Rasterized at Illustrator’s default 300 dpi to create an engraveable bitmap
    • I used a copy of the border object to create an exterior cut path
    • Saved As SVG, looked like:

  • The material is Draftboard
    • Operations were 3d Engrave for the interior raster image and obviously one Cut
    • On default Draftboard 3d Engrave, the 100% black areas are cut in about 1/16", half the depth of the material.
    • This 3" tall object took about 17 minutes to burn.
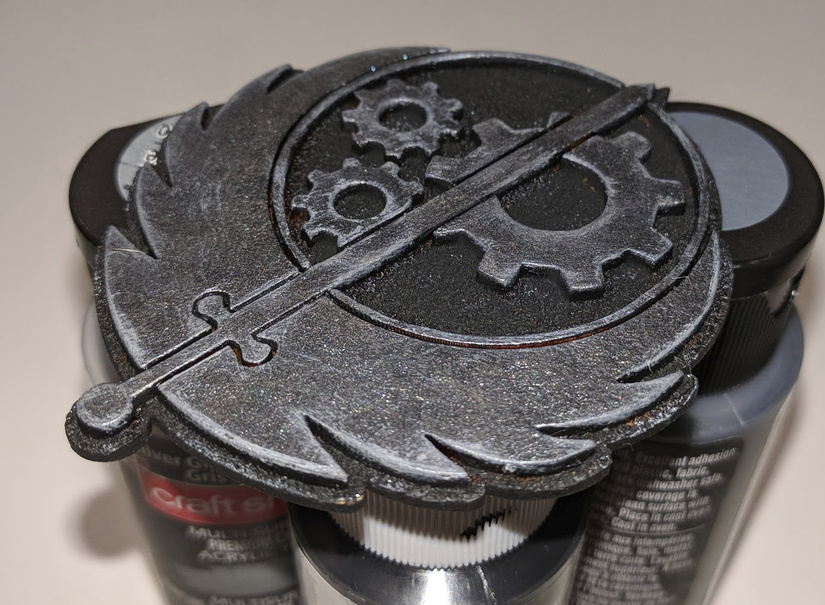
  • The paint is “Craftsmart” from Michael’s. How to paint, well, you could write a book about it. (If you do, please let me know, I should read it.) But here are the basics for this piece:
    • Flat black base coat
    • Dark silver on the high points (this is easy to do with a sponge brush, that 1/16" of relief is more than enough!)
    • Drybrushed the edges with a slightly lighter silvery color. This could look better but I haven’t done any model painting in about 20 years!
    • This object will probably look better coated with matte finish. The shiny gunmetal obscures the lighter weathered edges and the thing actually looks kind of lame unless the light is just right–then the depth really pops.

Before paint:

image

96 Likes

Very nice. I especially want to thank you for the write up. Very clear and helpful.

2 Likes

It looks great! I really like that gunmetal finish.

3 Likes

I think your results are stellar!

1 Like

Awesome! :grinning:

Oooooo!!! Looks great!! Love the design too!!

Wish I could say it’s mine, I just used something from a video game. :slight_smile:

  1. Shows folks that I know about video games.
  2. It’s still fabulous!!

Excellent project and result!

Thanks so much for the great write-up as well! You happened to describe something I was just about to tackle tonight as a matter of fact! (Creating a border around an object.)

Exquisite texture! Thanks for sharing your dry-brush process.

I think it looks great. Thank you for the write-up

I adore this!

That is really cool…!

Just saved this one, thank you for the write up. Cosplay badges and plaques here I go!

This is great! I love that you took the time to add the detail about how you did it. There isn’t much info anywhere about how to get the Glowforge to do what we want. Was really hoping some other Founders would start doing some YouTube videos, but I have not seen much. I think the paint job looks great, too!

A really neat project! Always fun to read the process … Thank you for that!

I will have more to post on the topic in a bit. I am working on the next project now and learning a lot… Getting laser-carved wood to look like real metal is going to be tough, though.

Looks amazing. Do you know if we can paint draftboard THEN engrave it? Or not advisible? New to GF

Yeah, you can. Just use acrylic paints.

1 Like

Thank you so much! Love seeing all the creativity in forum, you talented bunch of creatures!

1 Like