I finally got around to doing something I’ve been dying to try ever since I pre-ordered my Glowforge. Wood inlay!
I know lots of other people have been using their Glowforge to do inlay since day one. There are already a number of other posts/tutorials on the topic but I’ve chosen to skip the research phase and jump in feet first. I’m so happy with the results thus far that I thought it might be worth sharing some of the details of my naive attempts. I’m also curious how my process lines up with what other people are doing.
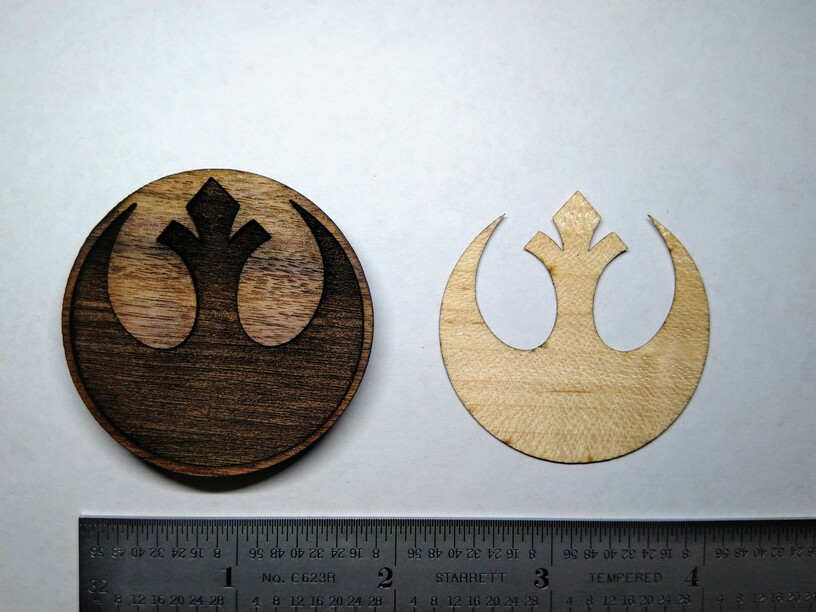
Materials: solid walnut (1/4" thick), maple veneer (0.018" thick), and Titebond II wood glue.
I wasn’t too worried about cutting out the veneer so began by dialing in the settings for the walnut base material. I wanted to get the edge of the engraved area as crisp as possible without spending a ridiculous amount of time on the engraving, so I decided to score the outline of the engraved area before doing the engraving. I ran all my test pieces at 225 lines per inch and I think that scoring the outline produced a much nicer looking edge than engraving alone. On the other hand, I haven’t tried just engraving, so maybe this is overkill.
This is my second attempt at dialing in the engrave settings. It took me a couple more attempts (adjusting the speed and power) to really nail it. I kept the number of lines per inch constant at 225.
What didn’t work:
- Full Power–too much power at any speed.
- High speed–cranking the speed up to 1400 seemed to produce a bit of a shallow ramp along the left edge of the engraving. Not sure why. I also noticed that setting the speed to 1400 didn’t decrease the print time compared to a speed of 1000.
- Insetting the engraving from the score path–at first I was worried that the engraving would overlap the score line, so I tried insetting the engraved area inside the score line by 0.0025". This turned out to be unnecessary and, surprisingly, left some high spots along the left and right edges of the engraving.
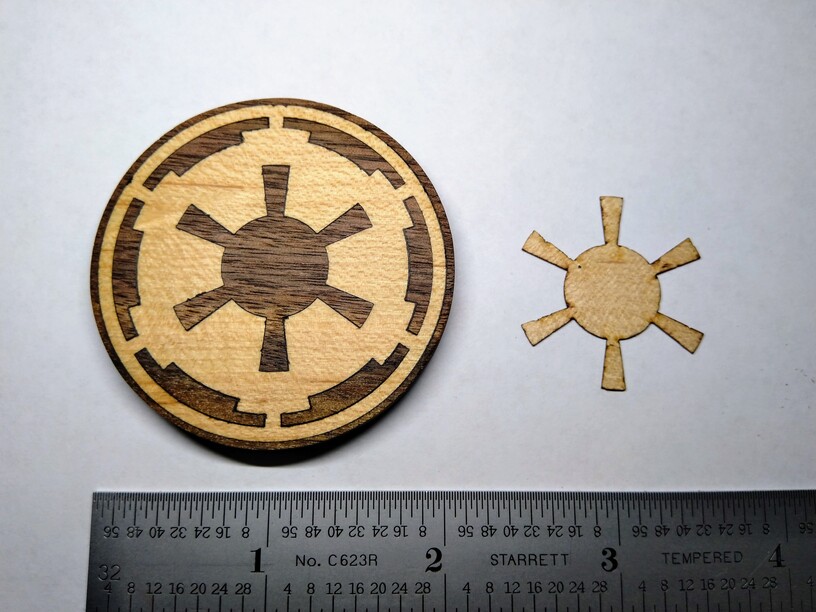
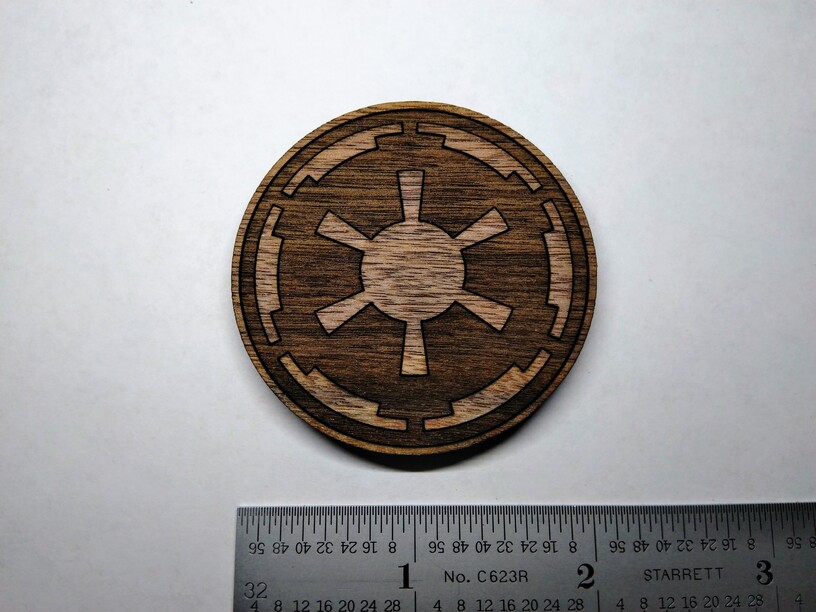
This is my first successful-ish attempt.
Procedure:
- Score–speed 150 / 20% power
- Engrave–speed 1000 / 80% power / 225 lines per inch
- Cut–speed 125 / Full power
- Inlay cut–speed 257 / Full power (proof-grade veneer settings).
I created a 0.005" kerf adjustment between the base material and the inlay using the stroke to path method in Inkscape.
Engraving at 80% power was just slightly too much. There were a few spots where the depth of the engraving was just slightly deeper than the thickness of the veneer.
Perhaps I should have been a little more worried about cutting out the veneer. I should have known better than to choose the proof-grade veneer settings to cut out my veneer. This veneer is only 0.018" thick and doesn’t have any adhesive or paper backing layers. If you look closely, you can see a number of places where the edges of the veneer are jagged and burnt. I was so tired/excited at the time that I didn’t even notice before gluing down the veneer.
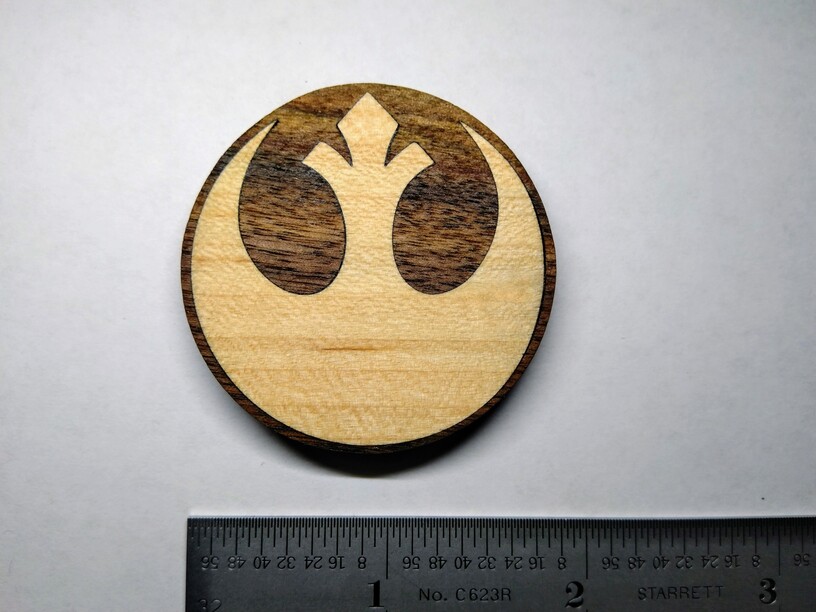
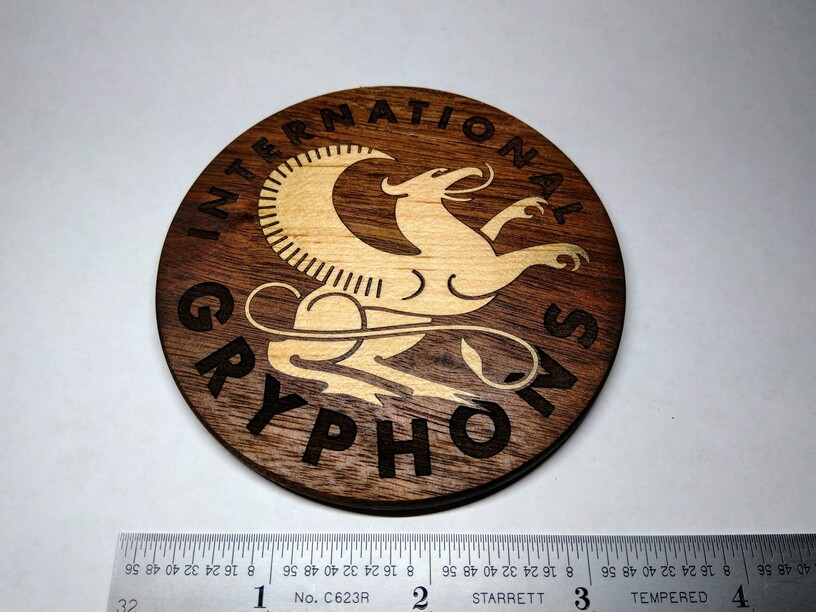
This morning I switched up the design and made a few adjustments, with noticeable improvements.
Procedure:
- Increased the kerf allowance to 0.006" (Pretty good. The veneer press fits without any glue in most places.)
- Score–speed 150 / 20% power (unchanged)
- Engrave–speed 1000 / 75% power (Just right! The veneer sits just slightly proud of the base material.)
- Veneer cut–speed 150 / 20% power (Hey, if it’s good enough to score the base material to depth, it’s good enough to cut through the veneer.)
Thoughts:
- I’m pretty sure I can get away with speeding up the engrave by reducing the number of lines per inch and increasing the power. At what point does the engraved surface become too rough?
- I get a pretty tight fit with a 0.006" kerf allowance, but there are still a few spots that are a little looser than others. Not really that noticeable without a magnifying glass though.
- I think that cutting the veneer back-to-front (i.e. flipping it over) looks better since the kerf is always narrower on the back. On the other hand, this veneer is only 0.018" thick. Am I crazy?
- I’m aware that hide glue is the traditional adhesive of choice for inlay/marquetry, but Titebond seems to work just fine. Curious if anyone here has any thoughts on using hide glue vs. Titebond (PVA glue) for inlay.
- I am just so chuffed at how well this simple test turned out, I can’t wait to try something really spectacular!