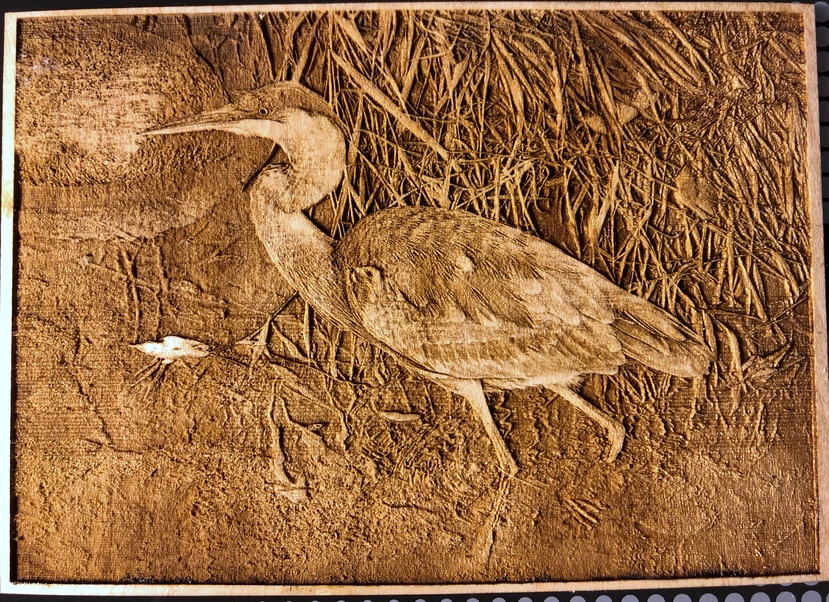
The finished product!
Finished size is approx 15cm across.
PG Maple Hardwood, HD photo, Vary Power default settings. Approx 46 min engrave, GF Pro
Not too unhappy with the result but I have some questions for the veterans in the crowd.
after cleaning up with isopropyl alcohol and a toothbrush the finished piece is slightly warped. I tried not to use too much liquid but the thin PG and the engraving seems to exaggerate the warping a bit. Any tried and true methods for flattening it out other than gluing it something else?
I was surprised at the depth achieved. Is it better to increase speed or reduce power to reduce the engrave depth?
is there a good ‘clean up’ setting to use as a second pass that might smooth out some of the larger field areas or would I lose some of the detail in the feathers?
Does the depth of the engrave stay consistent regardless of the overall size of the piece? i.e. on a larger piece would the depth changes seem more subtle because of the relative size?
I’ve read a few of the tutorials on prepping photos but still experimenting a bit. I wish these engraves didn’t take so long so iterating with variables was easier.
Any other comments or suggestions?
I am not a person with any photo editing or engraving knowledge. I just want to say that I love your original photo and would love to see some of your other photos before you convert to black and white.
Any tried and true methods for flattening it out other than gluing it something else?
Pressing while wet but it will likely not get it perfectly flat. It’s hard to do after the fact, though. Steaming the back, if you have the ability (a clothes wrinkle remove) might work - I’ve never tried it, although I have one and several pieces I wish were not as warped. I might have to try it myself! lol.
Is it better to increase speed or reduce power to reduce the engrave depth?
Either would work but you need to test - see my last comment below…
is there a good ‘clean up’ setting to use as a second pass that might smooth out some of the larger field areas or would I lose some of the detail in the feathers?
You would need to mask out the detail you want to keep (solid white) and then run with the focus offset to soften the detail. However, in future, you would be better understanding what the sharp detail in your original file would produce, and softening that in your editing software.
Does the depth of the engrave stay consistent regardless of the overall size of the piece?
Yes
I wish these engraves didn’t take so long so iterating with variables was easier.
Testing. Take a representative portion(s) of your art and cut into a small file, run tests on the target material. Play with settings - speed and power. Play with the softening of detail in the file, as I mentioned above. Find what gives you results you are looking for, then run the full print.
Thank you @dklgood. I’ll use the opportunity to plug my instagram account. I’d love you to drop by and take a look. @dimitri_harvalias
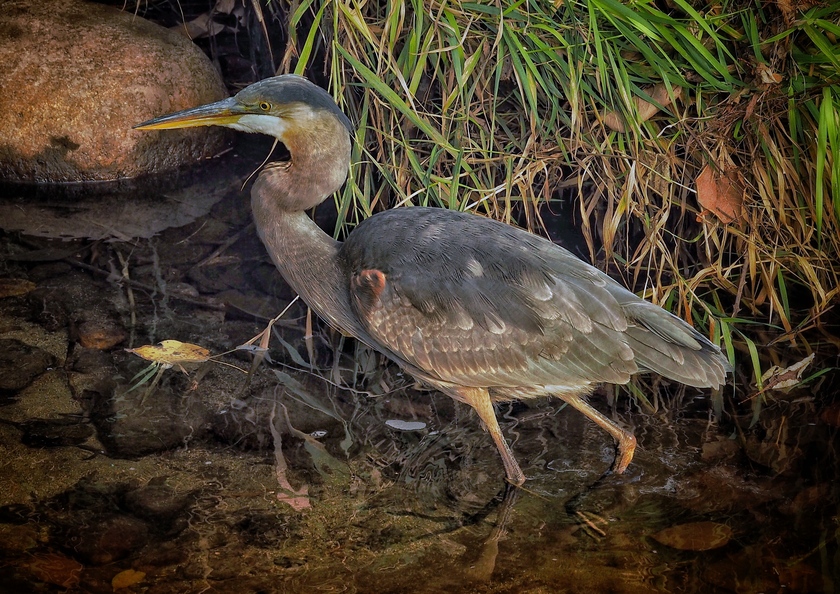
In the meantime here is the original of the engrave
Thanks for the feedback @eflyguy. The piece has had a little time to dry out and seems to have returned to ‘almost flat’. I’ll be sure to press the next ones I do.
I find it tough to get a representative sample that covers enough of the range of deaths to get a real feel. Either way, the full size tests aren’t a total write off. They make for good examples and are all part of the learning curve. I’ll continue to toy with the editing of photos. Thanks again.
Great photo! I saved one of those when I was working offshore once. (Actually flew it back in with me on a helicopter…it had gotten blown out to the rig in a storm and would have died out there so far from land. Quite a bit of irony there.)
Not much else to do when you’re offshore waiting on a logging run. (The part that tickles me the most was the bad-ass roughnecks knocking themselves out to craft a little carrying cage to transport him in…they actually welded a grating to a metal box so he could look out. People are wonderful inside…even the roughest of them.)
When I was fishing I was trying to catch something bigger but kept getting little brem and a whole school of them crowding around. Well this Blue Heron noticed and cam looking for a meal begging for the little Brem as I caught them. A bird with a bill like that, that can stand there looking you in the eye two feet away can be very intimidating.
Wood will keep its shape dry that it had when wet, I broke an 18" tile but I can press wet wood between two pieces of cloth that are compressed by two pieces of tile compressed with a few clamps. So being other than flat is not an option.
Really Beautiful picture and engraving. You did a great job with it and you’re off to a great start.
Weight on it while it dries can help, but using 99% Isopropyl Alcohol also helps reducing warping quite a bit too becasue it has less water than the usual over the counter stuff.
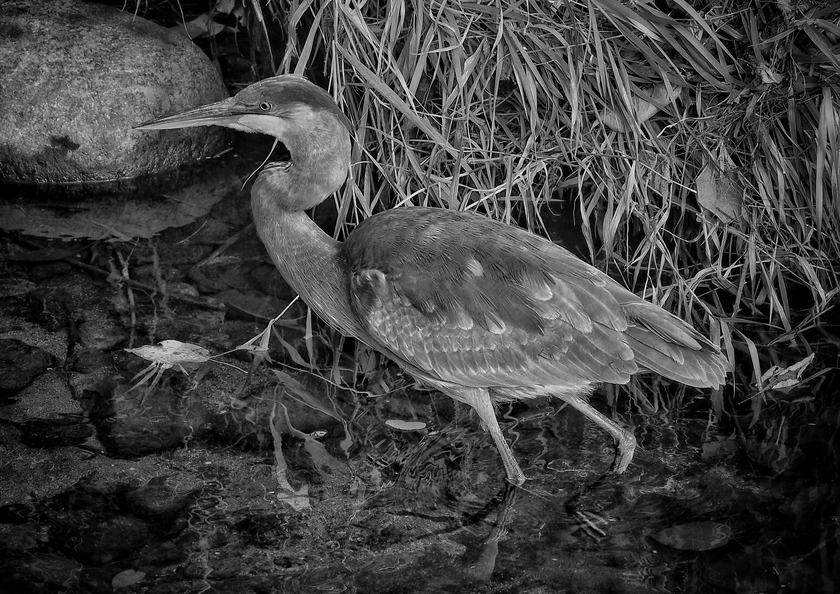
Your title is a bit confusing becasue you call it a “HD photo” engrave, but you used vary power. The GF “HD photo” setting actually uses convert to dots/halftone and it gives a very different effect that will look more like a regular photograph. The vary power you used will create the 3D effect you got becasue the darker the color, the deeper the laser will go.
If you use vary power and don’t want it so deep you can reduce power/up speed, but your photo prep really matters here. Your photo looks good to our eye but to the laser it’s too dark. Keep in mind that when a photo is right for the laser it typically wouldn’t look so good to hanging on your wall and it should be a bit more contrasty and brighter overall than your pic. (There’s a ton of info here and on youtube etc. on prepping a photo for the laser.) Your pic would be really good to learn on and run 3-4 different ways to see what happens and what different settings/photo adjustments can do. If I were you I’d take the exact same image and run it under the real “HD photo” setting so you can see the difference. (Honestly, 45 min for this aint bad at all really.) Then take your picture and make some adjustments such as contrast and brightness and see how they will burn differently.
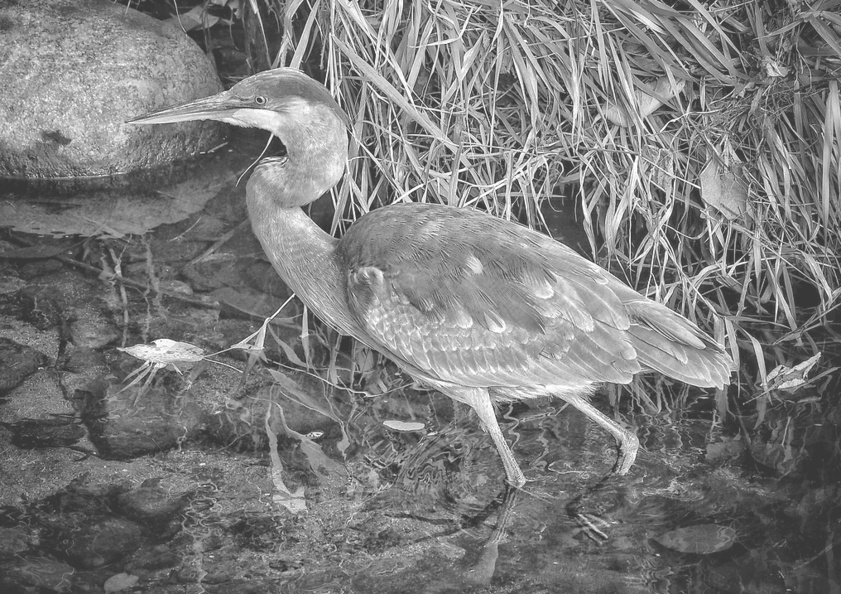
FWIW, this is just a very quick example of what the pic could look like adjusted for the laser. (It probably could even be a bit lighter/more contrast.) Sometimes you need to use masks or brushes to isolate some areas. For example, I think your bird looks great in your original pic, but the background to too dark. I’d isolate them and adjust the background separately.
I tried the 3D engrave option on another photo and it burned through all the detail. Reading your comments I’m guessing it was way too dark as well.
I’ll give the real default settings a try as well as lightening the overall image. Thanks for the response.
The 3D option is tricky it worked out pretty well on that particular image largely by not going too deep, and because the background was about as ideal as possible and there is no strong lighting.
Even so the head of the heron with its dark stripe looks a bit maimed if you look too hard as the color says to go deep but the actual shape is high and rounded. You might starting lighten the head there but increase the contrast so the feathers show dark and deep but the head stays round,
That is just a typical example of what is needed when going for 3D relief carving from a photo. With the sun on one side of a person’s face and the other side in shadow it smashes the shadow side of the face in as example, where in relief carving the natural light creates the shadow and you see it in full relief.
There are ways to get an actual 3d model and then use a 3D program to create the relief image where actual depth is set by the level of gray and you would be able to get 3D relief to half an inch but of course any actual colors would not take. I recall a very nice tiger that looked quite funny with no stripes but that is the nature of relief carving unless you wanted to go back with a paint brush and paint the stripes.