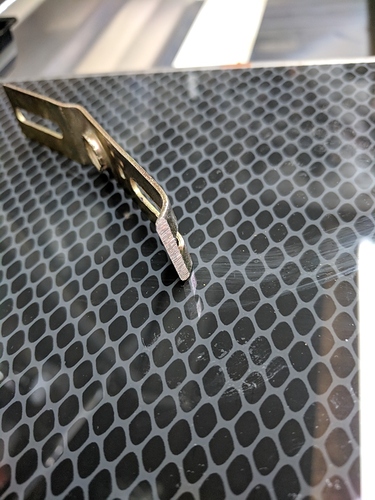
That hole pattern is cut out of an 1/8" sheet of aluminum that spans almost the entire width of the machine. The primary function of that metal plate is to provide rigidity to the case necessary to support the glass lid and keep it aligned.
A bit intimidating at first, but with care removing it is simple. There are three screws on the lid side, one in front and two in back. Then there are 3 plastic tabs on the inside edge of the top behind the three round aluminum tape stickers that need to be carefully deflected ( you do not want to break these) inward to release from the case, then it lifts right off.
Here is a picture of the special tool I made to pry back those three plastic tabs that secure the left edge of the top. I ground a sharp edge on it to get under the tabs.
Installation is as simple as positioning it, slight pressure pushing down and it snaps right in place. Replace the screws and you’re done.
The screws are a coarse thread that are run into the molded plastic when the machine is first assembled, so they cut their own threads in the plastic. When you reassemble the top, you want to be sure you run those screws into their original threads and not cut new ones.
It’s easy to find the original threads by turning the screw backwards and feeling when the screw ‘skips’. You can feel by the resistance in the screwdriver if you are running the screws into the original threads or not.
@chris1, you can cut that grill out from the rear, that’s how I did it, but since there is a control board there, you want to be sure to vacuum any metal shavings out and not leave any to blow around in there.
From the violence of the fan vibration I thought there was a good chance I would have to replace the fan, so getting the glass top off made pulling the fan a snap. Having the top open also allowed me to clean the area well and ensure there were no metal shavings left behind.
I didn’t take the decision to do this lightly, but running the machine in that condition wasn’t an option, and sending my precious back into the hands of delivery gorillas for a perilous journey across the country turned my stomach.
The entire operation was so easy I will not hesitate to pop that cover off when I need to clean or replace that fan. I already have an identical replacement fan for that eventual inevitability, because I didn’t want to be in the position of having my machine down until one arrived.
It was just because of that fan dance that I had wide-open access to that grill, and looking at it, my desire to eliminate it was overpowering. The perfectly clean fan now runs as smooth as new, and the cherry on top is that grill in my hand instead of in my way. 
When you take something apart not knowing how it is assembled, chances are good you are going to break something. @scott.wiederhold paid that price for us, and shared his experience. I owe him a great thanks for that, and chances are you will too one day.
