First Modification

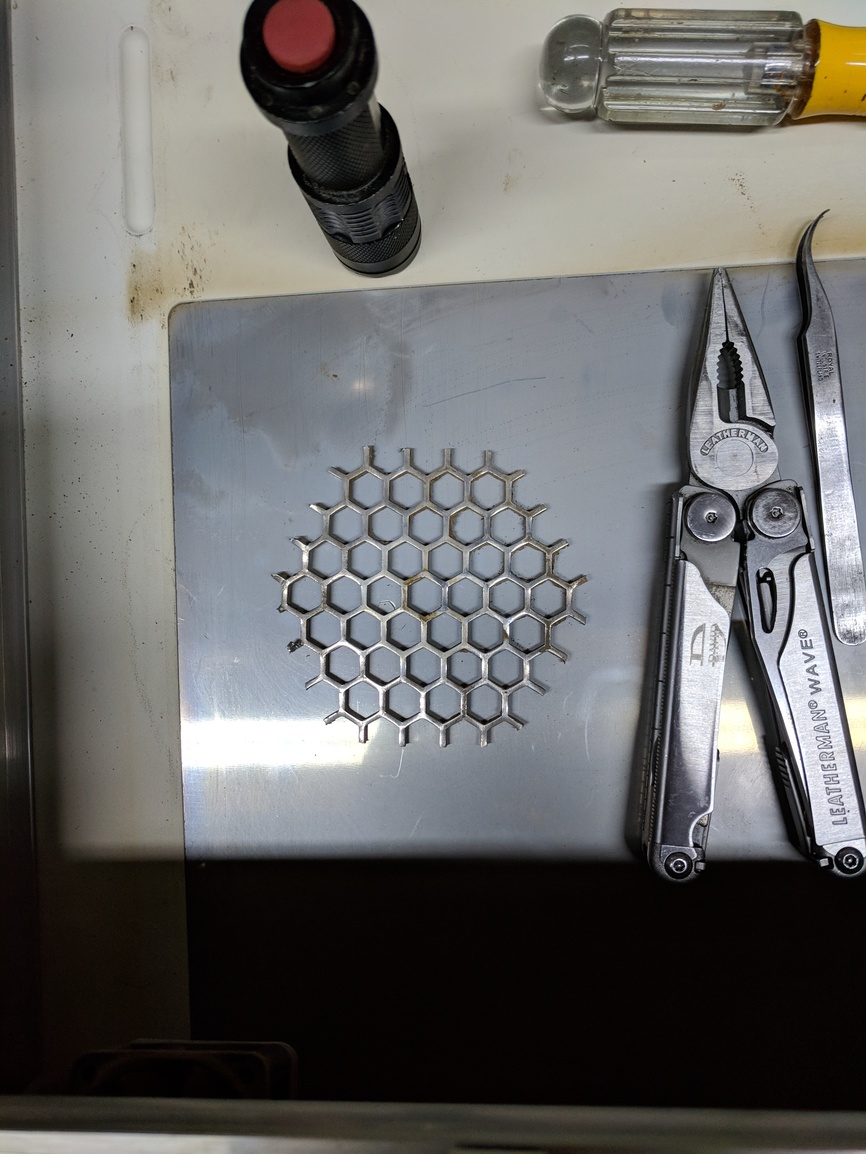
Once your glowforge is out of warranty, here is one of the few improvements you can make to your machine that doesn’t require an expenditure. Enter a jigsaw with a metal cutting blade.

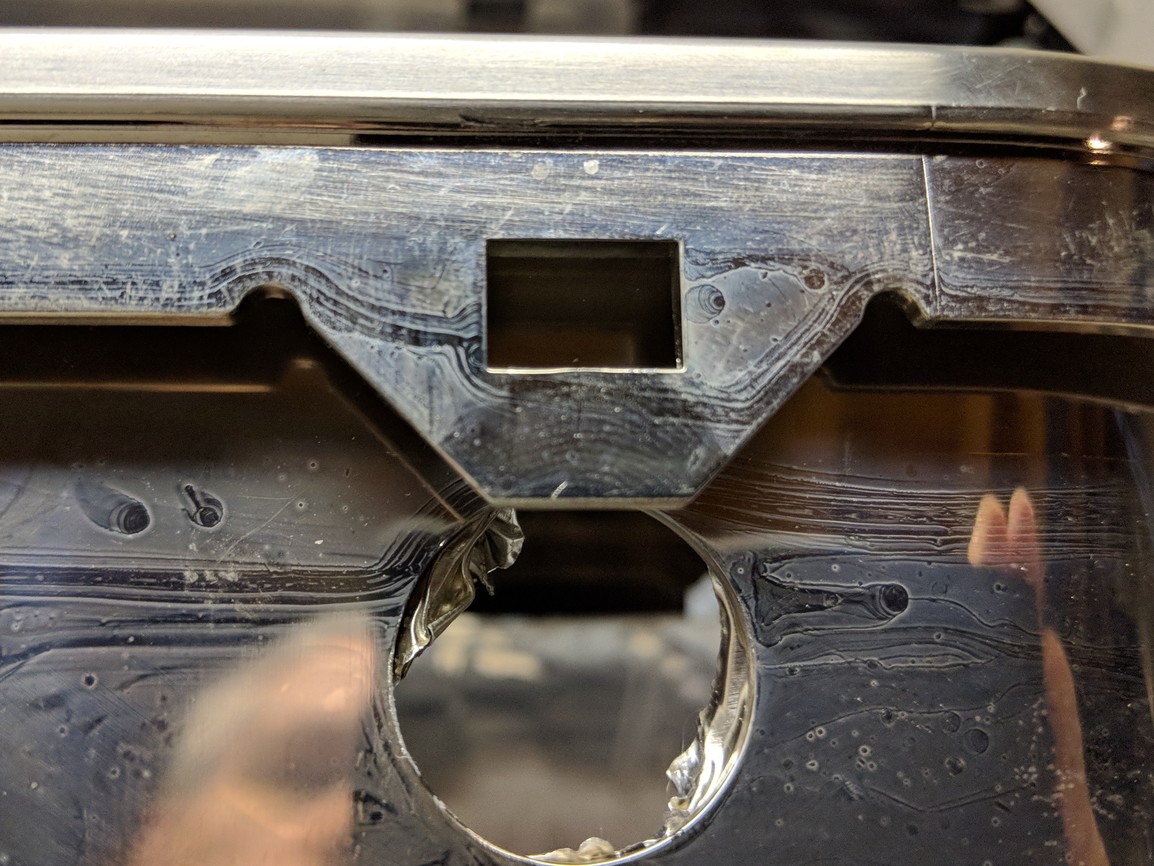
I’m sure most of you will recognize this as the exhaust fan guard. For liability reasons, this is required of manufacturing in this country to sell to the public, an unguarded fan is bad JuJu for a manufacturer because there is someone out there who is bound to be absent-minded enough to hurt themselves and blame the company for it. (“If you’ve been injured in an accident call Frank Azar!”)

In light of the fact that the exhaust port in practically every circumstance is enclosed within an attached vent tube, this grill presents a redundant safety that requires periodic maintenance. It will eventually face-load to the point of restricting the exhaust. Since by design, the exhaust fan moves more CFM than the intake fans, the machine maintains a negative pressure inside to prevent smoke from escaping… until this grill gets clogged. Then the interior becomes pressurized and it starts pumping out smoke from every crack in it.

My machine developed a hard vibration and a loud buzz because the fan had accumulated enough residue to be out of balance. Getting to the fan on the inside was difficult, to say the least, getting to the backside of the fan through that grill was even harder.
From the vibration, it was clear that running the machine in that condition would kill the fan bearings. I had already brushed and vacuumed the blades as well as I could so action was required.

I wanted that fan in my hands for an up-close inspection, so I needed to remove the top left glass top. Thanks to @scott.wiederhold’s intrepid tear-down of his machine, pictures of that and advice, it was a snap.
So when I removed the fan, there - there was that damn grill, right in my face. The time was now.

I have (had) 2 months left on my machine’s warranty (glowforge feel free to null the remainder) but considering the historic performance of this and the pre-release machine I was graced with, I have no doubt that it will sail through the remainder and well beyond. I just finished a 3,000 order of tokens, which brings the total of those to 5,000 plus enumerable cuts and engraves. This thing is a workhorse.

I think Jules’s recent post on how to clean the fan works fine, but removal of the problematic grill seemed to me to be the answer.
Not only does this action eliminate the need to periodically clean the grill, but it allows increased airflow. Since the heat exchange is a function of airflow across the coolant radiator that efficiency is increased also. I’d make a WAG at 10%. Plus now both sides of the fan can be accessed for cleaning, the effluent airflow is increased and is much less turbulent.
Here is a picture of the open left side after reinstallation of the cleaned fan (and no more grill to blow against). I think this view is superior to an endoscope.

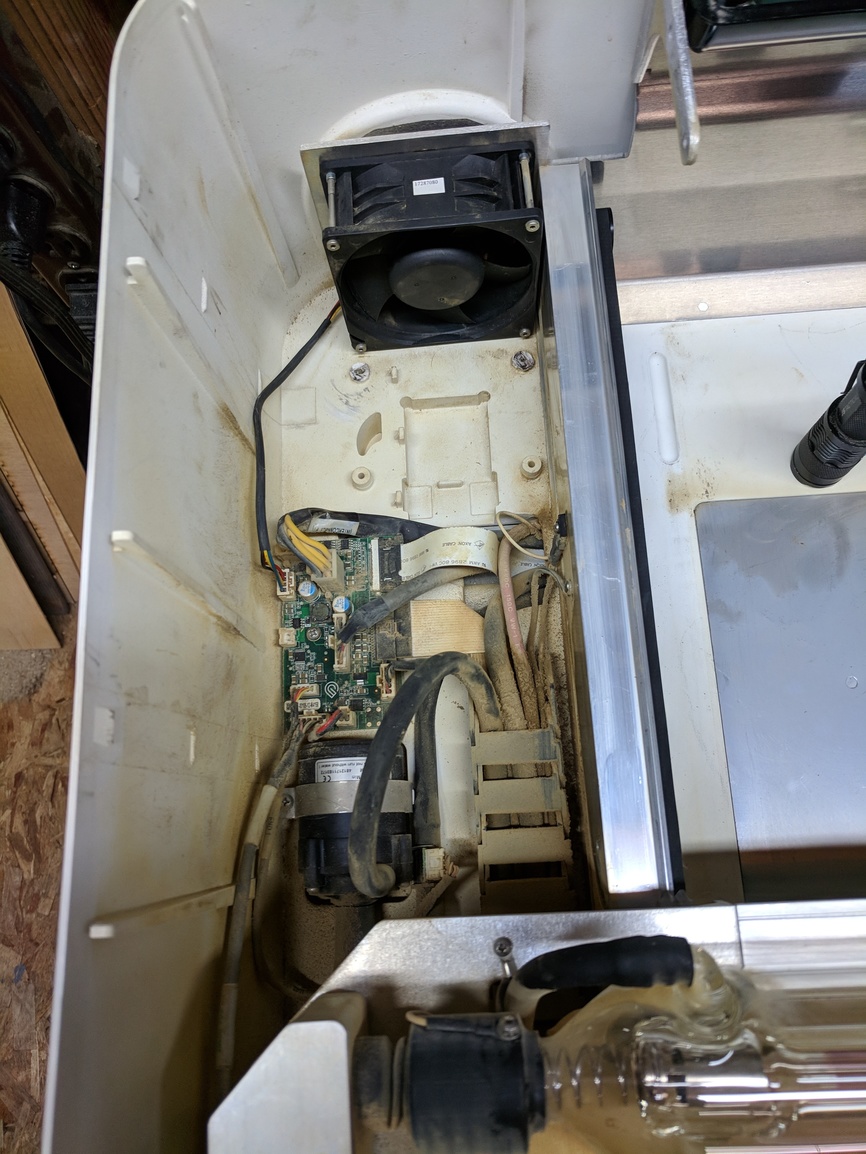
The machine is back together and humming along, smooth as silk. Oh yeah, it’s a bit cleaner in there too.
For as long as your warranty is in effect I wouldn’t recommend this to anyone, but beyond that, I think it is a solid improvement. This is a beautiful machine, and I don’t foresee any other modification in its future, but holding that grill in my hand, puts a smile on my face.

Edited to add; There is some question as to whether or not glowforge will perform any repair on a modified machine, so if you choose to, enter into this with that understanding.

52 Likes

You said you would. :smile:
(Let me know if the alignment is affected, and if it runs quieter…call it curiosity.)

9 Likes

I was gentle in the removal of the top for that reason. lid alignment, focus and all is good. I’d swear it is quieter, but that may just be a reflection of how pleased I am with myself…
I do know airflow is greater and smoother. I also believe I can see a difference in how quickly smoke is evacuated… but again, maybe 10%. Maybe. I am quite sure I won’t have to think about maintenance to that area until I get a buzz in the machine again. :wink::sunglasses:

14 Likes

Did you see a way that the grill could be removed that does not require cutting it? Thinking that you might have discovered something about it after you cut it.

Even when it gets out of warranty I am not liking to remove that top. It is getting painfully obvious that depending on what you have cut and how much of it that extreme gunk buildup in that fan that cannot be cleaned is a limiting factor that most machines would breach eventually.

1 Like

Or, indeed, whether you can remove the grill without removing the top. I presume it’s possible to just snip it out from the back?

6 Likes

When mine goes out of warranty I plan on using a 3 1/2" hole saw to cut out the grill from the back side. Just plan in being careful not to run it into the fan blades.

A Dremel would seem likely to work as well by cutting each spoke but a hole saw will do them all at once.

7 Likes

It is such a shame that the fan isn’t easily removed or replaced. Really feels like an oversight… anything with moving parts or shorter lifespans should have been arranged to be replaceable. I’d give it a pass except that we have 50 years of PC design to learn from, replacing power supplies and fans in a modern PC is often doable without tools (except maybe a screwdriver).

10 Likes

That hole pattern is cut out of an 1/8" sheet of aluminum that spans almost the entire width of the machine. The primary function of that metal plate is to provide rigidity to the case necessary to support the glass lid and keep it aligned.

A bit intimidating at first, but with care removing it is simple. There are three screws on the lid side, one in front and two in back. Then there are 3 plastic tabs on the inside edge of the top behind the three round aluminum tape stickers that need to be carefully deflected ( you do not want to break these) inward to release from the case, then it lifts right off.
Here is a picture of the special tool I made to pry back those three plastic tabs that secure the left edge of the top. I ground a sharp edge on it to get under the tabs.


Installation is as simple as positioning it, slight pressure pushing down and it snaps right in place. Replace the screws and you’re done.
The screws are a coarse thread that are run into the molded plastic when the machine is first assembled, so they cut their own threads in the plastic. When you reassemble the top, you want to be sure you run those screws into their original threads and not cut new ones.
It’s easy to find the original threads by turning the screw backwards and feeling when the screw ‘skips’. You can feel by the resistance in the screwdriver if you are running the screws into the original threads or not.

@chris1, you can cut that grill out from the rear, that’s how I did it, but since there is a control board there, you want to be sure to vacuum any metal shavings out and not leave any to blow around in there.
From the violence of the fan vibration I thought there was a good chance I would have to replace the fan, so getting the glass top off made pulling the fan a snap. Having the top open also allowed me to clean the area well and ensure there were no metal shavings left behind.

I didn’t take the decision to do this lightly, but running the machine in that condition wasn’t an option, and sending my precious back into the hands of delivery gorillas for a perilous journey across the country turned my stomach.
The entire operation was so easy I will not hesitate to pop that cover off when I need to clean or replace that fan. I already have an identical replacement fan for that eventual inevitability, because I didn’t want to be in the position of having my machine down until one arrived.

It was just because of that fan dance that I had wide-open access to that grill, and looking at it, my desire to eliminate it was overpowering. The perfectly clean fan now runs as smooth as new, and the cherry on top is that grill in my hand instead of in my way. :sunglasses:

When you take something apart not knowing how it is assembled, chances are good you are going to break something. @scott.wiederhold paid that price for us, and shared his experience. I owe him a great thanks for that, and chances are you will too one day.

14 Likes

Turns out it is easy with that top out of the way.
I was slightly intimidated to do it, but now that I know how easy it is I will do it again without a second thought.

It is really about the same difficulty, just care not to break those three plastic tabs is important.

3 Likes

that’s one of my worst habits…

5 Likes

Yeah, I snuck up on how much force to apply to them. They were stiff enough that there was a definite pucker factor, then “pop” and it was released.

2 Likes

This is exactly what my machine is goin thru. After cleaning the grill and fan my loud rumbling has now got even louder. One of the techs informed me to get this novec degreaser and they are to remotely turn my fan on when I have the cleaner. I have about 6 months left on my warranty so I dont think cutting the grill off is in my best interest. I have always wondered why they didnt make it easier to access they fan components. I have had nothing but get success with my forge. This has been my only issue, guess I’m a heavy user and have been trying to keep up with keeping it clean but even after following @Jules detailed cleaning extravaganza I still have this. Hopefully once I go thru the degreaser and i talk to the tech again my fan will be considerably quieter

3 Likes

Yeah, you really don’t want to void your warranty with that much left.
The company has had at least one machine running non-stop, so I’m sure they have encountered this issue before and found a solution.
I have always had a strong mechanical aptitude, and the Navy trained me as an airframe/powerplant mechanic. I’ve been taking stuff apart most of my life, so at 63 years old I have a pretty good handle on how most stuff works. Still, I was a little intimidated at surgery on my precious. :grimacing: 
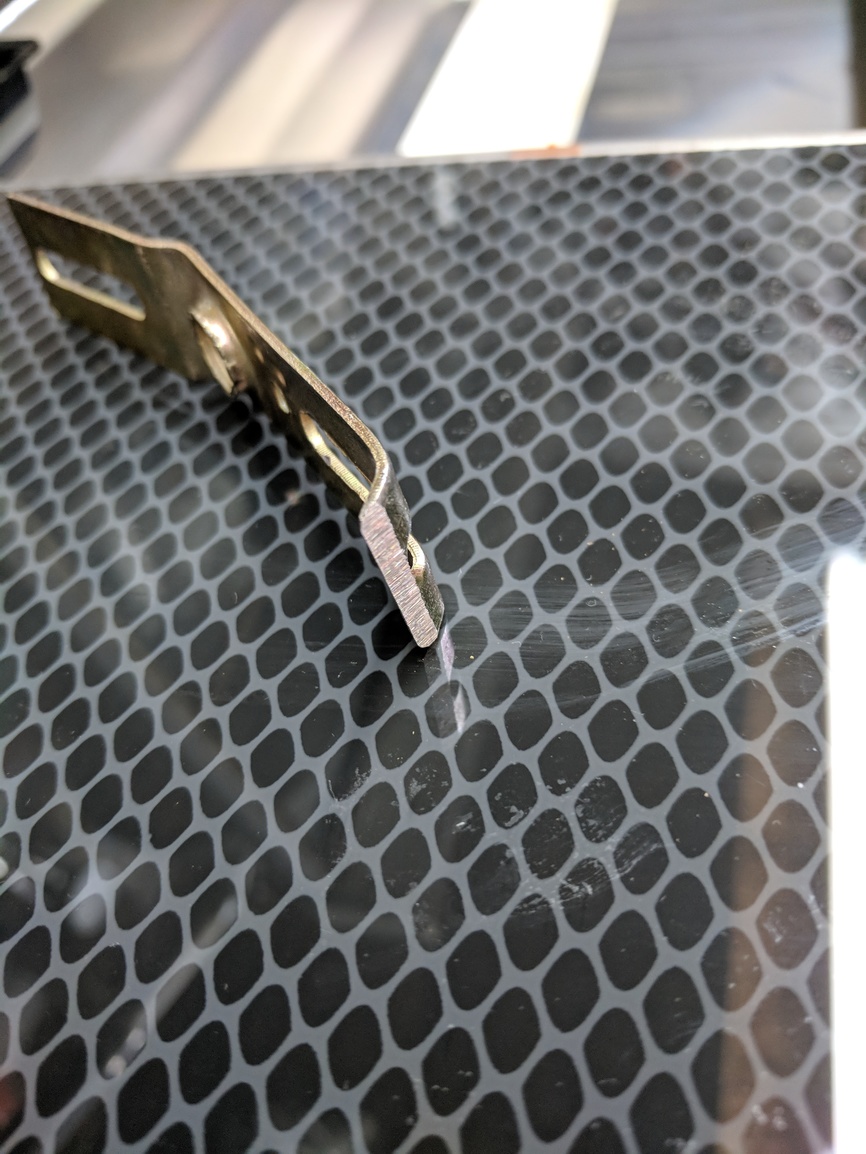
Now with that dang grill out of my way I couldn’t be happier.

5 Likes

Wouldn’t a paint scraper (stiff blade) maybe 1 1/2" work? Or a car trim removal tool?

1 Like

this, although they generally have a thicker chisel point. but that’s probably what i’d use since i have one.

I have a set of some kind of heavy duty plastic (nylon?) with one that’s got a pretty sharp edge. But thin stiff and sharp was why I was thinking maybe a stiff paint scraper. I had to buy a putty knife yesterday and almost picked up the rigid version when I wanted a flexible one.

A while ago I bought a set of dental tools - they are great for poking in the back of the fan and really shifting the crud. Of which there is a lot!!!

But, you are right, that grill is going to go when it’s time is up.

In the meantime, after the last cleaning I get a real rumble and groan when the machine fires the fan up - it’s OK once it’s running.

1 Like

Seems like we all are getting that loud rumble now…or I’m just noticing everyone’s post since mine started

1 Like

The access hole is only 1" in diameter. I had nothing that fit the bill so bending a lip on that scrap metal and grinding an edge on it took all of a minute. It worked perfectly.

Here is a picture of one of the tabs (courtesy of @scott.wiederhold) from the back side.

TAB
When installing the top, the square hole slides down on a ramped cleat and snaps in place on the square bottom shoulder of the cleat. Two of them are marked with an arrow in this picture…

Inside

It really is simple to accomplish.

2 Likes

The tabs (the ones that need to bend) appear to made of aluminum (in TAB.jpg). Is that correct? (in your description you mention 3 plastic tabs that need to e deflected inward)