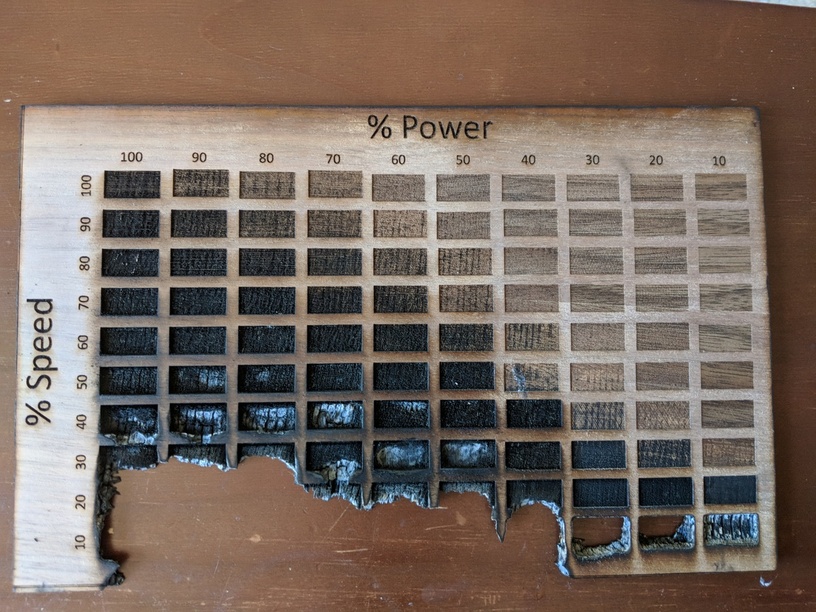
I had some old walnut veneered plywood from an old project and recently got my glowforge. I wanted to see how the different settings worked with this new material. It never actually was aflame, but it definitely smoldered some (obvious evidence in the picture).
22 Likes
Definitely points out those limits, doesn’t it? 
3 Likes
Now, that’s what I call a heat map!
7 Likes
this is just me, but i might have lifted the lid before it completed.
i’m weird, tho.
10 Likes

3 Likes
That’ll buff right out…
7 Likes
 Probably would want to use the upper right hand settings
Rub a little coconut oil and turmeric on it and you’ll never notice the giant burn. It’ll heal right up.
3 Likes
Agree.
The upper right does look like the sweet spot for this material.
Next question?
Good reason to never leave the GF unattended.
There’s a certain refreshing reality to that, isn’t there? Unvarnished Truth.
Speaking of which, you gonna varnish that before framing?
1 Like
It took about four hours to complete, and I monitored it on my screen. I’d run over whenever it got to the lower left squares to make sure nothing actually caught fire. It was as in control as burning wood could really be…
Monitored it on your screen? Do you have a webcam or baby monitor set up or something?
Each square is a different step (different color in inkscape), so the standard software lit up the square it was working on.
edit: when it got to any of the lower ones, I’d run over and watch it complete that step. I’ve learned that 10% speed is very slow.
Considering it prints from the bottom up, that took some gentlemans attachments to let that thing run!!!
yea… watching it smolder was scary. If it turned into open flame I’d have turned it off in a heartbeat, but it never got to that point.