Hi- This is my first post. I’m brand new to using a Glowforge (arrived 2 weeks ago). This is my first real project after a couple of test prints. I’ve worked, previously, on a laser cutter in an academic setting. Back then I was playing around with insetting acrylic and I’m thrilled to jump in again. I’ve never done anything this complex before and I’m pretty happy with the results. Except…
In the past, all my insets were snug enough to rely on tension fitting. Unfortunately, the complexity of this design demands that I use glue which I’m dreading. Any tips on precision gluing would be appreciated.
Nice!
The acrylic solvent is difficult to get controlled placement without it getting where you don’t want it.ive had my best luck with a syringe. The goal would be to place it in the contact area, and let capillary action spread it.
Also have a way that any extra can drip away without running down any outside bit. When doing the sides of a box as example I make one corner the lowest point and where the sides come together at the bottom of a valley that way any place that does drip just leaves without making a mess.
Also I keep the stuff at as close to freezer temps as I can as it evaporates at room temps like it was almost boiling.
I guess my experience is that it’s easy for the Weld-on to run over onto the face of the acrylic and mar it. I know that if you are careful you can minimize it, but it almost feels like playing the lottery. Is the angle your holding this organic piece at a fraction of a millimeter off? I’ve done the syringe. It does work the best, but you press too hard and it runs over the face of the piece. (I guess I was hoping to find a magic bullet.) I’m re-cutting a couple of pieces to get a tighter fit. Thank you so much for your answers.
If you are using Inkscape you can use a shape that is a single line and make the width of the line be the kerf (Usually about 0.006") and then use Path>Stroke to Path to make it two lines Path > Break Apart to separate them and then clean up the thickness and fill that results. Then if you use the inside of the two for the outside piece, and the outside line for the inside piece after first mirroring the shape, the very slight “V” of the cut will fit very tightly as a “/”. You will want to experiment first to find the ideal for you and the specific material.
Also, while weld-on will do a perfect job if you do a perfect connection, you might find that medium thickness CA glue or Scotch maximum strength model cement are a bit more forgiving in imperfection. also while Weld-on will run the capillary everywhere the piece only needs to be held at a minimum of three places rather than everywhere.
Hey- I might have to take a look at that. I don’t know Inkscape. I’m an Illustrator.
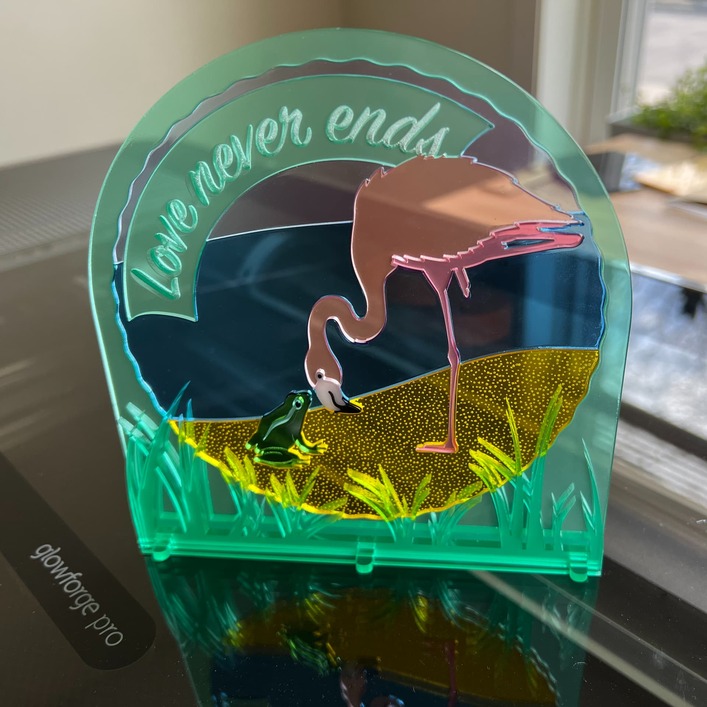
I order some weld-on. I will definitely look at CA glue and Scotch. I’m not familiar with them. I might have to experiment and practice. (I’m making this as a gift for someone who lost her husband. They had a “thing”. He collected frogs and she collected flamingos. So- I’m feeling stressed about making it as clean as possible.) Non-the less it’s been a great lesson figuring things out on the machine.
Illustrator may do something similar. To go from the recorded line down the center to two lines on the sides of a line-width. the math would be the same. Glowforge only uses vector centerlines and not line widths.
Sorry I can’t give any tips on avoiding drips; just want to say your work is wonderful! Don’t stress over the little imperfections.
Something I’ve found with acrylics if I’m using a runny glue is to have some alcohol inks on hand to add color that acts as camoflage. Practice on scraps and see if this can be used for your work.
Be aware the CA glue will outgas and leave a powdery white residue if too thick. Also, the laser cut edge of acrylic have a residue from the cutting process that makes a good bond with solvent cement harder to achieve. If you can, sanding the edges a bit will help. Note that solvent cement can be purchased in different thicknesses too if there is a gap between parts. Also consider just “tacking” parts together in strategic locations rather than gluing all the way around an edge.