This is the first project I tackled other than a glowforge ruler and a death star tree ornament. I am not a Illustrator pro or efficient at all but taught myself for this project. I read a few instructables sites telling me to download programs and such in order to figure out the depth. Luckily I had requested a lake depth map probably a year ago in anticipation for the glowforge.
I decided to scrap all of the sites on showing the programs to use because of the steep learning curve. If I was going to do a bunch of different lakes I would have spent the time to learn but I just finished this mid yesterday so I didnt have much time. I ended up having the map on a background layer and tracing each depth layer from the map in Illustrator.
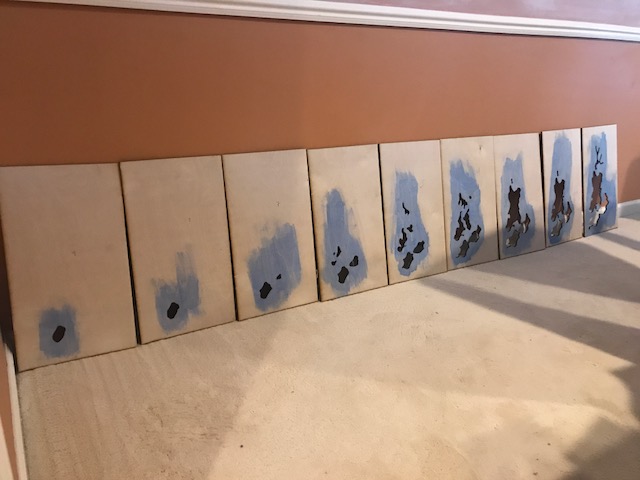
Here are the different layers before assembly minus the top layer
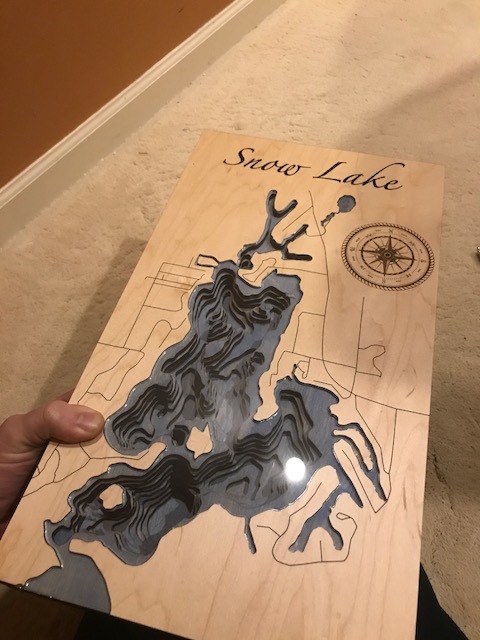
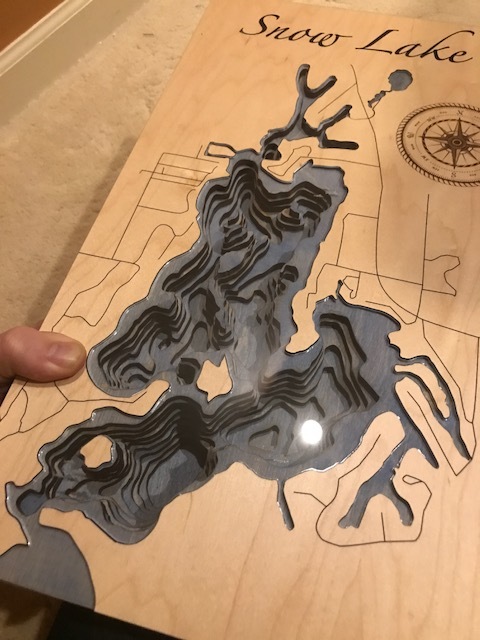
And then the final product. I ended up cutting a layer of plexi for the top layer of the lake and ended up engraving some small fish on the backside. It s bit hard to see in the pics but you can in the up close one. Let me know what you think. I still want to make some sort of frame and level out the edges but my wife loves the burnt edges and insisted I not cut or sand them. This can free stand on a mantle or table but its not super stable. I am super excited about the end results especially for having almost no experience with the glowforge or illustrator. I used the PG Maple for the top layer however I ended up using 1/4" maple veneer for the rest. I was nice that I have a pro because I only had to ripe the boards down and feed them in the slot rather than having to cut them all to fit the GF. I learned alot with this project and am eager to tackle a new project. BTW I also cut a tag out of cardboard that I cut and engraved with the families signatures which turned out fantastic too. I think my next project will be something with cardboard.
That turned out great! This is one of the projects I want to do with my Pro too. Thanks for posting about using the pass-through and not being proficient with Illustrator as I am a newbie to all of that as well.
Honestly after trying to figure out so many peoples own way to do it I figured there are a thousand ways to skin a cat and I might as well do it my own way. I will say I have some experience with photoshop which transfers some knowledge into illustrator. I’d be happy to answer any questions.
Ok. This is my new “FAVORITE!” Very well done! (I had wondered why someone didn’t add the clear top layer to fit . Perfectly logical touch that is perfectly AWESOME finishing touch. Did I mention well done?
OK, so I thought I would take a few minutes and describe how I went about designing and assembling the final piece. Just a note up front. I made a ton of mistakes and essentially cut everything twice so I would recommend to think about things before as you can waste alot of material.
Materials. I ended up using PG Plexi and the top layer was the maple plywood that came free with the GF. I ended up buying a whole sheet of 1/4" plexi before I decided to use the PG. I also bought a 1/4" Maple plywood and mdf from Menards. I think they call it hardboard instead of mdf but essentially its like the stuff the GF sends. I also bought vinyl decal transfer tape. I’m pretty familiar with this stuff as I used to have a decal cutter. I was going to use it as a protective cover like GF uses. I ultimately didnt use it on this project but I did use it on another one and it worked great.
I started with a map that I requested over a year ago. I wish I remember where I contacted to get it but it was a government office as there were no published surveys of this lake. There are a few ways to take satalite photos and convert them to this but I was at a loss. So I opened up Illustrator and traced out each line using layers so that I could turn them on and off for the different cut lines. This is where I should have spent more time. There were times where I forgot to draw in the right layer and should have just redone it right because I wasted alot of time. If your going to use this route I highly recommend you get a tablet to use instead of a mouse. Once you get a hang of it it is pretty easy. I ended up tracing the roads on the provided map only to realize after a test print that the roads are way off of reality. 20170706102607421.pdf (765.0 KB)
I tried to upload a layer example but it says it is too big. I originally was going to cut just the section needed for the relief and this is were I messed up. I didnt account for the fact that as the layers were more towards the top new areas opened up so I ended up cutting out too much. I tried to do this to fit them all on the product that I got from GF. I ended up cutting out full pieces for each layer as you can see in my original post.
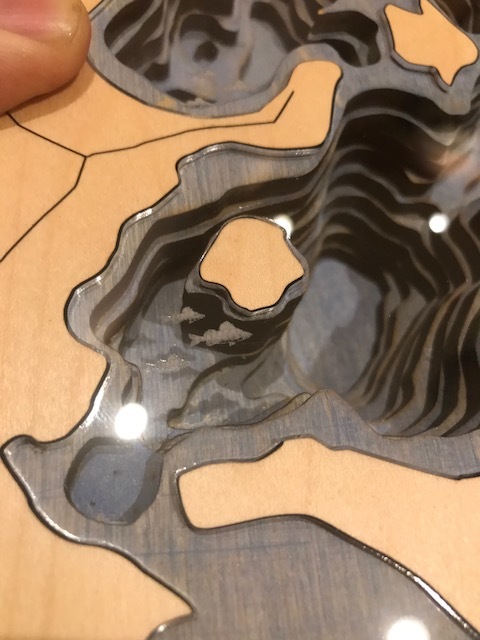
Once I had each of these I took some acrylic paint and diluted it with water. Tested a few areas and decided that I wanted to let it sit for about 10 seconds or so and then wipe it away. I left the wood grain and kept the piece light. I was originally playing around in my mind about painting each layer a differing shade of blue or buying blue plexi and cutting each plexi payer out making the combined areas of blue plexi darker. This would have been awesome but a full sheet of blue plexi is special order in my normal store and super expensive. I said that I would print a test layer of plexi and if it looked good I would do the whole thing. It turned out way better than I thought and would keep the inside from getting dusty.
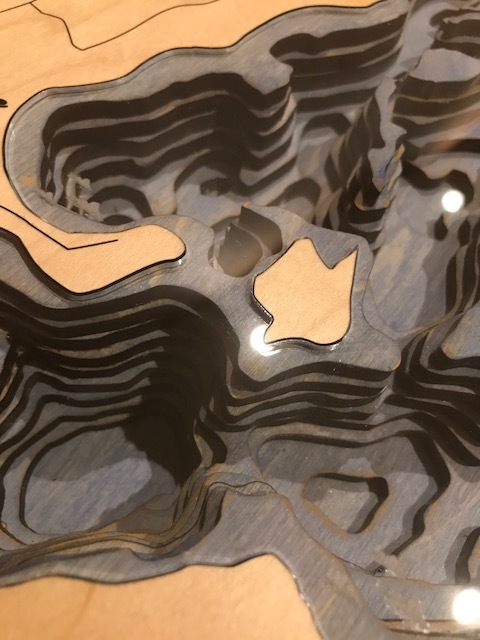
Then I thought about etching the fish on it. Etching the backside was the way to go but once it was all together I would have changed my placement. If it is not at least 2 layers deep in the lake its really hard to see the fish since the layers show wood grain.
Assembly I used wood glue spread out and tried to keep away from the lake holes as I figured it would be hard to clean out. Glue still got in there and it was hard to clean out. I used Gorilla glue wood glue. I clamped it for about 30 minutes and it was good to go. Now the plexi was another story. Wood glue doesnt dry necessarily clear and in a few spots it messed up the blue paint. Only I could probably pick them out however if I glued the plexi in with that it probably would have looked bad. I ended up using super glue but only on the small pieces. For some reason the plexi fit the wood really tight in areas so the main piece I just left friction fit. That way also maybe I can add some more fish or take it out in the future.
Also not in the pics is the backside. I ended up trying the trace feature. My dumbass used a sharpie which probably would not have been that bad except after I traced it I wanted to use some of the transfer sheet to protect the rest of the wood. I never moved the piece but once you open the door again your image moves. It ended up tracing about 1/2" off and I couldnt sand off the sharpie all the way. Oh Well.
One more somewhat of a problem had to do with my designing. The layers did not line up exactly and each outline cut did not either and this made all of the outside layers look a bit uneven. I wanted to run it through my table saw but my wife insisted the burnt edges looked fantastic and gave it charm. I was unsure if my parents would just place it on a mantle or hang it on the wall so I didnt frame it or make a stand. I may do that later.
That pretty much wraps it up. I hope this helped anyone thinking of doing it. Overall it took a good 3 days and this was alot of failure, trying to learn a map program, whatching videos, reading blogs, etc. If I did it again it would probably take me a day.