One hiccup though. Because I am using Mirror command to generate the tabs on opposing sides, there’s a limitation. I created this with the number of tabs set at 20. If you set that to a higher number, the added tabs will not mirror because obviously those bodies did not exist in the timeline before the Mirror command. If it’s set to a number less than 20, you just get the yellow warnings because those bodies referenced within the Mirror command no longer exist. This doesnt break the model though.
IF I was using Pro/E or Geometric Design I would just be able to Mirror the Pattern command and everything would show up OK. I tried that in Fusion and it doesnt seem to be available.
The Test Fit Octagon™ is golden. Never thought to do several trials on one piece. I’d do one, then adjust on a piece with just one slot Duh. Great share.
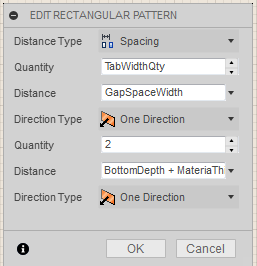
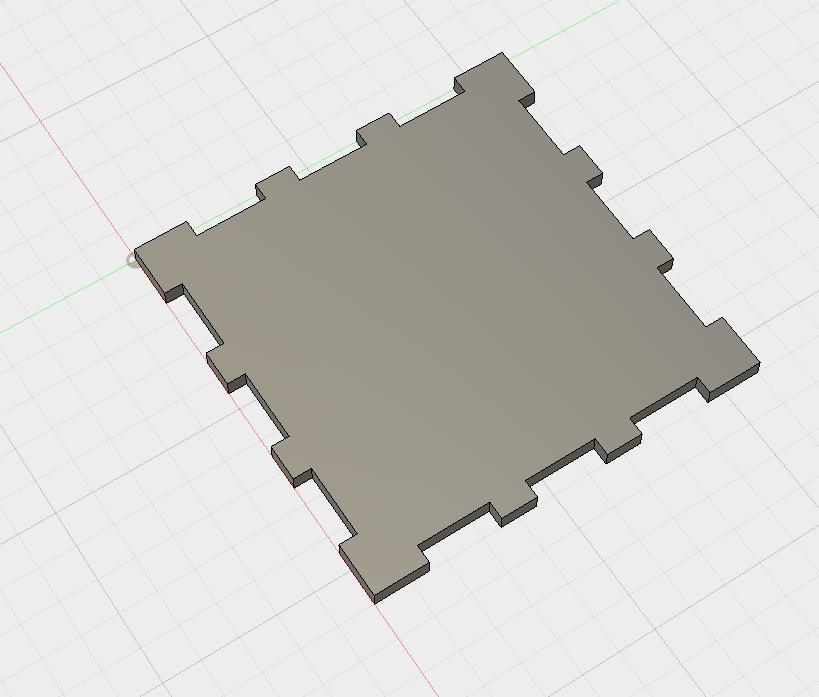
Yay! I remade the bottom of the box that can control the quantity of tabs. I asked Lars Christensen about it. He has an AMAZING YouTube channel with tons of Fusion 360 tutorials and has multiple live streamed training sessions each week. He pointed me to using parameters in the Rectangular Pattern.
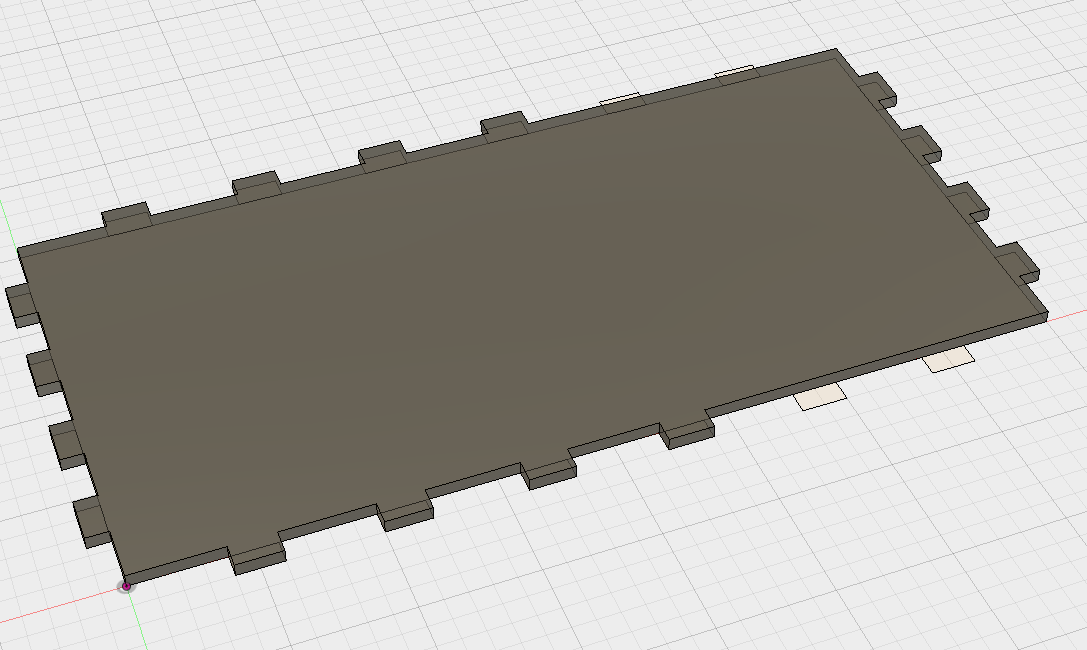
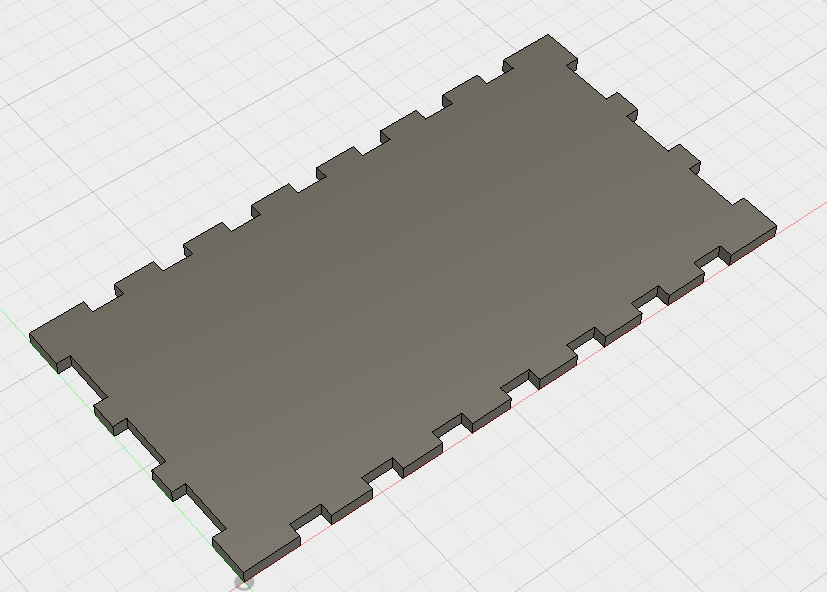
It worked! This is the same exact box with different parameters.
I know there are a lot of other parametric boxes on the forum but I just wanted to see if I could squeeze it out of my own brain. Plus I wanted a shout out to Lars who is killing it!
He pointed me to two videos to help with parameters.
One problem I hope he can help with and (I asked about) is this. I set my sketch to have 4 tabs and extruded it. But when I modified the sketch to have more tabs they weren’t extruded. So I have one more little bit I am missing. STAY TUNED!
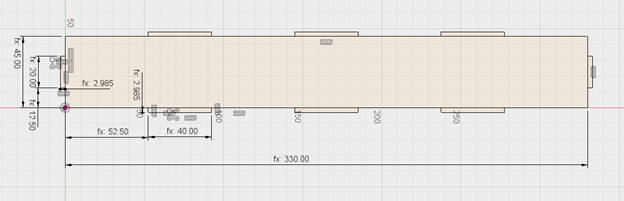
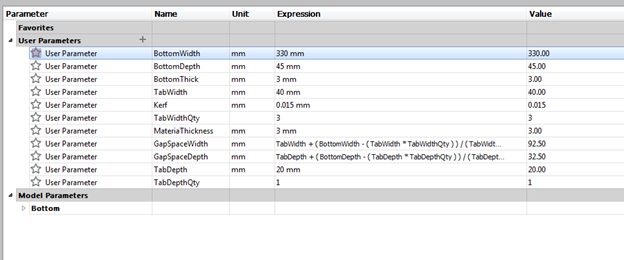
OK here is where I got. In the parametric box bottom above, I designed it with 4 tabs by putting little rectangles on the outside of a larger inner rectangle and extruding that. But that put a line between the main rectangle and all of the tabs
That means that to make the extruded body you selected the inner rectangle and all the tabs. The problem arose if your changed the number of tabs in the parameters beyond the amount of tabs you extruded originally, those additional tabs did not extrude. (as you can see above)
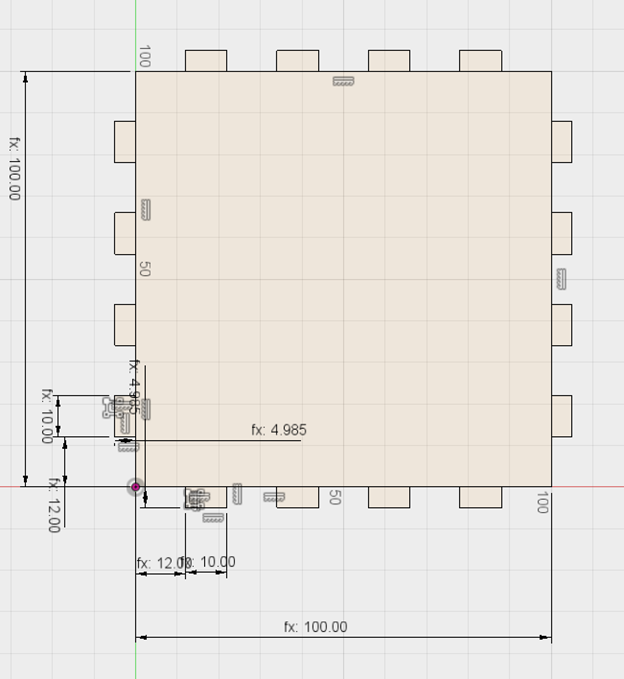
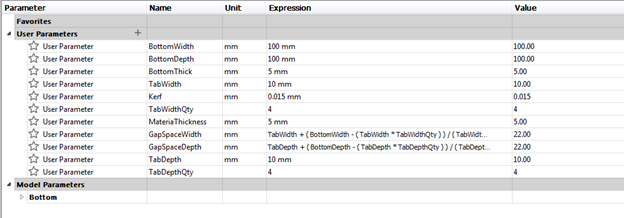
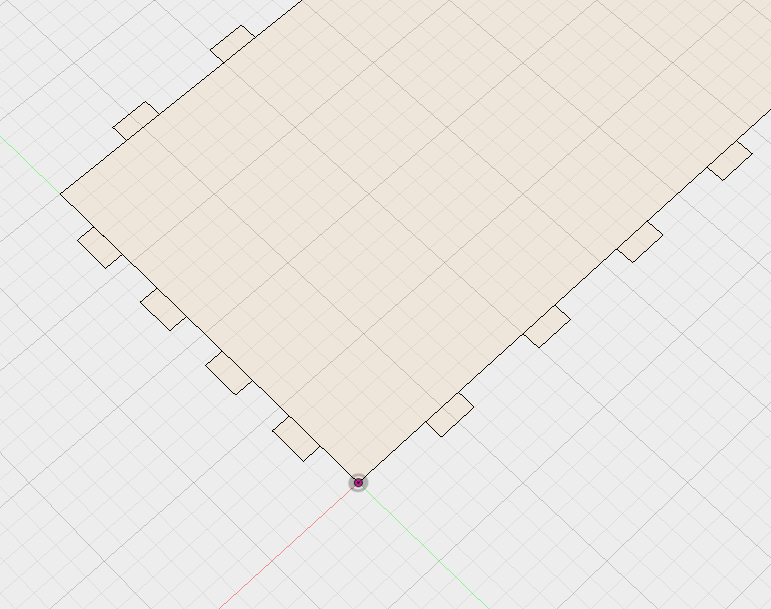
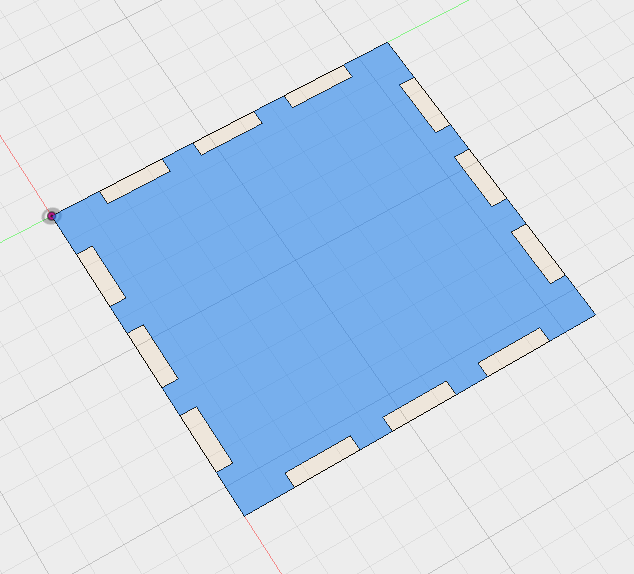
So I redid the parametric box bottom so that I defined the spaces between the tabs and had them positioned inside the main rectangle. What that leaves you with is an unobstructed extrudable space.
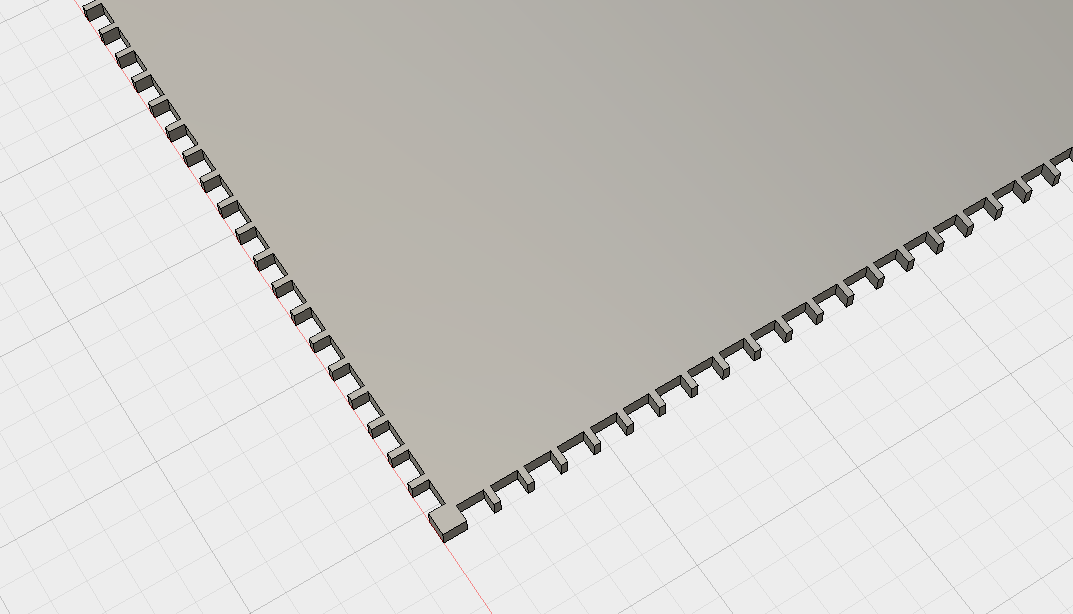
But I found that if I changed the tab quantity beyond the original extruded amount it still omitted the remaining tabs. So I rolled back in the timeline and changed the sketch to have 100 tabs per side that were then extruded.
@Jules You use, or have used, AI, Inkscape, Fusion 360 etc. After using them, which software is your go to for doing inlay with kerf adjustment? I’m trying to figure out if it’s worth spending the time to learn Inkscape or just upgrade my AI CS3 to Adobe Cloud.
For kerf adjustment I prefer Illustrator. (Easy enough to just offset the path by half a kerf-width, then either combine the two shapes or delete one of the lines.)
You don’t need to update the CS3 though - you can do everything you need to do in that version very easily.
I think the method you used (placing rectangles inside a larger rectangle) is probably better than mine, but I thought I’d make the model from this post public, just in case you (and others) want to check it out… http://a360.co/2Ejc75c
Thanks. The main issue that I’ve encountered with CS3 is that files often can’t be opened because they were created in a later version of AI. If that’s the only issue, I won’t upgrade.
Isn’t that mainly a text thing? (I know mine has to substitute text all the time, but it’s worth it to not pay a monthly subscription for something I already have.)
When it’s a missing font, it usually tells me that. The warning I’m talking about just says that the file was done with a later version of AI and might have errors and then shows a blank workspace. I’m not going to upgrade to the cloud version. Too expensive. I’d rather move to Inkscape or make do.