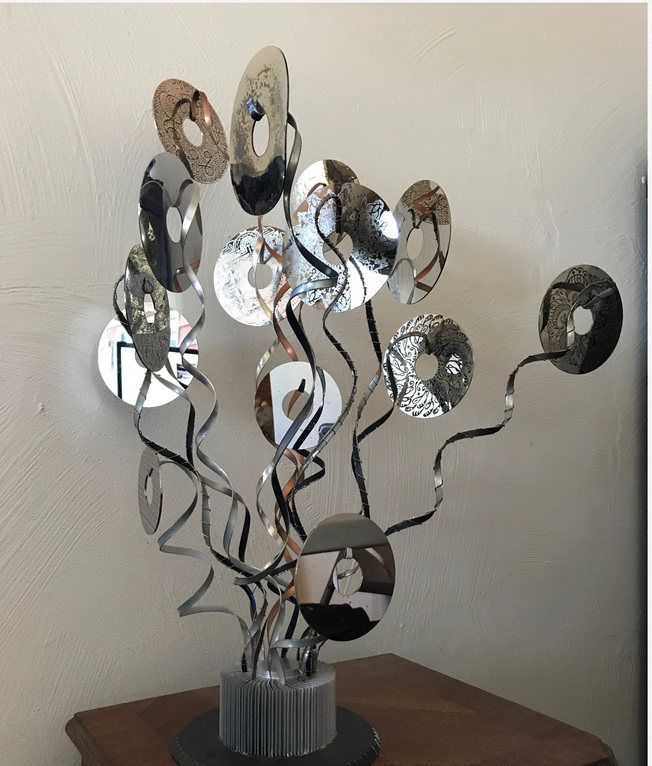
Ever since I received my Glowforge I have been using it to etch or cut various materials that come out of computers. I fugured out a safe way to etch the hard drive platters without damaging the glowforge. (Spray paint the platter so when the paint is burnt away it destroys the shiny surface revealing the aluminum core. Then remove the leftover paint and the shiny surface remaining makes for a nice contrast.) A few of them are shown on some wind chimes.
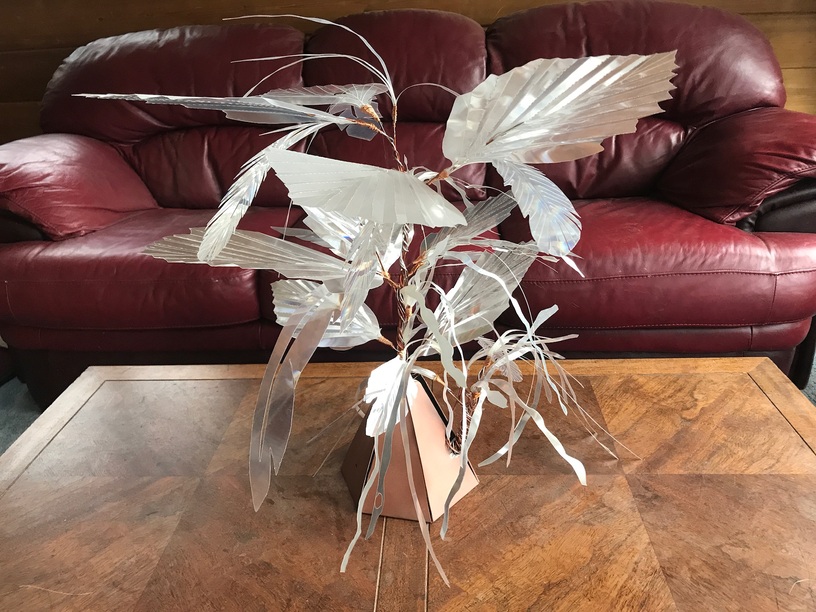
When I take apart a monitor screen there are really beautiful layers of optical acrylic sheets behind the actual screen. They can be etched or cut for different fun stuff.
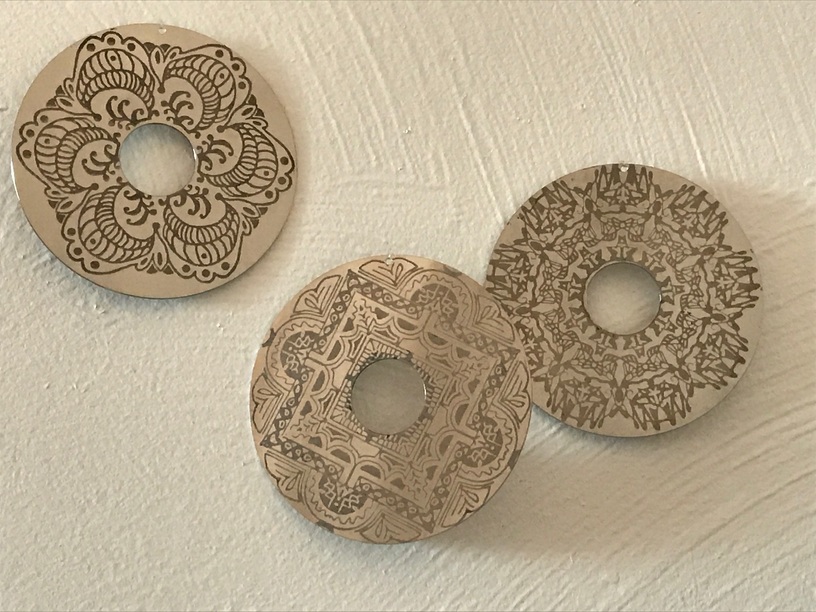
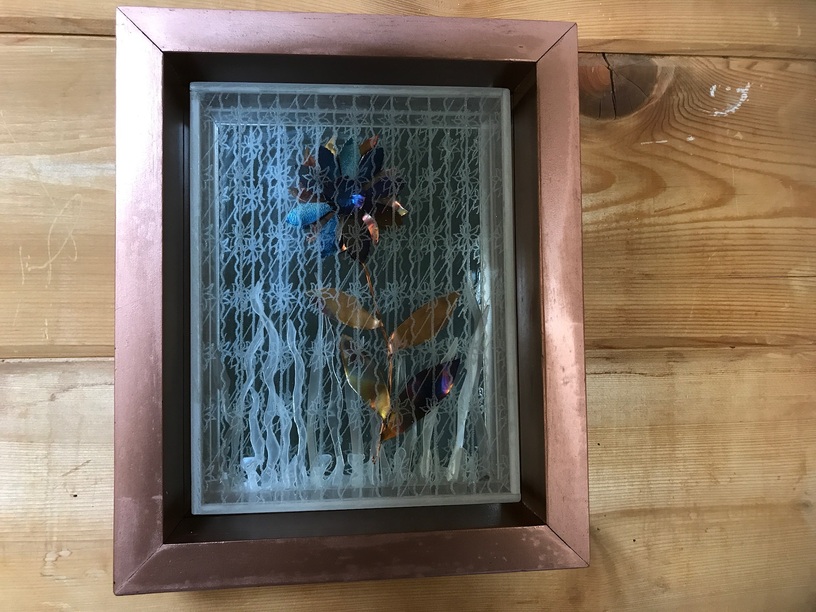
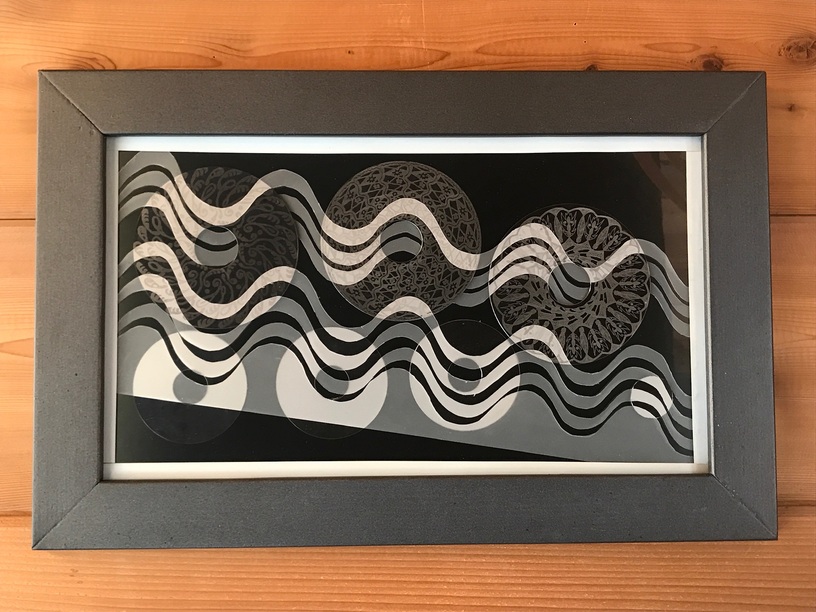
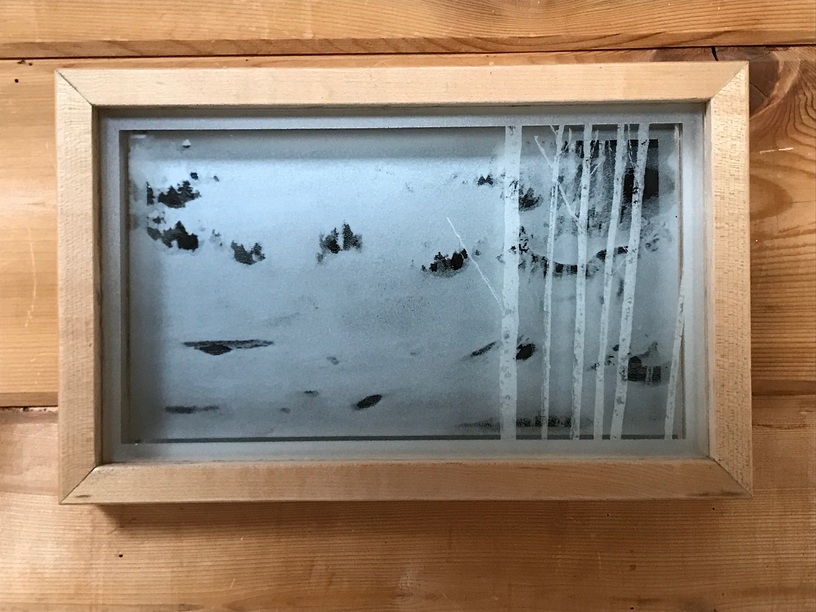
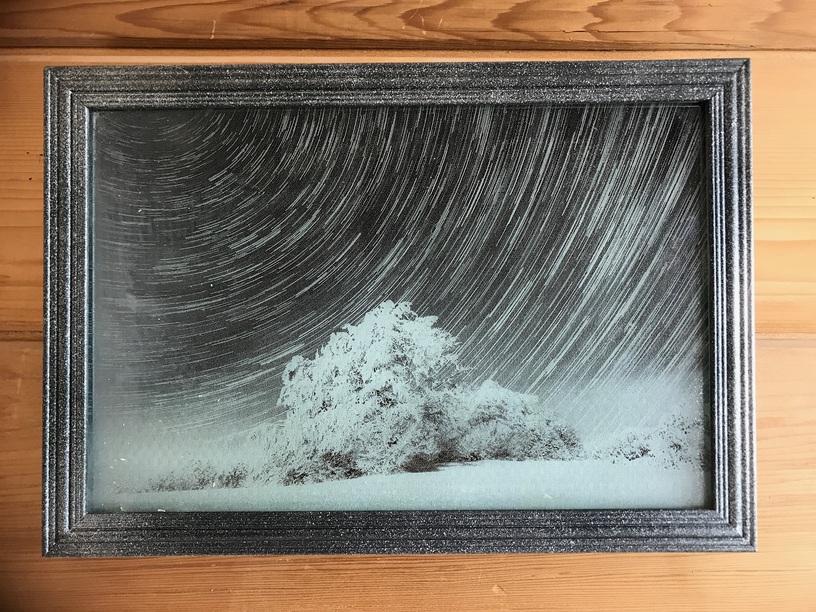
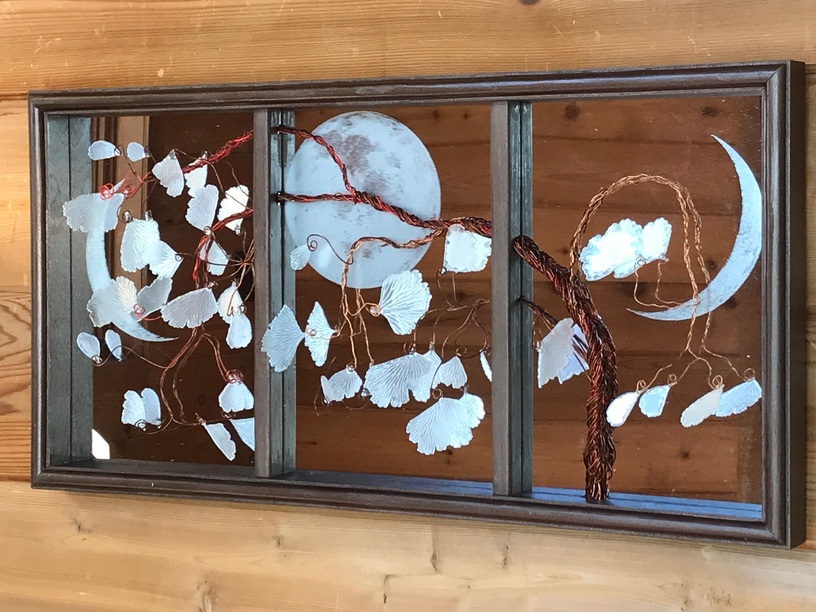
And I have had lots of fun etching glass and mirrors and layering them. Almost everything I use is from some kind of discarded item. (I have yet to use any of the proofgrade materials provided.). So I spend a lot of time experimenting for best results. Here are some samples of what I’ve done. Since most of the things are shiny, it’s really hard to photograph well. Mostly I just want to show all you creative people out there about the really cool resource of monitor screens and mirrors.
Besides etching them you can drill and cut them and torch them to create pretty colors. Platters from laptops are made of glass and are really beautiful when torched. They will also slump and melt together just like molten glass.
As borosilicate glass has a very low coefficient of expansion it will be harder to get to show an etch that other types of glass. If you could find some cobalt carbonate and mix a tiny bit with glue and paint it on the glass and laser it. then where the laser was strong it might get some of the cobalt into the glass. It would only take one part in 50,000 to be visible and one part in 1,000 would be nearly black.
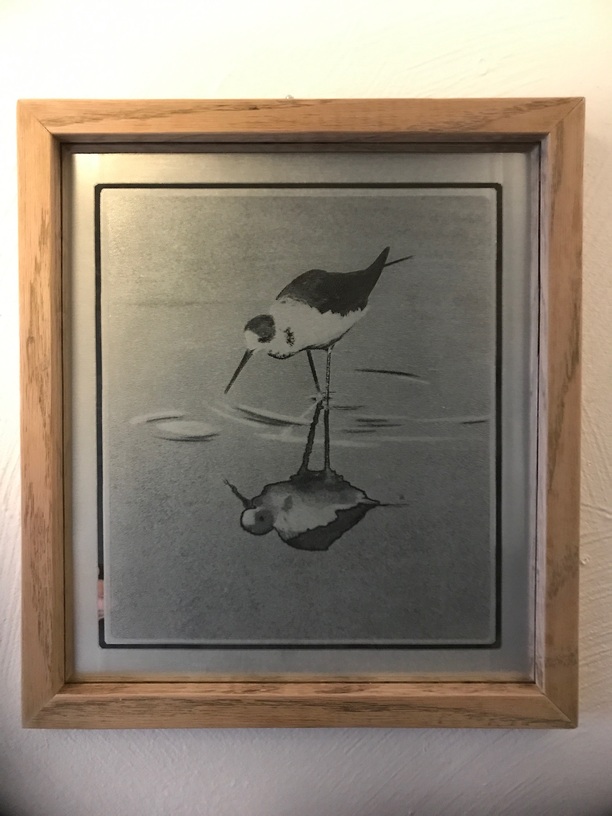
Some of the glass I use is really old, as in about 60 years (came out of a renovated apartment building) so I think it tends to be harder than new glass. In all cases , though, I use 1000 speed and about 80 power and 125 per inch. The reason that I ended up with these settings is that at higher power and density I lose details of variations of grey. I also select “dots” instead of “vary power” because the laser won’t do much to the glass at lower than 70 power. That said, you really have to experiment with what you have. I’m trying to etch subtle shades of photographs and it’s hard to get it to work.
Have you done any pictures of people? I just ordered my glowforge and I’m wanting to make some pictures of my daughter on glass. What’s the best kind of glass to use?
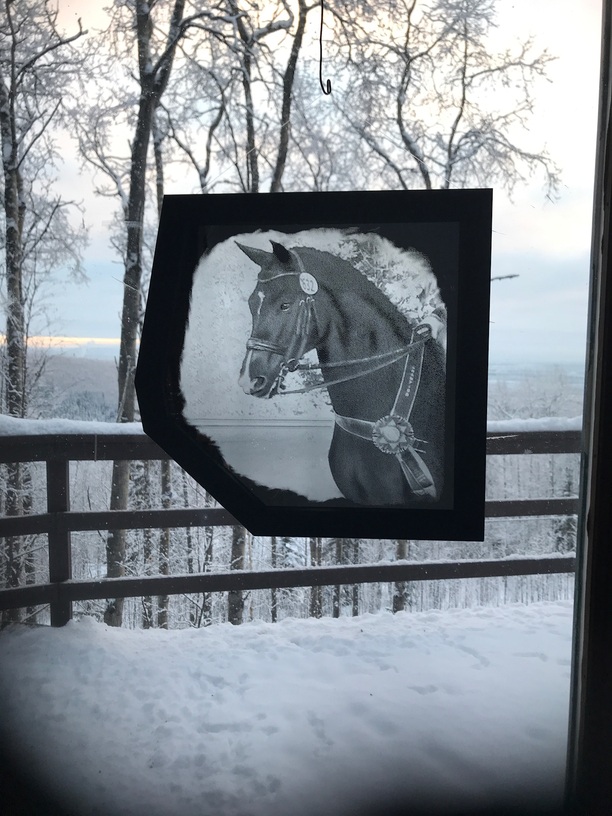
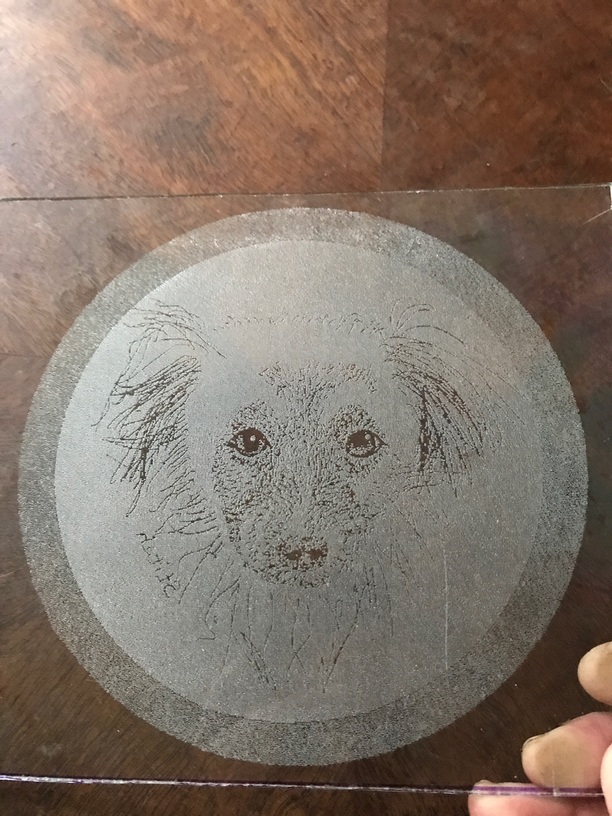
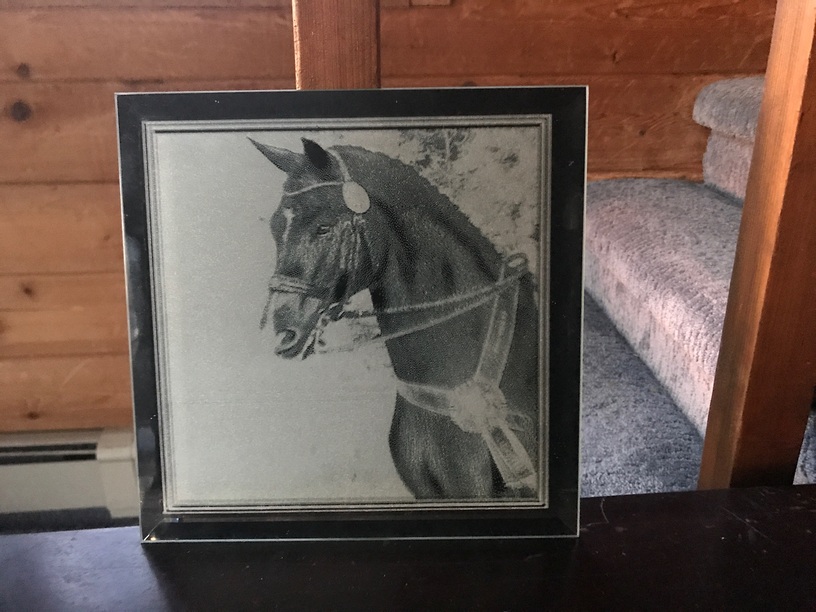
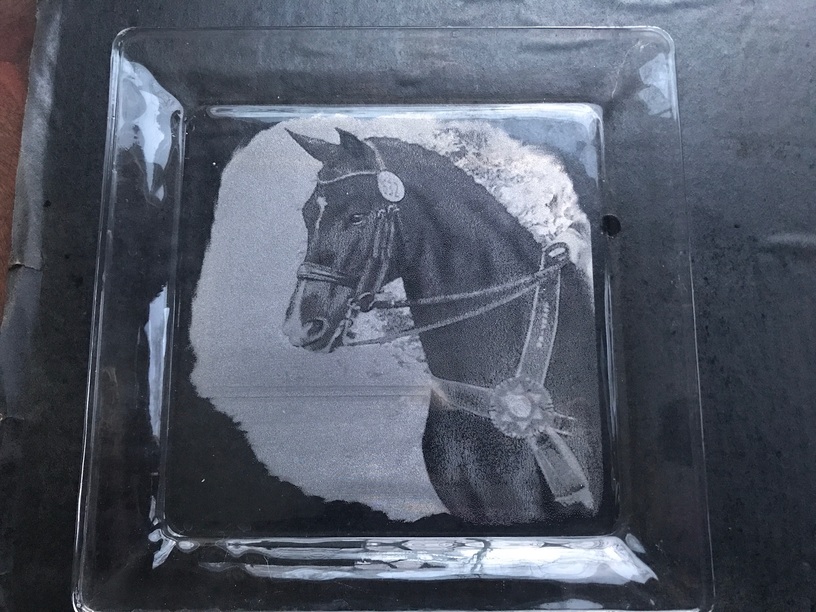
I haven’t done any people, but I have done a few animal portraits. Here are just two. The dog, Stitch, was a try piece on a scrap piece of glass, 7x7”. The horse is on the back of a glass platter and on a square mirror tile, 8x8. I suggest you get a couple of cheap door mirrors to practice on. I like the mirrors better than just the glass because the image can be seen easier since if the glass has light behind it you won’t be able see it very well. The type of glass doesn’t matter in my experience. (If you don’t know how to cut glass I suggest you learn so you can use scrap stuff. It’s not hard.)
You’re going to need to fiddle a lot with the image in order to get it to translate. I was working from photographs and then enhanced them in a drawing app. The contrast is really important since the only way to get a black is for the glowforge not to etch the glass. (This means you have to invert the image and make it a negative before printing.). Wherever the laser hits the glass it shows the same white dot and so to get variations of grey you have to vary the dot density (a setting choice on the glowforge). Subtle variations can’t be seen easily. You are just going to end up experimenting!
I like the last picture the best, and it is a nice touch the way you did the background on the horse. The irregular shape adds interest to the picture.