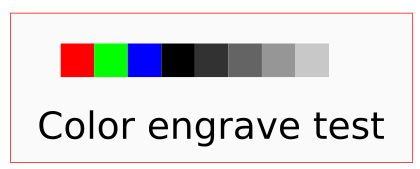
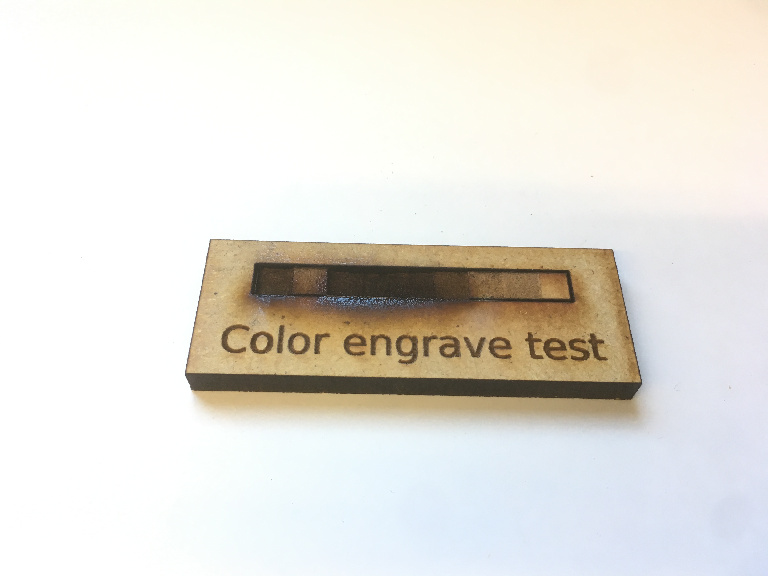
Out of curiosity, we created a test image with 9 squares filled with different colors to test depth of cut vs. color on the Glowforge. We wanted to see if the GF would engrave deeper depending on the color of the image.
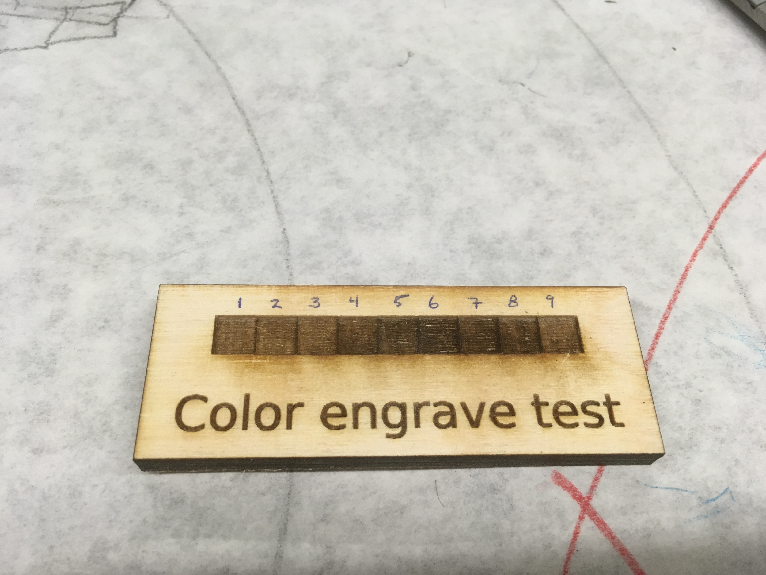
Material: ¼" Birch plywood (0.235")
Speed: 1000
Power: Full
Draft Quality: 195 lines / inch
We measured each square four times - three in the corner and once in the center of each square to get an average measurement of the pocket that is engraved. All measurements are in inches. The following is a table of our results. As it shows, the color had a very minimal, if any, impact on the depth of the engraving. Observationally, it appears that #6 was the darkest.
Color
Red
Green
Blue
Black
Gray 50/255
Gray 100/255
Gray 150/255
Gray 200/255
Gray 250/255
meas1
0.04
0.036
0.036
0.037
0.033
0.035
0.038
0.046
0.046
meas2
0.039
0.036
0.034
0.033
0.036
0.035
0.038
0.043
0.04
meas3
0.035
0.041
0.036
0.033
0.034
0.036
0.037
0.039
0.035
meas4
0.039
0.039
0.035
0.035
0.037
0.035
0.035
0.043
0.042
Average
0.03825
0.038
0.03525
0.0345
0.035
0.03525
0.037
0.04275
0.04075
Delta
0
-0.00025
-0.00275
-0.00075
0.0005
0.00025
0.00175
0.00575
-0.002
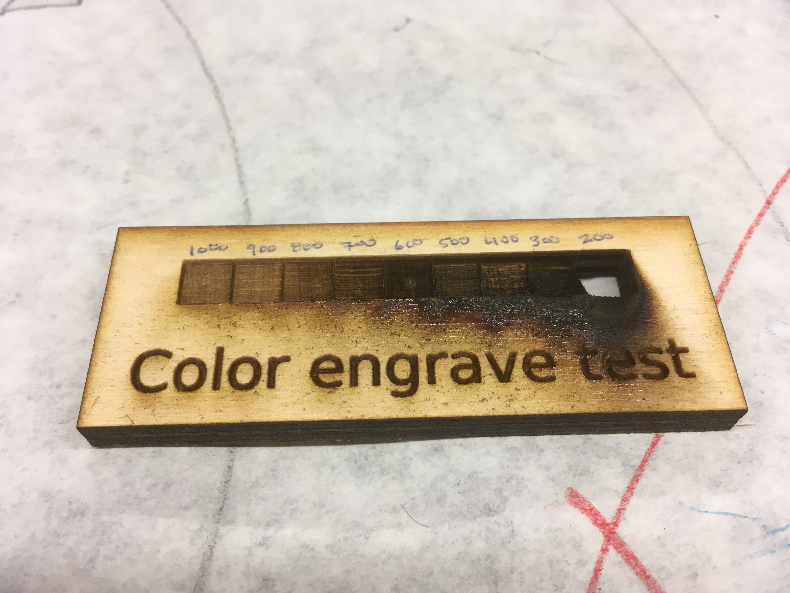
We re-ran the same artwork, but this time we modified the speed of the engraving. The colors of each square were kept the same as before. In this test, we modified the engraving speed by increments of 100 from 1000 down to 200. As you can see in the image below, a speed of 200 burned through the entire thickness of the ¼" Birch plywood sample.
Since the data we measured in our first test did not vary greatly between the four data points, we only measured each square once. The table below summarizes our results. In this, we can see a more significant trend of cutting depth vs. engraving speed. These tests warrant further exploration and future additional testing. This table is provided as a reference and a starting point for future designs and projects.
I believe when doing a vector image, the color is ignored other than setting the order in which the UI executes the cut/engrave. This would explain why you basically got the same result from all of them. I think the variation you are seeing is due to the fact that you were using plywood which can vary if you are engraving beyond the top veneer layer.
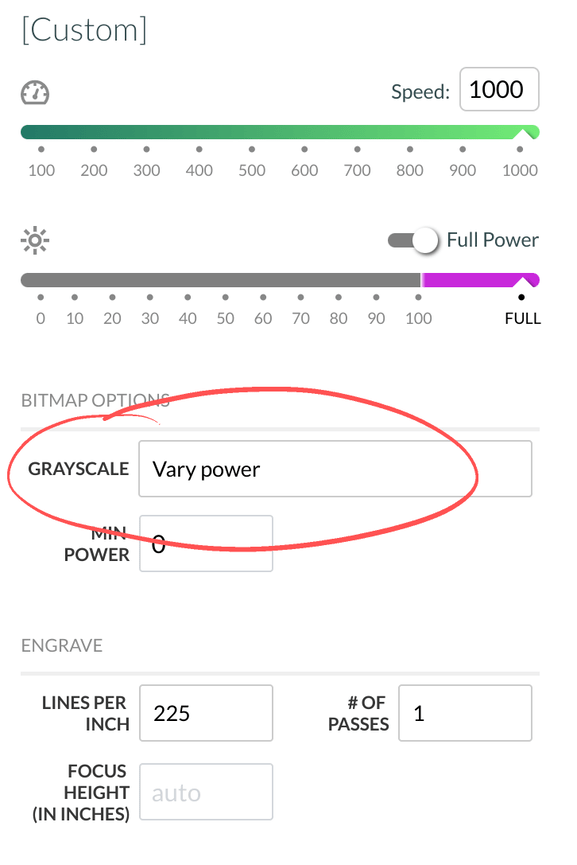
To vary the engrave using color it needs to be a rasterized image.
Yep! The 3D engraving option offered by Glowforge on Proofgrade hardwoods, draftboard, and acrylics only kicks in as a choice for raster images, and it’s only offered as a default for those materials. (Plywood doesn’t 3D engrave well because of the veneer.)
It is possible to manually set for Varying Power, but only on raster images. Vector engraves will follow whatever settings you give for it, and you would need to set the power and speed individually for each color in order to vary the depth achieved by the burn. (Which is why the second test showed better results…the speed was being varied manually. But speed is just one of the three parameters…speed/power/LPI.)
If you want to test for depth engraving, use the 3D Engrave setting provided by Glowforge with an appropriate grayscale depth map for the listed Proofgrade materials, (they do all the heavy lifting), or you can manually use the Variable Power setting on a raster image on your own material. (Coincidentally, if you do that, you can still control the depth of the engraving overall by varying the speed used, LPI, and maximum power setting.)
Try their 3D Engrave…it’s incredibly powerful and gives beautiful results. (There’s a reason it’s taken so long to develop this machine. It does it all for us.)
Thanks for the feedback! I figured it was something like that. I’m toying with the idea of using this as a controlled experiment for my students to conduct in our class. I thought there was a way that it would vary power with color - I assumed it worked the same with the vector image. Good to know!
I haven’t been back to the school over the weekend, but I have another trial ready to run tomorrow.
I re-ran the test using the same image but exported as a PNG instead of as a vector image. The data seems much more consistent! Interestingly, Red Green Blue are not all the same depths - Blue was the deepest, then red, then green. In grades from all black (0,0,0) in increments of 50/255 units of greyscale appear to correlate to about a 0.020" depth difference.
These were all run using the standard Proofgrade settings. We did modify the focus height to 0.250" to match the actual thickness of our MDF boards.
Yes, the Red is 255,0,0 and the Green was 0, 255, 0 and Blue was 0, 0, 255. I expected the three to all engrave to the same depth. I haven’t re-run this test, but it is peculiar.