According to my email records, I paid for my glowforge on September 29, 2015, before glowforges even existed. I finally received it on 10/12/2017… Just at a time when I was divorcing, so it went straight to the moving van, and it has sat in its box in the shed of my new house for the last 5 years.
Well, it’s finally time for me to take it out, and I’m a bit worried about its aging. I live in California, and my shed isn’t particularly damp . And I didn’t find any bugs, spider webs, rust, or mouse droppings… So far so good. So far I’ve found one issue: The “handle piece” at the front of the glass separated at its glue joint. (Glue and glass seldom cooperate, so I wouldn’t be surprised if I’m not alone.) At each end of the handle piece there’s a little plug which came out… I can plug those back in which I assume are for the LED lighting.
Is this thing even gonna work? Have I set a world record for the oldest unused glowforge?
And if anyone has advice about the “best glue” to reattach that aluminum handle piece, please offer it up. C’mon, that’s gotta be common.
Wow, that’s definitely gotta be a record! As for the handle, 5-minute epoxy should work fine. I’d check the hinges on the back of the lid too, in case it was the environmental conditions that got to the glue.
Oh, and you’ll probably have one of the original black lid cables that rubbed on the edge when the lid was opened and wore thru over time. You can put some duck tape or something over the sharp edge, and then just avoid opening the lid real wide.
Good luck, I sure hope your machine will start up and make you as happy as it has so many of the rest of us!
Black lid cable? Maybe experience will clarify what you mean exactly, but I’ll be on the lookout.
I notice that opening the door, the edge of the glass top slides against the glass on the left side, and it sounds like a paper cutter. I have yet to put shims under its feet cuz its surface isn’t very even, so all its weight is on 3 corners. That might be the reason.
The black lid cable is the only one that crosses the hinged portion of the lid.
And yeah, it’s easy to twist the frame if your surface isn’t totally flat (level doesn’t matter so much, it’s FLAT you want). You can shim it with sheets of paper under the corners until the lid closes smoothly. There shouldn’t be any rubbing when it’s lined up right!
If the machine has never been used, I wouldn’t worry about it. I’ve had my machine for 5 years and the original cable is fine, and does not contact any “sharp edges” when the lid is open.
I would be more concerned that the tube was predicted to last ~2yrs, whether used or not. Again, I’m at 5 years now and my tube is failing. It’s been on the decline for the past year or so.
Wow…in some ways, that’s pretty cool. As @eflyguy said, I’d probably be more concerned about the tube still being functional. I’m looking forward to hearing about how things go when you finally fire it up. You have a brand new museum piece, there!
Those are sensors that tell if the lid is open and if the connection is broken on either one the Glowforge will not work. I have not yet had an issue with the glue for the lid but would think that CV glue would be best. My very first experience with CV glue many years ago when it was first available was just that sort of issue.
As I assume the Glowforge was wrapped in a huge plastic bag it should have stayed dry, but if there was sustained cold enough to freeze water that could be a problem but if so there would be a lot of dampness. I do hope you also have two boxes as many required pieces are in that second box, most importantly the crumb tray and perhaps some materials to start with. I would be surprised if the wood in that was good still.
Also, a piece of >1/2" plywood the size of the Glowforge can permanently solve the flatness issue. I had 1/2" foam PVC big enough and never had that issue.
Yes, I have the crumb tray, duct, “proof grade materials” and even the air filter.
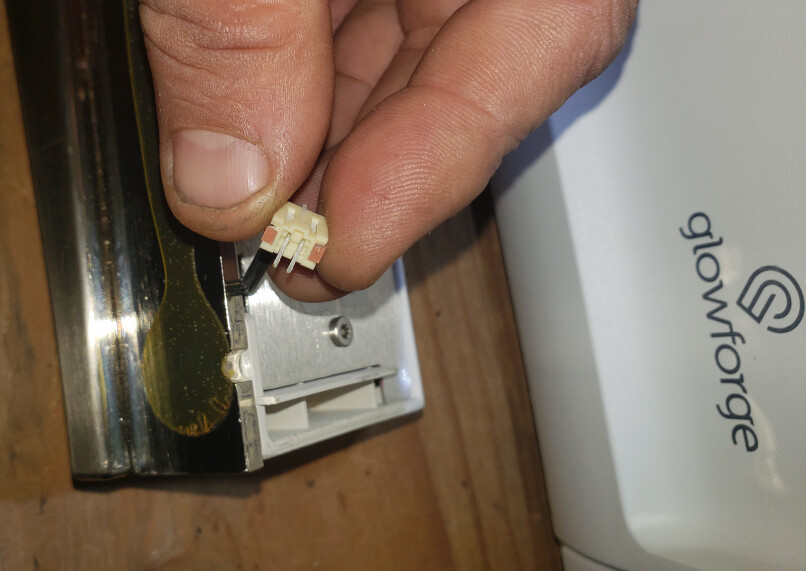
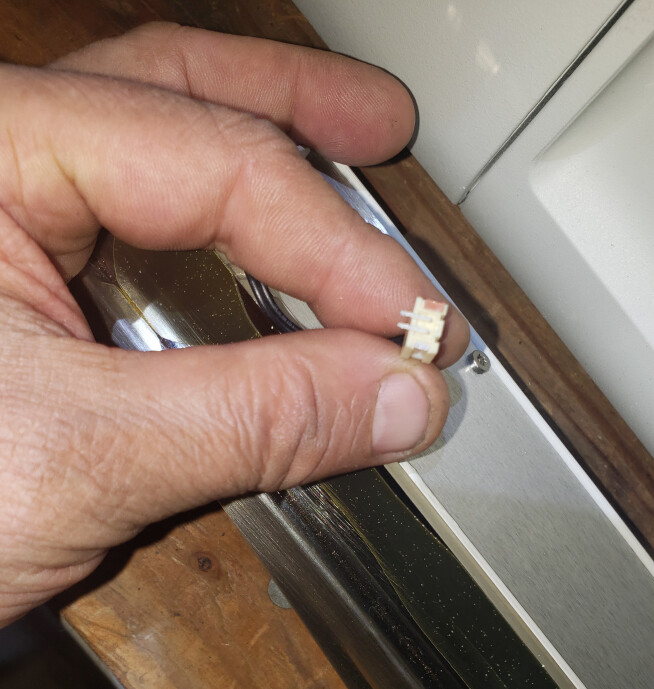
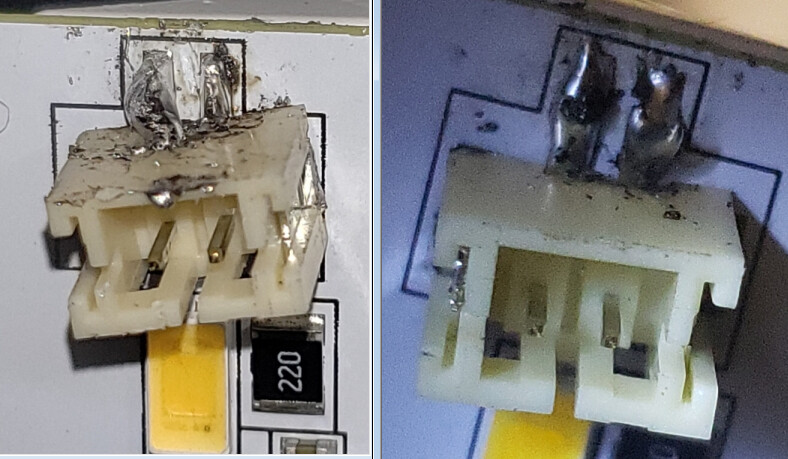
Well, here are some photos of what I’m referring to. I was mistaken… They’re not “unplugged”, the pieces are apparently just unsoldered. (Or they just got torn out when the handle piece fell off.)
It is hard to tell exactly What is going on there but I would expect “plugged” to be much better than"soldered" where two bits can part company. As noted I have not seen my own handle part company, and that looks different from other’s photos, so I cannot tell for sure. but the front corner of the lid is a magnet and sensor arrangement to know it the lid is closed. When replacing the black cable I did not have the link at the other end of that lighting bar properly seated and I got that lid open error. Fortunately It was an easy fix to re-seat it.
The bits between my fingers are actually the “sockets”. So it’s made to be unplugged, but that’s not where it separated, unfortunately. This is NOT an easy place to get a soldering iron, (facing up at the door) but will update after I give it a shot.
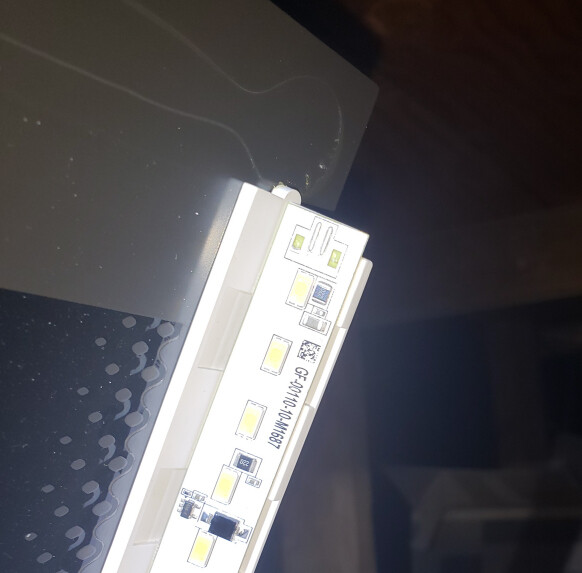
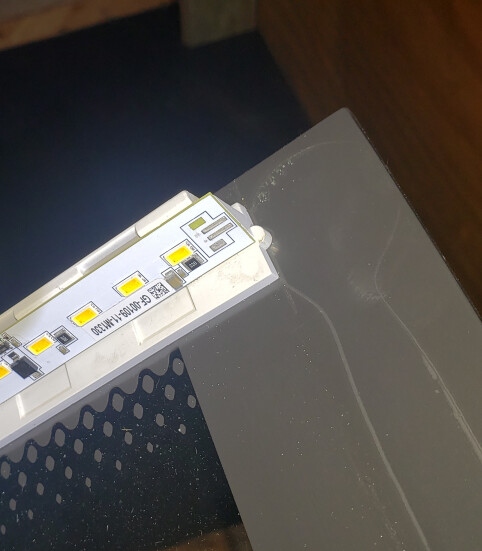
Below are the “sockets” which became unsoldered. For some reason the upload process keeps rotating my images 90 degrees.
Hi Paul, hopefully the last 6 years haven’t been too hard on you, welcome back!
Now, I’m not sure, but I think that circuit is just the magnetic switch that was mentioned. So a switch either opens or closes a circuit, could be all you need to do to make the machine functional is to short across the leads to close the circuit. That should effectively bypass the built-in safety shutoff, disabling it.
Regarding the lid rub, slide your fingertips under the corner of the case, and with your knuckles resting on the table slowly lift that corner with your fingertips while observing the lid clearance. Shim the corner that responds positively.
I would have been more worried about freeze bursting the fluid-filled tube. Hopefully, you will get that thing to wakeup.
Oh, and you definitely hold that record.
My solder joints look positively GHASTLY! Soldering at that angle, with super-tiny surface mount stuff ain’t easy. Hopefully they work.
I used JB Weld 5-minute epoxy to put the whole “aluminum lid handle thing” back on, with a piece of cardboard to protect from drippage. Won’t plug back in until the epoxy is fully cured (1 hour).
The lid issue is resolved. Those ugly solder joints apparently work, because the lights get brighter when the lid closes fully.
I think I’m all set up! Connected to Wifi, and it sure looks pretty. (I forgot my desktop PC never had WiFi because it was hardwired, and my tablet wasn’t compatible. So I had to add a WiFi card.)
But um… Now what? The setup process doesn’t give me a “hello world” project, and it doesn’t even say how I would go about cutting something like a DXF from my computer. I didn’t see a manual in the box. Am I gonna need a tablet or can I just send stuff to it from my PC?
Will be researching and I’m sure I will figure it out, but tips welcome.