One thing to keep in mind is that the iPad Glowforge app is a little behind the web app in development, although it has come a long way from first release. It depends on your needs. You can use the web app on an iPad if needed.
I’m not sure anyone has put together a tutorial on Affinity Designer specifically for the iPad. I’m guessing things are a bit different than when you use the program on a Mac. I have AD on my iPad but not on my Mac, so I can’t compare. But I’ll be glad to help you figure things out. I haven’t used the program much, but did a little playing around after I saw your message, and was able to create a simple vector cutting outline from a photo.
Here is what I did:
-
In AD, use the plus sign to create a new project and choose import from photos.
-
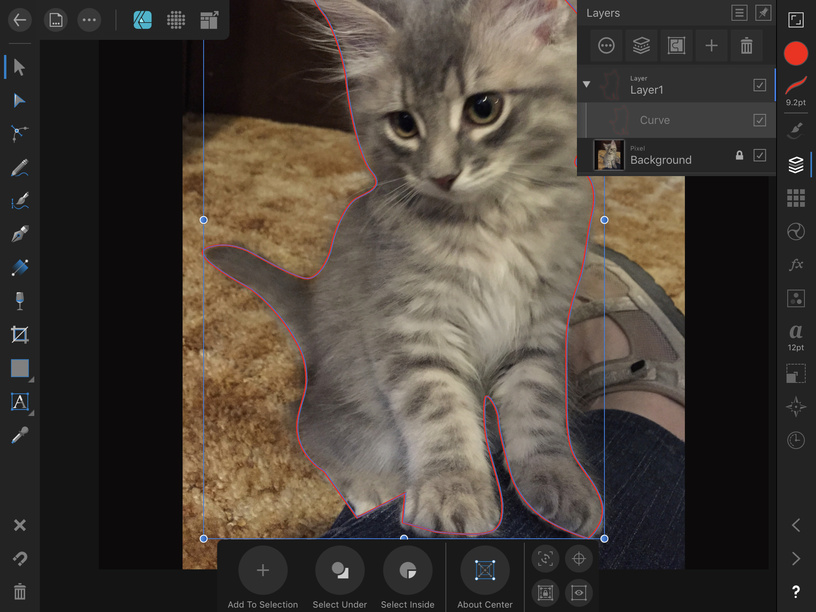
Open the Layers palette on the right hand side and you will see your photo on a locked layer labeled Background. Click the plus sign and choose Vector Layer to add a layer for your cutting line.
-
Now choose the pen tool and draw an outline around your figure where you want to cut, one node at a time. Don’t worry too much about accuracy as you can always go back and edit each node (using the node tool) until the outline is to your liking.
-
To get the file into the Glowforge app, you need to export it as an SVG. Choose the icon at the top left that looks like a letter with three dots on the bottom. Export will be one of the options. That gets you to an option screen where you will select SVG. Choose the SVG (for export) preset, and give the file a name then click OK.
-
Save it to the Files app on your iPad in the Designer folder.
-
Once the file is saved, choose Select in the upper right hand corner of the Files app and select the file. Click on Share in the lower left hand corner of the window. Scroll around the choices and you should see Copy to Glowforge (assuming you have downloaded the Glowforge app.)
-
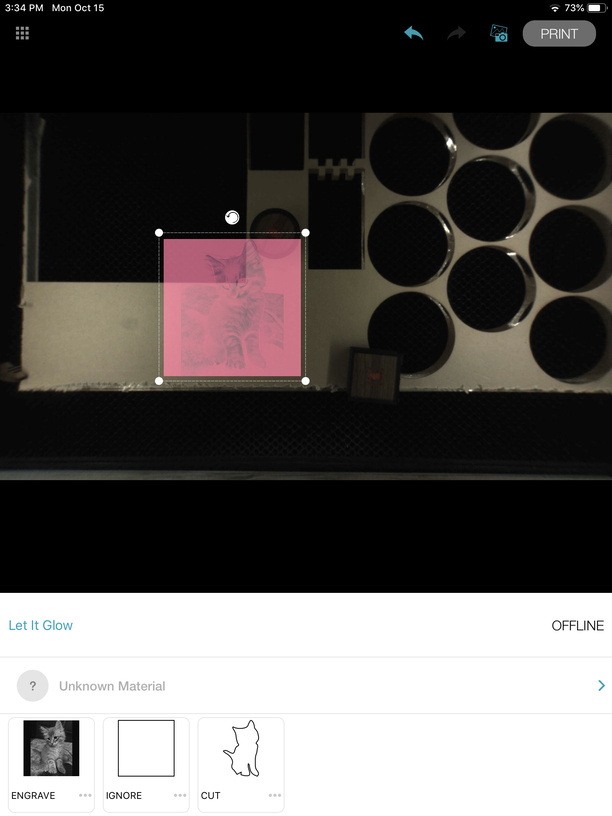
Make sure you are working in Portrait mode in the app. The photo and cutting outline (as well as a bounding box that you can set to Ignore) will come in huge because it’s based on the 45 inch photo at 72 dpi that the iPad saves photos in. You will have to grab a corner of the selected figure and drag it much smaller until it’s in the allowed bed area. Unfortunately the Glowforge app does not yet have rulers so it would be a good idea to put one in the bed of the Glowforge to guide you here.
I hope this is enough to get you started. Just holler if I can help further.