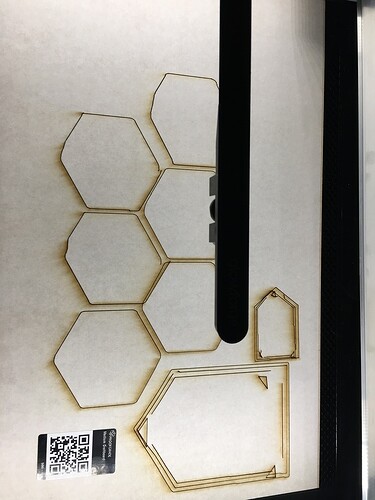
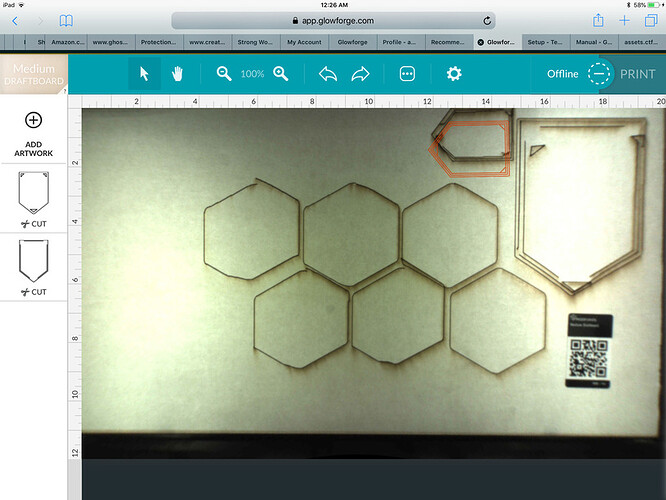
Received my Glowforge yesterday, and I must say my excitement turned to frustration. Trying to setup the WiFi connection took hours and once that was finally completed we tried our first cut. During the first cut process we noticed that the cuts were not lining up or cutting correctly. During the cutting process it looks like the laser arm is misaligning or coming of track. If facing the machine the left and right side goes in different direction at a slant position instead of being lined up moving together in a straight line. Both cut files that was tried did not cut properly. Please note we used a preset existing design and Glowforge material that was sent in the accessory package. Don’t know if this is fixable, but I would hate to have spent 6K on a machine that is not functioning as designed.
The photos provided are the coasters, and then we tried another design just Incase we did something wrong but came out with the same results.
Please advise as to how to fix this issue. Thank you.
It sounds like your gantry simply hit something during one of your cuts and has stepped out of alignment. You can adjust that yourself.
… From Rita’s reply in another post ( https://community.glowforge.com/t/resolved-what-has-happened-this-is-off-the-rails/19978/3 )
Is it possible something in your Glowforge blocked your laser arm from moving? Please check around the rails for any obstructions. If there aren’t any, could you please do the following for me?
- Turn off your Glowforge
- Try gently sliding the laser arm towards you a bit, perhaps moving one side, then the other. Whether or not that works, continue to the next step.
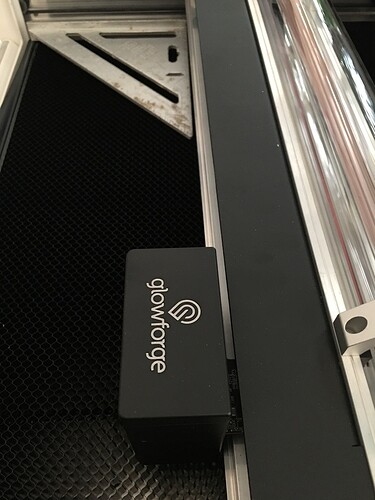
- Placing one hand in front and one in back, gently lift up the laser arm on the right side, near where it shows that it’s off the track in your photo. Make sure your hands grip the metal bar, not the tube itself.
- While lifting upwards, roll the the gantry towards you, then farther away a few times. Your goal is to straighten it out, so that it’s parallel to the front door. It will pop back onto the track where it belongs.
- Once it’s on the track, place one hand on each side of the laser arm (left and right now, rather than front and back) and roll it to the center of your Glowforge. Then roll it back about three inches, forward to center and then 3 more inches towards you, and then do that a few more times.
- Move the Printer Head to the approximate center of the laser arm.
- Turn your Glowforge back on and continue printing.
It looks to me like your material is hanging off the left side of the crumb tray. The gantry hits it and gets misaligned, and that throws off your cuts. I learned this the hard way, trying to maximize usage of the edges. You can still use them – it just has to happen AFTER the middles are cut out, and you can break the leavings apart and use them to make smaller things. 
I’m so sorry for the challenging start. I extracted the logs to investigate the problem you ran into, and I agree that the steps quoted below are a great place to start troubleshooting:
After these steps are complete, I’d also like you to try a test print. We included an extra piece of Proofgrade Draftboard with your materials shipment for troubleshooting. Please print the Gift of Good Measure on Proofgrade Draftboard on the far right side of the bed, as close to the edge as possible.
Let us know how it goes by including a photo of the print in your reply.
Thanks in advance!
I wonder if a large disclaimer or caution would give some emphasis to keeping materials that extend to the sides ONLY ON THE CRUMB TRAY GRID.
‘Materials only on the crumb tray’ is not detailed enough, since the no-go edges are also part of the crumb tray.
I did this once myself with material extended past the grid and on the solid part. I got lucky though since it was a thin scrap of material and just shifted when struck. When I yanked the lid up and examined the situation, it was easy to see the problem.
Got my eyebrows together a bit, wondering why they would even let this happen. Seemed like it could have been engineered out with a higher edge ridge or some other type of physical block.
-> STAY ON THE CRUMB TRAY GRID WITH MATERIALS. <- maybe a safety sticker or at least an obvious push in the manual so people (like me and others) don’t have to figure this out for themselves…
Maybe add some of that yellow/black striped caution tape to the edges 
Thank you Houdini7 we will try this and see if it works.
Good day Vee,
I tried what Houdini7 suggested, but it did not work. There is something wrong with the machine. I tried to upload a video but it did not work. What other options is available for me to upload the video?
Can you post a photo of the bed with the draftboard in it and the lid open? Particularly looking to see that the board is square to the crumb-tray and that the gantry is square to the unit. A video would be nice too, but I’m not sure why you can’t upload that.
A full sheet of draftboard will just fit inside the lips of the crumb-tray. So if you then slide the gantry over the board we should be able to see if everything is square.
Hi Houdini7 it’s not the bed that is causing issues, it the actual laser arm that is out of whack. Is there another way I can send u the video because I can’t upload the video for some reason
Videos have a limited size restriction. I tend to use YouTube with the permissions set to unlisted.
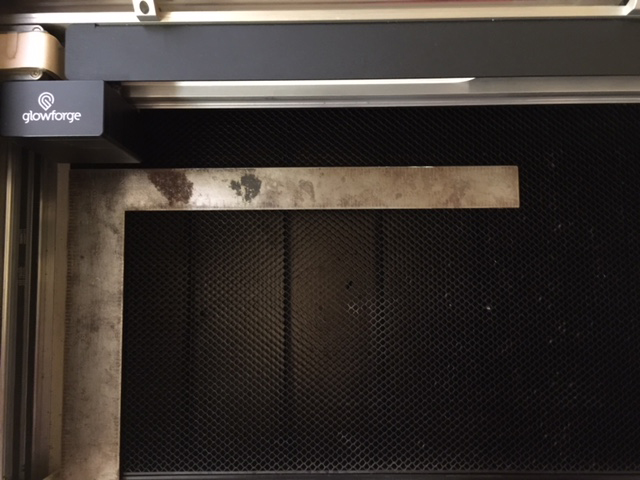
You can also just take a picture with your cell phone and upload it here. If you have a carpenter L square like the one shown in the photo below, drop down the front door and align it along one edge of the tray so you can check to see if the gantry (the laser arm) is parallel to the ruler.

Hi Jules, the issue is when the machine is in motion. That is when it starts going in different directions.
I’m going to send you a Private Message with some tests you need to make.
You’re going to need to follow the instructions CAREFULLY, especially the part where I tell you to unplug the machine first.
It’s going to take me some time to type it up, I’m having a little issue with an eye at the moment, so check later this evening for the instructions and pictures.
Can’t specify enough that you’re going to need to follow the instructions exactly.
Ok thank Jules, anything is helpful because I don’t want to have to send this machine back. Can you look at the video I have posted on Facebook at Antolia chocolates
It won’t let me view it for some reason. Had you tried uploading to Youtube? That’s where I stick any videos and they upload straight from an iPhone…then you can just give us the link.
Hi Houdini7 I made the video public on Facebook under Antolia chocolates. Maybe u can try to view again.
Unfortunately, it looks like your unit is experiencing an issue that we can’t resolve remotely. I want you to have a reliable unit, so I’m recommending we replace this one. I’ll be in touch via email to sort out the details. I’m so sorry about the bad news.


