Some CAD programs have direct laser compatible export (such as SVG) from a sketch (depending on your CAD that may be what you want, but I’m going to show this in OnShape not because it is special for this but because it is what I use in my CAD/device design course at the medical school). But what if you either free modeled (direct model in fusion 360 speak) which is a digital clay mode) you have no sketches (also if you only made a sketch you can probably just draw this is illustrator/inkscape), far more useful is you have a modeled shape (like a flange) and want a laser cut thing to sit on the flange. Now there are many ways to do this but this is a simple way that’s easier to remember for a single 2D thing for the glowforge (flat-packing a multi-part-surface thing is another workflow - there are programs for that like MoriMoto). First step (no pun) is to build your 3D model, and you can build it in metric or inches (I will exercise my god-given right to measure things in furlongs and chains until you pry them from my cold dead fingers!) as OnShape converts easily between. Note once you’ve done this is is way simpler than the list below seems, but understanding a bit helps in troubleshooting.
-
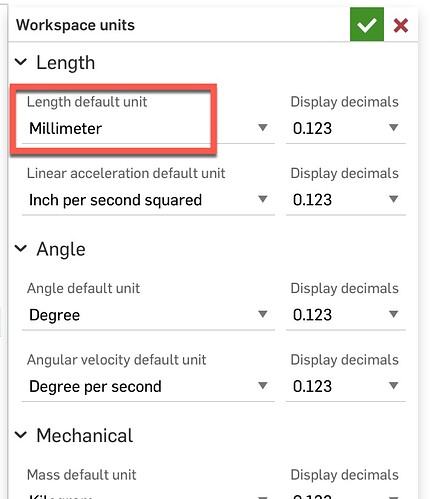
first step is to switch units to inches (sorry metric dudes DXF is clunky in metric) with the hamburger menu top left, just the workspace units) It does not matter if you designed in metric but when you export dxf uses the units active at time of export
-
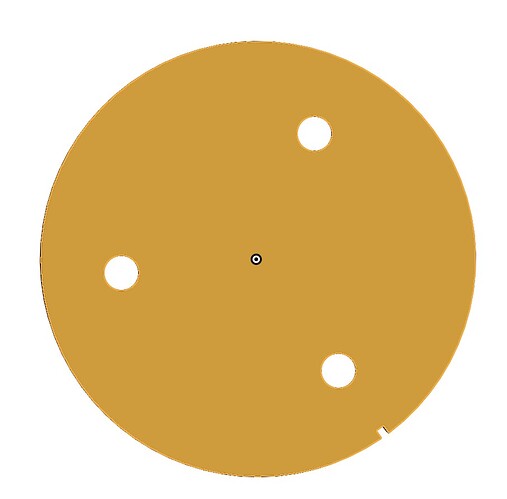
Click (Once!) on the surface you want to export to make it yellow (this step is technically optional but unless the surface is selected it doesn’t get a file name…)
-
Tip: chamfers and fillets will not be included in a 2D export so you get the outer diameter
-
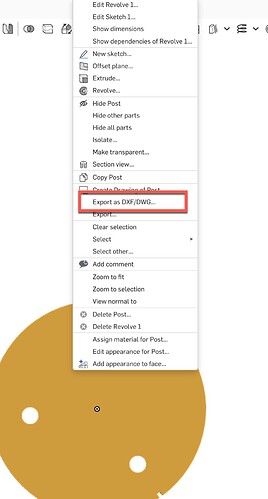
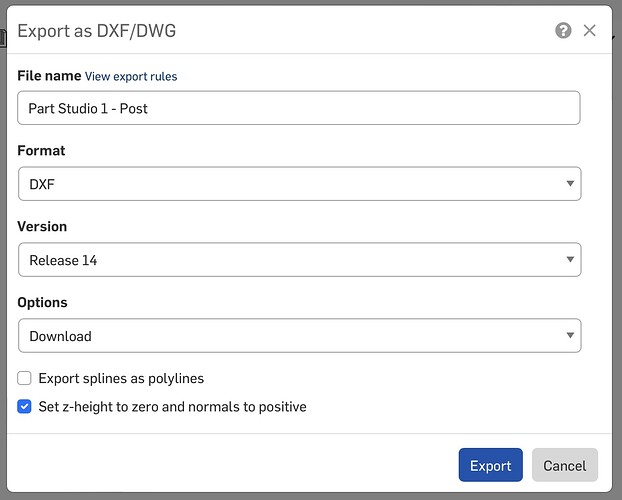
Right click on the surface and you will see the “Export as DXF…” menu choice, and other than the file name (which is the part studio name - part name) leave the other options as they are…
-
Now go into your dxf-importing drawing tool as desired (I will use Adobe illustrator, but Inkscape, etc all should be very similar)
-
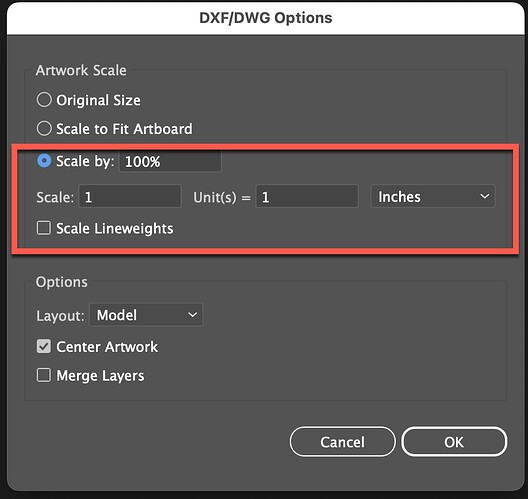
Now crank up your boombox because welcome to the early 80’s! DXF is awful, but it is common. The first fun fact: dxf is unitless (well not exactly it has arbitrary units
 ) which is why we had to do step 1 above… so typically in programs that ingest dxf files the tool needs to know what the internal arbitrary units are in the real-world, in this case inches, so the way Adobe shows it is how many arbitrary units == number of real-world units (e.g. 1 unit == 1 inch) second tip, you can use this to scale an input as in, 1 unit == 0.5 inches will scale the object to 50% or the reverse (which in 1982 was probably useful).
-
Ok so now the outline of every part of the surface is in your drawing program, but you’re not quite done depending on the drawing package. Note: illustrator for instance does not join the lines (other programs do) you could just send this file as-is to the GF and it will cut it, but each line will be a different cut, and unless you like going slowly we need to join the paths. There are many ways, and if you’re @Jules or @cynd11, illustrator experts, you probably know the correct way, (if you’re @chris1 ) you probably hand edit the dxf to join the paths) but I’m a moron and so this is what I do: I drag box around the shape, if your shape has inner paths (like a screw hole) de-select those and use the join tool (cmd-J on a Mac, I assume ctrl-j on windows?), now sometimes it will throw an error that this type of path can’t be joined (ok just ignore it then). Note recolor your paths as needed for separate ops in the laser
-
Do the file->save as… svg
-
Print
-
Profit
edit: images
