Gothic Rocket

Wow! Awesome job!!

3 Likes

You’ve got some incredible talent, I hadn’t connected that you were also the one who made the needle LED signs. Inspiring work, and can’t wait to see what else you share!

3 Likes

Looks amazing

3 Likes

Electrifying

3 Likes

Very cool, thanks for that!

2 Likes

Looks amazing! Love these.

2 Likes

I used to run the tesla coil and van de graaff generator when I worked at OMSI in high school- this brings back memories!

4 Likes

@dan have you been to the spark museum in Bellingham? I think you’d love it. I’m the co-founder & president. We have one of the largest public Tesla coils in the US, and during the weekend show you can get in our cage & get zapped:

Megazapper

5 Likes

If you don’t mind, where’d you get the material you used on the rings? Is it painted/gilded?

It looks quite metallic, and I’ve been having a hell of a time finding sufficiently-metallic-looking acrylics with cut edges that look as nice as that.

I was also surprised at how well it turned out. Even standing right in front of it you can’t really tell that it’s acrylic.

It is .2” clear acrylic that I bought at the local hardware store. It’s not marked, so I don’t know if it’s cast or extruded. I bought it in a 4 x 8 sheet for a larger project and cut it down, I made these from what I had left over.

It’s painted with Rustolium specialty metallic gold Or silver paint. See below.

image image

4 Likes

I wanted to add an addendum to this, to pass on something I learned about painting acrylic.

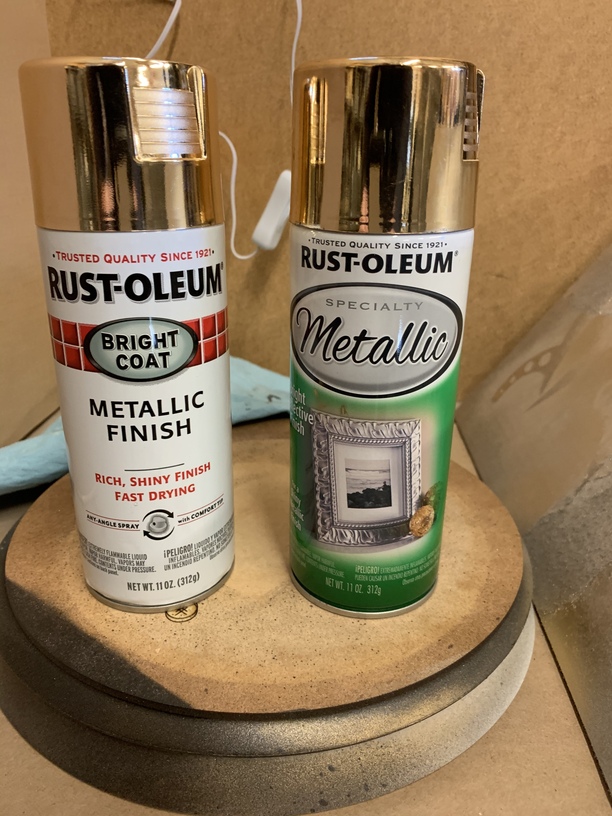
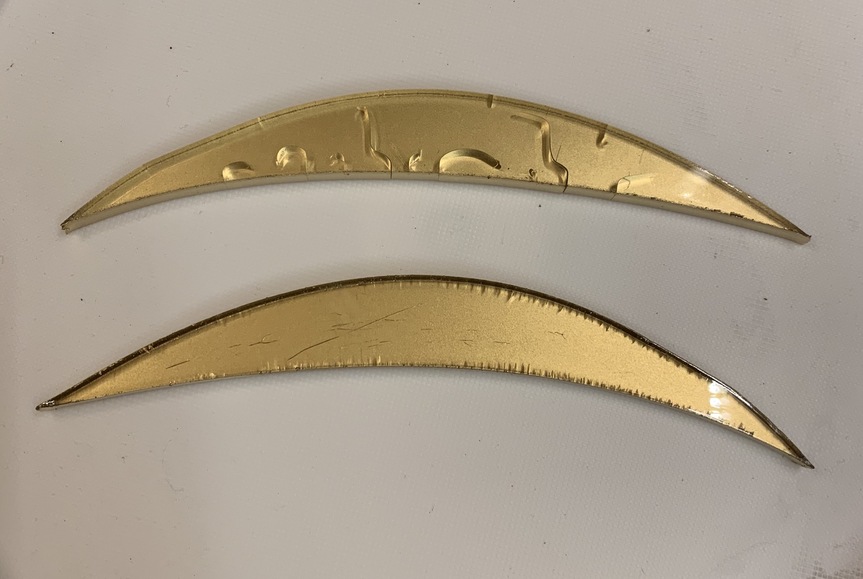
I decided to make another one of these, but when I painted the acrylic It cracked badly. I thought I was using the same paint as before, but it turns out not. below are the two cans of paint. both are rust oleum; The one on the left causes the cracking, the one on the right does not. Further below is a photo showing the result of using the two different paints on the acrylic. The top piece was painted with “rust oleum metal finish“ paint. The bottom piece was painted with “rust oleum specialty metallic“ paint. Huge difference.

6 Likes

Good info, thanks for sharing.

What are the marks on the bottom one, just where it didn’t stick near the edges?

My understanding is cracks start along exposed edges, which the top part certainly seems to support, but the bottom looks a little like small cracks are starting?

I noticed those too. They are small little cracks along the edge but they haven’t gotten any bigger.

They are tiny little cracks, but not the surface cracks like you see with crazing. Using the wrong paint seems to dramatically amplify the effect, with the crack in some cases going all the way through the material.

I just cut another piece and annealed the edge before I painted it. I’ll check it in a bit & see if that made any difference.

1 Like

It’s supposed to be caused by the solvent that carries the paint. Would be interesting to know if there is a difference between those two.

That makes sense. The can doesn’t have the ingredients & I guess I don’t care enough to dig into it online… I just won’t use that paint on acrylic.

I tried a test where I cut a rectangle & annealed the edges of half of it, then painted it all on one side. The annealing definitely does significantly reduce the cracking. I need to work on my annealing skills though, I got a little too much heat on it & roughed up the edge a bit.

1 Like

The bright coat on the left has acetone, the specialty uses toluene.

2 Likes

Thanks. Acetone will definitely do it. I’m surprised it’s not crazing the front as well.

That was quick work!

They have one of the friendliest sites, every product page has a tab for the SDS in every language.

1 Like

Hah! got it straight from the horse’s mouth. That is the best. Thanks.