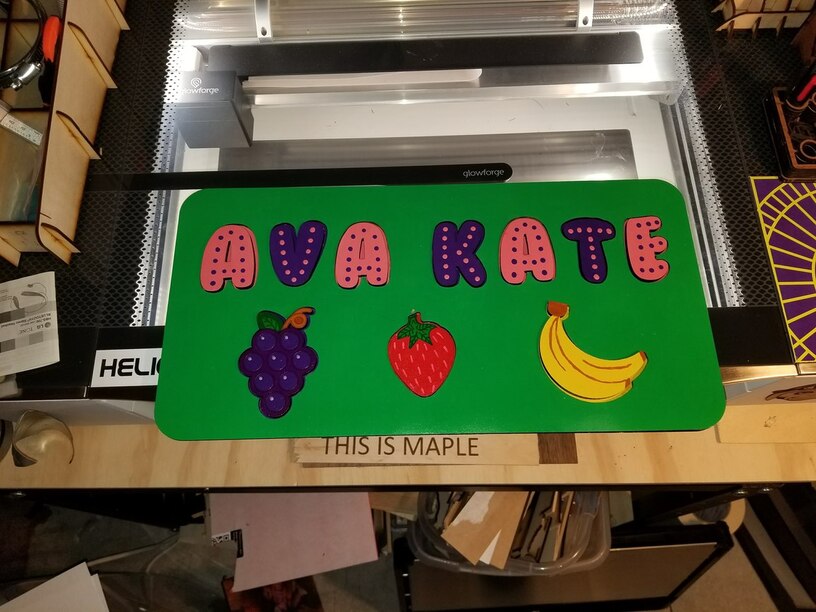
After doing that repair on that pickup I decided to make puzzles for each of the Granddaughters as these are imposable to buy because their names are such as they will never find them in souvenir shops.
My other daughter. Aunt to the granuns did the finish work. It is meticulous to the point of almost not wanting them to play with them. But then what was the point? Shame she can’t learn a bit from Bob Ross about speed and efficacy. We could do some good Etsy business. Done in two thicknesses of draftboard.
Oh, I would if I knew a way to cut her time from three weeks to three hours! I could cut my part down to well under an hour with a few more iterations to smooth out the workflow.
I may well have to learn to do this kind of finish work myself as well. I mean I learned how to finish my knife sharpener handles after all.
She is an artist … and your part is over the top fun! What a great project.
I’ve done three name puzzles (no fruit). One for my grandson (when a friend saw it … they asked if I took orders). They are very crafty and do woodworking (just without a laser). So, I decided to cut for their two children and give it unglued and unpainted.
Make reusable stencils to help painting. @smcgathyfay can probably give you a couple of tips for progressive stencils. Several others on the forum could too I’m sure.
That is acualy a great idea, show one or two finished and show one unfinished. Show the price of each and I bet a lot of people will get excited to finish their own!
You can but it depends on how many you want to make. I find that either the masking is a PITA to remove, or it removes itself just prior to me wanting to paint something and I have to figure out re masking it again.
I’m picture a small jig with 2 sides you can bump against and a couple of dowels to position the stencil. Bump the letters in, apply stencil and hit with paint. Pull and repeat. Same jig for all letters, just different stencil to put in place…
Go with whatever approach works best for you though. It was, like I said, an idea that popped into my head for a more mass-production approach.
I see what you are saying and that would probably work well if all that was going to change was the lettering but if I make more the letters will be sized by how many, the extra pieces will all be custom. so…
These were all Draftboard, but I make a lot of things from Baltic Birch ply, and it would work fine. You’d want to use enough clearance to be able to sand and paint everything and get a good fit.