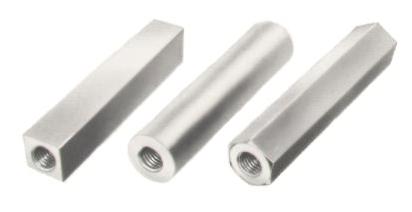
Hello all, I am working on a Gyroscope pendant project and was hoping someone can direct me to the type of pins or screws I can use to connect the wood rings. The pendant will be about 2.5" x 2.5". There are three rings that I plan to have spin in different directions. The easy version is just to have one pin that goes through all rings. That will be plan B. I’d prefer the connectors be set up like the following reference photos:
My version, however, is made with wood rings so this is where it gets a bit tricky. I was thinking about using micro screws but I want the rings to spin somewhat smoothly. Does anyone have any ideas of what I can connect the rings with? Possibly a thin metal bar that screws in at one end? Is there even a bar like that out there. Any suggestions welcome. I’ll opensource everything for this project once I am done. Let me know if you need any clarity
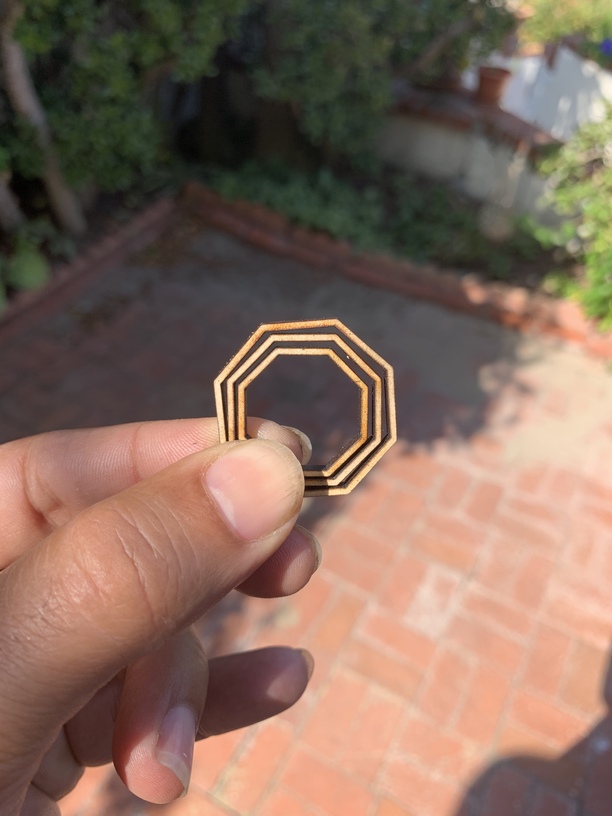
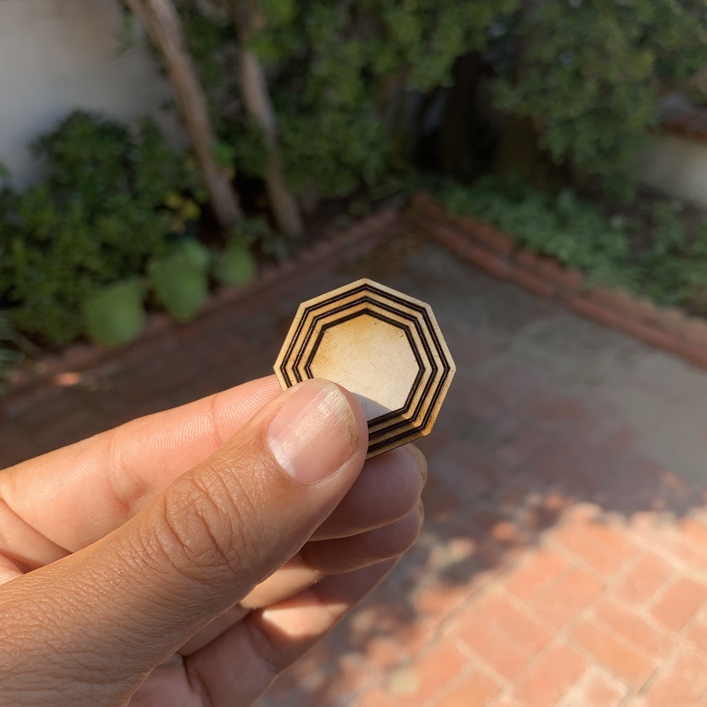
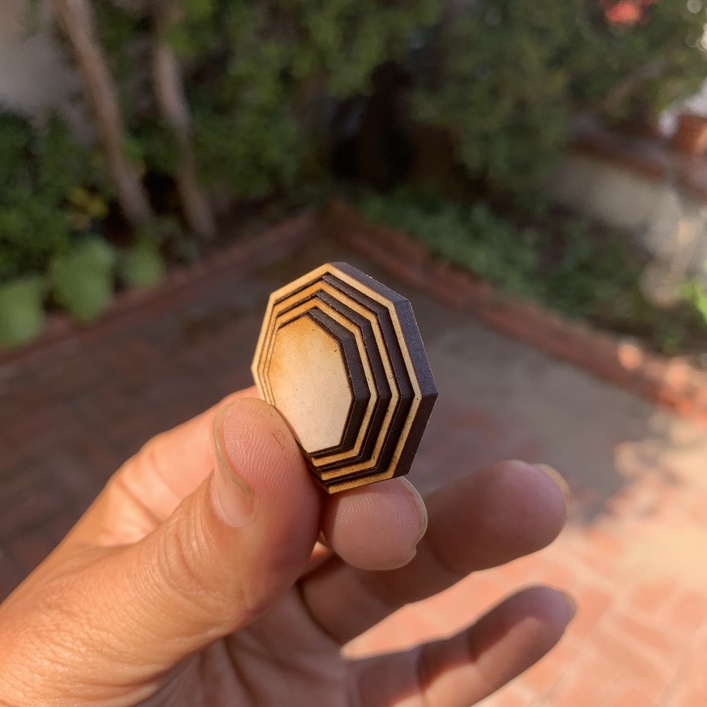
Here’s a test cut with test wood so you get an idea of where I am headed:
Take a look at this site, they have a tiny expanding curtain rod. Might find something that works: Minimum World I googled “screws for doll houses.” HTH
Bamboo makes very interesting hinge pins where folk want to stay with pure wood. otherwise tiny eye rivets can make very reasonable bearing surfaces where some sort of metal pin is involved, particularly the pins for electronic plugs.
Hmmm. I don’t see it happening. You’ll need a machine screw and a nut. You’re also going to need a spacer to keep the rings apart. I have a bunch of really small screws and nuts, 1mm and smaller, and I don’t think I could make it work with anything I’ve got, there’s doesn’t look like there’s enough space.
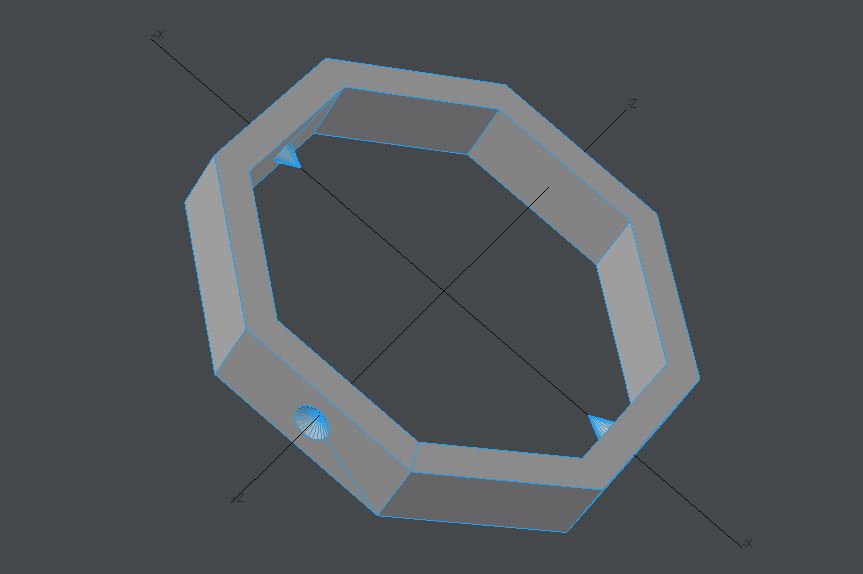
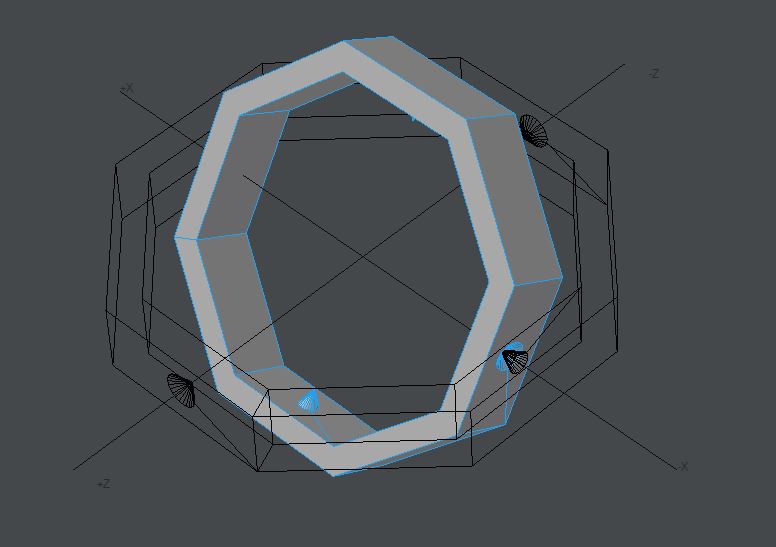
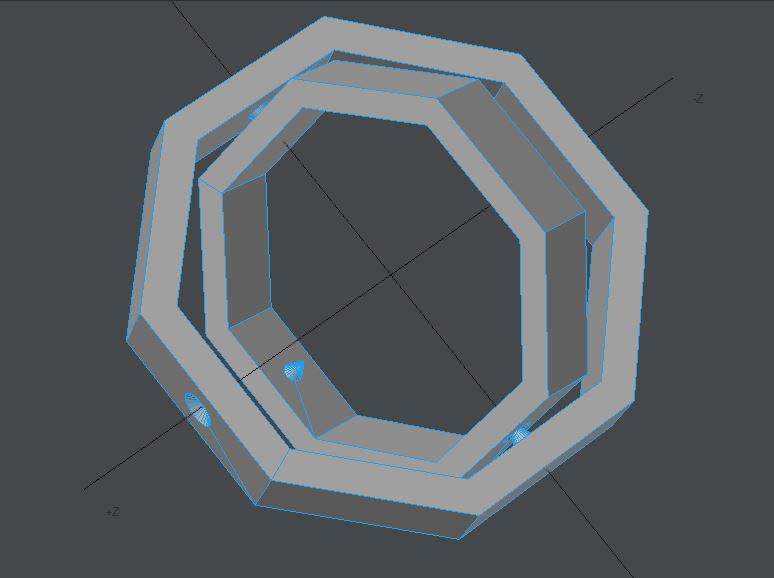
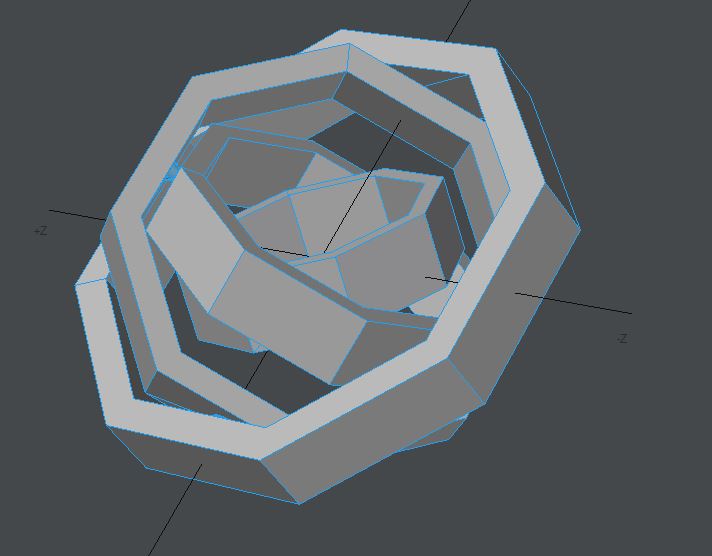
Usually for this sort of thing, each ring has two diametrically opposite conical “pins” that point inward. Each ring (except the outermost) also has a set of diametrically opposite countersunk pockets cut in the outside face that the inward facing pins from the next larger ring engage. The pockets don’t go all the way through the ring, so the rings stay centered. The points of the pins ride in the countersunk pockets allowing the assembly to freely spin.
Here’s what a ring would look like. Two inward facing pins and two outward facing pockets for each ring except the outermost which has no outward facing pockets, and the inner solid hexagon which has no inward facing pins.
The next smaller ring rides on those inward facing pins, which engage the outward facing pockets on that smaller ring. I left the outer hex transparent in this picture.
I thought about this more and changed my mind… If you can find some small wood screws with a length that’s the thickness of the hexagon wall, plus the distance between the hexagons, plus just a tiny bit more, like a mm or so, you can use the screws driven through from the outside of the hex to the inside and these will act as the “pins”. Once you’ve driven the screws through, reach in with a little file to get rid of any threads at the very tip of the screw, so it’s just a point. Back the screws out a tiny bit and align the hex with the next inner hex. Then drive the screws home. The points will dig in to the wood and make their own pocket. And with a little “work hardening”, moving it make and forth, it should get reasonably loose and spin freely. If it doesn’t, a little graphite powder will fix it right up.
If the heads of the screws interfere with the next ring, you can file them down once you’ve driven them in…
You also need a precision drill to do those side holes. Unless you were planning to jig them up sideways and use the laser—I guess that would work but will take a bit of experimenting.
There are several possible solutions here. I would look at findings for beading. You can find a flat head pin that you can push through a hole in the two parts and then depending on your skill level either peen or bend the cut end to prevent it from coming out, or file it flush and glue only one end.
You can also find tiny screws. If you glue them and are careful, you can use laptop screws for wood and their fine thread will allow them to spin pretty freely. Amazon has an assortment of sizes for 15-20 dollars that I use for a lot of projects. As above, you will want to glue one end and possibly countersink the head. I use them for wood and plastic. I always tap the hole before installing the screw so that the wood isn’t stressed much. You can find wood thread screws but the more aggressive thread will wear out the hole in the moving part.
You could also use a straight pin and a tiny washer and glue one end of the pin to the wood to keep it in place. Then the washer keeps the two parts at the proper spacing and also lets them spin smoothly. While the washer is needed in this option you could use it for all the options.
Thread is another possibility, though it may be hard to tie the knots with the precision you need.
Amazon also has small drill sizes, usually in sets or bulk.
Thanks for your replies. This is super helpful. I think my test cuts may be throwing you off a bit. That’s not the final cut. I will have much more space between each ring and each ring will have a bit more thickness added to it. That was just my very first cut to get the idea across. Apologies for the confusion. I appreciate your feedback.
This is why I like this community. Solutions come up that you may never think of. I may not use the site you listed for this project but will definitely have it in my bookmarks for future projects to come. Thanks!
I have something I am using to cut the holes so no worries there. Also, the rings will be much thicker than what you are seeing in the test cut. I should have clarified that, my apologies. Thank you for your feedback.
Anyone know if there is a smooth thin metal bar that has threading on the inside to take a screw on each side. A metal bar, where if I cut it down, the threading will still be usable? Something like this at a micro size:
also was thinking I could have a bearing type ball separate the sections with a bar going through it. Loving all the suggestions. Its got the wheels turning. I am going to try out a few options from above. keep em’ coming if you have anything else.
The problem you will find is that micro threads are very expensive. The cost to produce miniature machined parts goes up by a huge amount when you drop below about 2 mm diameter. Trying to do internal threads on something that small is very expensive, even in large quantities. Then you have the wall thickness to support the threads, which will get to the point really fast that the threaded tube is larger than your laser cut part.
While it is possible to find such a part, or have it made, I think you would be best served to look into either threading into the wood and gluing the screw or the head pins as mentioned in a couple of places. If you are worried about the glue holding the pin, try scuffing it with a little sandpaper before applying the glue.
You also don’t have to worry about wear with these little parts - the forces on them are so small that a 2mm machine thread screw should give you lots of life with little wear.
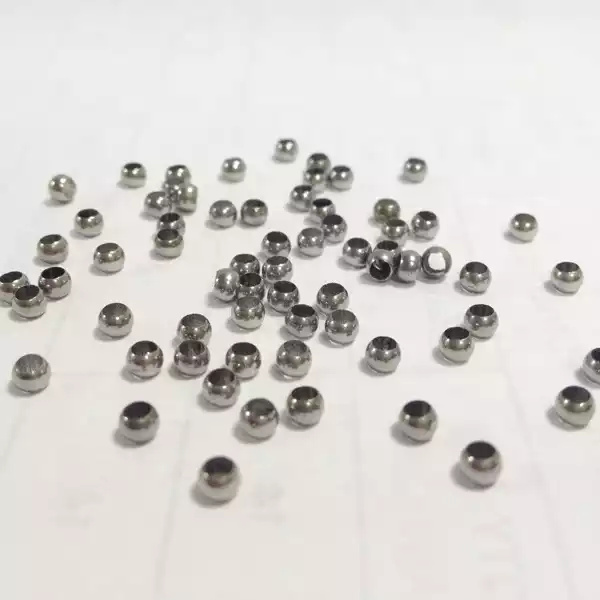
You could also get crimp beads the correct size to go over the threaded part of your screw that is the axle and use it as a bearing.
Another possibility is to use the crimp tube as the axle. The tube will allow you flare the end, keeping it in place.
Tiny metal pins like this are pretty widely available, probably even at your local hobby shops, craft stores or hardware stores. You might have to buy a longer piece to cut down to the right lengths, but it’s out there. Check out the retailers listed on the website below. This stuff is literally everywhere.
Look at eyeglasses screws on Amazon. You can get kits with sizes down to about M1.4. When you drop below that, the screws themselves cost about $1.00 each or more depending on the size.