Since it’s Halloween, or at least for Halloween, I’ll hand out the candy first.
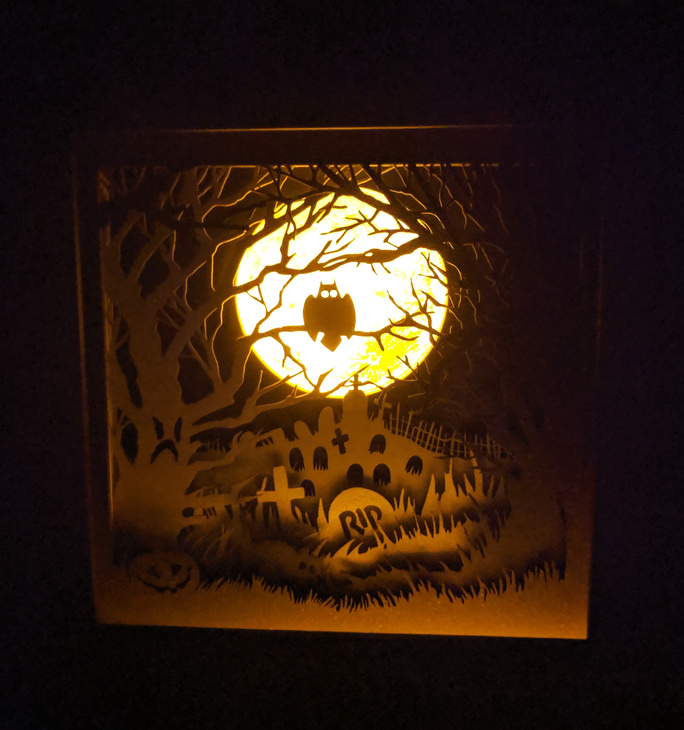

The top photo was taken using Night Sight on my Google Pixel phone. The photo is better than real life.
I purchased the design for $5 from Paper Ink and Knife, which I found by googling. The moon engrave was not included with the design so I found me a picture of the moon from NASA and after ten tries finally figured out engrave settings that didn’t totally suck. I don’t like my final results as a standalone engrave, but it is pretty much exactly what I was shooting for when edge lit.
I made an unlighted shadowbox using maple and water color paint in August, but I wanted to do one with LEDs and I kinda owed a Halloween freak a present so the idea was born. What went through several iterations in my head was how to mount the LEDs and wiring, under the acrylic, in a box. I found a roll of orange LEDs on Amazon and found a 12V power supply with matching plug. Luckily the length of the female barrel (the one inside the box) was the same length as my longest standoff in a M3 screw and standoff kit I also purchased off Amazon. So how to line up a bunch of standoffs and keep the female barrel connector from moving?

Make a frame from draft board. Those black standoffs are hexagonal and slide through the draft board. The hole at the bottom is the outside diameter of the female barrel connector plus a tiny bit of wiggle room. The instructions with the design said to use double-sided foam tape to assemble. There are seven layers, each 7.75" x 7.75" - so a lot of tape is used.
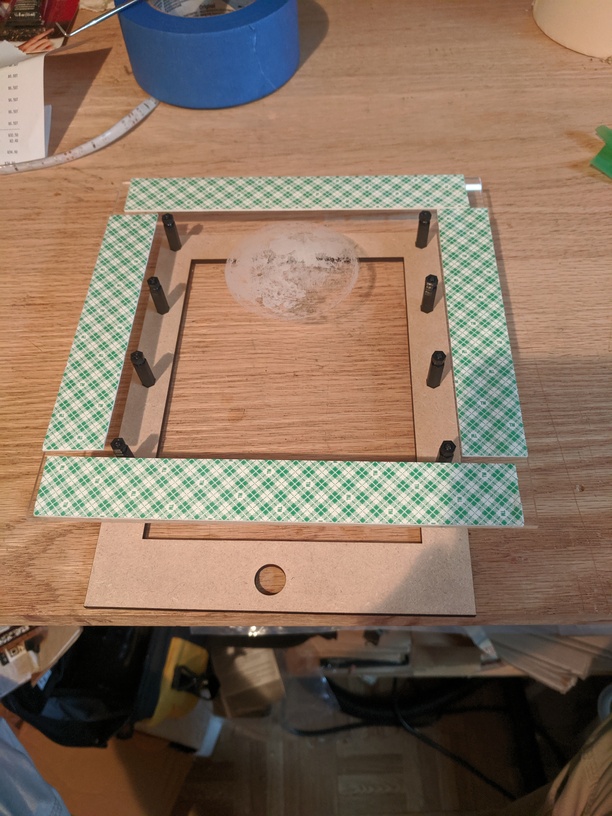
No, the tape is not thicker than the nut on the back of the standoff, but it is close enough as long as you’re using paper. I don’t think the tape is thick enough to properly separate the layers. If I do it again, I will use something else. Maybe a thin corrugated cardboard and a spray adhesive.
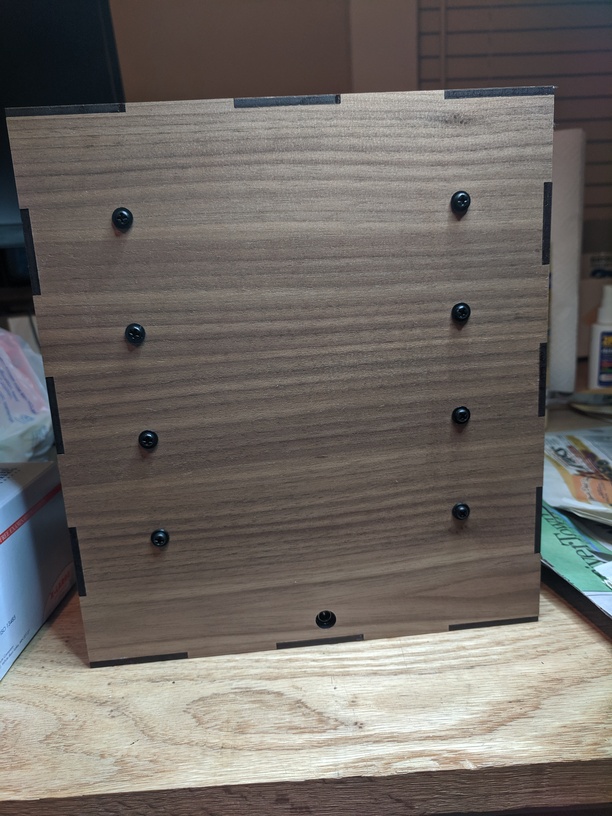
After assembling all seven layers I flipped it over and dabbed the back of the draft board with some CA glue. This in-place jig is about alignment and the screws going into the stand-offs will hold it in place. I just needed something to keep it firmly attached to the proofgrade walnut plywood back when it was assembled so the barrel connector would align correctly. Therefore, I didn’t bother to sand off the proofgrade finish. I did screw quickly so the CA glue wouldn’t set up before I could press the two pieces together.
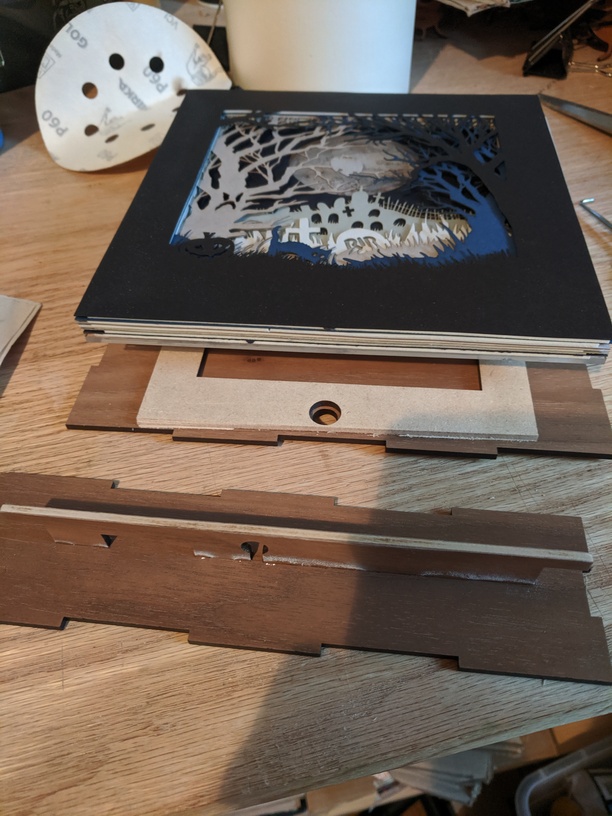
There are a few things to note in the photo above. First is a design fail. I had to saw off the bottom of the draft board jig because it was too long. I caught this after it was cut, but before I cut the walnut back. Turns out the stand-off placement was correct, I just missed the bottom being about an 1/8" too long. I could have re-cut, but then I would have had to pass up an opportunity to use my Japanese pull saw. The second thing to note is how the hole in the walnut is the diameter of the male plug and the hole in the draft board jig is the outside diameter of the jacket of the female plug. Luckily the male one was smaller or this wouldn’t have worked so well. The bottom piece is what the LED strip attaches to and the hole in it is for the back end of the female barrel connector. The back end tapers and this keeps it in place. The LED strip has an adhesive back, but I read it is not very strong. So, I sanded off the char to provide the best surface to adhere to and hoped it would work.

It did work, however, I should have provided more strain relief on the right where it has to twist around. So all that was left was to glue up the box.
The connection feels solid.
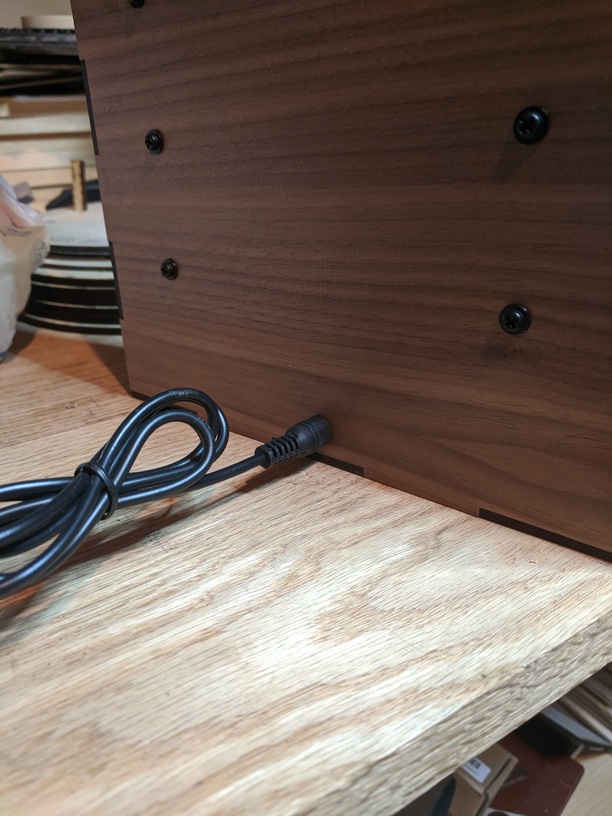
I wouldn’t bet on ten thousand insertion cycles. Or a thousand cycles. But I expect it will last several years.
Materials are proofgrade walnut ply, medium clear acrylic and draft board. The design was from Pen, Ink and Knife, the paper is card stock from Blick Art Materials and everything else is from Amazon. Now I just need to figure out what to do with a few meters of orange LEDs.

