Before I invest the time and material to figure this out myself, I thought I would ask the Glowmind… I am looking for a manual setting that will etch on acrylic without eating away enough material to make an obvious change in depth. Frosted glass is the ideal analogy. Anyone have good numbers in your notebook?
I’ve had very little time on device and have zero intuition so far on reasonable starting values. Tap Plastics’ scrap bin makes experimenting cheap but it never hurts to look for a head start.
Off topic stuff:
Do we yet have some convention for topic titles and tags that we can use to post and search for manual settings? I love naming conventions and would suggest something like this:
Topic: Concatenate “MANSET:,” material name, and effect
For example: MANSET: Generic acrylic, frosted surface effect
Body: Contains relevant values, sample image, creator notes such as material brand name or vendor.
Tags: MANSET for Manual Settings WIP for Work in Progress or FINAL for a completed, usable setting. (Perhaps WIP is always implied unless FINAL is specified.)
I did choose the weird term “MANSET” deliberately because a general term like “manual settings” will turn up allll kinds of other things.
There are MANY ways to skin this cat, of course. A wiki was mentioned before and I think that would be great, but we have this forum running now.
I think there’s a spreadsheet, but I don’t have the link handy.
And in my experience something around 5 pews at full speed are needed to get through the masking reliably. After that, it’s a question of just how light/heavy you want to go (and defocus blah blah). Somewhere around 15-20 pews (don’t have the piece handy) will get through 7 mil mylar, FWIW.
I didn’t write down the settings, unfortunately, but one of the first experiments I did was a very low power engrave on clear acrylic. The end result looked almost like a vague shadow or scratches in normal light, but the design popped right out when it was edge lit.
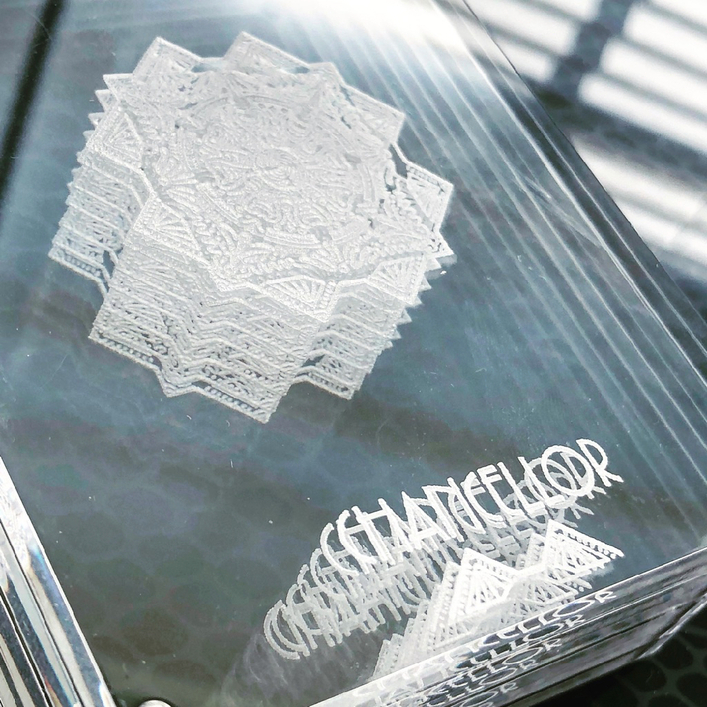
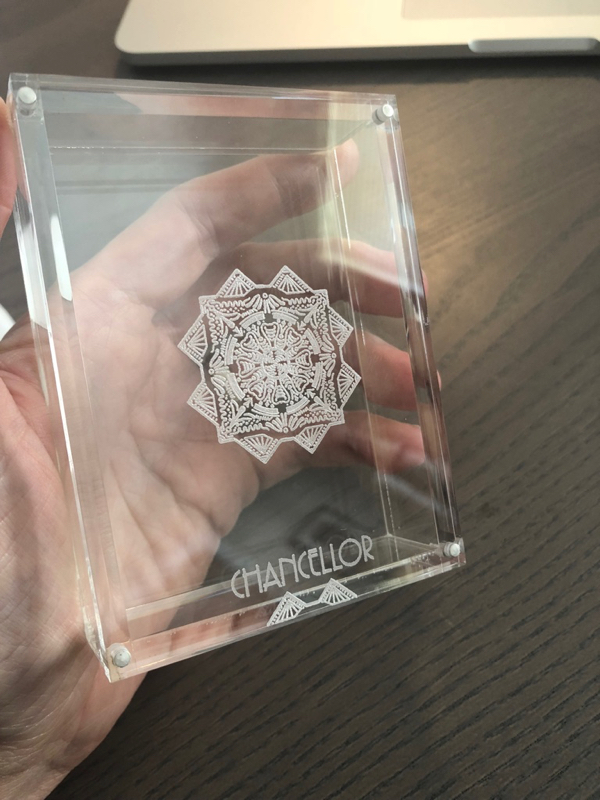
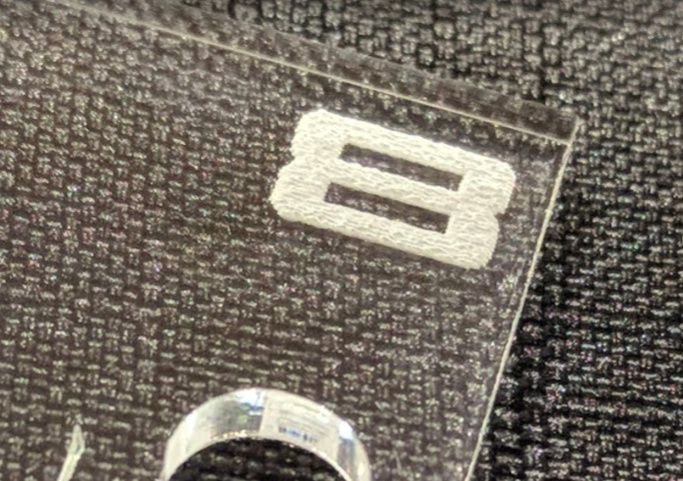
I have been engraving a number of acrylic card cases with a design and while I don’t know what you personally feel would qualify as “very shallow” I can say that with my current settings you get a clear white mark and when running your finger over it you don’t really feel an indentation but just the rough surface.
My material is 0.185" thick and I am using 800 speed, 30 power, 450lpi for my artwork.
What do you mean by ‘shallow engrave’? Something between ‘graphic’ and ‘deep graphic’? Select each one then switch to manual and you can see the settings, and you can interpolate.
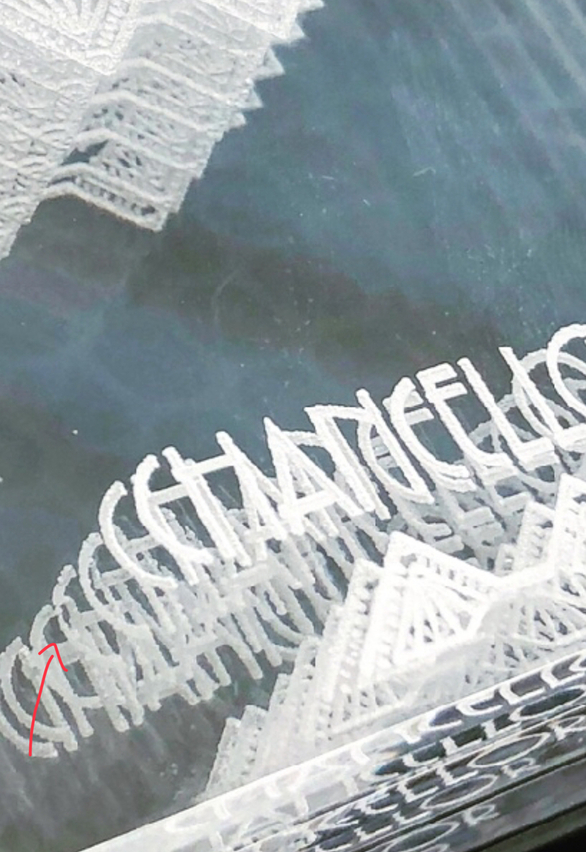
At 450lpi, the type in Chancellor seems to have ragged edges and one of the Cs looks like it didn’t print well. See faint arrow. What do you think caused that? I assumed that you took the resolution down to speed up the “printing” but 450lpi doesn’t seem low res. Or maybe low power?
That is a very zoomed in view on a pretty small detail, those letters are not very big. Also a bit distorted because you are looking through about 8 layers of acrylic. It probably could be slightly cleaner but in person with your eyes it looks very good. You can endlessly tune but at some point you just have to make the darn things.
Just ran these on an acrylic project. It’s just deep enough that you can catch your fingernail on the edge, but not a very obvious visible depth.
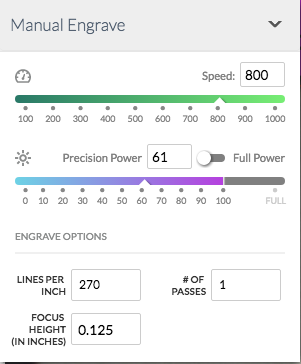
This is actually the factory proofgrade setting for “graphic” except I bumped the speed to 800 from 700 and dropped the LPI from 450 to 270. Both changes basically just to save some time, I’d guess it was about 30% time saving.
I experimented with the values in this thread and found 800/61/270 LPI to be good for my needs. I could not find a shallower etch that also had good contrast. There may be a way to get there, I certainly haven’t turned all the knobs, but called it good 'nuff so I could get to making my first practical item.
Since 450 lpi is way smaller than nominal kerf, dropping to 270 will (approximately) give you a proportional reduction in total energy delivered and hence engrave depth. Ish.