Headphone Holder, Redux

I made a headphone holder that I talked about in my Mark’s Learning Projects thread. I wasn’t completely happy with it, but didn’t want to waste material making another one. Then my order of :proofgrade: Draftboard arrived and everything changed.

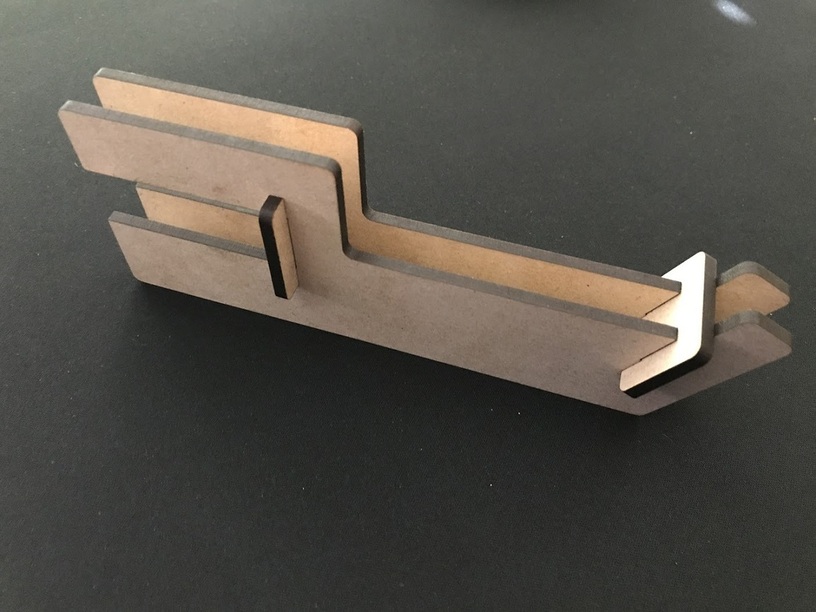
I took this as another opportunity to improve my Fusion 360 skills and I was very pleased with the progress I made. All of the key measurements were parameterized. I also applied some lessons I learned recently doing some test cuts and dialing in on kerf to make the slots that connect the pieces nice and tight.

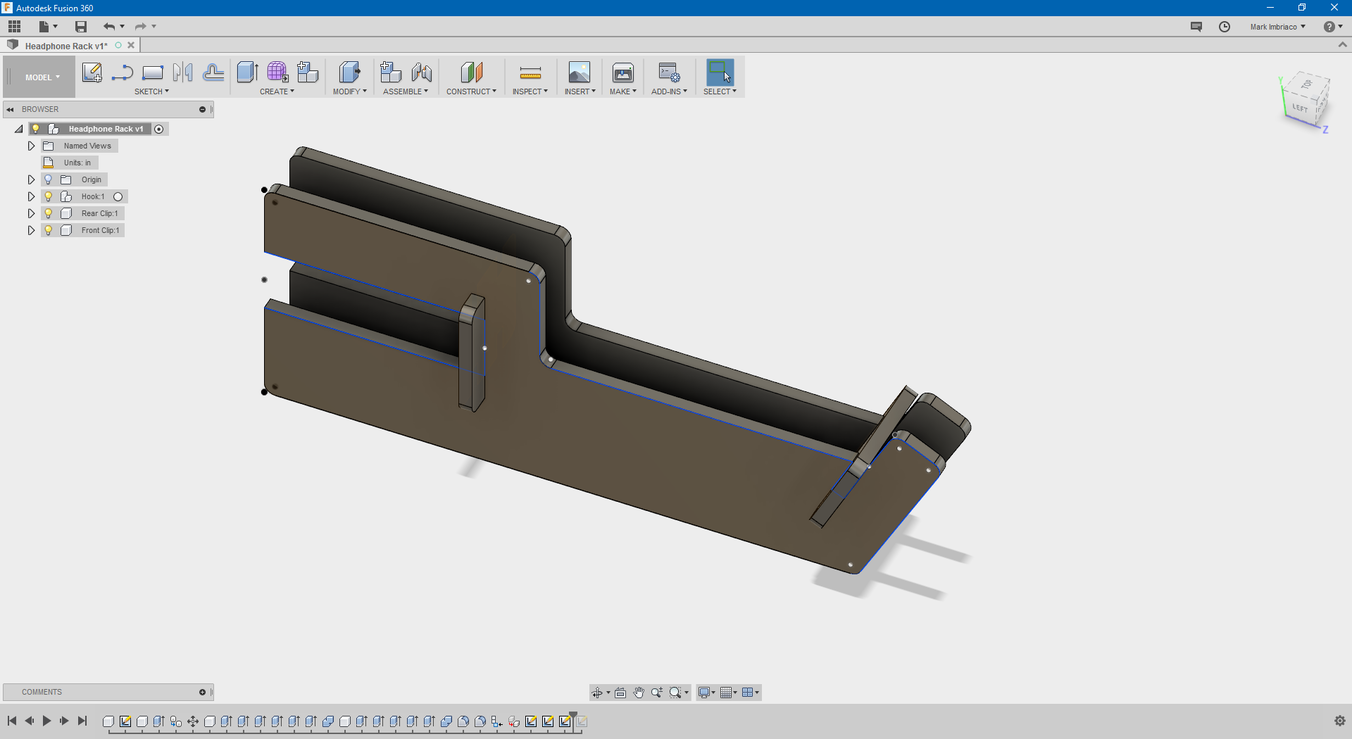
My workflow evolved a bunch here. I was doing things the hard way before, making sketches of each piece individually and extruding them out. That is very much a case of “fighting the tool” and slowed me down. This time, my workflow looked more like this:

  1. Sketch out main body of the hook.
  2. Extrude one hook.
  3. Copy the hook and move it 0.5" to the left of the existing hook.
  4. Create a new component, select one of the faces from the rear slot in the hook, and extrude a material-thickness box as the beginning of the rear clip.
  5. Continue to sculpt the box by extruding faces, adding fillets, and so on until the shape is correct.
  6. Use the Cut flavor of the Combine operation with the Hook bodies as the tool to cut the notches out of the Rear Clip.
  7. Repeat steps 4-6 for the front clip.
  8. Select one of the Hook bodies and create a NEW sketch from it. Yes, I already had a sketch but this gives me a completely clean one that I can use to export a DXF from. This generated sketch will have all the paths closed, which may not be the case if you export your source sketch. This was a huge learning.
  9. Create new sketches for the front and rear clip and generate DXF files.

Next, I import the DXF files into Inkscape, arrange them into the orientation that I want to cut, set stroke width/color as desired (I always use 0.001" stroke width) and save as an SVG.

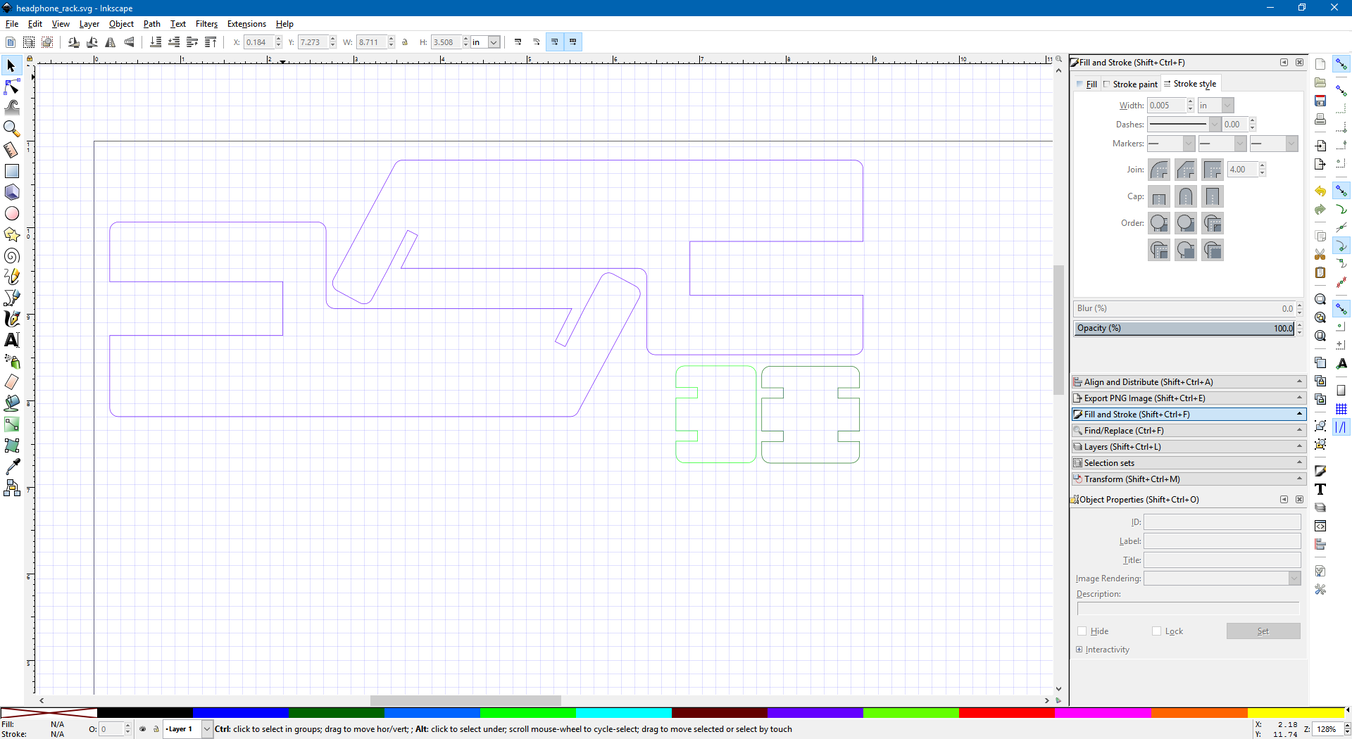
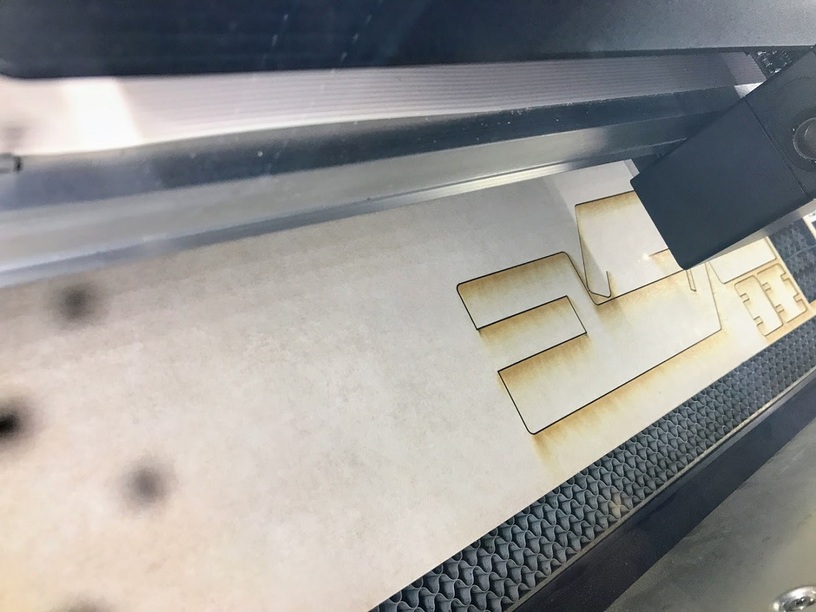
From there, it’s a simple matter of uploading the SVG into the GFUI, dragging it onto my material, and pressing print.

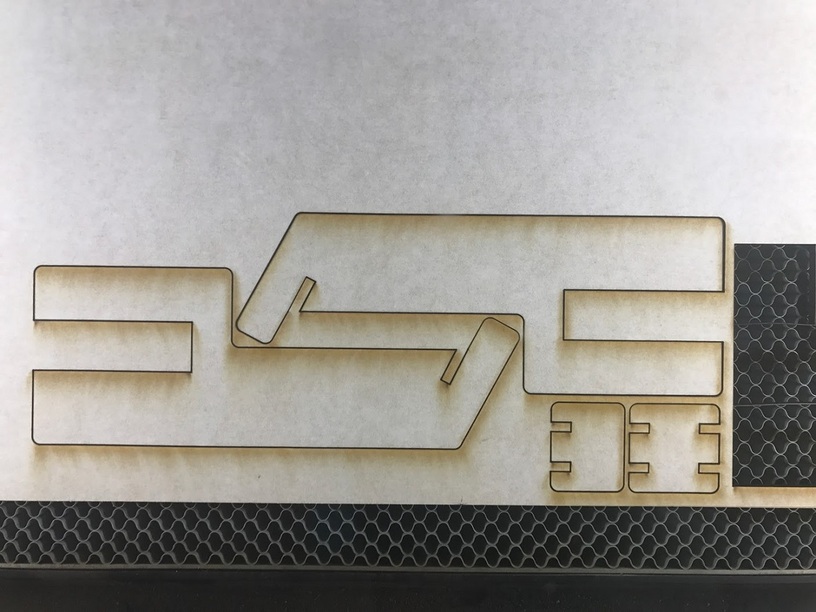
Remove the masking and assemble.

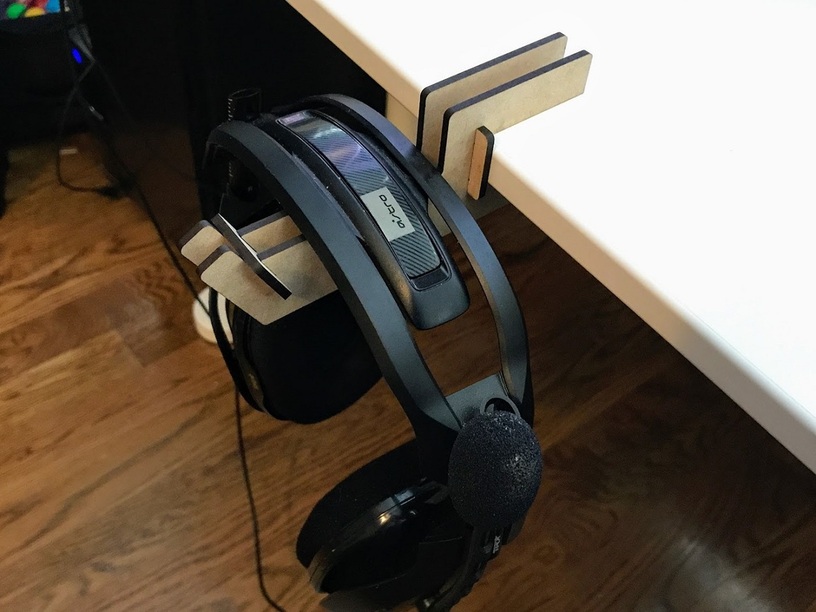
And take it for a spin!

If you’re like me the first few creations go quickly but as soon as you graduate beyond a basic coaster or sign it starts to slow down some since the designing complexity increases dramatically. The most important thing is to fully understand what happened when things don’t go as you expect while building small experiments to test your hypotheses.

For example, I spent some time last night making a few different sizes of rectangles and slots and really trying to understand kerf and how Inkscape interacts with it. As a result, my clips and slots fit perfectly on the first try. I had struggled with this previously, but the small focused experiments really helped me understand where I was going wrong.

I learned a lot in the process of making these, and I’m getting faster and faster each time I make something new. This project only took me about an hour from start to finish. I still have a long way to go, but I’m having a blast learning and even getting some useful and beautiful things occasionally along the way. Seeing the finished result look just like the model I started with in Fusion 360 is incredibly satisfying.

60 Likes

I am really liking this stuff and hope you will formalize it into a tutorial that will sit beside my F360 tutorials and complement them. Also, consider posting this into the free :glowforge: designs section once you are satisfied you have it dialed it.

If you are not already using it, there is an F360 plugin that allows you to click a face and immediately export it to DXF with kerf of your choice applied. Just go to the store and search “DFX for laser cutting” once installed it is in your sketch menu.

10 Likes

If you are not already using it, there is an F360 plugin that allows you to click a face and immediately export it to DXF with kerf of your choice applied.

Oh, that’s super handy. I’ve been manually using a kerf parameter and applying it where it matters (mostly slots/tabs) but being able to do that consistently will be great. Thanks for the tip!

8 Likes

Well done.

Now, if we could only get past the intermediate step from F360 to the GFUI. Oh yeah, we can!

I know you’re doing what I’ll call the “most popular” way of creating the new sketch, saving as DXF, importing to another program and saving an SVG.

If you spend a few minutes though and create a drawing (they can have as many base parts as you want) you can go direct to PDF. The GFUI likes PDF.

Just saying, you might want to investigate that method too. If you’re not adding engraves or scores to the project, just doing cuts, then it might be worth your while :slight_smile:

4 Likes

LOL, if you haven’t noticed I am a big F360 advocate along with the :glowforge: and the handibot.

5 Likes

This seems slower to me the times I’ve done it but it might just be my lack of practice.
I am needing to make some :glowforge: templets for the drawing module.

4 Likes

I noticed! Your tutorials definitely helped me get up the learning curve. Thanks for those. There’s a lot of learning to do, but I keep learning little tricks that speed me up and they’re compounding nicely. I’ll try to find some time to build some tutorial content myself if I can to share the love.

5 Likes

I’m still like you, it’s slower for me too. But, it has the potential of being better since you can update a part and have it reflect in the drawing right away.

And I’m thinking that practice will make it better still.

I think that Autodesk still needs to work on the drawing package some more, but I’m actually really happy that they have something that is much better than it was.

4 Likes

I didn’t realize you could export PDF there, I’ll definitely investigate and spend some time there. If I can remove a tool from the middle of the workflow I remove an opportunity for me to mess something up. I’ve definitely had times where the transition from F360 into Inkscape caused me to inadvertently resize something, or set the wrong stroke width, or …

5 Likes

I simply can not disagree with this and is probably best practice, I will try to make myself some templates tonight and try it out.

3 Likes

One of the handy aspects of setting up drawings in Fusion360 in order to export PDF files is the link they maintain to the 3D model.

I do believe drawings take longer to set up and I don’t think it’s to do with practice, but when it comes to producing iterative design, it then becomes an easier workflow for re-production.

Either way, you’re going to open the PDF file in Inkscape or Illustrator, etc. anyway because you want to assign colors to the objects so you can control operations, add engraving, bitmap images, etc.

5 Likes

If you’re going to do all of that then sure, but when I’m in engineer mode I don’t worry too much about making things pretty. It would be nice to score things direct from F360 though.

Whichever route gets you where you’re going is fine with me :grinning:, no real wrong answers

Edit: fine instead of done. I love autocorrect

4 Likes

Awesome! Love watching people’s process in going from idea to completion. I’m starting to branch out from the simple “drop an image and print a trinket” phase and trying to dive into some new areas, and I love what you say about taking the time to focus in on some small experiments to figure things out—I need to convince myself that it’s okay to do this. I get frustrated when things don’t go right the first time and I procrastinate when it comes to dealing with something I need to plunk through and figure out.

Love the design! Thanks for sharing.

5 Likes

Brilliant. We have a cool headphone holder design but it doesn’t table mount like yours does!

4 Likes

Cool, simple, useful, brilliant! Thanks for sharing!

1 Like