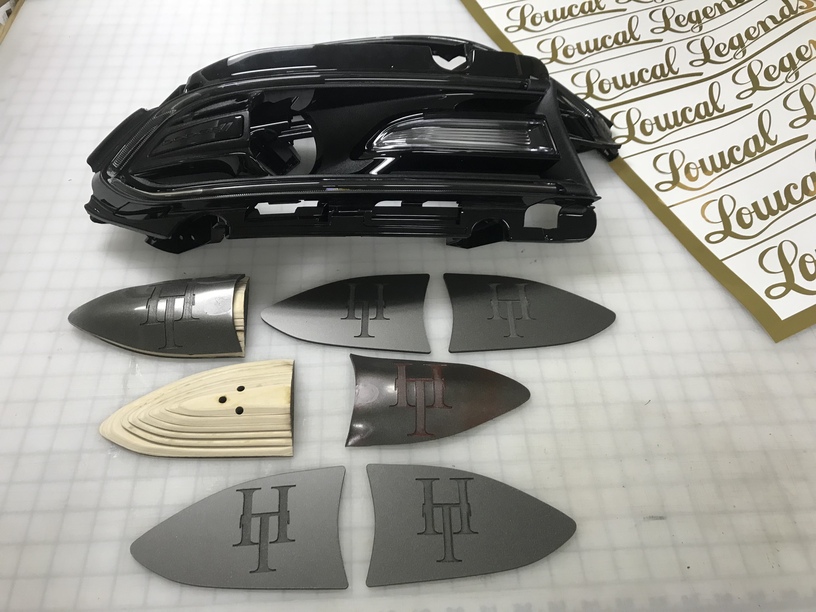
An automotive customization shop that I work with often came by with an unusual request: replace the dodge logo inside the headlamp assembly of a challenger with a car-club logo. By the end of the day.
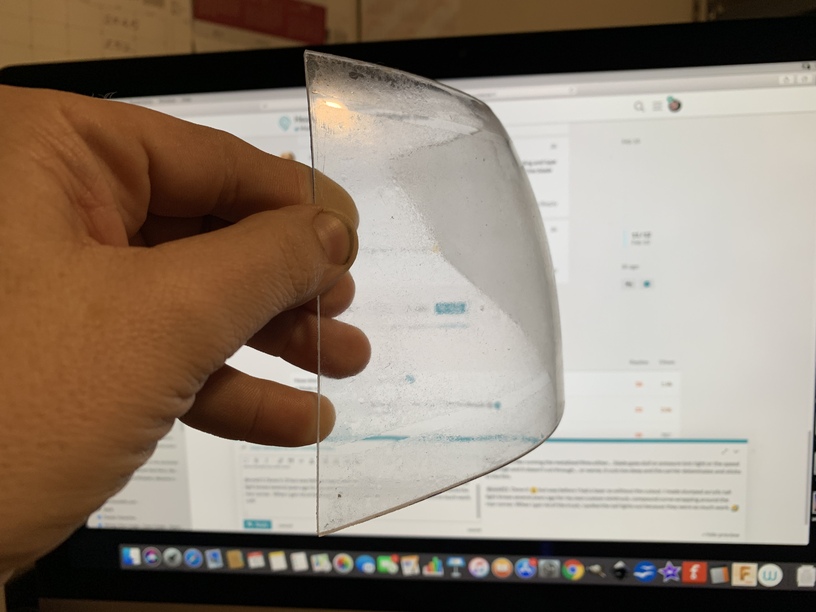
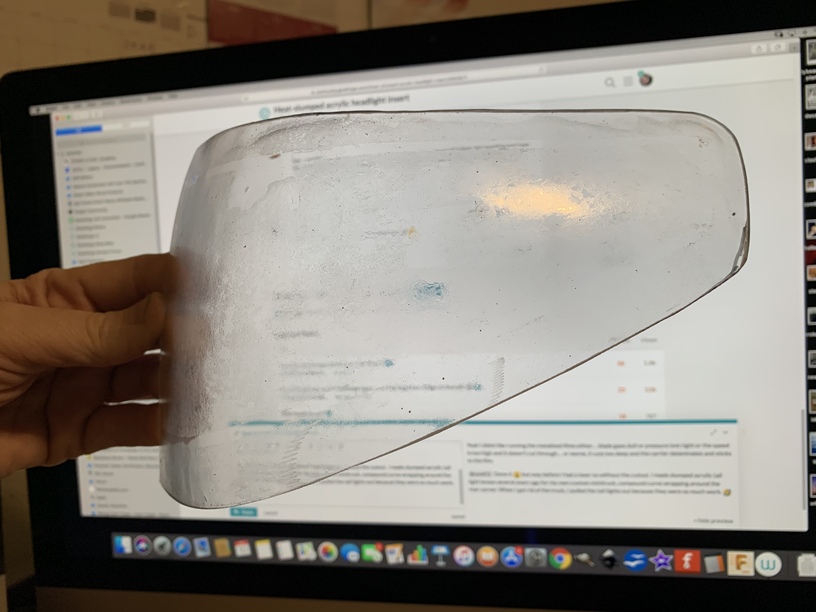
I had never done any heat-slumping before, but I figured I could take measurements, make a form, and it would just kinda work…
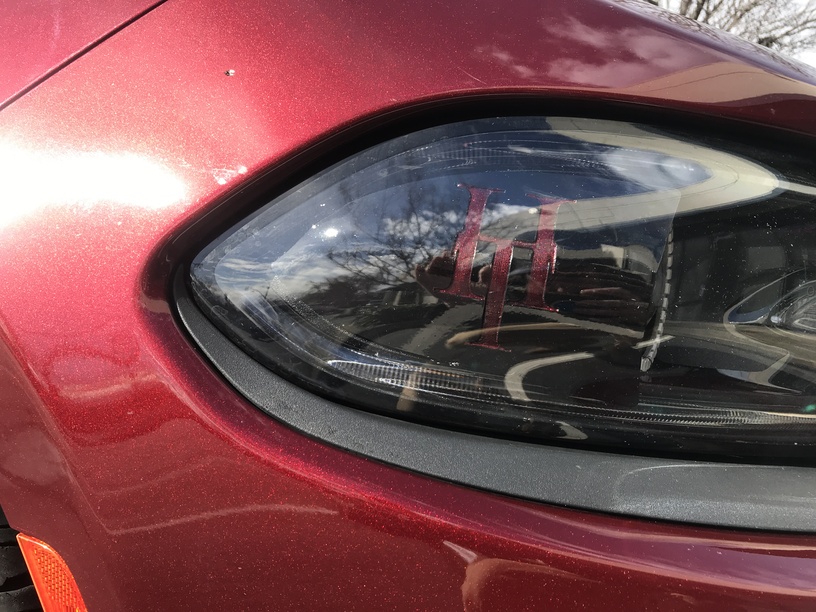
The first set one wasn’t quite right, but the second draft was about the right shape…made two copies, didn’t have any time left to keep iterating or slump the second set, the guys came and picked up what I had by then including the forms to slump the third set if needed, and I didn’t hear about the project again for several months. Last week, they brought the challenger to my studio for some decal work, and I finally got to see the headlamp-insert in place. Really subtle, hidden away down there. Fun!
Thanks! I’m just glad I wasn’t responsible for opening up the headlamp assembly!
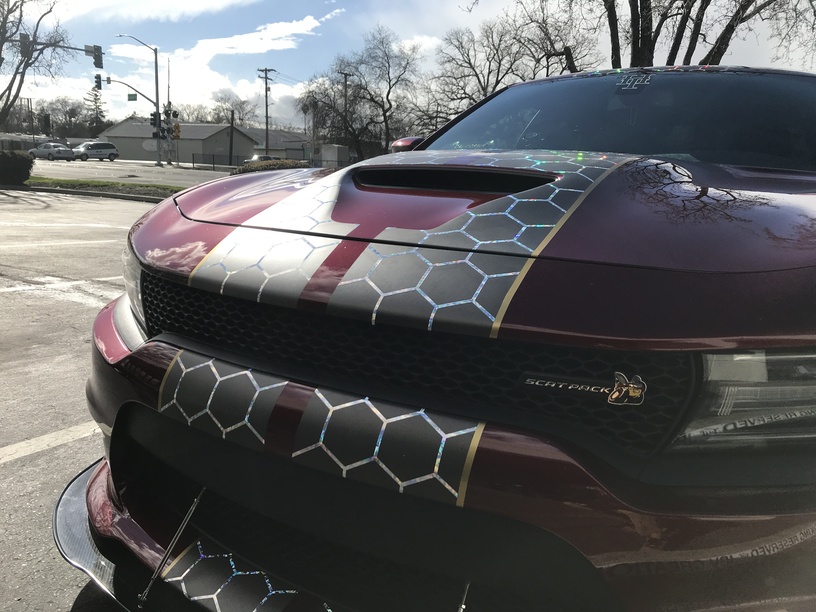
The decals I made were a honeycomb pattern cut from holographic shatter vinyl with gold vinyl stripes and details. Wish I would have had time to get it inside the studio for pictures with controlled lighting, but I only got a quick late-day shot in the parking lot.
I designed the file, but it was entirely based on specs I was given by Lowcal Legends Garage, who also supplied the vinyl and did the install after I cut and prepped the sections.
Holographic is the overlay or the matte black? I’d rather deal with matte black being the overlay. I miss doing these things. Great work on the design and the inserts.
Holographic laid onto the existing matte black stripes, all the way across the roof, the deck lid, and down the rear bumper. And it’s not very conformable at all, so yeah… I don’t envy the install!
What an amazing project! I do believe this custom acrylic car part is a first, unless @mpipes made one and didn’t tell us (know he works on a lot of cars).
Ugh…I wouldn’t be able to relax from the time I sent the 4’+ sections at a time, the weeding and tape job, to the final transfer tape removal. So many variables in metallic vinyls, down to the if the blade is fresh and pressures are right haha.
Yeah I didnt like running the metalized films either… blade goes dull or pressure isnt right or the speed is too high and it doesn’t cut through… or worse, it cuts too deep and the carrier delaminates and sticks to the film.
@cynd11 Done it but way before I had a laser so without the cutout. I made slumped acrylic tail light lenses several years ago for my own custom minitruck, compound curve wrapping around the rear corner. When I got rid of the truck, I pulled the tail lights out because they were so much work.
Yeah, I got paid. I’m pretty used to calls from them starting out with “Hi, I’m sorry, you’re gonna hate me…”, but they bring me a fair amount of business and understand the value of work. Also, it’s not a bad thing to have an entire family of mechanics who feel like they owe me favors!