Help me decide

My wife and I are VERY close to finally placing our order. We have done tons of research and think that the “Plus” model will fit our needs. I do have a couple questions though, that for some reason I could not find in any videos.

  1. How much woodworking knowledge do you need? I see people cutting wood in lots of videos, but never see anyone doing any sanding, does that laser make a cut that does not need to be sanded?
  2. We are not going to buy the portable vent thing, the place that we have set aside for it is right next to a window. I could not find any videos on how you vent it out of a window. As far as I can tell from the unboxing videos it just comes with the vent tube? Do I need to build something that tube will connect to, so that it fits in the window? I obviously don’t just want a vent tube hanging out of the window.
  3. I see in alot of videos that people are using masking tape on the wood, is this just simple masking tape that you would use when painting?
1 Like

Yep, the Plus is a good choice, a lot of folks go that route. :slightly_smiling_face:

The woodworking knowledge is not necessary…the laser will burn the edges of the cut so you don’t need to sand it. (Sometimes people will round an edge or something, so it’s optional, but not necessary.) And the Proofgrade materials that Glowforge sells (except the Draftboard) come pre-finished with a nice Satin finish, so you don’t even have to invest in a lot of varnishes. It really does save time.

The venting suggestions are going to depend on the kind of window that it is…if it has small panes, it’s easy to replace one of the panes with a sheet of clear acrylic that has a hole cut into it, and connect the hose to a port. Then you can keep the window closed and just let the exhaust escape. Or if the window has larger panes, you can just open it, and stick a large sheet of foam into the gap, and run the hose through a hole in it. There are a lot of very clever solutions…the idea is to just block the exhaust from getting blown back into the room if it’s windy.

Plenty of suggestions in the Beyond the Manual section that you can read up on while you’re waiting:

https://community.glowforge.com/search?q=exhaust%20setup

And you can use painter’s masking tape, but it’s a little pricey, and you have to watch for seams on the wood. There are paper masking tapes that come in larger rolls, that are generally used to transfer vinyl cuts for sign makers…it’s more economical and it’s white, which works better with the laser.

You’ll want to squeegee that down to activate the adhesive. (Or start out with the Proofgrade that Glowforge sells…it comes pre-masked on both sides.)

You can take a look at what they have available if you are interested at https://shop.glowforge.com/

Have fun with it! These are great little machines. :slightly_smiling_face:

7 Likes

Don’t buy a Plus, save your money and get the Basic.

For venting you could hang the hose out a window but most people cut a piece of something with a hole or gasket that fits in their window. Use this forums search function for “venting setup” and you’ll see lots of photos.

The masking is a much wider version of painters tape. This is preferable as it’s easier to out in and you don’t risk overlaps or missing bits that would affect engraving and clean up.

You don’t need any woodworking knowledge to laser cut though it can be helpful. The laser makes a very smooth cut in pretty much all materials it can cut.

2 Likes

Hi. It sounds as though you may be placing too much emphasis on videos as your information source. All your questions are answered in massive detail in this forum, but you do have to take the time to sit down, search, and read.
Glowforge (and many other companies) have laughable marketing pitching the idea that it’s trivial to set up and use their products to create all manner of wonderful things. The number of new users who post here in the Community, totally frustrated with their lack of success at basic operations, makes it clear they’ve been fooled into thinking there’s nothing to it. Wrong. Your success and satisfaction depends on the effort you put into educating yourself and experimenting with different techniques. This Community is a fabulous resource for that. The number one recommendation I can make to anyone considering the purchase of a Glowforge laser or wanting to enjoy their use of one is to put the time into exploring the content here.
Have fun!

6 Likes

I respect that searching here is a great resource, but this IS the age of video tutorials. I have done computer repair for 20+ years and still look up videos on how to teardown a new model of a laptop that I have never worked on before. When my refrigerator broke, I used videos to troubleshoot the issue and more videos on how to replace the thermostat. When my garbage disposal died, where do you think I looked? You get the idea. So I disagree that you can put TOO much emphasis on watching videos, but agree that more emphasis on these forums is good too. In my day they used to say “RTFM”, if your over 40, you know what I mean.

1 Like

We’ve just seen a lot of incorrect information propagated in random Glowforge videos. I kinda have the same reaction @whitehill voiced, because of that. :slight_smile:

1 Like

Counterpoint to @ekla: don’t get a plus, cough up the dough for the pro, cuz it rules.

4 Likes

The best place to learn about using the GF is from others users via the forum. Some videos posted by other owners are helpful–but don’t forget about the front end–learning to design something! If you’re not already familiar with something similar, Inkscape is a great tool for designing vectors (for cutting) and it’s free. Loads of ways to get images to engrave. It’s good to learn how to draw shapes yourself and save them into your own directories on your computer to load into the GF (some folks like the GF Library method, but mine has always had weird glitches, as well as I work on so many different things I find it easier to track myself in my own system).

And modifying patterns you can get for free, or buy, is a great way to see how something can be made, and then make the design suit your own needs…

The proofgrade prefinished maple ply is great, but I also really like fine 3mm MDF from WoodItis on Etsy. I also have had decent results etching/cutting without masking–just a damp cloth or eraser block cleaner gets the soot off (you even with masking, you’ll still have soot on the edges and etched areas you’ll want to clean off–and how much varies by material & type. (e.g. no soot with acrylic, but some with maple ply, more with MDF, and a lot it you use 50pt or higher card stock). It’s good to have the low or medium tack masking film, but not always necessary. And I don’t like using the draft board–too messy–gunks up the fan and machine very fast. But some love it–and often a way to test fit a design before using your good wood (cardboard cut from shipping boxes is great for that, too).

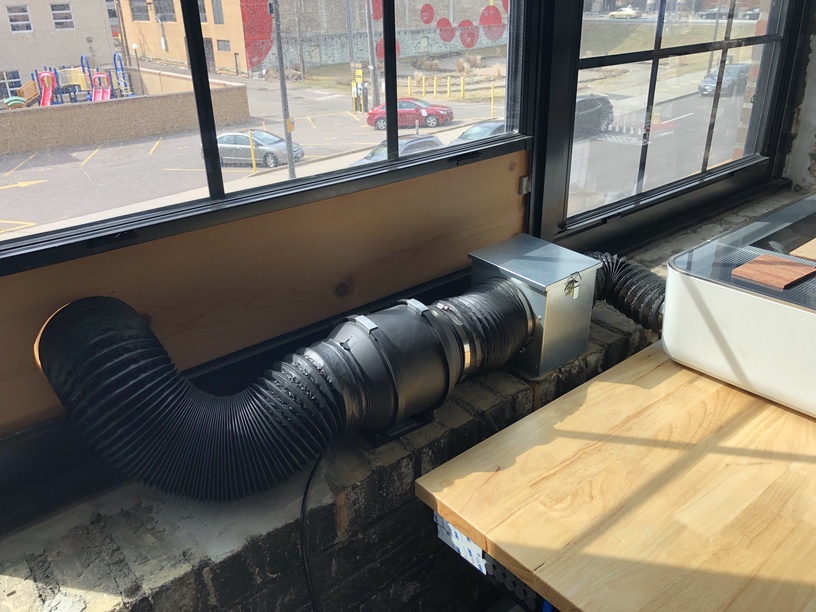
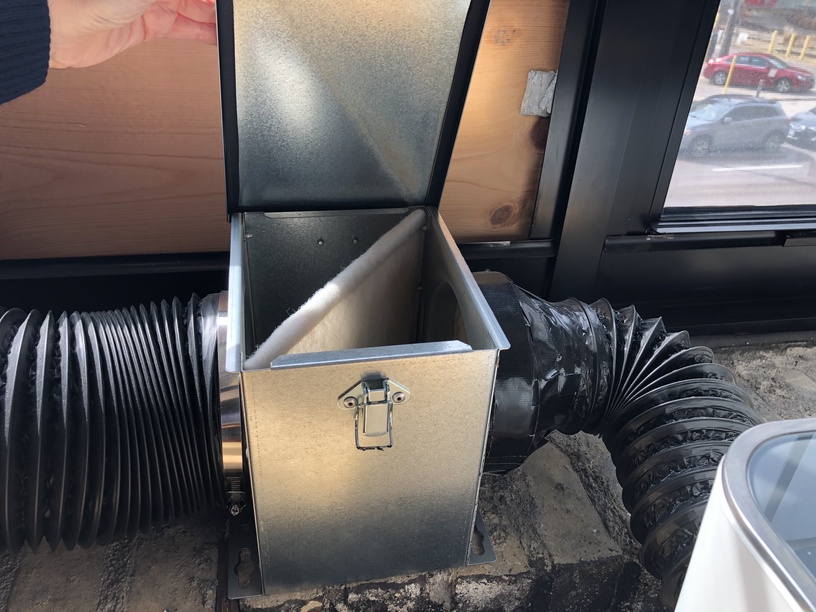
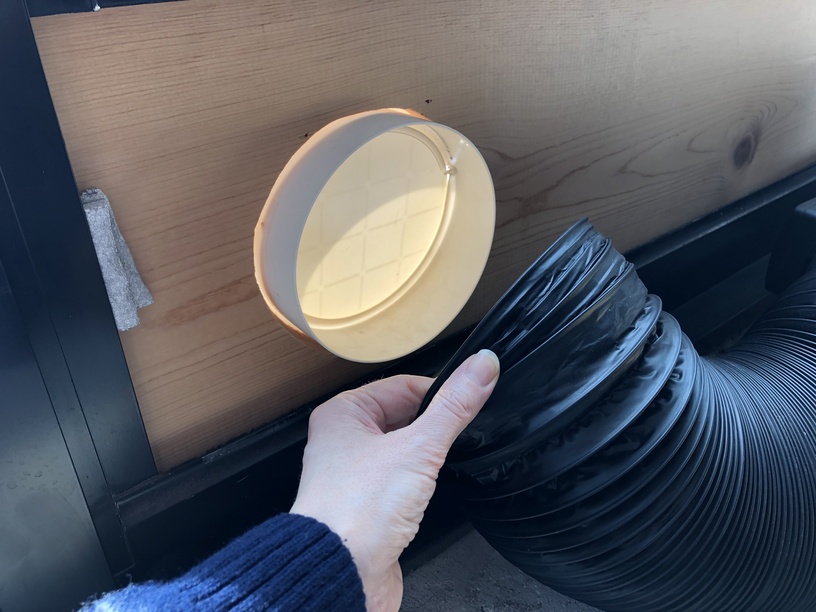
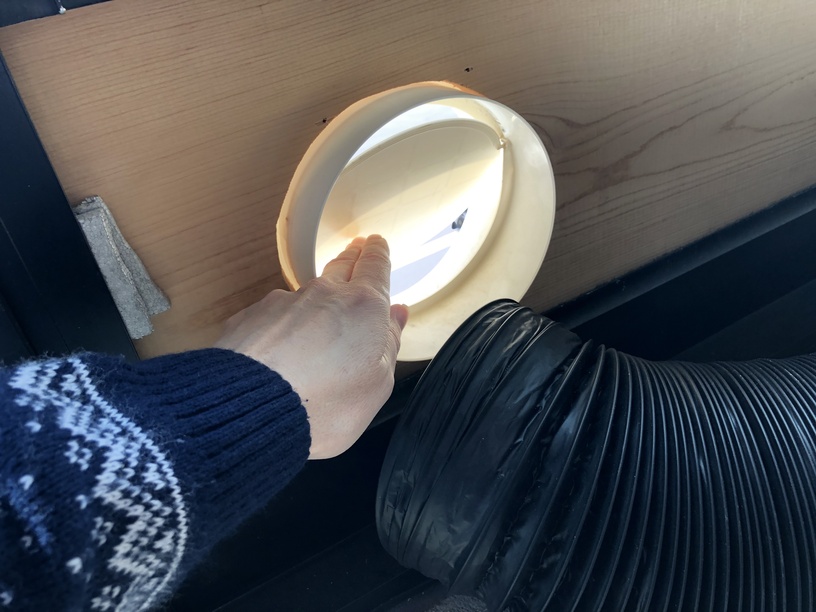
For ventilation, I still have my unit’s ducting against the screen of a 30" wide window, and use 1 1/2" thick foam insulation board to fill the space around the duct, and some pipe insulation to help fill gaps & seal between the foam and window. There are lots of really nice “blast gate” designs in the forum–I’ve just never gotten around to it–but I’d rather cut into my wall and put in another "dryer vent"set up for the GF. (Pending your climate, you may need a way to close your window due to extreme cold or heat/humidity for room comfort and protect your GF).

And I’m only 5’4", and found it really annoying having to stand on tiptoe and reach over the GF to get to the on/off button when it was at normal counter height. For a while I had it set up on a lower shelf unit, but now it’s at counter height again–and best thing was getting a remote control switch for the power, so I can turn the power on or off while at my computer–of course going to the unit to arrange materials and push the button–any little bit of exercise is a good thing, so I don’t mind having to walk over a few feet to do so…

And ventilation itself–there’s a lot out there about using an in-line duct fan to and turning off the internal fan for the unit–since that fan can be quite noisy. I’ve not installed one yet, but likely to do so in the near future–a lot of info about that on threads in the forum, and even videos on youTube… There are some great noise cancelling headphones that aren’t very expensive (e.g. ISOTunes) I use when it really bothers me…

Good luck, and enjoy!
Alas, can’t add anything about basic vs. plus–I bought basic, though when I pre-ordered, was the only option besides pass-thru…

4 Likes

Thank you, really helpful information. We have used design space that came with our cricut, will this be similar?

If it’s reasonable to cut a dedicated dryer vent hole, that’s the best solution. A window adapter would be second place.

1 Like

Truth. I love my Pro, but it’s serious extra $$ if that’s a concern for OP. Essentially just don’t the the Plus.

2 Likes

*pro high five*

2 Likes

I have the plus and I’m very happy with it. I do not have space in my home to set up the pro to use the passthrough effectively, so it would have been wasted money for me.

I use masking when I cut but not when I engrave.

Some people prefer the proofgrade, but I find the masking that comes on it is especially hard to remove after cutting a file. The one that I apply myself to non-proofgrade material is much easier to remove.

I have mine vented out the window. At first I just tossed the hose out the window, but now I have a more permanent setup using a dryer vent and acrylic cut to fit my window. I also use a blast gate (printed on my GF of course) to prevent humitity from entering from outside.

Welcome to the forum!

1 Like

I’ll pop in to also concur, if you’re not getting the pro, get the basic.

2 Likes

Here’s my venting set up, the glowforge comes with a silver 4" tube, which I didn’t use, I purchased a sturdier 4" and one 6" black tube, (I wanted black instead of silver) and some extra clamps. I also got a filter, an external fan, a dryer vent with hinged cover/blocker, and a lot of gorilla tape. if you’re interested I can look up my supply list on amazon. I have neighbors so the filter helps with the smell/debris/smoke.

1 Like
  1. Absolutely none. Most cuts don’t require sanding.
  2. Good. The portable vent thing is an absolute waste of money. Most people use an inline fan like the Infinity Cloudline S6, just because it is so much quieter than the installed exhaust fan. But you could run it straight from machine to window with the included hose. It is just louder that way. I bought a dryer connector that has an input and output and just let it fill the gap in the window and hook my hose right up to it.
  3. If you buy proofgrade materials, they are already masked. Other materials, people use a wide variety of things, ranging from Vinyl Ease Paper Transfer Tape (Never use vinyl, itself, in the machine) all the way to regular masking tape (I use that).
    Hope you get up and running with no issues. Enjoy.
1 Like

I have a Basic, and I’m perfectly fine with it. I don’t see much of an added benefit of the Plus. I’d say either Basic or Pro. I do have the AC under the GF for when it’s 100+ degrees in the summer, or I run it only at night when it’s too hot to move around the house.

I skipped reading the longer suggestions. I think the comment about videos was more towards the company promotional videos. They make things look easier than they are. It is easy to load a premade file and to cut it, but if you want to create something else, you’ll need to know another program.

I don’t have design space…I think I used it once for a few minutes before I returned the Cricut, but the GF interface is more of a tool to upload your file that you’ve already got prepared into. Not a design space. @bansai8creations had it right, you really need to learn an outside vector software like Inkscape or Illustrator…I know there are more…but I only use Inkscape at this point.

I have a slide window. For venting I cut a hole into a piece of plywood and wedge it between the window and the frame and just shoved the hose through it. I did have to seal off the gap where the windows overlap because the wind likes to blow smoke back into the gap.

Also, painter’s masking tape is crazy expensive and a ton of money and work when you add it up. Plus, if you overlap layers or leave a gap, it will affect the appearance of your work afterwards. @evansd2 has a really good beginners question guide. I use 12" wide paper masking to mask the plywood I buy. I also use an orbital sander to sand down the wood before masking, only because it’s easier for me to do it before than after. That’s the extent of my woodworking abilities.

2 Likes

Oh, no idea about that comparison since I’m not familiar with Cricut units (have a smaller one got ages ago).

The GF is about 75 pounds & needs stable support (nothing wobbly). Also needs good fresh air access on right side (the air intake is bottom right of machine, so if that’s not clear, can limit air intake & thus limit the exhaust, and unit can even shut down if too low of air intake–once found a piece of paper had slid under and drawn up on the holes & caused an error). Power button is quite small and is on the lower right, about 6" from the side on the back of the machine–which is why a remote switch is so nice! Fortunately the GF doesn’t have any special power requirements, except for being noted to don’t plug into a surge protector (not sure if that’s still the case for newer units or not).

Lots of great ideas posted by other owners in different forum threads, too!

1 Like

I’m with ekla. Get the basic if you don’t want to jump up to the pro. The plus USED to come with ta 45 watt tube and it said “upgraded optics” if I remember right. But now… I think the only thing you get for a plus over a basic is an extra six months of warranty. Put that money you save aside in case you need out of warranty repair.

2 Likes

This topic was automatically closed 32 days after the last reply. New replies are no longer allowed.