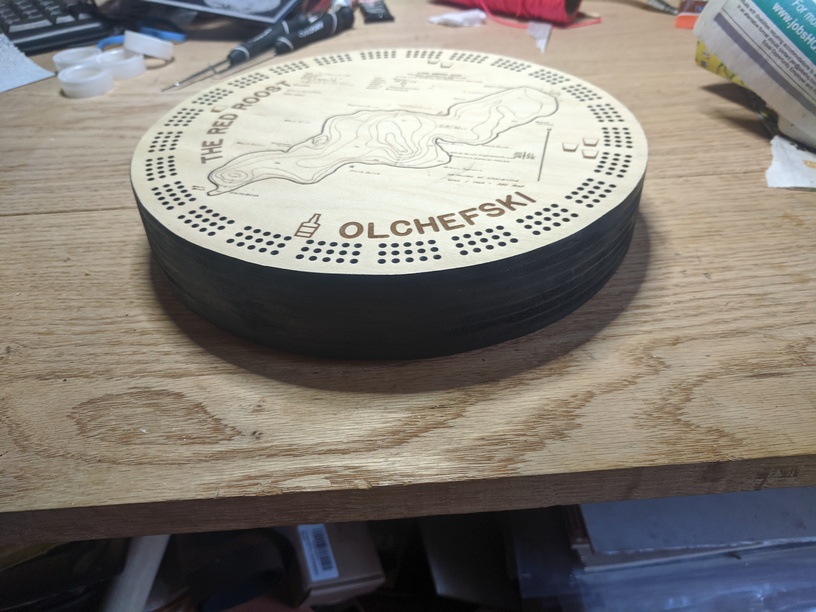
I’m making a cribbage board for a friend and I was going to do it in solid 1.5" thick ash. So I need to put in all the peg holes to a depth of somewhere around 3/8". My question is if anyone has a good technique for making the peg holes. I tried a relatively shallow engrave and then followed up with a drill bit, using the engrave divots as drill starting points. This worked OK, but I had some problems with the drilling in that the holes are so close together in some spots that the drill bit tended to rip out the wood between adjacent holes. I also tried multiple concentric rings as score toolpaths with the idea that the entire area of the hole would be vaporized. This worked OK but wasn’t that clean.
You can use engrave to “drill” your holes to depth, but you need to run some tests to get the right settings.
The basic testing idea is this: Make a series of holes of different colors so you can assign each a different setting. Draw a cut rectangle around the squares, and cut the whole rectangle (and the line of circles) in half with another line.
When running the job, you’ll:
engrave each circle with a different power and/or speed setting
cut the circles in half
cut the outline rectangle
You can then examine the profile of each hole, easily measure with calipers if desired, and fine tune over several runs.
Another option is to use a cut or score operation to do the circumference of the hole down to the depth you would like, which you will need to find through testing, and then just break off the stuff inside. Your holes aren’t that big and the inside pins will break pretty easily since they will be breaking with the grain. You may need to go a little deeper and use a tool if one breaks off midway, or use the drill at that point since you can use a smaller drill bit and not stress the sides of the hole.
You could router out a 3/16" deep pocket and then inlay a piece containing all of your peg holes cut out with the glowforge. I use these pegs from Amazon and thick proofgrade, but anything a bit over an 1/8" should work.
I think this falls into the “when you are a hammer, everything looks like a nail” area of thinking. I get it though. We all want to laser “ALL THE THINGS”. But I think perhaps if I were you I would simply mark the holes with the laser (light engrave) and then use a drill to actually make the holes. Just my two cents in the jar and I would love to see it when you get finished, no matter how you do it.
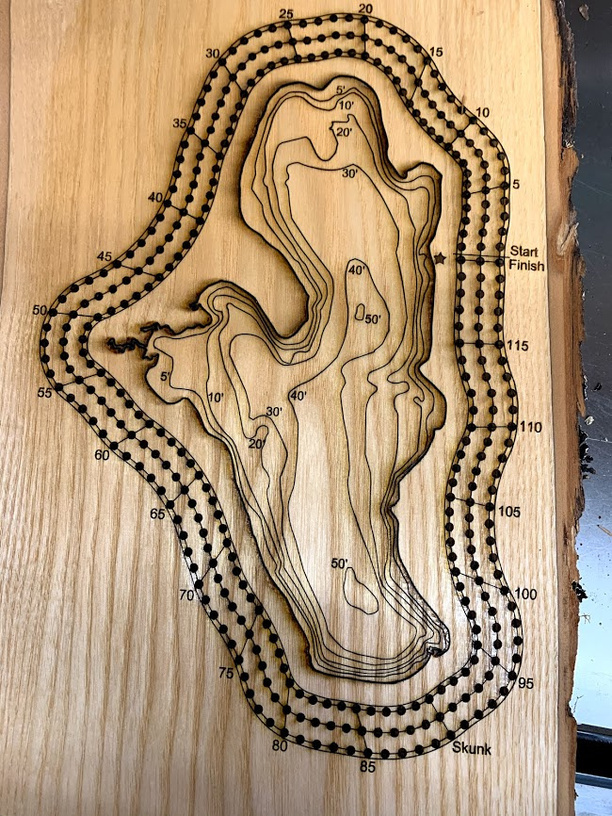
This is what I tried at first. See attached picture, on the inside (lower) track, between holes 17-19 and 24-25. I kept getting problems with the wood grain tearing out at the surface, mostly because of the close hole spacing and also due to the fact that my score lines that connect the tracks go deeper than I expected . The scores then make handy “break off” points for the top layer of wood to snap off via the drill bit.
Right now, the piece of wood is a live-edge slab of ash. So I tried to do all the laser operations before doing any of the drilling. Maybe if I can get some registration marks to place the wood back in the GF at the same exact location, I could laser-engrave the location holes, drill all the holes, and then do the score lines? Or, adjust the score settings so that the hole-connecting lines don’t go so deep into the wood.
I also plan to find a slightly bigger piece of wood, which will space the holes out a little bit more.
I was thinking that another option would be to do a multi-layer board - top layer being PG plywood, second layer being thick draftboard, and then surround with a 3/4" backing board and sides. Could even make the top pieces slide in/out to have pin storage inside.
I’ve also never played cribbage (this is a gift), so I don’t know enough about the board design to have confidence that the number of tracks, peg holes, etc. is correct.
You need 120 holes per track, grouped into sets of five to make counting easier and two or three tracks. Sometimes the board will have an indicator line or something at the 90, 60 and 30 hole. They are the skunk, double-skunk and triple-skunk points. You can also add another group of ten holes (times the number of tracks) to keep track of games won, but many boards don’t do this.
I use the stacking material method. You will need to use alignment pegs to stack the layers otherwise they will slide away from each other during the glue-up. I use thick proofgrade plywood (medium isn’t thick enough for the pegs) for the top layer and medium for the bottom. The interior layers are cheap 3/16" birch plywood. Even using alignment pegs you will need to sand the outside edge for two reasons: 1) you’ll never get a perfect stack and 2) even if you get a perfect stack the laser bevels the edge. Once I’ve sanded the edges I coat them with Rub’n’Buff (comes in black and various golds and silvers). Even using wood filler you’ll be able to see the layers, but it works.
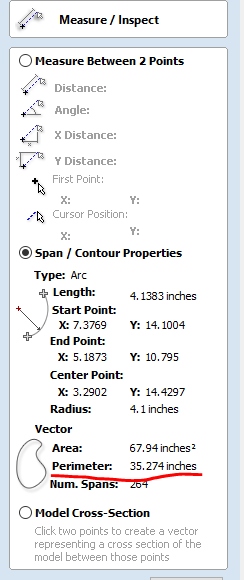
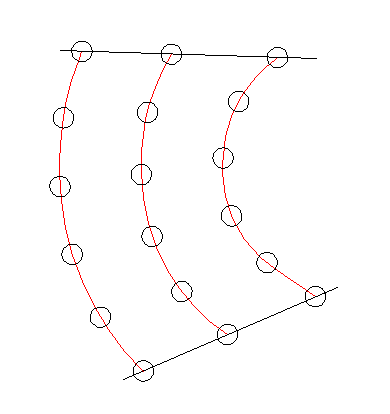
This led to some interesting geometry problems because you can’t just space out the holes on a regular basis. What I did was to measure out the perimeter of my inside and outside tracks, then divide that by the number of cross-lines at the 5 point intervals, and then indexed my crossline end points in even steps, and connected the dots.
For example, if the innermost track line is 30" in perimeter, and the outer is 35", I divided 30/24 to create the equal spacing on the inner track and 35/24 to create the spacing on the outer track. This allowed me to have the groups of holes be evenly spaced around the irregular perimeter.
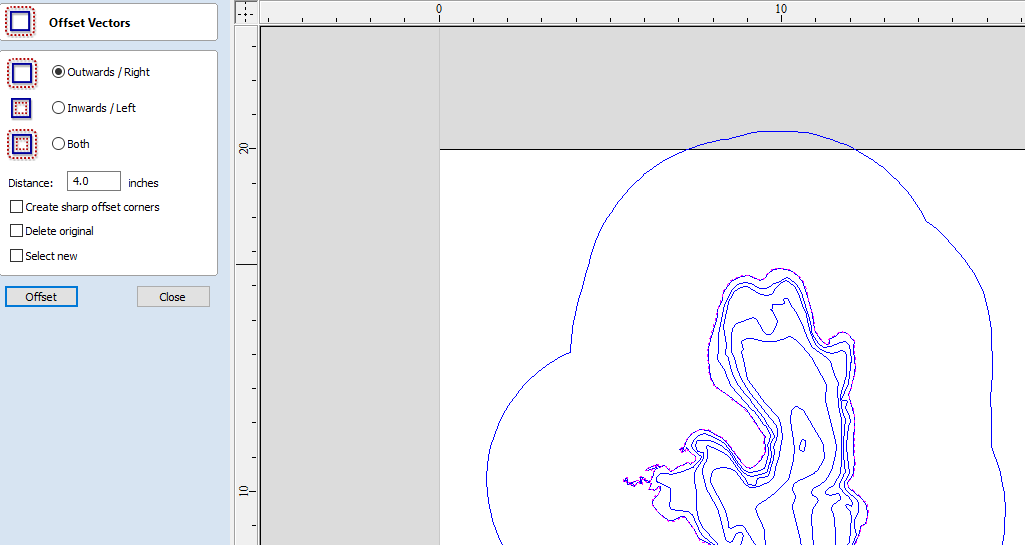
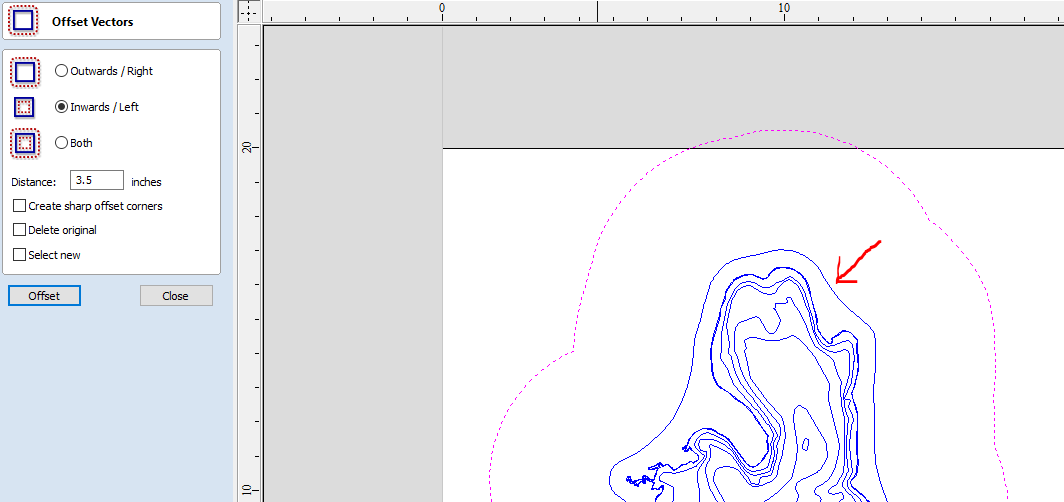
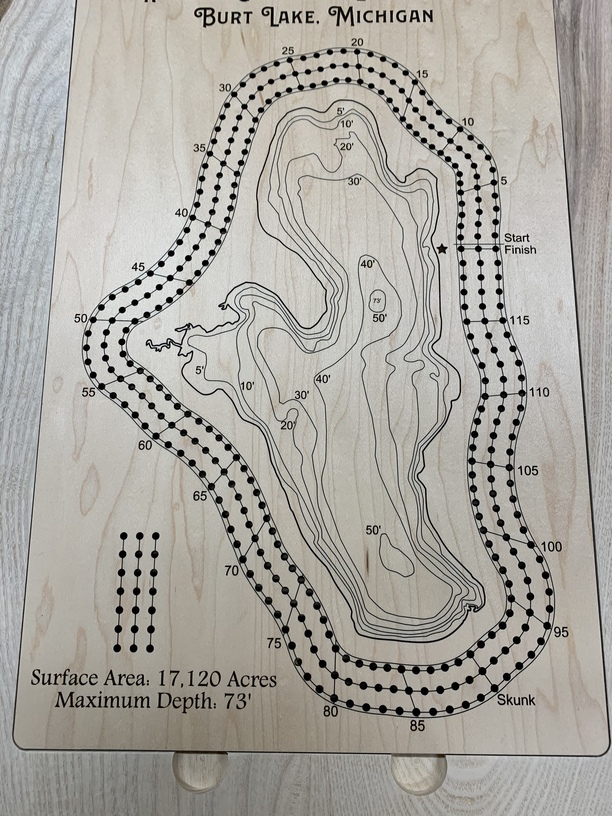
To create the “loose fit” around the shoreline, I took the outer shore vector and offset it outwards about 4" which made a lot of the detail go away, then offset that new vector back inwards the same amount. It smooths the curve pretty nicely, and avoids dead-end trips onto the various peninsulas.
The features available will depend on the size you need. Prepare to pay more for better quality; the brand points are off center on cheap bits and they don’t drill round holes.
I was just about to ask what kind of drill bit @astevens was using, and how fresh/old they might be. spur-point would make a huge difference compared to a general-purpose.
I am curious as to what software you are using? Thinking about how I would do this in Inkscape with the pattern along path. Getting the spacing between each hole correct as it increases in the outer paths and then ensuring the correct number of holes.
Divide the respective lengths by the number of crossing “marker” lines to determine the spacing between each line
Create a small circle on each border line at the start/finish line
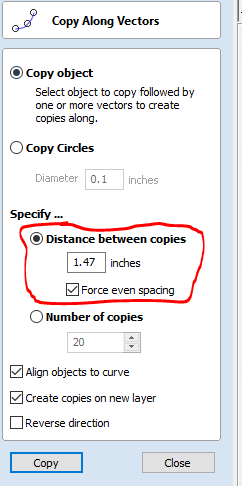
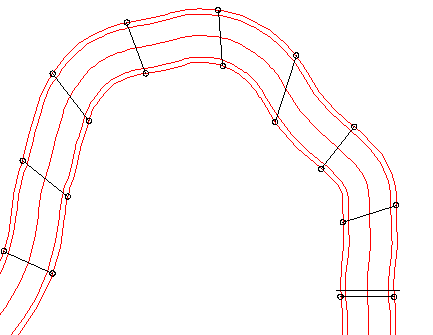
Use the “copy along vector” tool to create copies of the small circle all around the perimeter of each border
Draw marker lines between each pair of circles
Cut each of the three inner vectors into individual segments using the marker lines
Create a circle for the peg hole and select all the individual segments
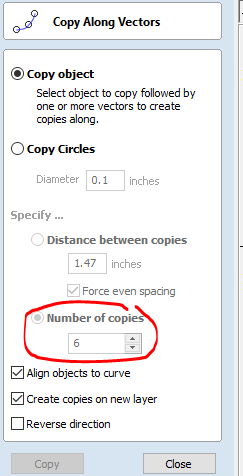
Use the “copy along vector” tool again but this time set the number of copies instead of the spacing and set the number to 6 (one more than what you actually want)
resulting in this for one segment:
Now each segment has six equally spaced holes, but there are duplicates at the end of each segment.
Use the “selection->select duplicate vectors” tool and then delete the duplicates
Rejoin all the segments so they cut out better on the glowforge
Oh, Thank you for this. I had a few people want cribbage boards but always declined because I never had great ideas for something new. This gave me the inspiration I needed!
Thanks for documenting this. These types of tips are so valuable. Inkscape’s pattern along path is pretty good and should be able to pull it off, but would have to use a couple extensions and do some tweaking. Nice.
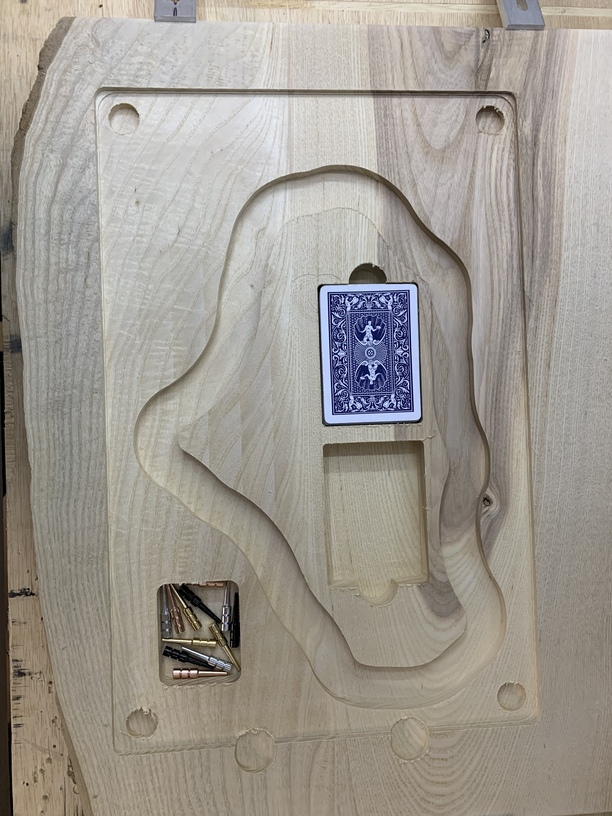
I went for the inlay option and used my CNC router to do the inlay. Pockets for card decks and peg storage and a loop pocket so the pegs stand up. Magnets will hold down the lid.