So i’m super new and am sure to have missed something relevant, so feel free to link me.
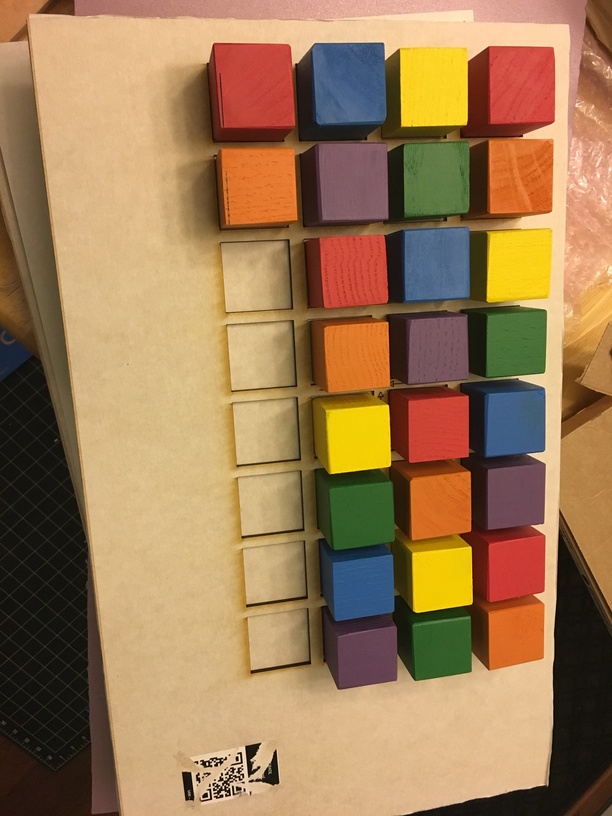
I’m cutting 1.5 in baby blocks on all 6 sides. It’s a bit of a monster of a project because of all the silly math involved.
I’ve read:
and
and have done these blocks on a ULS before. Of course I had math mathematical alignment ( a true 0,0) and a laser pointer to line up my template.
What i’ve done so far:
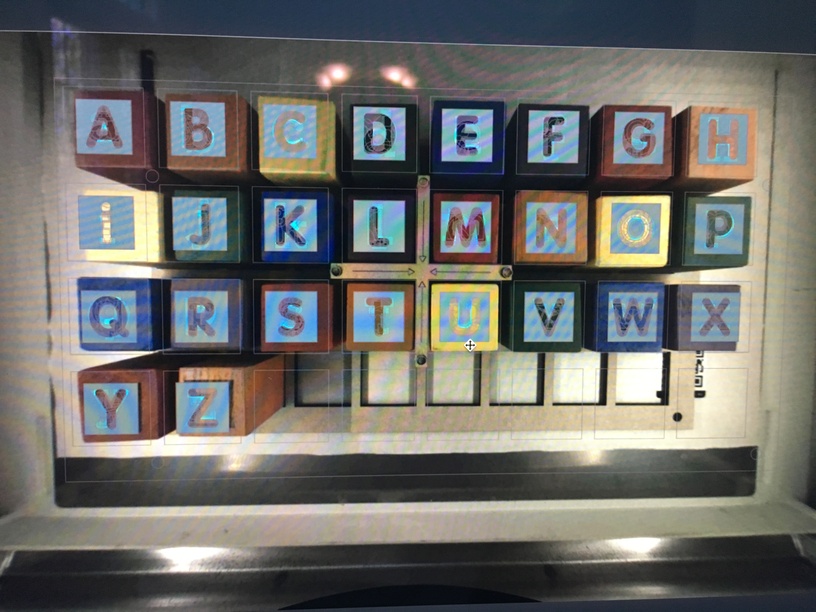
Created an ai file where everything is layered perfectly on top of each other and more guides than I can handle.
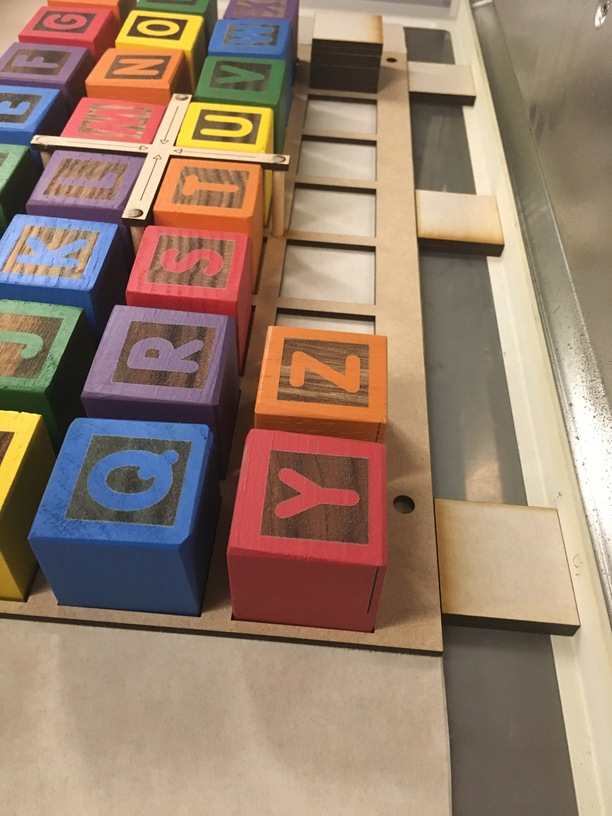
One of those layers is a template of the outline of the block (1.6in) with some arrows near the middle that I could use to visually line up my template with the GFUI. I cut that in PG Draftboard.
I’ve removed the Crumb Tray, added draft board under my template (because reflections), and filled it with blocks. I did fancy maths and this makes my material height .445. Which my cuts looked fine so far, just not the alignment.
So with my fancy alignment arrows, well they are a completely different size when they are 2+ in below the camera. Even trying to align directly under the distance skew is awful. Fortunately this is a 2D problem so I (mistakenly) assumed that if the tails of the 4 arrows are aligned i’m golden. Nope.
I tried cutting the blocks with aligning the arrows, and fumbled with GF reading my templates proofgrade label and recalibrating and such, until i finally was satisfied that I had aligned the arrows, had the correct height and went to cut. My horizontal skew was off by about 1/4 in. Vertical was within 1/16in from what I could tell so I was pretty happy with vertical, but obviously couldn’t let it keep cutting horizontal so off.
I was encouraged by the template 12x20 (linked above), but I’m pretty sure that won’t line up without the crumb tray. I’m pretty close here and was hoping maybe someone could help me with some tips to get to the finish line.
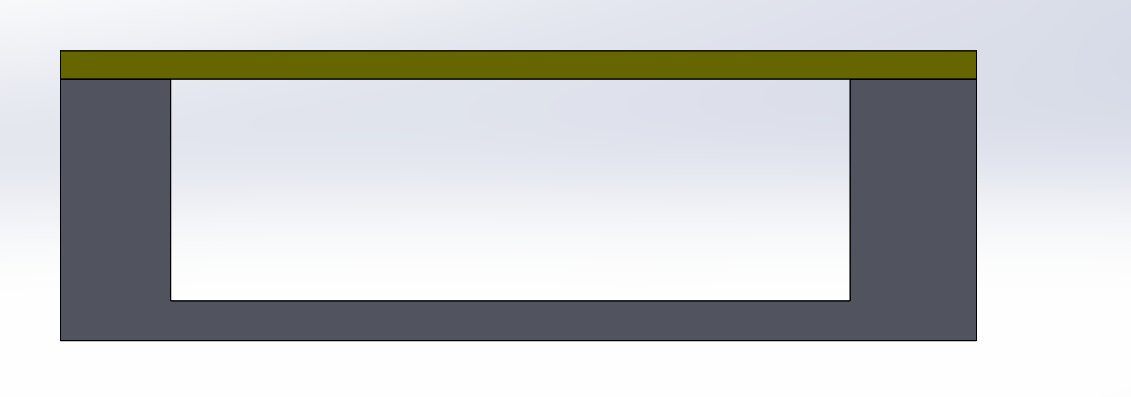
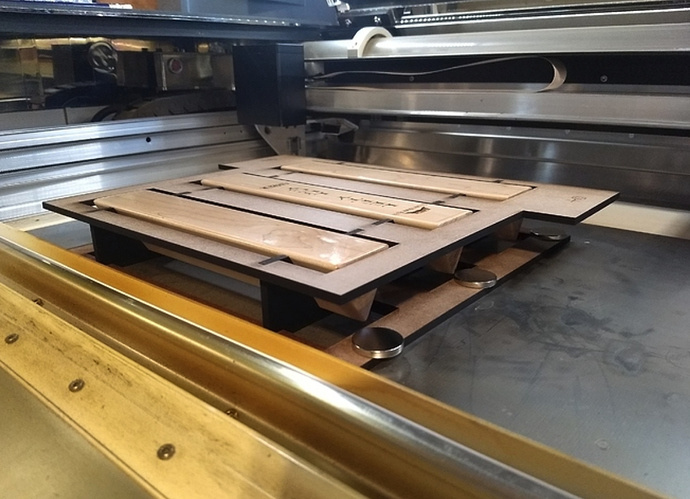
You need to place something (cardboard works) at a good height for the glowforge to cut and then cut out block sized holes. Then place you blocks in those holes and run your engrave with the right focus height. Its the same as if your crumb tray is there but with a more finicky setup to hold your jig
I made a template jig, so your just recommending elevating it to GF height to get the focus correct to do camera alignment? I guess that makes sense and is easy enough. Thanks for the help.
You want the jig at the same height as the object you’re engraving, so yes, the top of your blocks. Using the all-in-one SVG file you created, ignore everything else and cut the squares from the jig material, then without moving the jig, insert the blocks. It may not look aligned on the screen, but as long as you’re engraving from the same uploaded project file as you just cut from, the engraving will be in the right place.
but instead of your jig being on the crumb tray it is going to be propped up on things and then your blocks will be inserted through them. Sort of like this? I’m at work and don’t have any pictures of my jigs
I guess what I don’t understand is how you do your x/y alignment of the Jig. Do you use the crumb tray feet slot? I was trying to use the side and realized the print head drives into what ever you put there.
you have your cuts and your engraves in the same file. so toggle just the cuts on, cut your holes. Then, without moving anything or changing file or turning the glowforge off, insert your blocks, change your focus height, toggle the cuts off and engraves on, then run just the engraves. It will look wrong on the screen but just ignore that; it will engrave correctly.
the jig is one time use; if you turn the glowforge off or bump the jig or even leave that screen you might as well just cut a new one. I use a bunch of magnets to hold everything down and have steel plates for the sides of my jigs to magnet the cardboard top down to.
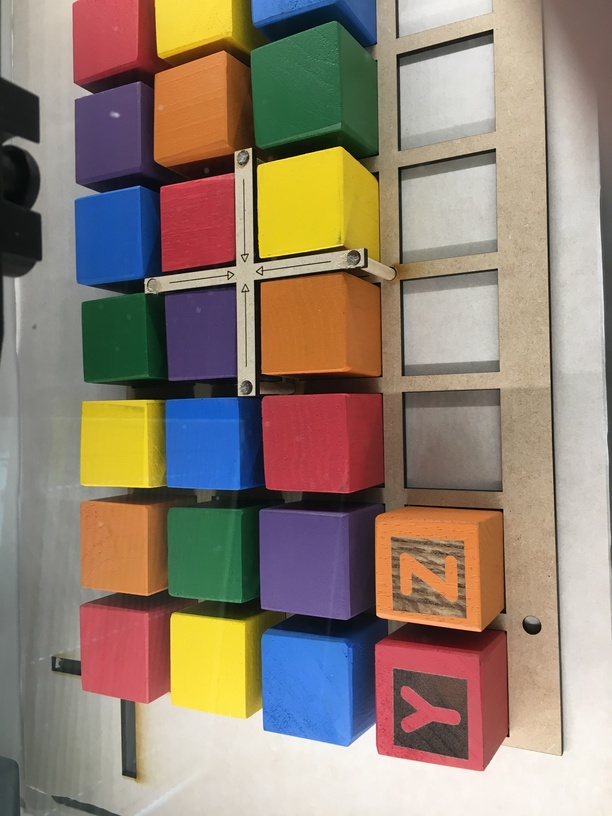
Cutting a new template each time I need to turn the 6 sided blocks is just not sustainable, because I will bump the jig trying to get the blocks out. So I tried the floating reference point. Still off a bit.
I’m not sure how uniform the size is on the blocks that you are working on, but making a slight kerf adjustment to the jig to hold the blocks snug can make a world of difference.
Also, what you want to do is elevate the jig up on legs, so that the blocks fit down into the holes. It saves you from having to individually code the focal point for each operation. If you can figure out a way to anchor the jig into the same place each time, it should give you very close alignment.
@rpegg has a great example of that kind of jig here, where he is working on some triangular tap handles:
Oh…one other thing - if you do elevate the jig, you will probably want to put little notches on each of the block holes so you can get the blocks out without shifting the jig…something like this…you might want to do a few less at a time so you can lift them out easily.
Your determination is paying off. It’s a great challenge but there are ways to overcome it. Whether it’s tiles or pencils or other things that are thick, it gets complicated to jig up a solution.
Here’s how I would do it with a full cardboard box as a jig. The box is 1.25" high so the blocks will be proud of the surface. With snapmarks, it would be easy, but the final alignment of the jig for repeating the operations and then flipping the blocks is a challenge, but there are ways to get the file aligned correctly. Your pizza box standoff idea is right on the money. Once you have the jig made and the blocks in, you could always just do one test block and align that. The rest will follow. That’s why I have one extra outline of the letter W in the center that you can score and align properly.
Using cardboard that is .15" thick, you could make the box for the jig, and fix it well to the center of the usable bed area. The material thickness of this would be 0.04" for its surface.
Then put the blocks in and you would have the surface height of the engrave for the top of the blocks in the jig .298".
At least I hope this would work. I’ve been wanting to do blocks some day and I figured I may as well take this opportunity to try it out. The file has the rest of the box jig outside of the viewable area. They are different colors so you can do three operations to get the whole box printed.
And are the blocks 1.51" or 1.5" exactly? I didn’t notice the dimension in the title, just remembered 1.5. I made the cutouts 1.5" with no kerf allowance.
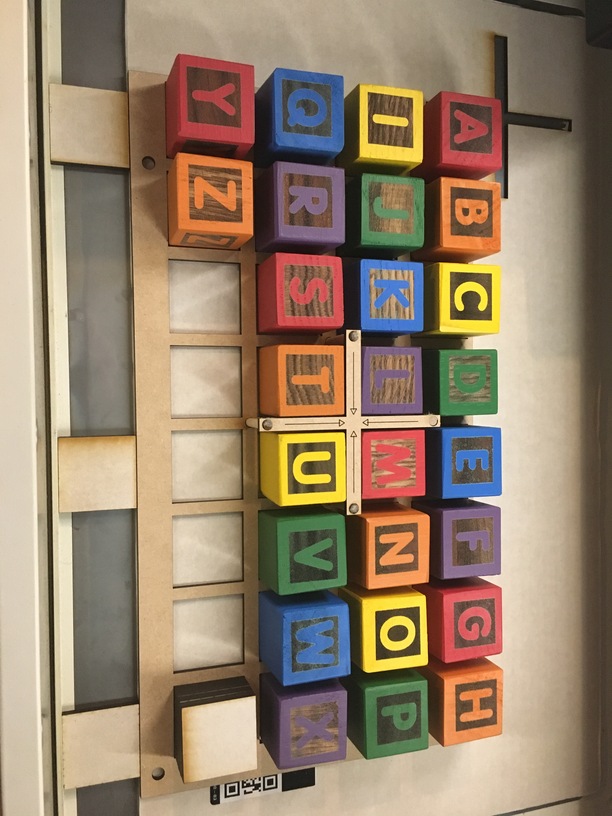
Final question: For all the folks who can think algorithmically: for doing the other sides of the blocks, would you shift each block six spaces down the series for each side? What is optimal for dispersing the letters and numbers out?
RE:Final Question, My Wife is a Graphic Designer, so we have 2 Upper Case Fonts, 2 Lower Case Fonts and then 2 Sides of Graphics, A for apple, etc. So every block is 1 letter.
I have stacked the cut-out tiles from the Template, I’m going to try and line that up in and empty square and see if it fixes the rest of the bunch. If not, moving on to making a super full height Jig.
I design my jigs to just have a removable top piece that I can re-cut if something happens to alignment. This way I can use mdf or hardboard for the structure and just sheets for cardboard for the alignment places. I found it easier than screwing around with attempting to align the jig again when I had issues (ended up cutting it 4 times when doing a batch of 100 spoons).
I also played with turning off the laser and not moving the jig to see if alignment changed and most of the time it was the same but a couple times the alignment moved even though I touched nothing.
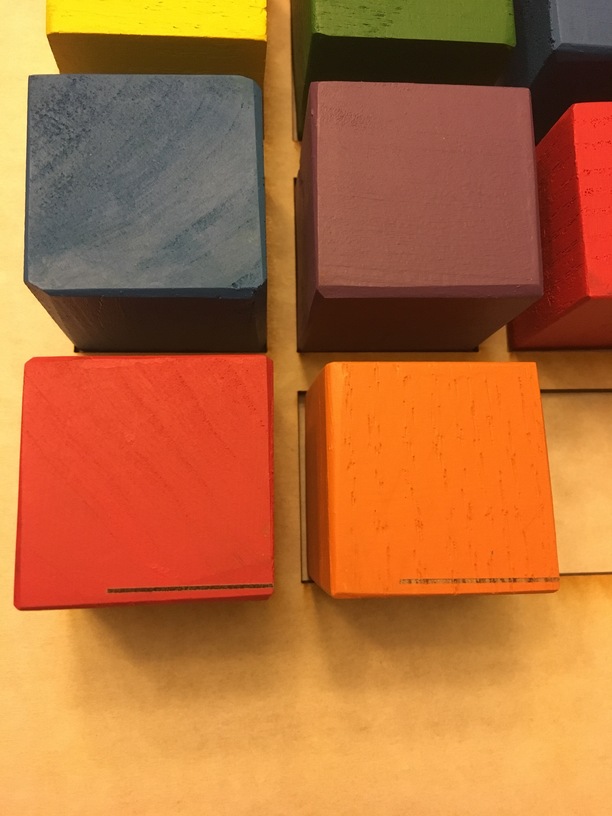
My blocks are between 1.51-1.54, the holes are 1.55 ish. (The blocks i’m using to test are not this as nice.) They could be snugger, but the annoying 1 block that’s bigger on one side is a headache. I’ll have to think about how I want to tackle a kerf in my next Jig.
Jules, I do like your method, but my struggle is the more friction I add to adding or removing blocks, the more opportunity I have to bump the Jig. I will probably invest in some significant magnets and abuse the crumb tray slots and bottom edge of the GF
BSheremeto, I am taking a similar approach to the sacrificial alignment piece. I stacked the cut-out squares to be the height of my blocks. Did the visual alignment the best I could and cut a test image on the sacrificial cut-out. Needed 1 bump down and I got good results.
This first set of blocks had pretty poor quality, I joined, planed and sawed them myself, but where I really messed up was using a circular disk sander on the edges. Many of them have some strange edges, so basically these are the misfits from my last set. So i’m happy with the alignment, just need to use the good blocks now and I think I’ll be there. I’m going to build up a bit more for the corner alignment piece and just have it so I can throw a .125in piece but block width x height. Visual align, burn a test cut on it, adjust.
Another Tip, I used spacers from the bottom edge of the GF. Nothing ever goes across there. So i used the lasers squares because they had good edges, and were available I did this to prevent Skew/rotation, as I have a nice edge on the bottom of the Template.
Also BSheremeto, the laser appears to align the print head visually under the camera. I assume most alignment mismatch actually comes if you bump the print head or is vibrates to a different spot over time. It’s only secured with magnets, so it has the ability to move.