Hi! I bought several pieces of 1/4" black MDF from Inventables and I just can’t get my GF to cut them. Does anyone have any experience with this?
I bought the black MDF ‘cause I though I’d save time sealing and painting, but… darn! It has been impossible to cut. The boards’ thickness (measured with my caliper) is 0.2". I have tried various speed and power settings, up to three pases and… nothing! Please help.
This is no help. “Check out #6”? #6 of what?? I would appreciate concrete, precise advise. Not just a link with “Check out #6” where there is no No. 6.
I successfully cut 1/4 MDF (from Craft Closet) using Speed 116, power set to FULL.
I haven’t used black MDF, but I don’t know why it would be any different.
You have to set speed to pretty slow for that thick stuff.
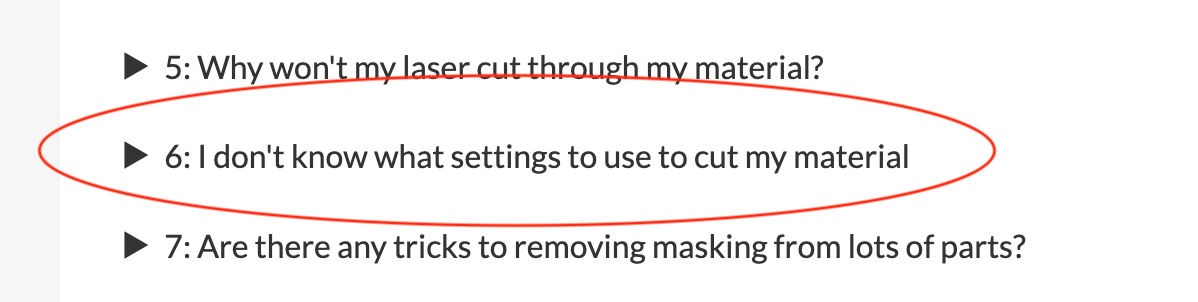
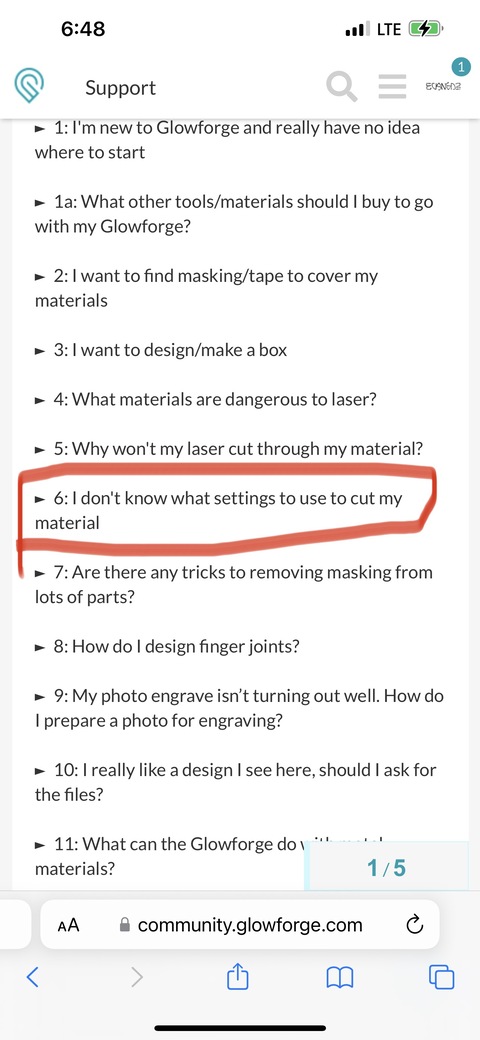
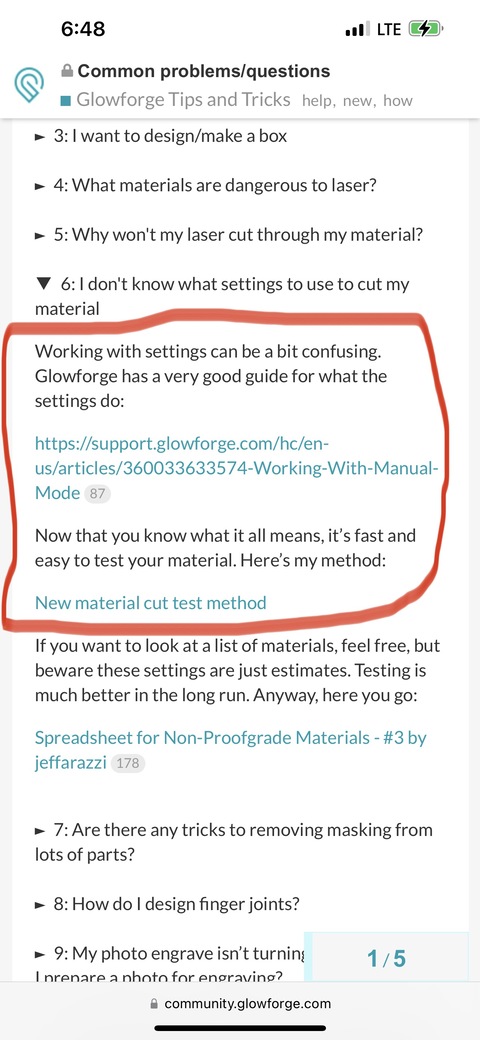
There is no quick simple answer and your question is something everyone asks eventually, so I wrote it up thoroughly ages ago and placed it here for all to see. You’re the first to say it was #19 on the list, I’m not sure how you got lost there, but it’s all there and has always seemed clear and as direct as possible.
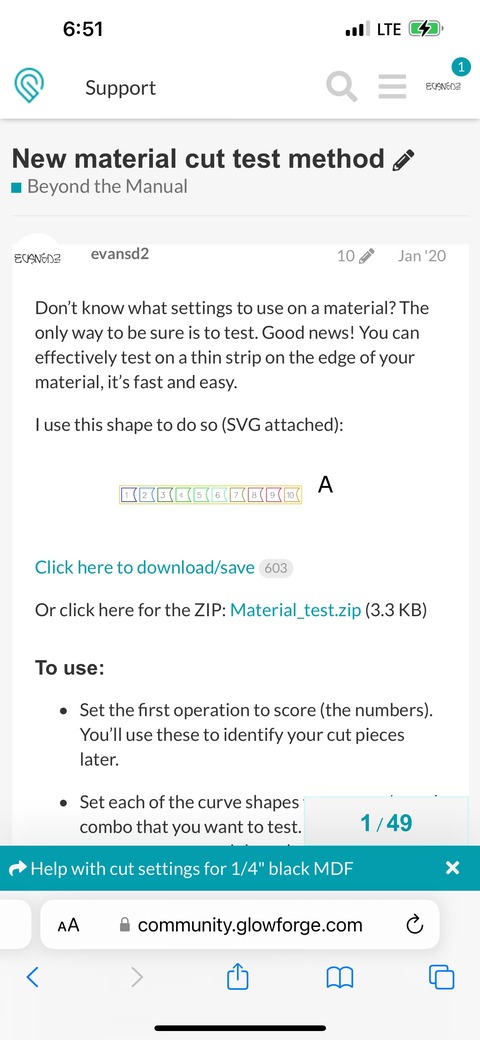
Testing is necessary with new materials. Dig in, learn this method to test, and you’ll be in business. Whole thing should take you only a few minutes and you’d be cutting in no time.
Nah it’s not like that. Everyone approaches reading stuff like this a different way. Maybe there’s something unclear and @martin.cerame can tell us how it wasn’t easy to get the info?
Might be a way to make it more clear for the next person, if they have a minute to explain how it was hard to find?
This is where the link took me to. It’s perfectly all right, though. Basically it’s trial and error, and error, and error, and error… I was just hoping someone would’ve dealth with the same material and shared the experience.
Patience, Grasshopper. We are not here to serve you. We are here to help you, but you must also try to help yourself. Take a deep breath. Relax. Good. Now move on.
Now click on item #6 in the list. This will take you to a super easy and methodical test method that uses only 1/2" of material and will let you dial in your settings PERFECTLY for every material. You will never again have to beg for settings. You will never again have to deal with excess charring and flashback on your materials. You will level up to being an expert laser user.
All MDF is not the same. It is more about the glue holding the dust of the wood together than the actual wood bits. 100 speed at full power is as strong as it gets and never recommended as a first try but multiple tries may get you to that point. You can do up to 3 passes at a time but each extra pass will be less effective than the one before as much of the energy will be wasted on the sides of the previous pass.
I have had success by first engraving halfway through so there are no sides to eat up the power. but that was just determination to have anything and useless as a routine way of cutting.
However, as a way of avoiding the extra effort of sealing and painting, I think you can mark that as a fail. MDF generally falls back to its original sawdust state more quickly if not sealed and painted in any case. At least you are not worried about turning everything black with soot
LOL! That’s the best advice so far: take a deep breath.
I’ll check the link out again. But I get the feeling the app doesn’t help much. Here’s why: I managed to punch a set of parameters that worked, cutting a test piece cleanly and nicely. But when I tried it again… no dice. The beam didn’t even get the whole way through. It seems that when you tweak the settings you have to either reload the page for the settings to come in effect or just wish for luck, I guess (so the settings that worked were from a previous pass, which wouldn’t make complete sense, but anyways…).
Sometimes, upon loading an artwork and clicking on “PRINT”, I have moved an artwork (before pressing the blue button on the machine) and the GF has cut the artwork in the previous position, not recognizing the move, so… I guess the online interface is not without its (major) flaws.
As previously stated, 1/4" is really at the limit, and if it’s store-bought, the consistency is likely very poor. MDF is glue and sawdust, very unreliable. “Proofgrade” draftboard is expensive because they can somewhat guarantee consistency.
I’ve never heard of black MDF before this thread. I have used Black and White board from THD, but it’s just whiteboard on one side and paint on the other, and horribly inconsistent as well.
The interface does not have major flaws, but not understanding how the inteface works will result in failures. Once you click “Print” the interface will follow instructions. Should you choose to move your artwork, the interface has no way of knowing that you changed your mind.