So I’m having troubles trying to design an SVG that has a generic shape with a image pattern for the fill. In this instance I have a silhouette of a dog for the front layer, and floral patterns I want engraved within the shape of the dog. However when I place the pattern and “expand” it for the GFUI to register the lines and such, instead of just expanding the paths of the pattern, it then registers the entire image used for the background. How would I go about getting Illustrator to only expand the pattern inside of the original shape?
I think you have bumped into the clipping path/math problem. The Glowforge interface cannot process clipping paths. There are many discussion threads regarding this. Here is one that may help: Adobe Illustrator to Inkscape: clipping paths and masks
4 Likes
Not sure how Illustrator works.
You could use a photo editing program to erase all the pattern around the dog and then make the dog shape into a vector.
Not entirely sure of the steps I took to get there, but I managed to accomplish deleting the invisible “clipping paths” and was able to print off just the image of the dog with the floral pattern within the outline. Will post an update once I can recreate it step by step for future users who run into the same issue with AI.
2 Likes
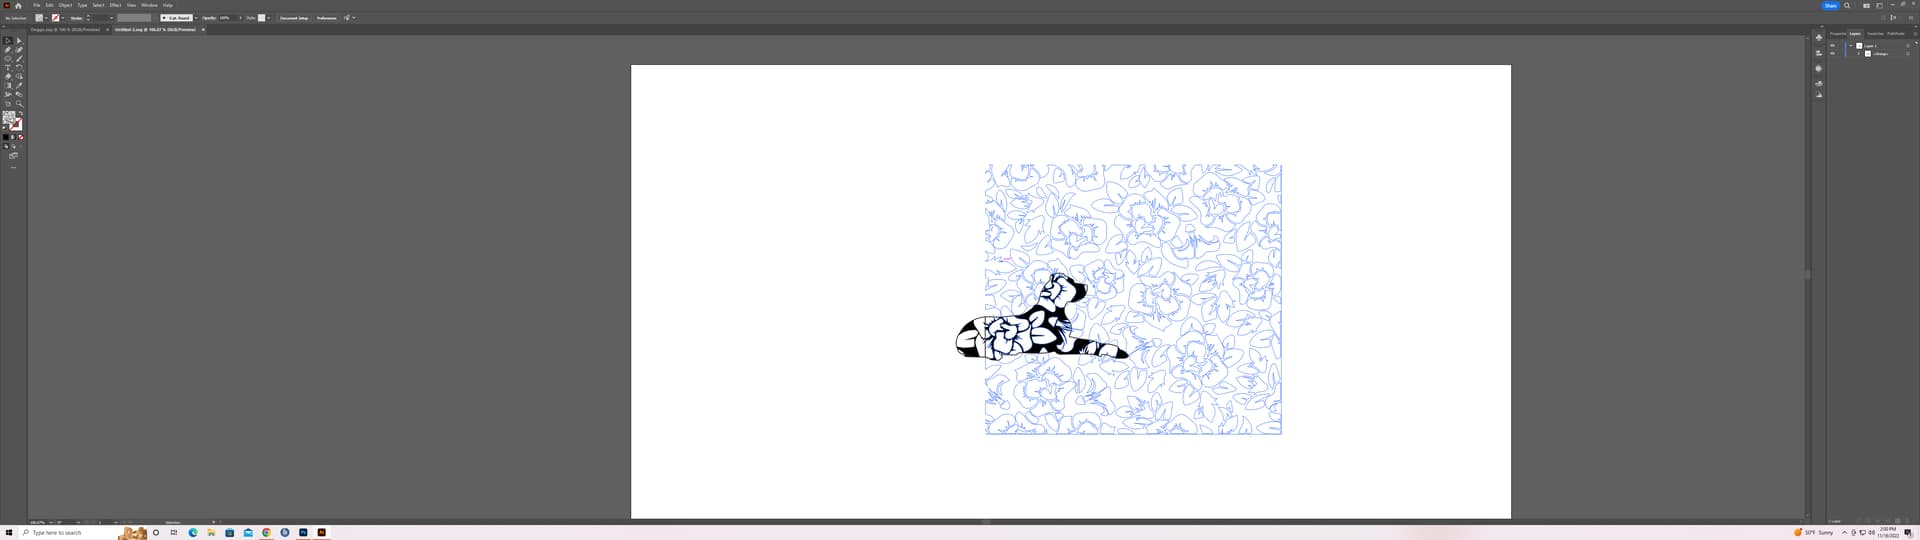
You might get better results by prepping the file in Illustrator only. You shouldn’t need to resize both pieces the gui. The dog should be a stroke outline without fill. The engraving pattern should be filled. Use the Pathfinder tool to trim the pattern to only be inside the outline, and rasterize the trimmed pattern. Should come over to the gui without any issues.
Good luck!
2 Likes
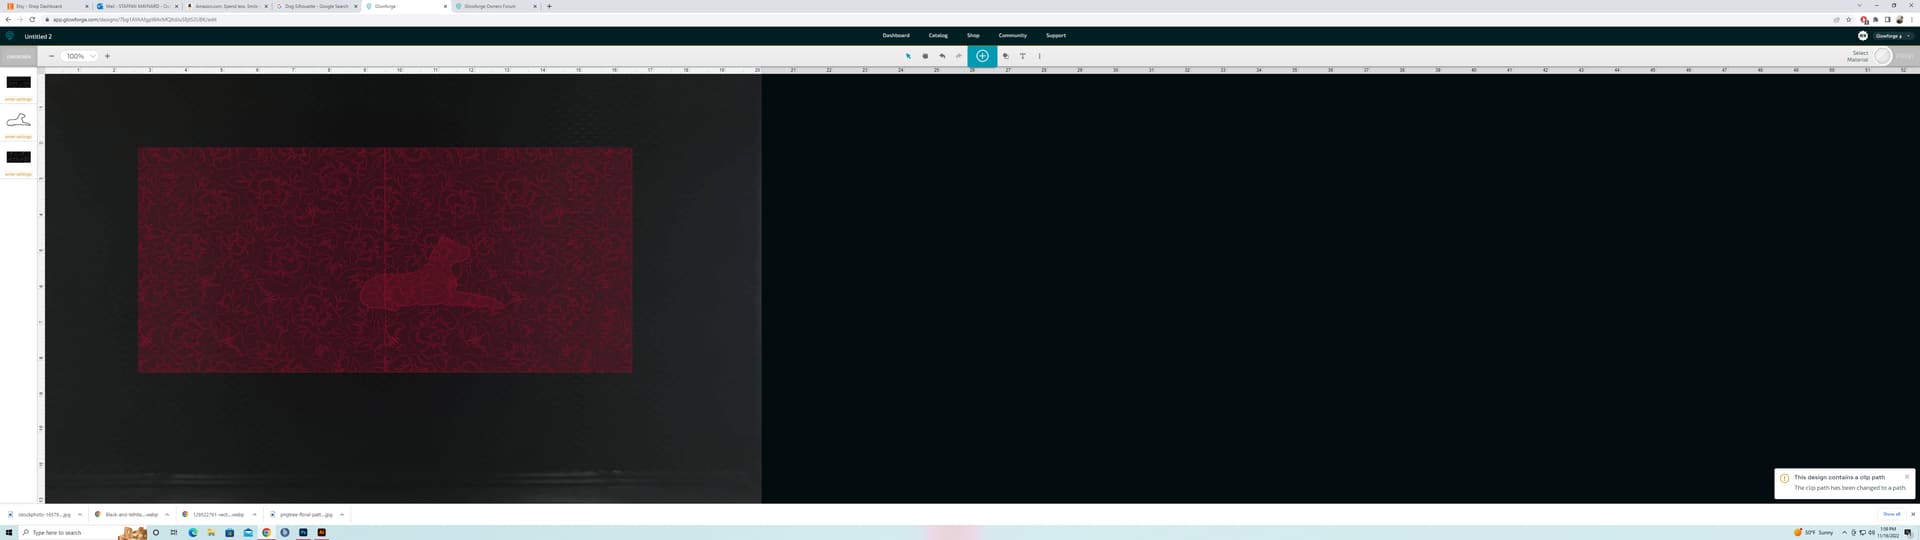
The step I found that eliminated the invisible clipping paths after creating a swatch of the pattern itself to use as “fill” on the outline, was by using the “Merge” shortcut in the pathfinder window, which limited the clipping paths to just what was inside the outline image of the dog, I will post a sample photo of a testing piece once I get home from work to show how it turned out.
1 Like
Initially the steps taken were.
1.) Select patterned image wished to use as a fill for a shape or object
2.) Place the image into a new file in AI.
3.) Select the layer, go to “Object”, “Create Image Trace”, followed by “Expand” all in the same “Object” Tab.
4.)Re-select the pattern (Edit + Invert colors depending on situation if needed) Click and drag the image to the “Swatches” tab to create a new pattern.
5.) Place the image or shape you’d wish to want filled/engraved with your selected pattern.
Repeat step 3 for this image.
6.) Select the pattern you just created in your swatch library for the fill, and designated color for outline (cut/score) line. (Here you can also select the image, right click and go to “Transform - Scale” and deselect all boxes except pattern, to zoom out/in on the detailing included in the pattern)
7.) Select the pattern filled image and go to the “objects” tab once more and click “Expand” again, this will generate the paths and anchor points for the filled pattern.
8.) Highlight the entire image, and in the pathfinder window select “merge” this will limit the pattern clipping path to just what’s inside the shape/image.
9.) Group everything together, save file as SVG. and you’re ready to send it to GFUI.
Hope this helps somebody.
6 Likes
Trial & Error on the instructions listed above, this method works. However depending on your patterned image you may end up with embedded grid lines as a result of Anti-alias software. Depending on the scaling of the pattern it may not be visible or affect your prints in the GFUI, however in some cases like the ones I printed today, it definitely affects it and will be visible on your prints. I will toy around with the settings, and coloring options to see if there’s a loophole to this method that will incorporate the lines into the piece. I’ve watched multiple videos on how to get rid of these white grid lines that show up as paths due to the Anti-alias software bug, but for the time being and all the effort I’ve put in. I’ve found no solution as of yet.
That being said, the steps listed above are still highly useful in certain applications.
1 Like
This topic was automatically closed 32 days after the last reply. New replies are no longer allowed.